


Quick Access Navigation Menu
- What's actually inside your lash dye (and why it matters)
- Salon lash tinting vs. at-home kits: what's the actual difference
- How to choose the right lash dye kit and shade
- The patch test: the step you absolutely cannot skip
- Step-by-step guide to applying lash dye at home
- Aftercare that makes your eyelash tint last longer
- Frequently Asked Questions (FAQ)
- Getting started with confidence
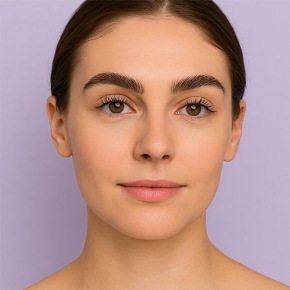
Mascara melts by noon in the UAE heat. You reapply, it smudges, and by the time you're halfway through your day, the effortless dark-lash look you were going for has completely vanished. If that cycle sounds familiar, you're already halfway to understanding why so many people here are switching to lash dye as their go-to solution for longer-lasting, low-maintenance color.
Semi-permanent lash color has moved well beyond the salon. Professionals rely on it for consistent client results, and at-home users have embraced it as a practical alternative to daily mascara. The hesitation most people have is completely valid: is it safe to apply near your eyes without professional training? Which formula won't trigger a reaction? What shade actually complements your complexion? At Winlash Dubai, we carry a wide range of professional lash and brow products and field these exact questions from customers every week. This guide exists because you deserve clear, honest answers before you open any kit.
By the end of this article, you'll know exactly which eyelash tint kit to choose, how to patch test correctly, and how to apply and maintain your results without compromising your eye health.
What's actually inside your lash dye (and why it matters)

The ingredients doing the hard work
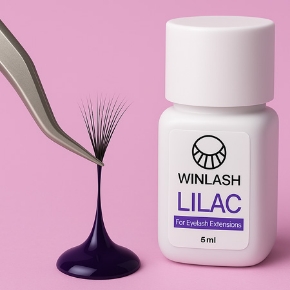
Eyelash dye works through oxidation-based chemistry. The active dye molecules penetrate the hair shaft and bond with the keratin structure to produce lasting color. Safer formulations use plant-based dyes like walnut husk, safflower, and yarrow as the primary colorants, supported by conditioning agents such as keratin, peptides, and hyaluronic acid. These ingredients actually strengthen lash fibers during the coloring process rather than degrading them. Cysteamine is another ingredient worth looking for as a gentler perming agent in lift-and-tint combo products, since it significantly lowers the risk of irritation compared to older chemical alternatives.
Ingredients that should give you pause
The high-risk list includes P-Phenylenediamine (PPD), thioglycolic acid, formaldehyde-releasing preservatives like DMDM Hydantoin and Quaternium-15, natural latex, phthalates, and heavy metals. PPD is the most common allergen in tinting products, it causes severe swelling, redness, and in serious cases, permanent eye injury. Thioglycolic acid is a known irritant, particularly dangerous for anyone with sensitivity. Formaldehyde releasers are problematic enough to face regulatory restrictions in multiple markets. If the product label lists any of these, put it back on the shelf. For an industry-oriented breakdown of ingredients to avoid in water-based lash products, review this list of top ingredients to avoid.
What the FDA says (and what that means for you)
No color additive is FDA-approved for permanently tinting or dyeing eyelashes. That doesn't make lash dye inherently dangerous, but it does mean ingredient transparency from the brand is everything. The responsibility sits entirely with the product formulator and the person applying it. Sourcing from a curated, reputable retailer rather than a random online seller is the single most effective way to reduce your risk, because not every product on a general marketplace has been vetted for use near eyes. If you want a focused primer on safety before deciding, our Is Lash & Brow Tinting Safe? Benefits and Risks | Winlash Dubai article covers the key precautions we recommend.
Salon lash tinting vs. at-home kits: what's the actual difference
Price and accessibility
A professional salon lash tint runs roughly $20 to $50 on its own, while a combined lash lift and tint service can reach $90 to $200. At-home eyelash tint kits typically cost $8 to $50 and often cover multiple applications. The math is straightforward: a monthly salon habit adds up fast, but an at-home kit requires you to be your own technician. Both are valid options depending on your budget, skill comfort, and how much time you want to invest in learning the process. If you're considering both services together, check our practical guide to a lash lift and tint combo to understand the benefits, procedure and kit recommendations.
Results and how long each option lasts
Professional tinting lasts 4 to 6 weeks because salon-grade formulas penetrate more deeply into the hair shaft. A DIY at-home lash tint typically lasts 2 to 3 weeks, partly due to lighter formulations and partly because application precision varies between users. Factors like oily skin, heat exposure, swimming, and oil-based makeup removers reduce duration regardless of which route you take. The gap in longevity is real, but consistent at-home tinting every 3 to 4 weeks can deliver reliable results once you've refined your technique.
Where the safety gap sits
Many reputable salons follow strict hygiene protocols, use ophthalmologist-tested formulas, and employ trained estheticians who can identify contraindications before they become problems. At-home kits carry real risks when instructions are skipped or inferior formulas are used. Based on product safety reviews and dermatology literature, the outcomes we see most often are eye irritation, corneal abrasions, chemical burns, and uneven color. The message isn't "don't do it at home." It's "use a professionally formulated kit and follow the process without shortcuts." That distinction is what separates a great result from a regrettable one.
How to choose the right lash dye kit and shade

Matching the formula to your skin type and sensitivity
For sensitive eyes, PPD-free and plant-based formulas are non-negotiable. Look for henna-extract kits or formulations with cysteamine instead of thioglycolic acid. For oily skin types, a deeper-penetrating professional-grade formula will resist the oils that cause premature fading. Kits labeled "gentle" or "hypoallergenic" without ingredient transparency are a red flag rather than a reassurance, a brand that can't tell you what's in the formula doesn't earn the right to work near your eyes.
Picking the right shade for natural-looking results
Shade selection is where most first-time users get tripped up. Keep in mind that personal preference, brow color, and lash density all play a role, but as a starting framework, here's how the main shades typically work:
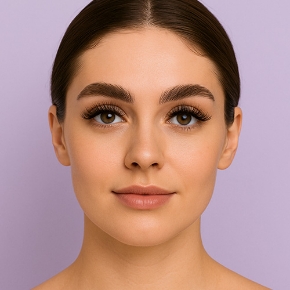
- Black: Most dramatic, ideal for fair or naturally light lashes that need a full transformation.
- Brown-black: Widely flattering, adds depth without looking harsh on medium complexions.
- Brown: Best for blondes and redheads, or anyone wanting a softer, natural enhancement.
- Dark brown: The go-to for brow and lash tint combinations, giving a cohesive look without requiring separate products.
The Esthetician’s Lash Tint Color Guide: Matching Pigments to Natural Undertones
| Lash Dye Shade | Target Natural Profiles | Visual Impact & Aesthetic | Pigment Development Window | Professional Formulation Tip |
|---|---|---|---|---|
| Black | Fair, light, or translucent natural lashes[cite: 2]; ideal for cool skin undertones. | Maximum dramatic intensity; mimics clean mascara without clumping. | 10 to 12 Minutes | Perfect for low-melanin hair fibers needing a complete depth transformation. |
| Brown-Black | Medium complexions, dark blondes, and neutral skin tones. | Adds noticeable depth and contrast without looking harsh or artificial. | 12 to 15 Minutes | A highly versatile baseline shade for universal, low-maintenance appeal. |
| Brown | Natural blondes, redheads, and warm or golden skin undertones. | Soft, realistic enhancement to deepen the lash line subtly. | 8 to 10 Minutes | Prevents a heavy block color on fine hair profiles; use short processing times. |
| Dark Brown | Brunettes, olive complexions, and dual lash-and-brow combo services. | Creates seamless chromatic harmony across both facial frames. | 10 to 12 Minutes | Reduce brow processing window by 2 minutes to prevent severe skin staining. |
Note: Accurate consideration of natural hair density and epidermal undertones prevents synthetic-looking results and guarantees a sophisticated, low-maintenance finish that flatters the face naturally.
When in doubt, go one shade lighter than you think you need. You can always go darker at your next application, and the goal for most people is a polished, natural finish rather than an overly dramatic one.
Where to source professionally formulated lash dye kits in the UAE
General beauty retailers stock whatever sells, not necessarily what's safest for the eye area. Winlash Dubai was built specifically to address that gap. Every product in the tinting range is selected with professional standards in mind, which matters enormously when you're working millimetres from your eyes. The catalog includes brands like RefectoCil, which offers full kits with detailed instructions, an applicator brush, and a comb to help you achieve even results at home. Note that RefectoCil formulations contain phenylenediamine derivatives, so a thorough patch test is essential, particularly if you have known colour-allergies or sensitive skin. Choosing a retailer that prioritises curation over volume means you're starting the process more safely from the outset. You can also explore locally stocked tint kits available in the UAE for convenient, vetted options, and review our Best Eyebrow Dye & Tinting Guide for brow-specific tips and product recommendations.
The patch test: the step you absolutely cannot skip

Why even experienced users need to patch test every time
PPD sensitivity doesn't always appear the first time you use a product. You can develop a reaction after years of using the same formula without any prior issues, which is why the assumption "I've used this before, I'll be fine" is exactly how people end up in urgent care. The stakes are real: skipping the patch test risks not just irritation but swelling, blistering, and in rare cases, damage to the eye area that takes weeks to heal. Current guidelines recommend all users, including returning ones, complete a patch test before every tinting session.
The correct patch test procedure, step by step
This is one process worth following exactly as written, without improvising:
- Mix the tint as directed, using the standard 2:1 ratio of dye to developer.
- Apply a small amount to the inner arm or behind the ear using a clean applicator.
- Leave it on for 45 minutes without rubbing or washing the area.
- Rinse off and observe the skin for 48 hours before proceeding with full application.
Any redness, swelling, itching, or raised skin response during that 48-hour window means you stop, do not proceed with the application. No reaction after 48 hours means you're clear to go. Two days of patience to protect your vision is one of the easiest trade-offs you'll ever make.
Step-by-step guide to applying lash dye at home
What to prep before you start
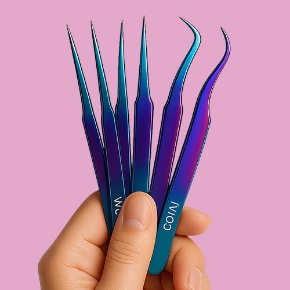
Gather everything before you mix anything: your eyelash tint kit, petroleum jelly or barrier cream, cotton pads, a clean applicator brush or the comb included in the kit, and a timer. Remove all eye makeup thoroughly, then clean your lashes until they're completely residue-free. Any remaining product blocks dye penetration and leads to patchy, uneven results. Many technicians apply a barrier cream or petroleum jelly to the skin directly around the eye, follow your kit's instructions carefully, and keep it well clear of the lashes themselves to avoid blocking the dye.
Applying the lash tint
Mix the dye and developer as directed, and only prepare the amount you'll use immediately since oxidation begins the moment the two components combine. Use the applicator brush to coat lashes from root to tip in one smooth, even direction, working quickly across both eyes. Set the timer per your kit's instructions, most standard formulas require 10 to 15 minutes, while sensitive-skin formulas may need slightly less. Remove the tint using a damp cotton pad in a firm downward stroke, never rubbing. Repeat until all residue is completely gone.
The mistakes that give DIY lash tints a bad reputation
Over-processing is the most common error: leaving the dye on longer than instructed doesn't give you deeper color, it gives you brittle, damaged lashes and uneven results. Skipping the petroleum jelly barrier causes the most eye irritation complaints, since the product contacts skin it was never meant to touch. Using an old or improperly stored kit is the third culprit: once a tube is opened, the formula begins to oxidize, and applying degraded product to your eye area introduces unnecessary risk. A fresh formula, a solid barrier, and a reliable timer are what separate a clean result from a cautionary tale.
Aftercare that makes your eyelash tint last longer

The critical first 24 to 48 hours
Avoid water, steam, saunas, and swimming for the first 48 hours after application. The dye needs uninterrupted time to fully bond to the hair shaft before any moisture exposure, and cutting this window short is the fastest way to reduce your result's longevity. Skip oil-based makeup removers, eye creams, and serums near the eye area for the first two days. Waterproof mascara should also be avoided during this window, removing it requires the kind of firm rubbing that disrupts fresh lash dye before it has fully set.
Ongoing habits that protect your semi-permanent lash color
Oil is the single biggest factor in early fading for any lash tint, so switching to an oil-free makeup remover long term is the most impactful change you can make. Avoid excessive eye rubbing and limit exposure to chlorinated pools. A nourishing lash serum used between tinting sessions conditions lash fibers and reduces the cumulative brittleness that comes from repeated chemical applications over time. Plan your next at-home application around the 3 to 4 week mark, or 5 to 6 weeks if you went the professional route, to maintain consistent, fresh color without over-processing your lashes.
Frequently Asked Questions (FAQ)
What should I do if lash dye accidentally contacts my eye or triggers an immediate burning sensation?
Stop the application treatment immediately. Avoid rubbing the affected eye area to prevent painful corneal abrasions, and rinse the eye thoroughly with cool running water or apply a cold damp compress to the skin. Do not apply any additional cosmetic products or soothing creams directly on top of an active reaction. If you experience significant eyelid swelling, blistering, or any changes to your vision, seek immediate professional medical evaluation promptly.
Can I safely use standard hair dye or unvetted brow formulas to tint my eyelashes at home?
No, utilizing generic hair coloring formulas near the delicate eye area introduces extreme chemical hazards. High-risk ingredients like PPD, thioglycolic acid, and formaldehyde-releasing preservatives commonly found in standard dyes can cause severe irritation, chemical burns, or permanent eye injury. Always source dedicated, professionally formulated eyelash tint kits from a curated, reputable retailer to ensure every product has been rigorously vetted for safe ocular proximity.
Why is it mandatory to run a patch test before every session, even if I am using a familiar kit?
Assuming past safety guarantees future immunity is a dangerous misconception; PPD sensitivity and intense allergic reactions can develop suddenly after years of using the exact same formula without any prior issues. Skipping this step risks severe swelling, painful blistering, and localized tissue damage near the eyes. Current guidelines strictly recommend that all users, including returning ones, complete a full 48-hour patch test before every single tinting session to monitor their current epidermal response safely.
How soon can I get my lashes wet, swim, or apply eye cosmetics after an at-home tinting session?
You must completely avoid water, steam, saunas, and swimming for the first 48 hours following your application. The active dye molecules require uninterrupted time to fully bond to the internal hair shaft matrix. Additionally, avoid applying waterproof mascara, rich eye creams, or oil-based makeup removers during this initial two-day window, as they will mechanically disrupt the fresh pigment bonds and prematurely fade your results.
Getting started with confidence

Applying lash dye at home is completely achievable when you start with the right formula, run a proper patch test, and follow the application and aftercare steps without skipping any of them. The process rewards patience. Thorough prep, 10 to 15 minutes of processing time, and 48 hours of careful aftercare add up to weeks of results that mascara simply can't match.
The key decisions come down to understanding the ingredients in your kit, matching the formula to your sensitivity level, choosing the right shade for your complexion, and sourcing from a retailer that has done the vetting for you. None of that is complicated once you know what to look for, and now you do.
For anyone in the UAE ready to try a professionally formulated, cruelty-free lash tinting kit, browse the tinting range at winlash dubai The product descriptions and educational resources are there to help you choose with confidence, no second-guessing required.

