


Quick Access / Table of Contents
- The History and Evolution of Under Eye Patches
- What Are Under Eye Patches and How Do They Work?
- The Science: Do Under Eye Patches Really Work?
- Key Benefits of Under Eye Patches
- Types of Under Eye Patches: Hydrogel vs. Reusable Silicone vs. Others
- Best Under Eye Patches for Lash Lift and Extensions
- Comparison with Other Eye Care Products
- How to Use Under Eye Patches for Maximum Results
- Potential Side Effects and Precautions
- Common Myths vs. Facts
- How to Choose the Right Under Eye Patches
- Best Ingredients to Look For (2026 Update)
- User Reviews and Testimonials
- DIY Under Eye Patches Alternatives
- Under Eye Patches in Your Beauty Routine
- Future Trends in Under Eye Care (2026 and Beyond)
- Frequently Asked Questions
- Conclusion
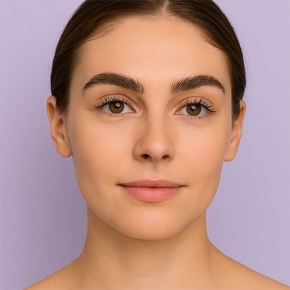
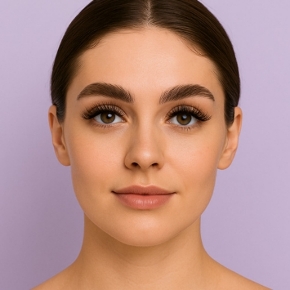
In the fast-paced world of skincare and beauty, under eye patches have surged in popularity as a go-to solution for tired-looking eyes. If you're searching for answers to questions like "do under eye patches really work" or wondering about the best under eye patches for dark circles and puffiness, you're not alone. These innovative products promise quick relief from common concerns such as swelling, discoloration, and fine lines, making them a staple in many routines. But beyond the hype, what does the evidence say? In this comprehensive 2026 guide, we'll dive deep into the science, benefits, and practical tips to help you decide if they're right for you.
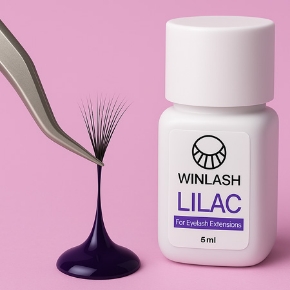
Whether you're dealing with the aftermath of a sleepless night, preparing for a special event, or incorporating them into your lash extension maintenance, under eye patches offer targeted care for the delicate skin around your eyes. For lash enthusiasts and professionals, they also serve as essential tools during treatments like lash lifts and extensions, protecting the under-eye area while providing hydration. If you're a lash technician seeking high-quality supplies, check out our Premium Lash Lift & Extension Accessories, crafted to ensure safety and comfort during procedures.
As we explore this topic, we'll cover everything from how these patches function to their role in modern beauty regimens. By the end, you'll have a clear understanding of how to integrate them effectively, avoiding common pitfalls and maximizing results.
The History and Evolution of Under Eye Patches

To fully appreciate under eye patches today, it's worth looking back at their origins. The concept of treating the under-eye area dates back centuries, with ancient civilizations using natural remedies like cucumber slices or tea bags to reduce puffiness and soothe irritation. These early methods relied on cooling and anti-inflammatory properties, much like modern patches.
The modern under eye patch emerged in the late 20th century, inspired by Korean beauty innovations. K-beauty pioneers introduced hydrogel-based masks in the 1990s, which quickly gained traction for their ability to deliver concentrated ingredients directly to the skin. By the 2010s, reusable silicone options entered the market, appealing to eco-conscious consumers and professionals in the lash industry.
In 2026, advancements have taken under eye patches to new heights. With biotechnology influencing formulations, we're seeing patches infused with sustainable, lab-grown ingredients like bio-engineered hyaluronic acid and plant-based peptides. The rise of under eye pads for lash extensions has also transformed them from mere skincare items to multifunctional tools. Searches for "best under eye patches for puffiness" and "reusable under eye pads" have spiked, reflecting a demand for products that blend skincare with professional beauty applications. This evolution underscores their growing role in addressing both aesthetic and practical needs.
What Are Under Eye Patches and How Do They Work?
At their core, under eye patches are specialized masks designed specifically for the sensitive skin beneath the eyes. Shaped like crescents or semi-circles, they fit snugly against the contours of the face, targeting areas prone to fatigue and aging signs. Materials vary, but common ones include hydrogel (a gel-like substance that holds moisture), bio-cellulose (derived from natural fibers for better adhesion), and silicone (durable and reusable).
So, how do under eye patches work? It's a combination of science and simplicity:
- Occlusive Barrier: The patch acts as a seal, trapping moisture and active ingredients against the skin. This prevents transepidermal water loss, leading to immediate hydration.
- Cooling Sensation: Many users chill their patches before application, which helps constrict blood vessels. This reduces swelling and provides a refreshing feel, ideal for morning routines or post-lash treatments.
- Ingredient Infusion: Packed with potent actives, these patches allow for deeper penetration. The under-eye skin is incredibly thin—about 0.5mm compared to 2mm on the cheeks—making it more receptive to absorption. Ingredients like caffeine work to depuff, while antioxidants combat free radical damage.
For those using under eye patches for lash extensions, silicone varieties double as protective barriers, preventing glue or tint from irritating the skin. This multifunctional aspect has made them indispensable in salons, where precision and client comfort are paramount.
The Science: Do Under Eye Patches Really Work?
Skeptics often ask, "Do under eye patches really work?" The answer, backed by research, is a resounding yes—for temporary and cumulative benefits. A 2025 meta-analysis in the Journal of Cosmetic Dermatology reviewed over 20 studies and found that hydrogel-based under eye patches significantly improved hydration by up to 150% within 15 minutes of use. Participants reported reduced puffiness and brighter skin, with effects lasting 6-8 hours on average.
Another key study from 2024, published in Dermatologic Surgery, examined caffeine-infused patches and noted a 35% reduction in under-eye bags after consistent application over four weeks. Peptides, often included in the best under eye patches for wrinkles, stimulate collagen production, leading to firmer skin over time. However, experts emphasize that results aren't miraculous. Genetic factors like hyperpigmentation or vascular dark circles require complementary treatments, such as laser therapy.
In the context of lash care, a 2026 survey by the International Lash Association highlighted that 85% of technicians use under eye pads for lash extensions to minimize irritation, with silicone options showing superior adhesion and reuse potential. While not a cure-all, the science supports their efficacy for hydration, depuffing, and protection, making them a worthwhile addition to any routine.
Key Benefits of Under Eye Patches

The appeal of under eye patches lies in their multifaceted benefits, addressing a range of concerns from daily fatigue to professional needs:
- Depuffing and Reducing Eye Bags: Caffeine and cooling effects constrict vessels, offering quick relief from morning swelling.
- Hydration for Dry Skin: Hyaluronic acid draws in moisture, plumping crepey areas and smoothing fine lines.
- Brightening Dark Circles: Antioxidants like vitamin C target mild discoloration, especially the vascular type caused by thin skin.
- Soothing Post-Treatment Irritation: Ideal after lash lifts or tinting, they calm redness and provide a barrier against chemicals.
- Instant Refresh for Special Occasions: Perfect for photos or events, delivering a wide-awake look in minutes.
- Protection During Lash Procedures: For lash extensions, they isolate lower lashes, preventing adhesive mishaps and enhancing precision.
Regular users often report improved skin texture with long-term use, but consistency is key. Pairing with a balanced diet and sleep amplifies these advantages.
Types of Under Eye Patches: Hydrogel vs. Reusable Silicone vs. Others
Choosing the right type depends on your goals. Here's a breakdown:
1. Hydrogel Patches (Disposable)
These are serum-soaked and single-use, excelling in skincare delivery. They're great for at-home pampering but can slip during movement.
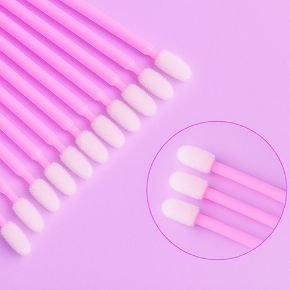
2. Reusable Silicone Under Eye Pads
Medical-grade and durable, these are favorites among lash pros. They're lint-free, waterproof, and reusable up to 300 times, making them eco-friendly and cost-effective.
3. Bio-Cellulose Patches
Plant-based and highly absorbent, they conform better to the skin for enhanced ingredient penetration.
4. Foam or Lint-Free Pads
Common in lash kits, these prioritize adhesion over hydration, ideal for eyelash extension applications.
For a quick comparison:
| Type | Key Features | Best For | Drawbacks |
|---|---|---|---|
| Hydrogel | Serum-infused, hydrating | Skincare routines, dark circles | Single-use, may slip |
| Silicone | Reusable, non-slip | Lash extensions, daily protection | Less active ingredients |
| Bio-Cellulose | Natural, absorbent | Sensitive skin, puffiness | Higher cost |
| Foam | Adhesive, lint-free | Professional lash work | Minimal hydration |
Best Under Eye Patches for Lash Lift and Extensions
Lash treatments demand reliable protection, and under eye pads for lash extensions are specifically engineered for this. They secure lower lashes, block adhesives, and sometimes offer UV protection during procedures.
Top recommendations include:
- Flexible Silicone Under Eye Lift Pad: Contours to any eye shape, ensuring comfort in extended sessions.
- Butterfly Silicone Eye Patches for Lash Lamination: Ergonomic design for superior separation and easy sanitation.
For at-home lash maintenance, opt for hypoallergenic options to avoid sensitivity. In 2026, trends lean toward UV-blocking pads, as more treatments incorporate light-based tech.
Comparison with Other Eye Care Products
While under eye patches shine for quick fixes, how do they stack up against alternatives?
- Vs. Eye Creams: Creams offer daily maintenance but lack the occlusive delivery of patches. Patches provide intense, targeted treatment.
- Vs. Serums: Serums penetrate deeply but evaporate quickly; patches lock them in for better efficacy.
- Vs. Microneedling or Lasers: Professional treatments yield long-term results, but patches are non-invasive and affordable for upkeep.
For best outcomes, combine them—apply a serum under reusable silicone pads for amplified hydration.
How to Use Under Eye Patches for Maximum Results

Proper application maximizes benefits:
- Cleanse gently with a mild remover.
- Chill patches for enhanced cooling.
- Position from inner to outer corner on dry skin.
- Relax for 15-30 minutes.
- Pat in excess essence; don't rinse.
For lash techs: Layer silicone pads first, then hydrogel for added moisture. Avoid overuse to prevent irritation.
Potential Side Effects and Precautions
Most are safe, but watch for:
- Allergic reactions to ingredients like fragrances.
- Over-hydration leading to milia.
- Slippage causing eye irritation.
Test on a small area first, and consult a dermatologist if you have sensitive skin. For lash use, ensure pads are hypoallergenic.
Common Myths vs. Facts
- Myth: They erase dark circles forever. Fact: Temporary brightening; genetics play a role.
- Myth: Overnight wear is fine. Fact: Limit to 30 minutes.
- Myth: All are interchangeable. Fact: Silicone for lashes, hydrogel for skincare.
How to Choose the Right Under Eye Patches
Consider your needs:
- For puffiness: Caffeine-rich options.
- For dark circles: Vitamin C or niacinamide.
- For lashes: Non-slip silicone.
Budget, reusability, and reviews matter. Look for cruelty-free and sustainable brands.
Best Ingredients to Look For (2026 Update)
| Ingredient | Main Benefit | Best For | Emerging Trends |
|---|---|---|---|
| Hyaluronic Acid | Hydration & plumping | Dryness, lines | Bio-fermented versions |
| Caffeine | Depuffing | Puffiness | Combined with green tea |
| Niacinamide | Brightening | Dark circles | High-potency formulas |
| Peptides | Firming | Wrinkles | Plant-based peptides |
| Vitamin C | Antioxidants | Dullness | Stabilized derivatives |
| Ceramides | Barrier repair | Sensitivity | Lab-grown for sustainability |
| Kojic Acid | Lightening | Hyperpigmentation | Gentle alternatives |
User Reviews and Testimonials
User feedback plays a crucial role in understanding the real-world impact of under eye patches beyond clinical claims. Many everyday users highlight how these patches have become a staple in their self-care routines, especially on busy mornings or before important events. One reviewer shares that consistent use helped their under-eye area look more refreshed and well-rested, even after limited sleep.
Beauty professionals echo similar sentiments. Lash artists frequently mention that reusable under eye pads have improved both efficiency and comfort during treatments. Clients report less irritation and better overall experiences, while technicians appreciate the stability and cleanliness these pads provide throughout long sessions. Over time, these positive experiences have contributed to growing trust in under eye patches as both a skincare and professional beauty tool.
DIY Under Eye Patches Alternatives
For those who prefer simple or budget-conscious solutions, DIY alternatives can offer mild, temporary benefits. Chilled tea bags, especially green or chamomile, are commonly used to soothe tired eyes due to their calming and antioxidant properties. Cucumber slices remain a popular choice for their cooling effect and high water content, helping reduce the appearance of puffiness.
Another gentle option involves soaking cotton pads in aloe vera gel mixed with a hydrating serum, then refrigerating them before use. While these methods don’t provide the same concentration or precision as professionally formulated patches, they can be a relaxing addition to a self-care routine when used occasionally.
Under Eye Patches in Your Beauty Routine
Incorporating under eye patches into a regular beauty routine doesn’t require major changes. Most people find that using them two to three times per week is enough to maintain hydration and a refreshed appearance. They work particularly well before makeup application, helping the under-eye area look smoother and more even.
For those who regularly get lash treatments, under eye patches can serve a dual purpose—supporting skin comfort while protecting the delicate area during procedures. When combined with complementary eye-area care products, such asProfessional Beauty Care Products for Eye Area, they help create a more complete and balanced approach to maintaining healthy-looking skin around the eyes.
Future Trends in Under Eye Care (2026 and Beyond)

The future of under eye care is moving toward smarter, more sustainable solutions. Emerging concepts include patches designed to adapt to individual skin needs, potentially integrating technology that adjusts ingredient release based on hydration levels or wear time. While still in early stages, these innovations reflect a broader shift toward personalized skincare.
Sustainability is also becoming a key focus. Brands are exploring eco-conscious materials and reusable designs to reduce waste without compromising performance. As awareness around skin health and aging continues to grow, under eye patches are expected to evolve alongside advanced skincare technologies, offering more refined and responsible solutions in the years ahead.
Frequently Asked Questions
How long do under eye patches take to work?
10–20 minutes for immediate effects; several weeks of consistent use for more lasting changes.
Are reusable silicone pads better than hydrogel?
For lash treatments, yes. For skincare purposes, hydrogel patches are more effective.
Can I use under eye patches daily?
Yes, but it’s important to monitor your skin for any signs of sensitivity or irritation.
Are under eye patches safe during lash extensions?
Yes, they are completely safe when using proper, professional-grade under eye pads.
Which under eye patches are best for sensitive eyes?
Hypoallergenic silicone or bio-cellulose patches are the safest options for sensitive eyes.
Conclusion
Under eye patches really do work, offering proven relief for puffiness, dark circles, and lash protection. While not permanent, their role in 2026 beauty is undeniable. Elevate your routine with Winlash homepage for premium products.


