RSS

Blog posts of '2026' 'July'

Lash Extension Allergy vs. Irritation: How to Prevent Red Eyes
Table of Contents (Click to Open)
  1. The Salon Crisis: Managing Post-Application Ocular Distress
  2. Medical Allergy vs. Chemical Irritation Matrix
  3. The Biological Divide: Histamines vs. External Corneal Insult
  4. Decoding Lash Glue Allergy Symptoms: The Contact Dermatitis Timeline
  5. Cyanoacrylate Fumes Sensitivity: The Physics of Gaseous Humidity Seeking
  6. The Master Emergency Protocol: Reducing Fume Load in Real-Time
  7. Material Optimization: How Advanced PBT Lattices Minimize Adhesive Volatility
  8. The Financial Toll of Ocular Irritation on Salon Client Lifetime Value
  9. FAQ: Emergency Ocular Troubleshooting for Elite Technicians

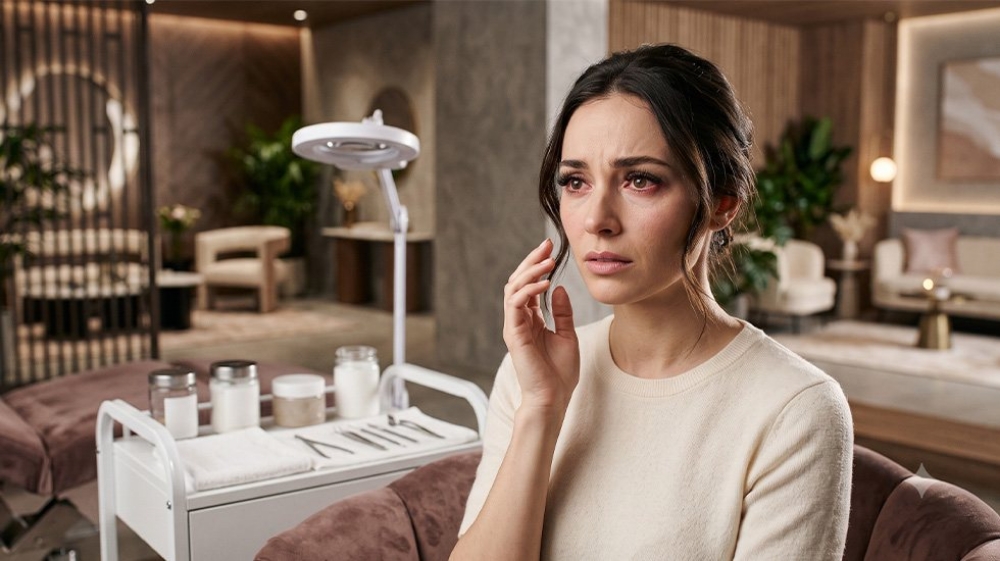
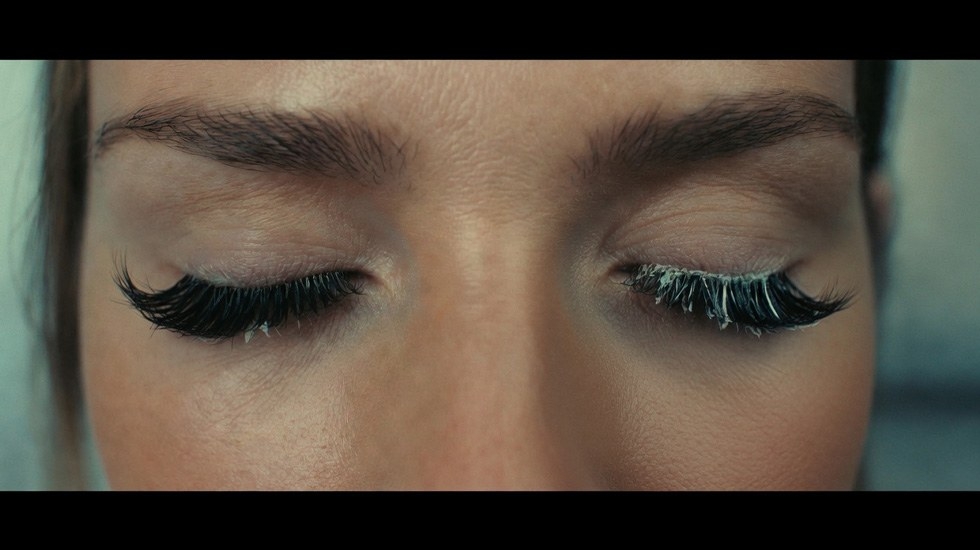
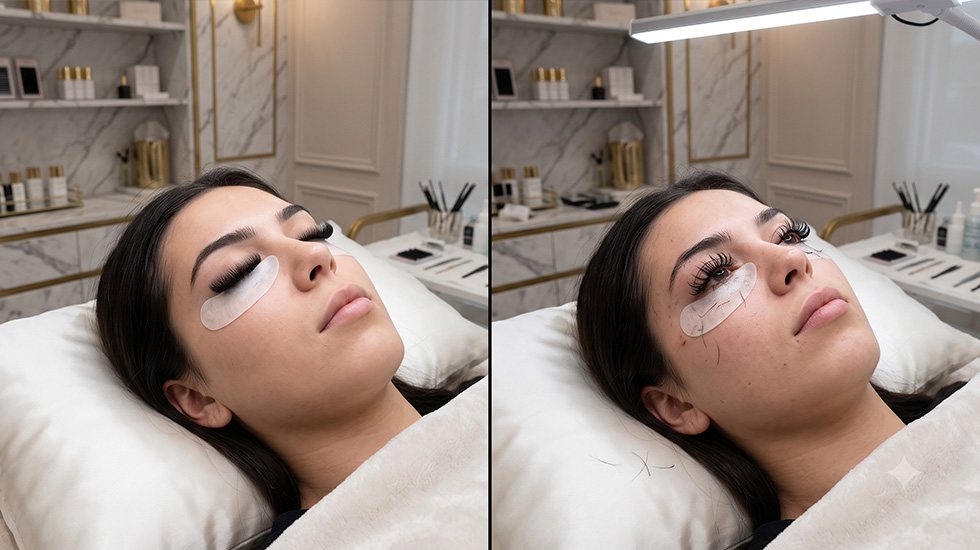
Your phone buzzes hours after a high-paying client leaves your chair, displaying a high-contrast photograph of inflamed, swollen, and bloodshot eyelids. Confronting acute red eyes after eyelash extensions is an intense, high-stress salon crisis that can instantly shatter your client retention rates and compromise your professional credibility. For master artists, handling this emergency calmly requires a deep, scientific understanding of ocular pathology rather than defensive guesswork. Successfully saving your business relationship hinges entirely on your immediate capacity to differentiate between an incurable immune system rejection and a highly preventable chemical burn—allowing you to adjust your application variables and preserve premium eyelash extensions loyalty.

Executive Brief: Molecular Resolution of Ocular Sensitivity

Ocular adverse reactions following synthetic lash placement are heavily misdiagnosed within the luxury beauty market. Technicians frequently label every localized inflammatory response as an allergy, missing critical operational warning signs. True lash glue allergy symptoms manifest as a systemic, histaminic immune response triggered by direct epidermal contact with curing compounds. Conversely, acute cyanoacrylate fumes sensitivity is a localized, mechanical irritation caused by gaseous monomer vaporization stripping the eye's natural moisture barrier. By isolating these physiological boundaries, advanced salons can deploy calculated safety protocols—utilizing specialized gaseous scavengers, optimized environmental parameters, and low-exposure fiber lattices to preserve absolute client safety.

Medical Allergy vs. Chemical Irritation Matrix

Comparison matrix of true lash glue allergy versus chemical fume irritation symptoms

To protect a reacting client and determine whether an immediate, chemical mechanical removal is required, an elite technician must cross-reference symptoms against this definitive clinical breakdown:

Clinical DiagnosticTrue Lash Glue AllergyChemical Fume Irritation
Biological MechanismSystemic T-cell immune response (accumulation of histamines over repeated exposure).Localized physical barrier insult (acidic dehydration of corneal and scleral tissues).
Primary Symptom ZoneSevere erythema, internal itching, and deep blepharitis (swelling of the upper and lower eyelid lines).Bloodshot sclera (redness restricted mostly to the eyeball), mild stinging, and dry watering.
Temporal Onset & EvolutionDelayed onset (manifests 12–72 hours post-treatment) and intensifies continuously over time.Immediate or sub-acute onset (peaks within 24 hours of application) and naturally subsides over time.
Operational Action RequiredImmediate chemical removal using a high-viscosity cream remover and referral to a medical professional.Retain extensions. Adjust salon humidity baseline, neutralize curing gases, and refine isolation tracking.

The Biological Divide: Histamines vs. External Corneal Insult

Understanding the deep biology of a reaction prevents catastrophic decisions. A true allergic reaction involves a type IV delayed hypersensitivity response. When cyanoacrylate monomer molecules repeatedly touch the skin, the immune system recognizes them as external antigens, building antibodies over months or years. This explains why a loyal client can suddenly develop severe lash glue allergy symptoms after years of showing zero sensitivity. Once this genetic switch flips, taking antihistamines provides minor relief; the body will violently reject the allergen during subsequent applications, rendering further extension services impossible until the material is completely detached.

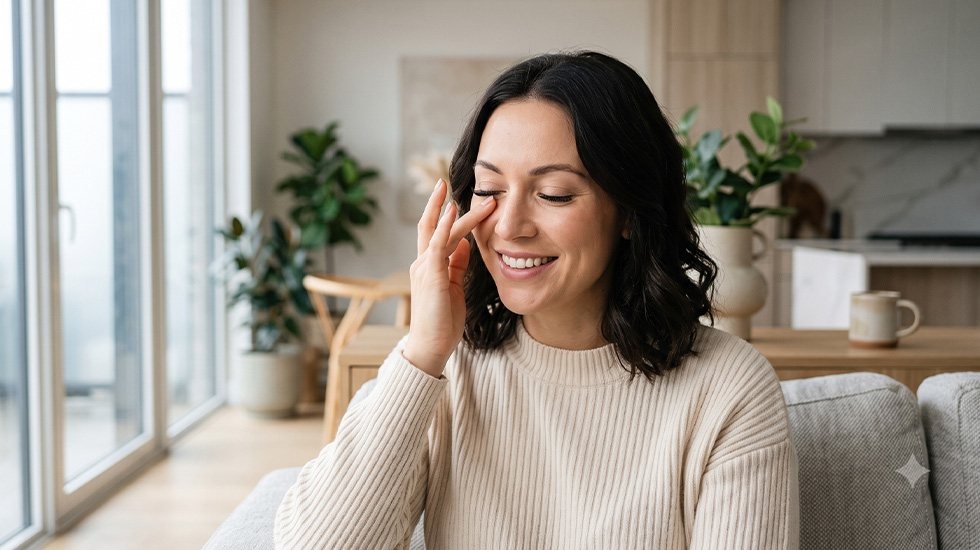
Chemical irritation, however, involves zero immune system memory. This is a direct physical consequence of cyanoacrylate's intense hygroscopic properties—meaning it aggressively absorbs moisture from its immediate surroundings to drive its curing cycle. If a client's eyes flutter open slightly during a set, or if the lower lash pads shift up and rub against the eyeball, the evaporating adhesive gases rapidly strip the moisture layer from the cornea and sclera. This creates a localized, non-allergic chemical burn that manifests as bright red eyes after eyelash extensions, which safely resolves as soon as the gaseous exposure drops.

Decoding Lash Glue Allergy Symptoms: The Contact Dermatitis Timeline

Timeline of contact dermatitis and lash glue allergy symptoms after extensions

When contact dermatitis manifests, the cellular timeline is highly predictable. The reaction rarely begins on your salon bed. Instead, as the polymer matrix stabilizes over 24 to 48 hours, the continuous micro-emission of residual chemical stabilizers induces escalating vascular permeability around the eyelid margins. Clients will experience intense, uncontrollable internal itching along the lash root line, followed closely by symmetrical swelling that creates a characteristic "heavy lid" appearance. If you observe generalized puffiness affecting both eyes equally, accompanied by crusting or weeping fluid along the skin fold, you are dealing with a clear histaminic event that requires an immediate, professional, non-abrasive removal.

Cyanoacrylate Fumes Sensitivity: The Physics of Gaseous Humidity Seeking

To effectively mitigate cyanoacrylate fumes sensitivity, technicians must understand the movement of airborne monomers. Evaporating adhesive molecules are structurally heavy and remain low to the surface, pooling directly in the ocular hollows of a recumbent client. If a salon's environmental relative humidity falls below the critical 45% threshold, the curing process stalls, allowing these volatile monomers to float in a gaseous state far longer. Seeking stabilization, these vapors instantly bond with the moisture of the client’s tears, causing immediate burning, micro-vessel dilation, and focal scleral redness. This explains why uneven redness confined exclusively to the lower half of the eyeball indicates a physical gas insult rather than a medical allergy.

The Master Emergency Protocol: Reducing Fume Load in Real-Time

Transitioning your application workflow from basic attachment to a high-level, allergen-isolated protocol is essential for protecting sensitive client demographics. Deploy this systematic management routine to control airborne irritants during every step of the appointment:

  • Phase 1: Chemical Decontamination and Sanitization: Unmanaged chemical residues sitting on the lash line prior to application will react unpredictably with fresh adhesive, accelerating gas production. Before isolation, purge the lash line completely of environmental particulates, lipids, and cosmetics using specialized, medical-grade beauty care products. This deep-cleansing preparation ensures a perfectly neutral skin surface, preventing premature monomer boiling and dramatically lowering the overall gas release during the application process.
  • Phase 2: Instant Gas Neutralization: The absolute gold standard for eliminating fume exposure is completing the service with an advanced chemical super bonder. Instead of leaving the adhesive to release vapors into the client's ocular space for hours, apply a micro-drop of bonder directly to the attachments using a micro-brush. This solution cross-links the liquid cyanoacrylate instantly from within, locking away volatile gasses inside a secure solid matrix within 3 minutes. This rapid stabilization stops the accumulation of airborne monomers, preventing chemical corneal burns and entirely removing the outdated 24-hour water restriction.

Material Optimization: How Advanced PBT Lattices Minimize Adhesive Volatility

Advanced PBT fiber lattices that reduce adhesive volatility and fume exposure

A hidden variable in managing chemical reactions is the surface properties of the synthetic extension fiber itself. Cheap, unrefined plastic fibers have poor capillary attraction, forcing technicians to use massive drops of adhesive to ensure a stable attachment. Excess liquid glue translates directly into high gas emissions and guaranteed irritation. Upgrading your inventory to advanced polybutylene terephthalate (PBT) fiber lattices completely resolves this structural issue:

  • Precision Base Geometry: Utilizing a high-purity db fast fan eyelash extension palette silk pbt provides optimized micro-textured bases that pull exactly the required amount of adhesive via natural magnetic cohesion. This prevents pooling and reduces vapor release to a baseline minimum.
  • Weightless Volume Architecture: For dense volume looks on clients with highly sensitive skin, opting for a specialized ib volume brown eyelash extension palette 5 shades lets you create soft, ultra-lightweight luxury looks. The refined diameter minimizes follicular weight and reduces the necessary bonding area, keeping the adhesive footprint tiny and well away from delicate lid margins.
  • Micro-Laser Enhancements: To achieve maximum retention without heavy adhesive usage, the engineered eyelash palette laser matte pbt features micro-laser incisions across the base of the fibers. This structural enhancement doubles the mechanical bond strength natively, allowing technicians to achieve a flawless 6-week hold while using up to 40% less liquid glue.

The Financial Toll of Ocular Irritation on Salon Client Lifetime Value

In the ultra-premium luxury beauty sector, client safety and trust are your primary capital assets. A single instance of unmanaged chemical irritation can drive a loyal client to leave a negative digital review, permanently damaging your salon's reputation. Shifting your operational protocol toward real-time gas neutralization and high-purity PBT material integration safely insulates your business from liability, positioning your brand as an elite hub of clinical excellence.

Insulate your salon business from application crises and safeguard your sensitive clientele. Discover the world's finest hypoallergenic adhesives, premium PBT palettes, and chemical vapor neutralizers at WinLash, and elevate your professional safety standards today.

FAQ: Advanced Ocular Troubleshooting for Elite Technicians

Can a client safely continue extension services after experiencing a true allergy?

No. True cyanoacrylate allergy involves permanent immunological memory. Once a client is sensitized, subsequent exposure will trigger increasingly severe contact dermatitis regardless of technique, requiring a permanent transition to alternative cosmetic options.

How can I instantly stop a client's eyes from watering due to fumes during a set?

Immediately stop application and reposition the eye pads to verify they aren't touching the sclera. Use a handheld fan blowing downward away from the face to clear pooled vapors, and dry the excess moisture to avoid a localized kinetic moisture shock.

Why does generalized swelling happen 24 hours after a completely painless application?

This delayed onset is typical of type IV contact hypersensitivity. While the liquid glue feels completely comfortable during placement, the continuous release of microscopic chemical stabilizers over the next 24 hours slowly triggers a deep localized immune response.

Why Does Lash Glue Turn White? How to Stop Shock Curing & Blooming
Table of Contents (Click to Open)
  1. The Panic of Frosting: Why Does Lash Glue Turn White?
  2.  Shock Curing vs. Blooming Effect Matrix
  3. The Molecular Science of Cyanoacrylate Polymerization
  4. Shock Curing: The Danger of Free Moisture Contamination
  5. The Blooming Effect: Volatile Monomer Vapor Accumulation
  6. Step-by-Step Prevention Protocol: Balancing Lash Micro-Climates
  7. Carbon Black Pigment Separation vs. Adhesive Frosting Physics
  8. Clear vs. Black Adhesives: Choosing the Right Chemical Lattice
  9. The Financial Toll of Brittle Bonds on Salon Retention
  10. FAQ: Advanced Adhesive Troubleshooting for Master Artists

You complete a flawless, micro-symmetrical volume set, only to look down and witness a lash artist’s ultimate horror: a chalky, stark white crust creeping across the base of the extensions. The immediate panic of asking why does lash glue turn white is a high-stakes defining moment that separates amateur technicians from master ocular architects. This unsightly frosting completely ruins the dark, dense aesthetic of premium sets, leaving clients frustrated and your salon's reputation vulnerable. To permanently eliminate this retention-killing anomaly, masters must look past basic application tips, invest in scientifically formulated eyelash extension glue and liquids, and dive deep into the precise chemical physics of cyanoacrylate curing dynamics.

Executive Brief: Managing Cyanoacrylate Curing Pathologies

White residue on professional eyelash extensions is never a random manufacturing defect; it is a direct biological and environmental consequence of unmanaged polymerization physics. In the intense, variable-humidity climate of Dubai, lash artists frequently misdiagnose this phenomenon. The white chalky substance manifests via two completely separate chemical pathways: shock curing lash extensions (instantaneous liquid water contact) and the cyanoacrylate blooming effect (delayed precipitation of volatile monomer vapors). Understanding these molecular boundaries allows elite salons to deploy targeted chemical interventions—specifically advanced moisture pre-calibration and rapid polymer chain sealing—ensuring clean, jet-black bonds with absolute structural flexibility.

Shock Curing vs. Blooming Effect Matrix

Comparison of shock curing vs blooming effect on eyelash extensions showing chalky white residue causes

To establish a flawless troubleshooting protocol, an experienced technician must instantly recognize whether they are dealing with an instantaneous kinetic shock or a delayed vapor condensation. Use this definitive architectural matrix to diagnose the exact chemical failure occurring on the lash line:

FeatureShock CuringBlooming Effect
Primary Root CauseDirect, sudden exposure of liquid adhesive to uncalibrated free moisture or liquid water droplets.Accumulation, stagnation, and subsequent condensation of volatile monomer vapors on wet adhesive.
Temporal OnsetInstantaneous (occurs within seconds of improper moisture or liquid contact during the set).Delayed (manifests several hours later, often after the client has left the salon environment).
Physical MorphologyThick, dense, rough, and highly visible chalky-white structural layer directly at the adhesive base.Fine, powdery, soft frosted mist or superficial white dust coating the extension fibers.
Engineered SolutionPre-application lipid and moisture balancing using high-purity chemical primers.Instant polymer-chain encapsulation and vapor neutralization via advanced chemical bonders.

The Molecular Science of Cyanoacrylate Polymerization

Professional lash extensions rely entirely on ethyl-cyanoacrylate, an acrylic monomer that remains liquid inside the bottle due to acidic stabilizers. When expelled onto a jade stone or glue ring, it requires a weak base—specifically the microscopic moisture layer naturally present in ambient air and on the human eyelash cuticle—to initiate anionic polymerization.

During a healthy cure, these individual monomers link together to form long, organized polymer chains, creating a strong, crystal-clear, and flexible solid matrix. However, if the kinetic speed of this chemical reaction is thrown out of equilibrium by excessive environmental moisture or unmanaged vapor release, the polymer chains form chaotically. This molecular disarray compromises the physical integrity of the bond and refracts light differently, showing up as a white, frosted blemish.

Shock Curing: The Danger of Free Moisture Contamination

When a lash artist encounters true shock curing, they are witnessing a violent, unchecked chemical reaction that instantly severely degrades lash retention. This pathology occurs when liquid water or an excess of free moisture collides directly with unpolymerized ethyl-cyanoacrylate adhesive. A classic example is utilizing a traditional nano mister too close to the face (within 30cm) or too quickly after completing a set, resulting in heavy water droplets resting on the extensions, causing a severe nano mister shock. However, in high-end salons, this is also frequently triggered by a client's tearing eyes due to cyanoacrylate fumes, or micro-condensation caused by faulty salon air conditioning units blasting cold air onto a warm face.

The physics behind this failure rests on capillary action and rapid surface tension shifts. The sudden rush of liquid water molecules forces the outer layer of the cyanoacrylate drop to polymerize instantly. Because this outer shell hardens in milliseconds, it creates an impermeable barrier that traps unlinked, wet volatile monomers and gasses beneath it. The trapped internal pressure breaks the expanding polymer lattice from within. Instead of forming a smooth, transparent crystalline structure, the adhesive crystallizes into a highly brittle, chalky white shield that completely loses its tensile strength and structural flexibility. This causes total mechanical bond failure, leading to immediate lash shedding within 24 to 48 hours.

The Blooming Effect: Volatile Monomer Vapor Accumulation

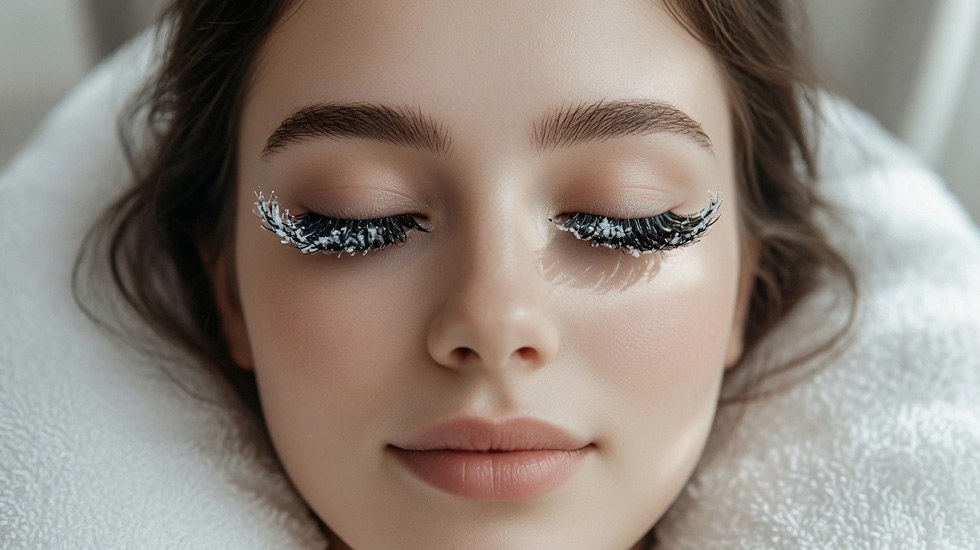
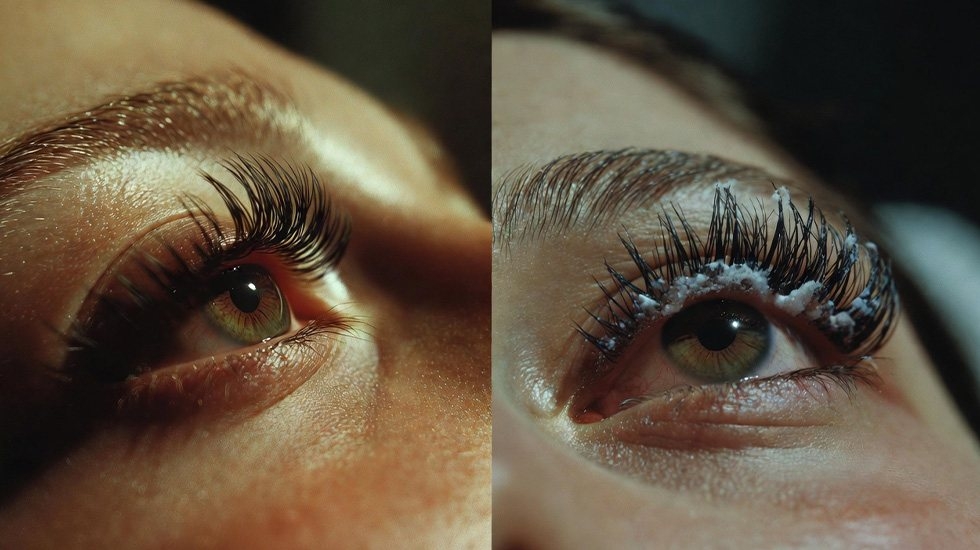
Close-up of cyanoacrylate blooming effect causing fine white powder on lash extensions overnight

Conversely, the cyanoacrylate blooming effect is a subtle, atmospheric phenomenon driven by unmanaged vapor pressure dynamics. Cyanoacrylate monomers are highly volatile, meaning they readily evaporate into the ambient air as volatile monomer vapors while the liquid glue bead is slowly curing. If the ambient relative humidity (RH) in your salon is too low (below 40%), or if you use an excessive volume of adhesive on a single volume fan, the drying and cross-linking process slows down significantly, leaving the outer layer of the glue wet and exposed for an extended period.

As these gaseous monomers hover directly above the natural lash line due to inadequate salon ventilation, they slowly seek out moisture sources in the immediate micro-climate. Once they locate airborne moisture, they undergo a mid-air polymerization process, condense into microscopic solid particles, and gently precipitate back down onto the adjacent areas. This creates a fine, powdery, frosted coating across the mid-lengths and tips of the extensions, rather than just at the base. It perfectly explains the classic industry mystery: why a lash set can look completely black, clean, and flawless when the client leaves your chair, but appears covered in a white mist by the time they wake up the next morning.

Step-by-Step Prevention Protocol: Balancing Lash Micro-Climates

Eliminating white residue from your professional career requires transitioning from reactive troubleshooting to an advanced, engineering-focused application protocol. Controlling your salon's micro-climate (ideal range: 45–60% humidity and 20–22°C temperature) is crucial, but managing the chemical properties of the natural follicle is where master retention is won. Follow this systematic chemical management routine to guarantee deep obsidian retention:

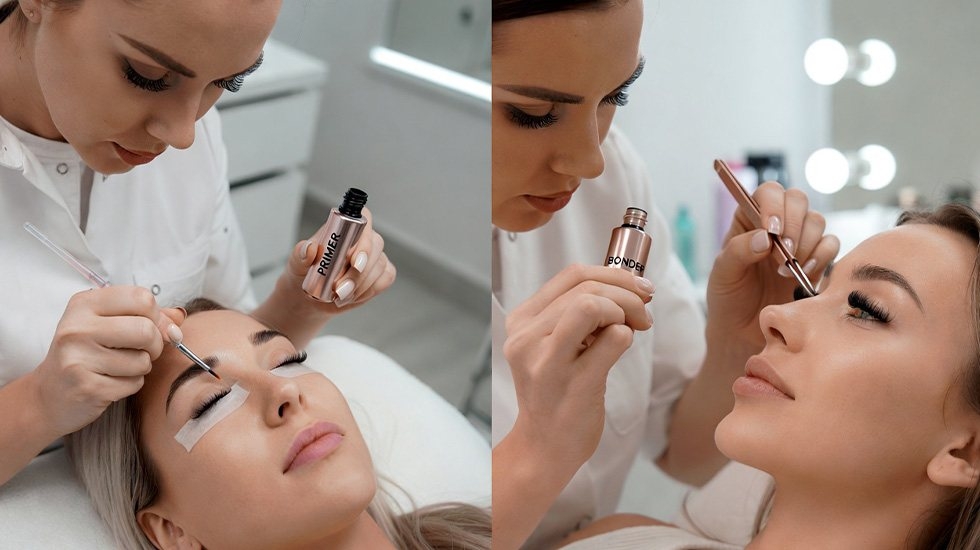
  • Step 1: Calibrate the Cuticle with a Dedicated Lash Primer: To master how to prevent lash glue turning white, you must first normalize the surface moisture of the natural lash. Natural lashes carry highly unpredictable ratios of sebum, cellular debris, and intracellular moisture. Applying a fast-curing adhesive to an uncalibrated cuticle triggers a chaotic moisture shock. By pre-treating the lash line with a high-purity lash primer, you strip away problematic surface lipids while perfectly balancing the natural moisture baseline. This clean preparation ensures a smooth, highly uniform anionic polymerization the exact millisecond your extension fan contacts the follicle.
  • Step 2: Instant Vapor Encapsulation with an Advanced Bonder: The true hero of modern lash chemistry is the immediate post-application sealant. Relying on outdated training manuals that force clients into a strict 24-hour water quarantine is a major operational risk, especially in the humid Gulf region. The moment you finish applying your last extension, apply a micro-drop of a specialized bonder directly onto the bond zones using a micro-brush. This solution initiates an immediate, highly controlled polymerization of the adhesive from the inside out, completely locking down volatile monomer vapors within 3 minutes. With no escaping vapors, the blooming effect is physically blocked from forming, while the cyanoacrylate matrix gains elite structural flexibility, instantly rendering the set 100% waterproof.

Carbon Black Pigment Separation vs. Adhesive Frosting Physics

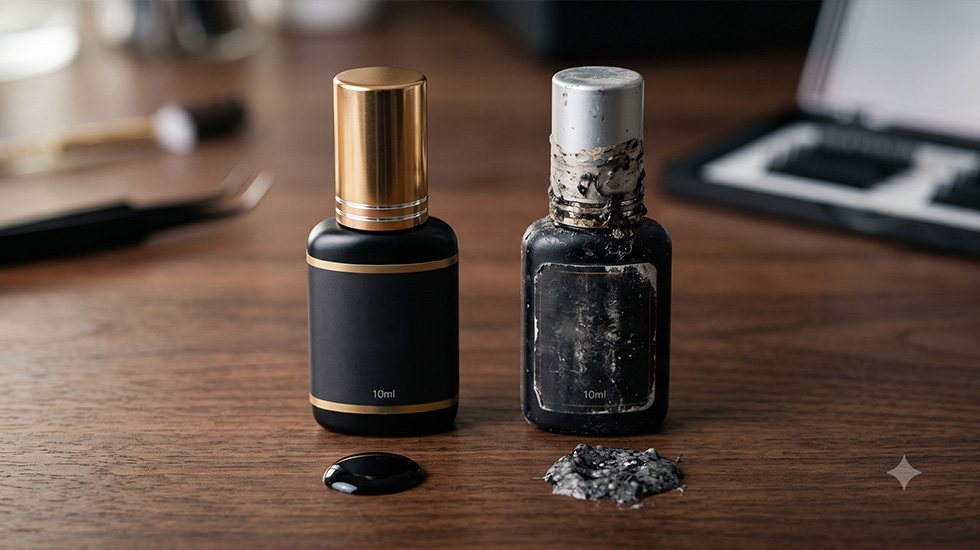
Often confused with environmental blooming, carbon black pigment separation is another severe chemical pitfall that destroys the deep appearance of professional sets. High-end black adhesives get their rich obsidian depth from microscopic carbon black particles mechanically suspended within the clear cyanoacrylate liquid matrix. Because these pigment particles have a higher density than the liquid monomers, they naturally settle at the bottom of the bottle when left static.

If a technician fails to shake the adhesive bottle thoroughly (ideally for 60 seconds manually or using a mechanical glue shaker) before dispensing a drop, they will primarily express clear cyanoacrylate with an inadequate concentration of pigment. When this poorly blended, low-viscosity solution interacts with ambient humidity, it undergoes a phase separation. This structural imbalance magnifies the visual impact of any minor frosted lash extensions, leaving behind a mottled, dull greyish-white base. Utilizing a molecularly stable, highly homogenized formula like eyelash extension glue black 5ml provides a uniform particle suspension that strongly resists phase separation even under extreme environmental stress.

Clear vs. Black Adhesives: Choosing the Right Chemical Lattice

Clear vs black eyelash extension glue comparison for preventing white residue and pigment separation

For avant-garde styling, colored lash sets, or clients presenting with extreme chemical sensitivities to carbon black pigment, transitioning to a clear adhesive lattice is an excellent alternative. While clear glue completely removes the risk of pigment separation, many master artists falsely assume it is immune to aesthetic defects. In fact, clear cyanoacrylate lacks the stabilizing thermal mass that carbon black particles provide, which can sometimes make its curing speed slightly more unpredictable under sudden humidity drops or spikes.

In reality, clear cyanoacrylate is equally susceptible to both shock curing and blooming if moisture and vapors are poorly managed. When a clear adhesive shocks, it loses its seamless clarity and turns into an opaque, highly reflective white bead that looks messy and unrefined. For ultra-clean styling or colored contact lens coordination, utilizing a premium eyelash extension glue white (clear formulation) provides a pristine, translucent bond line—giving you complete aesthetic safety, provided your advanced priming and bonding protocols are rigorously followed.

The Financial Toll of Brittle Bonds on Salon Retention

In a luxury beauty market where clients demand flawless execution, white residue is more than a visual blemish—it is a financial leak. Brittle, moisture-shocked bonds lead to premature lash shedding, triggering emergency fix-it appointments that drain your salon's time and resources. By modernizing your workspace chemistry with calculated priming and instant vapor neutralization, you shift your salon into a premier bracket of multicultural excellence.

Elevate your professional toolkit from basic adhesives to advanced chemical solutions. Explore the complete range of master-grade liquids, primers, and specialized adhesives at WinLash, and redefine your lash retention standards today.

FAQ: Advanced Adhesive Troubleshooting for Master Artists

Can I safely use a nano mister without triggering a kinetic shock?

Yes, but it requires strict calibration. Wait 3 minutes post-set, hold the device 40cm away, and mist for under 15 seconds. To eliminate this kinetic risk entirely, replacing misting devices with an advanced chemical bonder is highly recommended.

How does extreme outdoor humidity accelerate the delayed blooming effect?

Stepping into high humidity creates a sudden vapor pressure shift. Uncured, volatile monomers violently evaporate from the wet adhesive core, polymerize instantly in the damp air, and fall back onto the extensions as a white, powdery frost.

Can frosted lash extensions be fixed, or do they require a complete removal?

Mild blooming (powdery dust) can be masked by re-hydrating the surface with a micro-brush of primer. However, structural shock curing (thick, brittle crust) permanently fractures the bond lattice, requiring immediate removal and replacement of the affected fans.

Lash Primer vs. Lash Bonder: Do You Actually Need Both?
Table of Contents
  1. The Chemistry of Cyanoacrylate Adhesives
  2. What is a Lash Primer? (The Pre-Treatment Catalyst)
  3. What is a Lash Bonder? (The Post-Treatment Lock)
  4. Side-by-Side Retention Matrix
  5. Environmental Factors: Temperature and Lash Room Humidity
  6. How to Integrate Both into Your Workflow
  7. The Cost of Misuse: Shock Curing and Brittle Adhesive Bonds
  8. Frequently Asked Questions

In the professional eyelash styling industry, maximizing retention requires a precise understanding of your chemical application timeline. When analyzing your back-bar protocols to prevent premature shedding, navigating the exact chemistry of Lash Primer vs. Lash Bonder is critical to your studio's success. While exploring professional eyelash extension glue and liquids, many lash artists question whether these formulas are interchangeable or redundant. To optimize cyanoacrylate polymerization and safeguard your sets against varying environmental climates, let's dive deep into the science of lash retention to understand why these two distinct liquids operate on completely opposite ends of your styling workflow.

The Chemistry of Cyanoacrylate Adhesives

Chemistry of cyanoacrylate adhesives in professional lash extensions

To understand retention enhancers, you must first understand your glue. Modern professional lash adhesives rely almost exclusively on cyanoacrylate. Unlike traditional glues that dry via evaporation, cyanoacrylate cures through a chemical reaction called anionic polymerization. This reaction is triggered instantly by moisture (specifically hydroxyl ions) present in the air and on the surface of the natural lash.

If the natural lash is too dry, too oily, or highly acidic, the polymerization process stalls, resulting in poor attachment. Conversely, if sudden moisture hits the curing glue externally, it causes "shock curing," turning the adhesive brittle, white, and highly prone to premature shedding. This is exactly where primers and bonders step in to control the environment.

What is a Lash Primer? (The Pre-Treatment Catalyst)

A professional lash primer is a precision-engineered pre-treatment liquid applied to the natural lashes immediately following the initial deep cleanse (lash shampoo) and prior to placing your first extension. From a biochemical standpoint, it serves as the ultimate surface-conditioning agent that bridges the gap between organic hair keratin and synthetic cyanoacrylate.

The Science of Surface Prep: Human eyelashes are naturally coated in sebum (lipids), metabolic proteins, and residual cosmetic elements. This film acts as a physical barrier. If a fast-setting adhesive is applied directly over an unprimed, oily hair shaft, the cyanoacrylate bonds to the volatile oil layer rather than the actual hair structure, leading to catastrophic retention failure within 48 to 72 hours.

A high-performance primer dissolves these stubborn lipid matrices cleanly using optimized, cosmetic-grade solvent carriers while simultaneously modulating the hair's natural pH level. Healthy human hair naturally sits at a slightly acidic pH of roughly 4.5 to 5.5. Primers elevate this local environment toward a mild alkaline state (typically between 7.0 and 8.0).

When exposed to this slight alkalinity, the microscopic keratin cuticles—the protective, shingle-like outer layers of the hair shaft—gently swell and lift outward. This micro-scale texture optimization dramatically multiplies the physical surface area of the natural lash. When a classic extension or volume fan is placed, the liquid cyanoacrylate flows into these microscopic gaps instantly, establishing an unshakeable mechanical lock. This eliminates extension sliding, grounds the attachment base, and significantly cuts down your isolation-to-placement transition time.

What is a Lash Bonder? (The Post-Treatment Lock)

Conversely, a premium lash bonder functions on the polar opposite end of your appointment timeline. It is a highly specialized post-treatment accelerator designed to interact directly with the active, curing adhesive points once your styling map is 100% complete.

To grasp the engineering genius behind a bonder, one must look at how traditional cyanoacrylate cures naturally. Without a post-treatment curing agent, lash glues rely entirely on ambient atmospheric humidity to slowly polymerize over a 24 to 48-hour window. This standard atmospheric curing operates strictly from the outside-in, forming a premature outer crust that traps volatile, unpolymerized monomers underneath. As these trapped molecules slowly break down and cure, they continuously off-gas, releasing heavy chemical vapors that cause burning sensations, eye redness, and localized chemical sensitivity for the client.

When a professional bonder is precisely micro-dosed onto the active glue joins, it completely rewrites this volatile timeline by triggering a series of immediate structural upgrades:

  • Instant Inside-Out Polymerization: Instead of waiting days for atmospheric moisture to settle, the bonder introduces immediate chemical cross-linking agents that force polymerization from the core outward, solidifying the adhesive mesh in under 3 minutes.
  • Immediate Vapor Capture: By locking the cyanoacrylate chains rapidly, it permanently traps unpolymerized monomers beneath the surface, completely neutralizing chemical off-gassing and eliminating post-appointment stinging or redness.
  • Elastomeric Matrix Shock Absorption: Traditional slow curing leaves glue joints rigid, glassy, and brittle. A bonder infuses calculated elasticity into the bond site, creating a resilient, flexible matrix that safely bends under daily brushing or sleeping friction without snapping off.
  • Absolute Elimination of Downtime: Because the chemical bond is fully stabilized instantly, it completely abolishes the outdated "don't wet your eyes for 24 hours" restriction. Your clients are free to shower, swim, sweat, or steam immediately post-appointment with zero risk of shock curing.

Lash Primer vs. Lash Bonder: Side-by-Side Retention Matrix

Side-by-side comparison of lash primer and lash bonder functions

To keep your back-bar protocol clear and optimize your client care strategy, evaluating the structural layout of Lash Primer vs. Lash Bonder across key performance metrics is essential. Here is how these two liquid powerhouses compare when addressing specific adhesion, retention, and chemical curing variables during application:

FeatureLash PrimerLash Bonder
Application TimingBefore applying extensions (Prep)2-3 minutes after the final extension (Finish)
Target SurfaceNatural lash cuticleAdhesive bonding points
Chemical GoalRemoves lipids, adjusts pH to alkalineAccelerates inside-out polymerization
Client BenefitPrevents base extensions from slippingZero fumes, instant water exposure allowed

Environmental Factors: Temperature and Lash Room Humidity

Your workspace environment heavily dictates how extension liquids behave. Cyanoacrylate is highly hygroscopic—it draws moisture from the surrounding air to cure. Therefore, fluctuations in your lash room humidity and temperature can completely alter your adhesive’s curing speed, making primers and bonders your environmental insurance policies.

In Low Humidity Conditions (Below 40% RH): The air lacks the moisture needed to kickstart anionic polymerization. The glue stays wet for too long, causing extensions to lean, slip, or create "stickies." Utilizing a pH-balanced primer in this scenario is vital; it forces the natural lash cuticle to act as a localized alkaline accelerator, speeding up the magnetic attraction between the extension base and the hair shaft.

In High Humidity Conditions (Above 65% RH): The glue cures too quickly, often partially hardening before you can place the extension onto the natural lash. This causes a weak surface-only bond. To prevent this adhesive layer from degrading rapidly into brittle adhesive bonds, applying a post-treatment bonder seals the core structure instantly, protecting the premature bond from collapsing under heavy atmospheric moisture.

How to Integrate Both into Your Workflow

For master lash artists, it is not a matter of choosing one over the other; it is about combining them systematically to achieve unparalleled retention. Here is the professional step-by-step master method using high-performance components:

  1. Prep: Wash the lashes using an oil-free lash shampoo. Rinse thoroughly and pat dry.
  2. Prime: Apply a minimal amount of primer to a microfiber brush. Dampen, don't soak, and glide it across the natural lashes. Let it air dry completely.
  3. Isolate & Bond: Dip your lash extension into a premium, stable adhesive like our Eyelash Extension Black Glue (5ml) and place it accurately on the isolated natural lash.
  4. Lock: Once the full set is finished, wait 2 to 3 minutes. Take a clean microbrush, apply a tiny drop of bonder, wipe off the excess, and precisely dab the base of the extensions where the adhesive sits.

The Cost of Misuse: Shock Curing and Brittle Adhesive Bonds

Common mistakes with lash primer and bonder leading to brittle bonds

While adding these liquids to your back-bar can transform your business, improper application protocols can yield catastrophic retention issues and chemical irritation for your clients.

An all-too-common industry error is over-priming lashes. Because primers contain controlled amounts of cosmetic-grade alcohol to strip oils, soaking the natural lashes can over-dehydrate the hair cortex. When the hair becomes hyper-dry, the adhesive cannot cure from the inside out; instead, it crystallizes on the surface, causing the extensions to pop off effortlessly during the post-appointment brush-out.

On the flip side, mismanaging your bonder can trigger immediate shock curing. If you apply a post-treatment bonder too quickly—before allowing the outer layers of cyanoacrylate to naturally settle for 2 to 3 minutes—the rapid chemical conversion turns the glue frosty white. This is known as bleaching or blooming. Not only does this ruin the aesthetic look of a clean black lash line, but it also creates a rough, scratchy texture that causes localized eyelid friction and premature shedding within days.

Pro-Tip for Lash Techs: Always practice micro-dosing. Use a microfiber brush, apply your liquid, and firmly dab the brush tip onto a lint-free glue wipe to extract excess moisture before touching the client's lash line. Less is always more.

Frequently Asked Questions

Can I use a lash bonder instead of a primer?

No. They serve completely unique chemical roles. Primer prepares the raw, natural canvas for initial bonding by removing oils, while a bonder modifies the internal structural curing of the glue at the end of the treatment.

Does primer dry out the client's natural lashes too much?

Only if over-applied. If your client has extremely dry, brittle hair or a low moisture level, you can skip primer and use a saline primer or pre-treatment cleanser instead. For oily skin types, primer is mandatory.

Can I use a nano mister if I already applied a bonder?

You don't need to. A nano mister introduces external moisture to cure the top layer of glue slowly, whereas a bonder polymerizes the internal core instantly. Using both is redundant and can occasionally over-saturate the bond.

When comparing Lash Primer vs. Lash Bonder, do you need lash primer and bonder for every client?

Yes, because they serve opposite functions. In the breakdown of lash primer vs lash bonder, the primer is used at the start to strip oils and open cuticles, while the bonder is applied at the end to instantly cure the glue mesh.

So, do you need lash primer and bonder for every set? While not mandatory, using both together is the ultimate insurance for maximum retention, zero vapor irritation, and allowing clients to wet their lashes immediately.

Want to unlock industry-leading retention metrics for your salon or brand? Elevate your lash studio setup with authentic, premium supplies exclusively from WinLash.

How Long Does Lash Glue Last? The Ultimate Wear-Time Guide for Strips to Extensions
Quick Access Table of Contents
  1. Why Lash Glue Lasts Longer (Key Tips)
  2. Factors Affecting How Long Lash Glue Lasts
  3. Pro Application Tips for Max Lash Hold
  4. Strips vs. Clusters vs. Extensions: Wear Times
  5. Lash Glue Shelf Life: Opened vs. Unopened
  6. Lash Glue FAQ: Answered

How long does lash glue last? It is one of the most common questions in the beauty community. Whether you are prepping for a quick weekend event or looking for a semi-permanent solution, knowing the realistic lifespan of your lash adhesive is the key to maintaining a flawless, safe look.

The short answer is that strip lash glue lasts 12 to 48 hours, cluster adhesives hold for 2 to 7 days, and professional extension glues can last 4 to 8 weeks. However, these timelines are not set in stone. Factors like skin oils, outdoor humidity, and the quality of your eyelash extension glue and prep liquids heavily dictate how long those bonds will actually hold.

👁️

Reviewed & Approved by WinLash Academy

Authored by our certified lash educators to ensure safe application, realistic wear-time expectations, and professional-grade retention secrets.

Safety Warning: A rising but dangerous trend is using hair bonding glue on eyelashes. Hair glue is not formulated for the delicate eye area and can cause severe chemical burns, permanent lash loss, and allergic reactions. Always use dedicated, ophthalmologist-tested lash adhesives.

Why Lash Glue Lasts Longer (Key Tips)

Lash glue retention on different lash types - strips, clusters and extensions

Imagine spending 20 minutes perfecting your eye makeup, only for your lashes to lift and flutter away due to a sudden spike in outdoor humidity or sweat. It is a highly frustrating experience that many face. Understanding how long lash glue lasts on your eyelashes is not just beauty trivia—it is the key to maintaining all-day confidence and ensuring proper eye hygiene.

In highly humid climates or during hot summer months, lash lovers face a unique set of challenges. Heat-induced sweat, high humidity that accelerates the chemical curing of the glue, and indoor air conditioning causing temperature swings all work together to weaken adhesive bonds. Utilizing poor-quality glues or wrong techniques generally leads to:

  • Premature Lifting: Nearly 40% of users report their strip lashes lifting or failing in under 12 hours.
  • Eye Irritation: Expired, low-quality, or contaminated adhesives cause redness, itching, or swelling in 25% of cases.
  • Wasted Products: Constantly reapplying adhesive degrades the lash bands, running through your lash sets and glue much faster than necessary.

A primary factor to remember is that adhesive bonds formed directly on the skin naturally break down much faster than hair-to-hair attachments, especially when sebum and sweat are introduced. In this comprehensive guide, you will learn exactly what causes early lifting and how proper glue selection, professional preparation, and smart aftercare can noticeably improve retention for strip lashes, DIY clusters, and salon extensions alike.

Factors Affecting How Long Lash Glue Lasts

How long your lash glue holds up is a direct result of science meeting your daily environment. Most lash adhesives are formulated using cyanoacrylate, a fast-curing acrylic resin. Unlike traditional glues that dry through evaporation, cyanoacrylate cures through a chemical reaction called anionic polymerization, which is triggered by trace amounts of moisture in the air.

This means environmental conditions like humidity, ambient temperature, and your skin's natural oil production do not just affect the glue—they actively dictate how the bond cures and holds over time.

Humidity, Heat, and Natural Oils: The Ultimate Lash Glue Killers

In regions with high humidity or during hot summer months, keeping fake lashes secure can feel like an uphill battle. When these environmental factors fluctuate, they disrupt the curing process, leading to either brittle bonds that snap early or weak bonds that slide right off.

Here is a breakdown of how these environmental forces impact your lash retention, along with practical solutions to combat them:

Environmental FactorIdeal EnvironmentHigh-Heat/Humid ClimatesImpact on Lash RetentionThe Professional Solution
Humidity45% – 60% RH70% – 90%+ (Humid coastal areas)Causes "shock curing" (glue dries too fast, becoming brittle and turning white).Use a dehumidifier in your treatment room, or opt for moisture-resistant professional adhesives.
Temperature20°C – 24°C38°C – 45°C+ (Outdoor peaks)Thins out the liquid adhesive, accelerating breakdown and reducing flexibility.Keep your indoor space temperature-controlled. Avoid storing your open lash glue in direct sunlight.
Natural Oils & SweatDry, prepped skinHigh sebum/sweat productionSebum chemically breaks down the polymer chains, causing early lift-off.Thoroughly prep with an oil-free primer. Use a professional-grade retention booster or bonder.
Pro Tip for High-Humidity Areas: If you reside in a highly humid or tropical climate, your adhesive will naturally cure much faster than stated on the bottle. To avoid dry-bonding (where the glue dries before touching the natural lash), speed up your placement technique or transition to a slightly slower-curing glue to compensate.

Pro Application Tips for Max Lash Hold

Proper application technique to make lash glue last longer

Applying lash glue is not just about sticking something on; it is about timing and quantity. If you ask any certified lash technician, they will tell you that 80% of premature lash fallouts happen because of poor application technique rather than the adhesive itself.

The golden rule of lash glue is the "Goldilocks Zone": using too much glue prevents the inner core from curing properly (creating a gooey, weak bond), while using too little glue causes the lash to lift at the corners within hours. Understanding the mechanics of your specific lash type is crucial for maximum retention.

Lash TypeAdhesive AmountWait Time (To Get Tacky)Application Technique
Strip LashesA very thin, even line along the entire lash band. Add a tiny extra dot on the inner and outer corners.30 to 45 seconds. (Wait until the glue looks translucent and feels sticky).Anchor the center first, then gently press and hold the corners down for 10 seconds.
Cluster LashesA small, precise micro-drop on the spine of the cluster.15 to 20 seconds.Apply 1mm away from your eyelid skin, fusing the cluster to the underside of your natural lashes.
Lash ExtensionsA thin coating on the bottom 2mm of the extension base (no clumps or visible droplets).0.5 to 3 seconds (depending on the formula's speed).Isolate a single natural lash, slide the extension along the lash to distribute the glue, and place.

The Secret is in the "Tackiness"

If you try to apply strip or cluster lashes while the adhesive is still completely liquid, they will slip, slide, and ruin your eye makeup. Allowing the glue to sit for a few moments lets the solvent begin to evaporate, initiating the polymerization. This creates a vacuum-like grip the second the falsie touches your skin or natural lash.

For those performing professional extensions, using a high-quality professional lash primer is non-negotiable. It strips away the natural lash's cuticle oils, providing a rougher microscopic surface that the adhesive can lock onto for weeks rather than days.

Strips vs. Clusters vs. Extensions: Wear Times Compared

If you are searching for how long do glue-on lashes last, the answer is highly dependent on the category of lash you choose and the chemical makeup of the adhesive. Not all lash glues are created equal; a daily strip adhesive serves a completely different purpose than a semi-permanent extension bond.

To give you a bird's-eye view, here is a simplified breakdown of the industry-standard wear times under normal conditions:

Lash CategoryAverage Wear TimeAdhesive Base ChemistryApplication SurfaceBest Suited For
Strip Lashes12 to 48 HoursRubber, Latex, or Acrylic CopolymerEyelid skin (just above the lash line)Daily wear, special events, quick removal
Cluster Lashes (Segments)2 to 7 DaysFlexible Acrylates (Bond & Seal)Underside of natural lashes (hair-to-hair)Multi-day weekend wear, DIY custom mapping
Eyelash Extensions4 to 8 WeeksMedical-Grade CyanoacrylateIndividual natural lash fibers (hair-to-hair)Semi-permanent wear, professional application

1. Strip Lashes: 12 to 48 Hours

Classic strip lashes are designed for temporary wear. Because the adhesive is applied directly to the highly mobile skin of your eyelid—which continuously produces sebum and sweat—the bond naturally degrades faster than lash-to-hair attachments.

Standard drugstore strip glues generally hold up for 12 to 24 hours before the inner or outer corners begin to lift. However, premium, water-resistant acrylic-based formulas can comfortably push that limit to 48 hours, keeping your falsies secure even through intense workouts or outdoor summer events.

2. Cluster Lashes: 2 to 7 Days

How long do cluster lashes last with proper glue application

Often referred to as individual DIY lashes, clusters have surged in popularity because they bridge the gap between daily strips and salon extensions. The key to their multi-day durability lies in the application method: you are gluing the cluster segments directly onto the underside of your natural lashes, completely avoiding the oily skin of the eyelid.

When using a high-quality "Bond and Seal" system, these lashes can easily survive sleeping, showering, and daily activities for up to a week. Because they are reusable, carefully cleaning off the adhesive residue after removal allows you to wear your favorite cluster sets multiple times.

3. Professional Eyelash Extensions: 4 to 8 Weeks

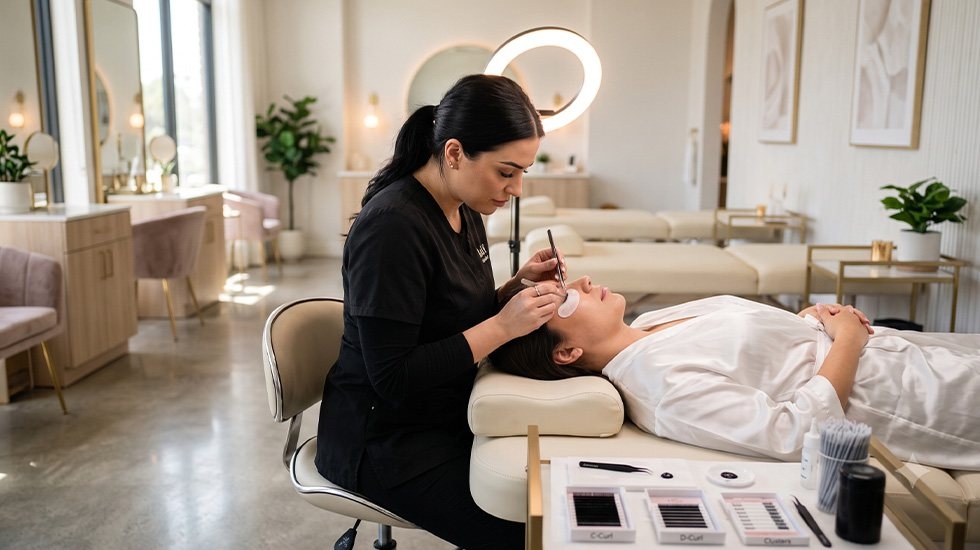
If you want a low-maintenance, wake-up-ready look, professional extensions are the gold standard. In this process, a certified lash artist isolates a single natural lash and attaches an extension using high-performance, cyanoacrylate-based professional extension glue.

This medical-grade bond is exceptionally rigid and waterproof once fully cured. Rather than the glue dissolving, your extensions will naturally shed along with your natural lash growth cycle (which averages 2 to 5 lashes lost per day, per eye). To keep your extensions looking full, professional infills are recommended every 2 to 3 weeks.

Lash Glue on Lashes vs. Skin: Why the Surface Matters

A common question among lash lovers is: how long does eyelash glue last on skin? If you apply adhesive directly to your eyelid skin (which is standard for strip lashes), the bond will naturally degrade much faster than if you apply it hair-to-hair (standard for clusters and extensions).

Your skin is a living organ that constantly secretes natural oils (sebum), sweat, and sheds dead skin cells. These natural barriers slowly seep under the glue line, breaking down the chemical bonds. On the other hand, your natural lash shaft is made of dead, keratinized protein. It does not produce oil, providing a stable, porous surface that allows adhesives to lock in tight.

Application SurfaceAverage RetentionPrimary Bond Destroyer
Eyelid Skin (Strips)12 to 24 HoursSebum, sweat, facial cleansers, and frequent blinking stretch.
Natural Lash Hair (Clusters/Extensions)2 Days to 8 WeeksNatural lash shedding cycle and heavy oil-based cosmetic products.

Note on Pre-Glued Lashes: If you are using self-adhesive or pre-glued lashes, they rely on a pressure-sensitive solid adhesive strip. While incredibly convenient, these typically last only 8 to 12 hours on oily eyelids before losing their tackiness entirely.

Lash Glue Shelf Life: Does Eyelash Glue Expire?

Lash glue shelf life - opened vs unopened expiration guide

Yes, absolutely. Like any cosmetic chemical, lash glue degrades over time. If you have ever wondered can lash glue expire?, the answer is yes—and using expired glue is one of the leading causes of early lash fallout and severe eye irritation.

Every time you open your adhesive bottle, microscopic moisture from the air enters the nozzle. This triggers a slow, internal polymerization process. Over weeks, this degrades the glue's bonding power long before it completely dries up in the bottle.

How Long Does Lash Glue Last Once Opened vs. Unopened?

  • Unopened Bottle: Under proper storage conditions, an unopened bottle of professional lash adhesive or high-quality strip glue can last for 6 to 12 months from the manufacture date.
  • Opened Bottle: Once the seal is broken, you should replace your lash glue every 1 to 2 months (maximum of 8 weeks). After this point, the chemical compound loses its elasticity, resulting in poor retention.
How to Spot Expired Lash Glue: Toss your adhesive immediately if you notice it has become thick, stringy, or gloopy. Other clear warning signs include a strong, vinegar-like chemical smell, separated pigment (grey or marbled fluid instead of solid black), or if it takes much longer to dry than usual.

How Long Does Eyelash Glue Take to Dry?

Understanding drying times is essential to avoid premature lifting during application. There is a chemical difference between "drying" (becoming tacky enough to hold) and "curing" (forming a completely waterproof polymer bond).

  • For Strip Lashes: Traditional strip glue takes about 30 to 60 seconds to dry down to a tacky, workable state. Never apply the strip immediately; letting the formula sit allows the liquid solvents to flash off, giving you instant grip upon contact.
  • For Professional Extensions: Professional cyanoacrylate adhesives cure almost instantly. Depending on the room's humidity, professional glues take anywhere from 0.5 to 3 seconds to cure. Fast-drying formulas require quick, precise placement to prevent the glue from curing before it even touches the natural lash.

7 Practical Tips to Make Your Fake Lashes Last Longer

Whether you wear daily strips, DIY clusters, or salon extensions, your aftercare habits and prep work play a massive role in how long you can keep glued eyelashes on. Use these 7 professional tips to maximize your adhesive's holding power:

  1. Prep with an Oil-Free Cleanser: Natural oils are the ultimate enemy of lash adhesives. Always wash your eyelids and natural lashes with an oil-free lash shampoo or micellar water before application. This strips away microscopic sebum, creating a clean canvas for the glue.
  2. Wait for the Glue to Get Tacky: If you are using strip lash glue, never press the lash band onto your eye immediately. Wait 30 to 45 seconds for the liquid to become slightly dry and rubbery. This ensures the lashes grab instantly without sliding around and ruining your eyeliner.
  3. Avoid Oil-Based Makeup and Skincare: Check your eye creams, facial oils, and eyeliners. Any product containing oils (like coconut oil, mineral oil, or argan oil) will slowly seep under the glue line and dissolve the adhesive bond, causing early lifting.
  4. Apply a Micro-Layer: More glue does not mean a stronger hold. A thick blob of glue cures unevenly, remains gooey inside, and traps moisture. Apply a paper-thin, even layer of adhesive along the lash band, focusing slightly more on the inner and outer corners.
  5. Seal the Bond: If you are wearing clusters or extensions, using a professional sealer or super bonder immediately after application locks the cure. This neutralizes any lingering adhesive fumes and forms an instant moisture-resistant shield.
  6. Sleep on Your Back: Sleeping face-down on your pillow causes friction that mechanically pulls and twists your lashes. Switching to a silk or satin pillowcase reduces friction, helping your lashes glide smoothly rather than snagging during the night.
  7. Store Your Glue in a Cool, Dark Place: To prevent your opened adhesive bottle from thickening prematurely, store it in an airtight container with silica gel packs at a stable room temperature. Avoid hot bathrooms where steam and temperature fluctuations speed up spoilage.

Why Lash Glue Fails Early: Common Mistakes to Avoid

Why lash glue lifts early - common mistakes and solutions

Sometimes, despite your best efforts, you might experience early lash fallout. In almost 80% of cases, premature failure is caused by these hidden slip-ups:

  • Using Expired Products: Trying to stretch the life of an old adhesive bottle will always result in poor retention. If the glue is stringy, separated, or smells odd, toss it.
  • Immediate Water Exposure: While modern professional glues with super bonders can handle moisture quickly, traditional strip and cluster glues need at least 12 to 24 hours to cure fully before getting wet in pools, showers, or steam rooms.
  • Over-Manipulation: Frequently touching, pulling, or adjusting your falsies with your fingers transfers natural hand oils to the glue line, rapidly weakening the chemical structure.
Important Safety Warning on Hair Glue: If you are wondering how long does hair bonding glue last on eyelashes, the simple answer is: do not try it. Hair bonding glue contains high concentrations of harsh chemicals and latex designed for scalp hair, not the sensitive skin around your eyes. Using it on your eyelashes can cause severe eye damage, allergic contact dermatitis, and permanent damage to your natural lash follicles.

High-Performance Lash Adhesives for Maximum Wear Time

If you are tired of your lashes lifting prematurely due to heat, sweat, or high humidity, upgrading to professional-grade adhesives is a game-changer. Formulated to withstand demanding climates, our selected adhesives offer outstanding retention for both everyday users and lash artists.


Recommended ProductMax Hold DurationBest Suited ForAction
WinLash DB Mega Adhesive Ultra-fast curing, oil & humidity resistant40 to 60 DaysProfessional Lash ExtensionsView Details
WinLash DB MAX Adhesive Super flexible, fast tackiness for DIY setsUp to 36+ HoursDIY Strips & ClustersView Details
IB Super Bonder (Lash Sealer) Instantly cures and seals adhesive bondsAdds 48 Hours / Boosts Extension RetentionAll Lash Types (Strips, Clusters, Extensions)View Details

Explore Our Full Lash Glue & Supplies Collection

Lash Glue FAQ: Professional Answers

How long do individual cluster lashes last with glue?

Individual cluster lashes typically last between 3 to 7 days when applied using a specialized cluster adhesive (such as a Bond and Seal system) and attached to the underside of your natural lashes. Unlike daily strip lashes, clusters avoid direct contact with the eyelid's natural oils, which dramatically extends their wear time.

Does unopened eyelash glue expire?

Yes, unopened eyelash glue does expire. When stored in a cool, dark, and dry environment, an unopened bottle has a shelf life of 6 to 12 months. Always check the manufacturer's expiration date on the bottom of the bottle before use.

How long does Duo lash glue last on eyelashes?

Duo lash glue is formulated for temporary wear and generally lasts between 12 to 36 hours on the eyelashes. Because it is a flexible latex or acrylic-based formula, it is easily removed at the end of the day using standard water-based or oil-free makeup removers.

How long do pre-glued, stick-on lashes last?

Pre-glued (press-on) lashes usually last for 8 to 24 hours. Since they rely on a dry, pressure-sensitive adhesive strip rather than wet glue, they are ideal for quick, mess-free applications. However, they are highly sensitive to facial oils and water, meaning they rarely survive overnight sleeping.

Get Longer-Lasting Lashes: Next Steps

Summary of lash glue longevity tips for strip, cluster and extension lashes

Understanding how long your lash glue lasts helps you make informed choices that fit your lifestyle, budget, and beauty goals. Whether you love the temporary glam of strip lashes, the weekend convenience of DIY clusters, or the effortless, wake-up-ready luxury of eyelash extensions, the secret to maximum retention always comes down to proper surface prep, precise application, and smart climate-proofing.

By keeping your tools clean, storing your adhesives in a cool, dark environment, and choosing products that match your local weather conditions, you can easily double your wear time and keep your natural lashes completely healthy. Explore our professional-grade, humidity-tested collection at WinLash to find the perfect match for your signature look. 👁✨

Brow Lamination vs. Microblading: Which One is Actually Better for You?
Quick Access Navigation Menu
  1. 1. The Technical Blueprint: How Each Treatment Works
  2. 2. Pain Levels, Healing Windows, and Skin Barrier Impact
  3. 3. Longevity vs. Long-Term Commitment and Fading Profiles
  4. 4. Financial Investment and Daily Maintenance Protocols
  5. 5. The Brow Transformation Comparison Matrix
  6. 6. Frequently Asked Questions (FAQ)
  7. 7. The Bottom Line: Which Brow Path Wins?

When searching for the ultimate way to achieve full, structured, and perfectly defined eyebrows, two dominant trends consistently lead the conversation: Brow Lamination and Microblading. Both promises beautiful brow transformations, yet their methodologies, biological impacts, and commitments couldn't be more different. Deciding which path to take requires cutting through the marketing hype and evaluating how each treatment interacts with your hair biology, lifestyle, and pain tolerance.

Modern brow care has evolved beyond one-size-fits-all solutions. Many consumers are moving away from permanent invasive alterations in favor of adaptable, specialized lash and brow lift products that work naturally with existing hair anatomy. This scientific, unbiased diagnostic breakdown compares the exact mechanics of brow lamination versus microblading so you can invest your time and money with absolute confidence.

1. The Technical Blueprint: How Each Treatment Works

Brow lamination hair restructuring vs microblading skin tattooing process

The fundamental difference between microblading and brow lamination comes down to where the modification takes place: inside the skin or strictly inside the hair structure itself.

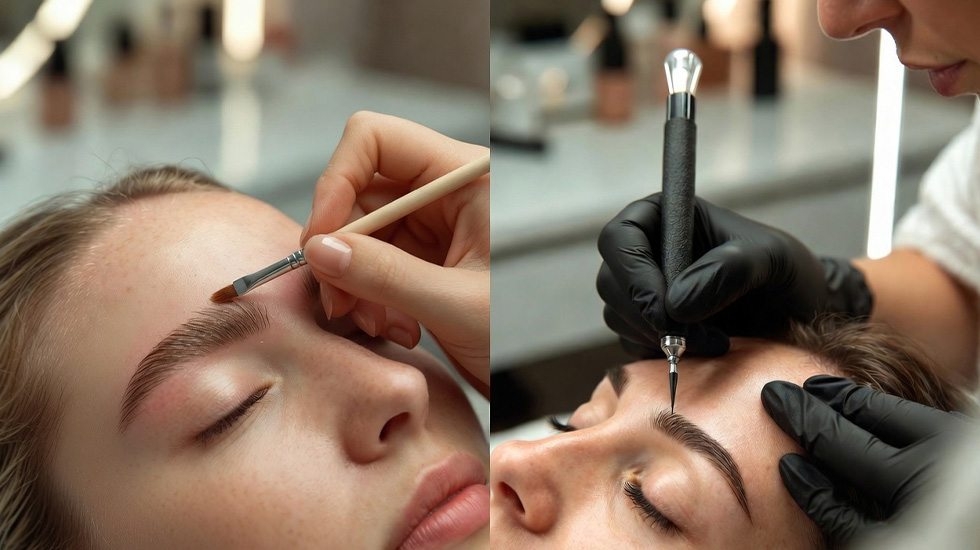
Microblading is a form of semi permanent cosmetic tattooing. A technician uses a manual tool equipped with a cluster of micro-needles to slice fine, superficial cuts into the upper layer of the dermis, depositing pigment to mimic individual hair strokes. It relies entirely on creating a visual illusion of hair where none exists.

Brow Lamination, by contrast, is a non invasive eyebrow treatment focused on chemical hair restructuring. Instead of penetrating the skin, the lamination solution relaxes the internal disulfide bonds within the eyebrow hairs. This allows the hair strands to be molded, flattened, and brushed upward into a full, feathery, and uniform trajectory, maximizing the surface area of your natural hair.

2. Pain Levels, Healing Windows, and Skin Barrier Impact

Because their biological entry points differ, their physical toll on your comfort and skin health varies wildly.

Microblading physically breaches the epidermal skin barrier. Even with topical numbing creams, the scraping sensation can cause discomfort, minor bleeding, and swelling. Because it leaves open micro-wounds, it requires a rigid 7 to 14-day healing window characterized by scabbing, flaking skin, flaking pigment, and strict avoidance of water to prevent deep bacterial infections.

Brow lamination involves zero skin trauma and absolute zero pain. The active solutions are brushed topically over the hair fibers. While individuals with extreme skin sensitivities might experience mild localized redness, there is no open wound, no scabbing phase, and no down time. The only restriction is keeping the area dry for the first 24 to 48 hours while the chemical bonds reset permanently.

3. Longevity vs. Long-Term Commitment and Fading Profiles

Brow lamination fading naturally vs microblading pigment changes over time

If you want a treatment you can set and forget for a year, microblading offers extended duration, lasting anywhere from 12 to 18 months depending on skin oils and metabolism. However, this longevity comes with a major catch: permanent commitment. Over time, pigment fading can cause the ink strokes to blur, expand, or shift into unappealing iron-oxide gray, blue, or salmon-pink hues underneath the skin, requiring expensive laser corrections.

Brow lamination yields a flawless brow fluffing retention period of 6 to 8 weeks, mirroring the natural lifecycle of human eyebrow growth. As your natural hairs shed and regenerate, the lamination gently fades away without leaving any artificial discoloration or permanent skin staining behind. This allows you to easily adjust your brow shape, style trends, or baseline appearance multiple times throughout the year.

4. Financial Investment and Daily Maintenance Protocols

Microblading requires a massive upfront financial commitment, usually running from $400 to $1,200 for an initial session and mandatory touch-ups. If you are unhappy with the hand-drawn symmetry, you are stuck with the results for months.

Brow lamination provides a highly economical and highly versatile solution. For consistent salon results or safe at-home styling routines, choosing an ultra-nourishing, premium system like the My Lamination Lash & Brow Lift Kit guarantees advanced structural accuracy without triggering harsh barrier reactions. If you are exploring various styling methods, reviewing a comprehensive best brow lamination kit guide helps you select professional-grade formulas that deliver optimal, chemical-safe hair redirection at a fraction of salon microblading fees.

The Brow Transformation Comparison Matrix

Comparison VariableBrow Lamination (Topical Hair Lift)Microblading (Cosmetic Dermal Tattoo)
Invasiveness & Pain100% Non-invasive; zero pain or discomfort.Invasive; requires skin slicing; mild to moderate pain.
Biological ActionDisulfide bond restructuring of natural hair fibers.Epidermal skin barrier breach to deposit ink pigments.
Lifespan & Fading6 to 8 weeks; fades naturally with hair cycle.12 to 18 months; can fade into gray/pink undertones.
Downtime / RecoveryNo down time; keep dry for 24 to 48 hours.7 to 14 days; scabbing, peeling, and infection risks.
Ideal CandidateAnyone with natural hair needing volume and shape.People with severe hair loss or bare brow arches.

6. Frequently Asked Questions (FAQ)

Is brow lamination better than microblading for people with sparse or thin eyebrows?

It depends on the presence of natural hair. If you have fine, light, or stubborn hairs, brow lamination is significantly better because it rearranges existing fibers to cover gaps and build realistic volume without skin trauma. However, if a medical condition causes total hair loss, microblading is necessary to draw artificial hair lines onto bare skin.

Can I safely get a brow lamination service if I already have old microblading tattoos?

Yes, combining the two is highly effective for masking faded tattoo lines. Once the dermal layer has fully healed from microblading, lamination topically redirects your natural hairs over the old ink, adding real three-dimensional texture to soften blurred edges and create a more modern, natural appearance.

Does brow lamination damage hair follicles or skin over time like microblading scars?

Unlike microblading, which can cause dermal scarring after multiple repeated treatments, brow lamination places no structural strain on the follicle matrix when performed properly. Using certified, vitamin-infused lamination kits and applying nourishing daily conditioning serums ensures hairs remain perfectly hydrated and completely healthy.

7. The Bottom Line: Which Brow Path Wins?

Comparison of brow lamination and microblading results on natural eyebrows

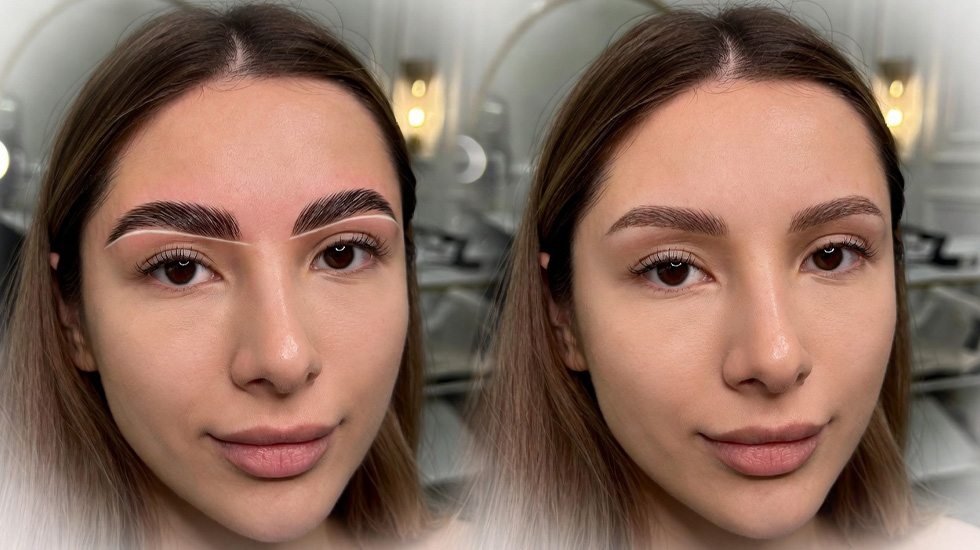
Choosing between microblading and brow lamination comes down to your personal beauty philosophy, pain tolerance, and budget. If you require absolute zero downtime, prefer a completely natural texture, and want the flexibility to adapt your look without risking ink disfigurements or permanent scarring, brow lamination stands out as the superior, modern, and safer alternative.

Flawless facial styling relies on absolute product purity and scientific precision. Elevate your brow game safely by sourcing premium, professional-grade lamination components, gentle texturing systems, and expert aftercare tools directly from the gold standard at WinLash. Explore the elite destination for safe beauty solutions, and unlock your true brow potential today.

Best Way to Remove Lash Glue: Safe Methods for Eyelashes & Skin
Quick Access Table of Contents
  1. Lash Glue Varieties and Their Adhesive Strength
  2. Lash Adhesive Bonding to Natural Lashes and Skin
  3. Indicators That Lash Adhesive Requires Prompt Removal
  4. Effective Steps for Lash Glue Dissolution
  5. Eye Preparation for Adhesive Removal: Essential Tools and Safety
  6. Oil Techniques for Eyelash Glue Breakdown: Coconut and Olive Options
  7. Precise Methods for Clearing Glue from Lashes
  8. Gentle Removal from Eyelids and Surrounding Skin
  9. Alternative Approaches Without Removers or Oils
  10. Key Errors to Sidestep in Lash Adhesive Cleanup
  11. Pro Advice on Maintaining Lash Glue
  12. Lash Solution Pricing and Availability in Dubai
  13. Common questions About Eyelash Glue Removal
Quick Summary: The best way to remove lash glue at home without a dedicated solvent is using oil-based cleansers (like coconut or olive oil) or pure Vaseline to break down the cyanoacrylate bonds. For professional lash extension glue, a professional cream remover is highly recommended. To get lash glue off skin safely, apply a warm compress for 5 minutes, follow with a light oil massage, and wipe downward gently—never pull or peel the adhesive dry.

If you are searching for the safest way to remove lash glue, you are not alone—safely getting stubborn adhesive off without irritating your eyes, damaging your natural lashes, or leaving residue on your delicate skin is a top priority for lash lovers. Whether you are dealing with daily strip lashes, clusters, or professional semi-permanent bonds, using the wrong cleanup technique can lead to traction alopecia or chemical burns. This expert-backed guide explores how to remove eyelash glue from skin and lashes effortlessly, preserving your natural lash health for future applications.

In Dubai's demanding climate, where summer temperatures frequently exceed 35°C and outdoor humidity ranges from 60% to 90%, lash adhesives undergo rapid curing cycles. This environmental stress can cause the glue to cling more stubbornly to your natural eyelashes and eyelids due to sweat and sebum interaction. Gentle yet highly efficient breakdown methods are non-negotiable to prevent follicular blockage in the UAE's arid yet humid conditions. Let’s dive deep into the specific chemical characteristics of lash glue varieties and how to master their damage-free cleanup.

Lash Glue Varieties and Their Adhesive Strength
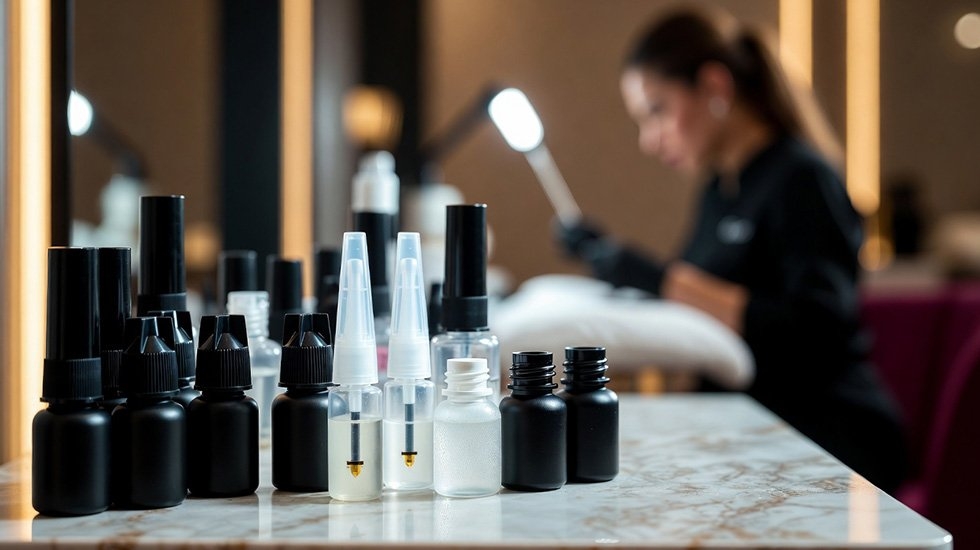
Different types of lash glue and their strength for extensions

Knowing the types of lash glue is essential for effective removal. Most are cyanoacrylate-based, comprising 90-95% of the formula, with variants like ethyl, alkoxy, and methoxy offering strong bonds that need targeted techniques to prevent damage.

Options include black glues for darker lashes, clear ones for natural looks, and specialized formulas for clusters or extensions. Black glues dry quickly (0.5-1 second) and suit professionals, though they're harder to see during cleanup. Clear glues provide more flexibility for beginners with slightly longer set times. In Dubai's humidity, low-fume, hypoallergenic options like WinLash's DB Max Lash Glue or IB Hyper Bond deliver 40-60 days of retention and dissolve easier with suitable removers.

Water-resistant glues withstand sweat and oil, popular in the UAE, but require oil-based removers for breakdown. Bond-and-seal systems, such as super bonders, speed curing and add flexibility, making removal cleaner. Extension glues for long wear (up to 8 weeks) are the toughest and often need professional-grade solutions.

Removal varies by viscosity and ingredients—thinner glues bond deeper, thicker ones stay surface-level. In Dubai, where AC contrasts with outdoor heat, glues optimized for 40-70% humidity avoid early curing or weakening, easing the process.

Lash Adhesive Bonding to Natural Lashes and Skin

Lash glue adhesion relies on cyanoacrylate polymerizing with moisture, forming a flexible bond in seconds that attaches synthetics to natural lashes or skin. On eyelids, it mixes with oils and sebum, potentially causing buildup if not cleared properly.

In humid Dubai, bonds may vary—stronger indoors but looser outside. Overuse can weaken follicles by gripping keratin too tightly. Skin adhesion is superficial but can irritate sensitive areas. Oils break the polymer chain, while steam softens it for safe separation.

Indicators That Lash Adhesive Requires Prompt Removal

Look for residue buildup as white or clumpy spots, common in Dubai's dusty air. Redness, itching, or swelling may indicate allergies, affecting up to 10% of users. Heavy or clumped lashes, or natural fallout, signal action to avoid growth cycle disruption. Sweat in the UAE climate worsens these, making timely removal essential for eye health.

Effective Steps for Lash Glue Dissolution

For the best way to get lash glue off, follow this detailed guide prioritizing safety. Start with clean hands and a well-lit space, especially in Dubai's bright sunlight or indoor settings. This walkthrough suits at-home users, focusing on efficiency without professional tools.

First, assess the glue type—strip lashes come off easier than extensions. Gather supplies: cotton pads, oils, or removers. Always patch-test to avoid reactions, crucial in humid climates where skin sensitivity spikes.

Eye Preparation for Adhesive Removal: Essential Tools and Safety

Begin by washing your face with a gentle cleanser to remove makeup. Tools include cotton swabs, pads, micellar water, oils (coconut or olive), and a mirror. In Dubai's heat, use lukewarm water to avoid shocking sensitive skin. Precautions: Close eyes during application, avoid rubbing, and if irritation occurs, rinse immediately. Patch-testing on your wrist 24 hours prior is non-negotiable, as allergens can worsen in high humidity.

Oil Techniques for Eyelash Glue Breakdown: Coconut and Olive Options

Using coconut or olive oil to remove lash glue safely at home

Oil-based removers are a top choice for dissolving cyanoacrylate bonds naturally. Coconut oil, rich in fatty acids, breaks down glue without harshness, ideal for sensitive Dubai skin exposed to sun and sand.

  1. Warm a small amount of coconut oil between fingers.
  2. Apply to closed eyelids with a cotton swab, focusing on lash lines.
  3. Let sit for 5-10 minutes to soften glue.
  4. Gently wipe away with a pad, repeating if needed.

Olive oil works similarly, nourishing lashes post-removal. In humid UAE weather, these oils prevent dehydration, keeping skin supple.

Soft Application Tips to Prevent Eye Discomfort

Use precise dabs rather than saturating—apply in circular motions from outer to inner corners. For no-residue results, follow with micellar water. This minimizes irritation, especially for those with dry skin from Dubai's AC-heavy lifestyle.

Steam and Compress Methods for Tough Residue

Steam loosens bonds by introducing moisture, perfect for cluster lashes in Dubai's steamy bathrooms.

  • Fill a bowl with hot water, lean over with a towel for 10 minutes.
  • Alternatively, use a warm compress: Soak a cloth in warm water, press gently on eyes for 5 minutes.

This method is effective for extensions, softening glue without chemicals.

Steam and Micellar Water Combo for Faster Cleanup

Hybridize by steaming first, then swiping micellar water—a dual-phase cleanser that lifts residue efficiently. In Dubai's climate, this combo combats oil buildup from sweat, delivering quick, clean results in under 15 minutes.

Precise Methods for Clearing Glue from Lashes

When focusing on clearing glue from lashes, precision is key to preserve natural integrity. High-search terms like "how to remove lash glue from lashes" highlight the need for damage-free techniques.

Use targeted tools like tweezers for clusters, ensuring no pulling. In Dubai, where lash trends are big in beauty salons, at-home methods save time and money.

Safe Handling of Cluster and Individual Lashes

For clusters, apply oil or remover, then gently separate with tweezers. Step-by-step:

  1. Soak a pad in remover.
  2. Hold over lashes for 2-3 minutes.
  3. Use tweezers to grip and slide off.

This prevents fallout, vital in humid conditions where glues cling tighter.

Safe Cluster Glue Removal from Natural Eyelashes

When tackling cluster glue, focus on methods that protect your natural lashes from breakage. Start with a specialized bond breaker or an oil-based cleanser to loosen the adhesive gently—apply it with a cotton swab along the lash line and let it sit for a few minutes before sliding the clusters off with tweezers. If you're at home without a dedicated remover, vaseline serves as a safe alternative: dab a small amount on, wait 5-10 minutes for the glue to soften, then wipe away with a soft cloth. This approach is particularly kind to sensitive eyes in Dubai's dusty and polluted air, minimizing irritation while keeping your lashes intact.

Managing Buildup on Natural Lashes

Excess glue buildup on natural lashes can lead to clumping and weakened growth if not addressed properly. After initial dissolution with oil or a remover, use a clean spoolie brush dipped in a light oil (like jojoba) to comb through gently, lifting away residue without pulling. This simple step promotes healthier regrowth by clearing follicles. In the UAE's environmental challenges—think constant exposure to sand and humidity—incorporating this into your routine helps combat wear and tear, ensuring your lashes stay strong and voluminous over time.

Gentle Removal from Eyelids and Surrounding Skin
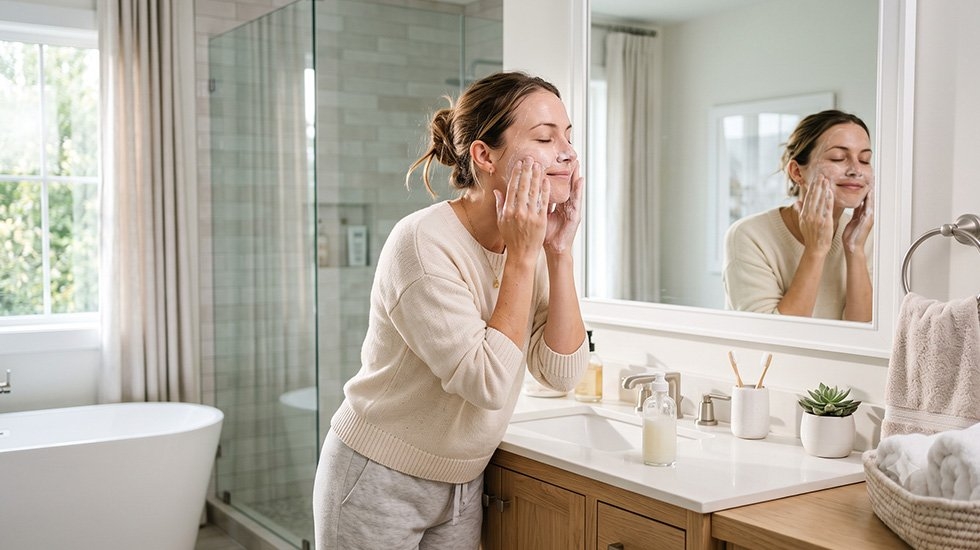
Safe ways to remove lash glue from eyelids and skin

The ultra-delicate skin around your eyes and eyelids demands highly careful handling when learning how to remove eyelash glue from skin without causing friction damage. Aggressive tugging or scraping can lead to immediate redness, localized inflammation, or even micro-tears in the epidermal layer. Instead, you must opt for soft, emulsifying techniques that dissolve the adhesive while simultaneously hydrating the skin barrier. In Dubai's scorching climate, where the constant contrast between extreme outdoor heat and dry indoor air conditioning strips away skin lipids, these replenishing methods protect your eyelids from flakiness and dehydration.

Natural Remedies: The Best Eyelash Glue Remover Home Remedy Options

If you are looking for an effective eyelash glue remover home remedy that avoids synthetic chemicals, everyday household staples can perform exceptionally well. Pure Vaseline (petroleum jelly) acts as an excellent molecular barrier dissolver: apply a targeted layer directly over the dried adhesive on the skin, massage gently in circular motions for 60 seconds, and let it emulsify before wiping it away with a damp microfiber cloth for clean, residue-free results. For those wondering how to get eyelash glue off skin safely without oils, facial steaming is your best route. Steam expands the skin’s pores and naturally loosens the cyanoacrylate bonds, allowing you to rinse the softened residue away with lukewarm water—maintaining perfect skin balance in the UAE's arid environment.

DIY Hacks for Eyelid Glue Without Commercial Removers

Stuck in an emergency without a professional salon remover? These strategic DIY hacks will help you understand how to get lash glue off skin using safe alternatives. Premium baby oil or pure jojoba oil are highly efficient at breaking down the polymer chains of temporary strip lash adhesives. Simply soak a clean cotton pad in the oil, press it firmly against the closed eyelid for 3 to 5 minutes, and gently swipe downward. Gentle makeup-removing wipes formulated with mild solvents can also handle on-the-spot fixes. Tailored perfectly for Dubai's fast-paced, high-end lifestyle, these quick hacks dissolve stubborn cosmetic adhesives in mere minutes, making them ideal when you are on the go.

Emergency Guide: How to Remove Super Glue from Eyelashes Safely

Accidents happen, and one of the most alarming search queries is how to remove super glue from eyelashes. If professional industrial glue or super glue accidentally contacts your lashes, NEVER pull or use scissors. Regular water will not dissolve it. Immediately apply a thick layer of pure acetone using a fine Q-tip, keeping your eyes tightly shut to avoid direct ocular contact, as acetone can cause severe corneal irritation. Let it break down the heavy bond for a few minutes, then use a fine spoolie to brush out the debris. If the glue is attached directly to the eyelid skin or if severe stinging persists, immediately bypass home remedies and seek urgent assistance from a professional beauty clinic or medical expert in Dubai.

Handling Adhesive Residue in Sensitive Eye Areas

Managing leftover adhesive hidden in tricky zones, such as under the lash line or right along the tightline, requires surgical precision to prevent eye irritation. Always utilize ultra-fine micro-swabs or Q-tips lightly saturated in a premium, non-runny cream remover. Keep your eyes closed during application to completely eliminate the risk of the liquid seeping into the eye. In the UAE's beauty communities, this hyper-cautious approach is the professional standard—especially since regional environmental factors like airborne desert dust and high pollen counts can quickly amplify minor ocular sensitivities.

Alternative Approaches Without Removers or Oils

Wondering about removing adhesive without removers or oils? These scenarios call for creative, minimalist solutions perfect for travel or when supplies are scarce. In Dubai's vibrant expat scene, where life moves quickly between meetings and outings, having oil-free alternatives on hand can be a lifesaver, allowing you to maintain your lash routine without bulky products.

Home-Based Dissolving Techniques

Embrace home-based techniques with simple household staples. Mix a mild soap (like baby shampoo) with warm water to create a foamy paste, apply it to the lashes with a soft brush, and let it sit before rinsing thoroughly. Makeup wipes infused with gentle cleansers also work well for gradual breakdown. These methods are straightforward and effective, adapting seamlessly to humid UAE homes where steam from a hot shower can enhance the process without extra tools.

At-Home Eyelash Glue Removal Without Tools

For at-home removal without tools, rely on accessible steps that fit any budget. Begin with a hot shower to generate steam, which softens the glue naturally, then follow up with careful wiping using a microfiber cloth. This technique handles strip, extension, and even stronger permanent glues efficiently. In the UAE's steamy indoor environments, it leverages everyday humidity for better results, keeping things simple and skin-friendly.

Hypoallergenic Options for Sensitive Skin

Sensitive skin? Hypoallergenic options like micellar water lift glue without stripping moisture, or aloe vera-based cleansers for soothing effects. Always start with a patch test on your inner arm to catch potential reactions early. In Dubai's environment, prone to allergens from dust and pollen, these methods help calm inflammation while ensuring a gentle removal, supporting overall eye comfort and health.

Key Errors to Sidestep in Lash Adhesive Cleanup
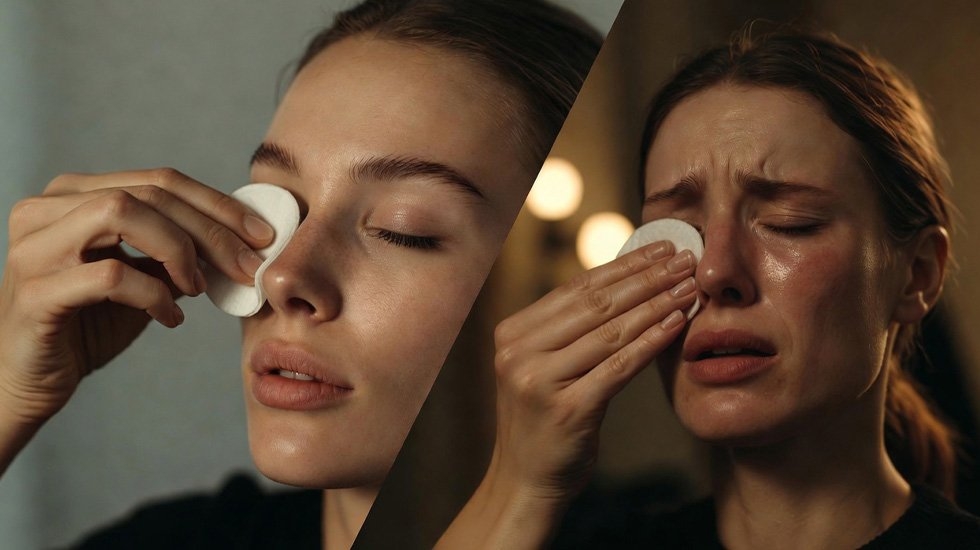
Common mistakes when removing lash glue and how to avoid them

Avoiding errors in lash adhesive cleanup prevents damage. Aggressive rubbing pulls natural lashes, causing patches. Using mismatched removers overwhelms skin or leaves residue. Skipping aftercare risks infections from buildup.

In Dubai's humidity, sweat makes glue clingier, tempting rushed fixes that harm more. Forgetting patch-tests leads to reactions, while harsh chemicals dry lashes in arid air. Patience with tested methods protects lash health.

Long-Term Risks of Excessive Lash Removal

Frequent or improper lash adhesive removal—termed "over-removal"—can disrupt the natural lash growth cycle, leading to thinning, breakage, or even permanent damage if not addressed. Lashes grow in phases (anagen, catagen, telogen), and aggressive techniques like tugging without proper dissolution weaken follicles, causing premature fallout and sparse regrowth over time. In Dubai's humid climate, where extensions might need more frequent touch-ups due to sweat, this risk heightens, potentially leading to irritated lash lines or stunted growth.

For recovery, incorporate nourishing serums rich in peptides or biotin to strengthen lashes, and give them a 1-2 week break from reapplication to allow full regeneration. Avoid oils during this period if planning extensions soon, as they can interfere with future bonding. Consistent gentle care ensures your lashes bounce back stronger, maintaining that voluminous look without long-term setbacks.

Safe Practices Over Quick Fixes: Common Myths

When searching for quick adhesive cleanup, it's tempting to chase shortcuts, but these often backfire. Debunk common myths: Plucking lashes without softening the bond risks pulling out naturals, while harsh chemicals like acetone can irritate eyes and dry out skin—especially in Dubai's hot, dusty environment. Quick fixes such as hot water alone or rubbing alcohol might seem efficient but can cause burns or incomplete removal, leaving residue that clogs follicles.

Instead, embrace safe practices: Start with oil-based cleansers (like coconut oil) to gently dissolve glue, followed by steam for stubborn spots—a hybrid that's effective and eye-friendly. Use micellar water for a no-rinse option, and always wipe downward to avoid damage. Prioritizing safety over speed ensures long-term lash health, preventing irritation and promoting stronger growth in humid UAE conditions.

Pro Advice on Maintaining Lash Glue

Lash technicians emphasize proactive maintenance to keep adhesives performing at their best, especially in variable climates like Dubai's, where humidity (40-70%) and temperatures (20-24°C) directly impact glue efficacy. Store glues in cool, dark spots—think AC-controlled rooms or fridges—to prevent premature curing and extend shelf life up to 6 months unopened. Shake bottles side-to-side (not up-down) for 1-2 minutes before use to mix ingredients evenly, and always burp the bottle by squeezing out air post-dispense to avoid oxidation.

Regular cleaning is key: Wipe nozzles with lint-free wipes after every application to stop buildup. For Dubai pros, monitoring room humidity with a hygrometer ensures optimal bonding—too low, and glue dries slowly; too high, it sets too fast. These habits minimize waste, reduce irritation, and deliver consistent results for flawless extensions.

Cleaning Bottles and Rings for Reuse

Maintaining hygiene with lash glue tools extends their usability and prevents contamination—crucial in humid Dubai where moisture can accelerate buildup. For bottles: After use, burp by gently squeezing to release trapped air, then wipe the nozzle thoroughly with a lint-free cloth or specialized wipe to remove residue. Avoid cotton, as fibers can clog the tip; instead, use alcohol-dampened wipes for stubborn spots, ensuring the cap screws on cleanly.

For glue rings: Soak in acetone for 10-15 minutes until glue softens, then scrub gently with a brush and rinse with warm water. Dry completely before reuse to avoid dilution. In the UAE's climate, store cleaned items in airtight containers to shield from dust and humidity. This routine not only saves costs but ensures safe, precise applications every time.

Smooth Shift from Removal to Reapplication

After mastering safe adhesive cleanup, a smooth transition to reapplication preserves lash integrity. Start by thoroughly cleansing with an oil-free shampoo or micellar water to eliminate any residue—floss between lashes with micro-swabs for a spotless base. Wait at least 24-48 hours post-removal to let natural lashes recover, avoiding immediate strain on follicles.

Prep with a primer to degrease and enhance adhesion, applying it sparingly to the lash line. In Dubai's humid air, ensure your workspace is controlled (40-70% RH) for optimal glue performance. This step-by-step approach minimizes irritation, boosts retention, and keeps your lashes looking fresh—ideal for seamless beauty routines in the UAE.

Lash Solution Pricing and Availability in Dubai
WinLash professional lash products available in Dubai

When considering where to invest in professional-grade salon supplies, WinLash offers highly competitive, premium options tailored specifically for the fast-paced UAE beauty industry. Whether you are running a high-end salon in Downtown Dubai or performing precise DIY applications at home, our specialized formulas provide maximum retention with effortless breakdown. Explore our premium selections like the DB Mega Lash Glue or Sky Creamy Remover, engineered for superior performance in high-humidity zones. With rapid, same-day delivery options across Dubai, Abu Dhabi, and Sharjah, sourcing your essentials is seamless. Visit WinLash Eyelash Extension Glue & Liquids to browse our complete collection and secure professional results without compromising on eye safety.

Product CategoryKey Technical FeaturesUAE Climate ResilienceAdhesive Dissolution
Premium Adhesives
(e.g., IB Hyper Bond)
Ultra-fast 0.5s drying time, low-fume, hypoallergenic, 7+ weeks maximum retention.High humidity resistance (40%–75% RH) ideal for UAE summers.Dissolves seamlessly with targeted lash glue remover gels.
Professional Removers
(e.g., Nano Creamy)
Gentle, non-drip creamy texture, zero skin irritation, fast-acting breakdown.Prevents focal skin inflammation caused by sweat and environmental dust.Fast, residue-free cleanup in under 3 minutes.
Advanced Retention Bonders
(e.g., IB Super Bonder)
Instantly stabilizes cyanoacrylate bonds (0.1s), introduces extreme fiber elasticity.Locks polymers firmly against intense salon AC temperature drops.Softens early shock-curing layers to ease final removal.

Top WinLash Products for Application and Removal

To elevate your business or personal beauty routine, incorporating matched formulations is vital. Here is a curated selection of standout solutions from WinLash's elite eyelash extension glue and liquids collection, explicitly engineered to conquer the GCC environmental challenges. Click the direct links below to explore real-time availability and complete your premium order:

  • IB Hyper Bond Black Lash Glue: Engineered exclusively for experienced lash artists navigating 45%–75% relative humidity. Featuring a lightning-fast 0.5-second dry time and up to 7 weeks of unyielding retention, it remains completely low-irritation and odor-free. Shop IB Hyper Bond Black Lash Glue
  • Nano Creamy Remover: This premium, medical-grade eyelash glue remover cream systematically breaks down the toughest chemical bonds without dripping into the eyes. Its rich, hypoallergenic texture is a lifesaver for clients with hyper-sensitive skin exposed to seasonal desert dust. Shop Nano Creamy Remover
  • IB Super Bonder V2 (15ml): An innovative formula that instantly encapsulates fumes and cross-links adhesive layers within 0.1 seconds. It infuses structural elasticity into the bond, drastically dropping irritation risks while multiplying lash lifespan in hot climates. Shop IB Super Bonder V2

Common questions About Eyelash Glue Removal

Q1: How to remove eyelash glue at home safely?

The safest way to learn how to remove eyelash glue at home is by using a combination of facial steam and a natural oil cleanser. Steam your face over a bowl of hot water for 5–10 minutes to highly soften the adhesive structure, then saturate a cotton swab with coconut or olive oil and gently slide the lashes downward. Never pull them dry to prevent natural lash fallout.

Q2: How to remove eyelash glue without remover solvents?

If you want to know how to remove eyelash glue without remover chemicals, professional oil-free alternatives like micellar water or baby shampoo are your best options. Mix a few drops of baby shampoo with warm water, apply it to the lash line with a soft spoolie brush, and gently comb through. This naturally dissolves daily strip lash glues and bond-and-seal systems effectively.

Q3: How to get rid of lash glue residue on natural eyelashes?

To successfully how to get rid of lash glue residue, avoid pulling the stubborn clumps with your fingers. Instead, dip a clean, lint-free mascara wand or spoolie in a lightweight oil (such as jojoba oil) and gently brush through your natural lashes from base to tip. The oil will systematically dissolve the micro-particles of the leftover lash bond without clogging your follicles.

Q4: Can I use Vaseline as eyelash glue? Safety, risks, and alternatives

If you are wondering can I use Vaseline as eyelash glue, the definitive answer is absolutely NO. Vaseline is a heavy petroleum jelly designed for moisture retention; it completely lacks any adhesive properties required to hold strip or cluster lashes. Attempting this will cause the lashes to slip immediately into your eyes, leading to severe blurred vision, blocked tear ducts, and ocular irritation. Always use approved, hypoallergenic lash glues instead.

Q5: How to dissolve strong lash extension glue from skin and eyes safely?

To safely dissolve eyelash glue of professional grade, you must use a specialized cream or gel remover rather than liquid solvents. Cream removers are highly recommended for Dubai's humid climate because they stay perfectly in place, minimizing the risk of the product seeping into the eye and causing chemical burning. Apply carefully with a micro-swab, wait 3 minutes, and wipe away downward.

Wrapping Up: Achieve Flawless Lashes with Smart Removal Habits

Mastering the best way to remove lash glue ensures healthy lashes and effortless beauty. Key takeaways: Prioritize gentle methods, understand glue types, and adapt to Dubai's climate with humidity-resistant products. Practice safe habits to avoid pitfalls, and explore WinLash for premium solutions. For more tips and to view all our products, visit the WinLash main page. Stay fabulous!

5 Reasons Why Your Eyelash Extensions Are Falling Out Too Fast
Quick Access Navigation Menu
  1. 1. Adhesive Degradation: Poor Salon Curing & Environmental Chaos
  2. 2. Structural Weight Overload: Heavy Fiber Selection
  3. 3. Sebum Accumulation and Acidic Skincare Interaction
  4. 4. Mechanical Strain and Improper Isolation Parameters
  5. 5. Confusing the Natural Biological Cycle with Premature Fallout
  6. Retention Retention Diagnostic Matrix
  7. Frequently Asked Questions (FAQ)
  8. The Bottom Line on Flawless Retention

Waking up to find your stunning lash investment scattered across your pillowcase or cheek within days of an appointment is incredibly frustrating. While dropping a few lashes daily is a completely normal biological occurrence, rapid or premature shedding indicates a critical flaw somewhere in the retention chain. Finding out exactly why your premium eyelash extensions are dropping off requires separating everyday aftercare habits from backend technical execution errors.

This diagnostic guide eliminates the typical beauty-blog guesswork. We dive straight into the underlying chemistry of lash adhesives, mechanical weight distribution, and lifestyle environmental factors that directly compromise your retention. By identifying these five core culprits, you can protect your natural lash health and preserve a full, dark, and voluminous frame for weeks on end.

1. Adhesive Degradation: Poor Salon Curing & Environmental Chaos

Professional eyelash extension application in clean salon vs home setup – impact on adhesive curing and retention

The absolute foundation of lash retention is the chemical cross-linking of cyanoacrylate adhesive. If a salon utilizes expired, degraded, or low-grade adhesive compounds, the extension bond will fail almost instantly when exposed to daily moisture. Cyanoacrylate relies on a very narrow humidity and temperature window to cure properly. If your technician’s room is too dry, the glue shock-cures or forms a brittle polymer chain; if it is too humid, the glue polymerizes instantly before making a seamless bond with the natural hair cuticle.

To prevent this, elite lash technicians rely exclusively on premium, climate-resilient formulations. Utilizing a high-grade, fast-curing eyelash extension glue & liquids system ensures that the adhesive shock-absorbs daily micro-movements, resists localized humidity spikes, and locks the synthetic extension base to the natural hair fiber without cracking prematurely.

2. Structural Weight Overload: Heavy Fiber Selection

A major reason extensions pop off—often taking the natural lash down with them—is basic physics: structural weight overload. Applying a synthetic fiber that is too thick or too long for your natural hair profile strains the root matrix. This excessive mechanical leverage causes the extension to droop, twist, and eventually break away from the hair shaft entirely within days of application.

Achieving a dramatic, dark styling look without sacrificing retention requires utilizing premium, micro-engineered synthetic components. Sourcing your materials from a professional-grade eyelash palette laser matte PBT variant featuring 20 dense lines of ultra-lightweight, tapered synthetic fibers allows artists to customize lash applications safely. These advanced matte fibers mimic human anatomy, providing rich volume while placing zero mechanical stress on fragile natural lash growth phases.

3. Sebum Accumulation and Acidic Skincare Interaction

Many beginners avoid washing their eyes because they fear water will wash away the bond. In reality, avoiding water is the quickest way to destroy retention. Your eyelids naturally produce acidic skin oils (sebum), shed dead skin cells, and collect sweat. If left uncleaned, this organic debris pools at the root margin. Because human sebum is chemically acidic, it slowly de-polymerizes the cyanoacrylate glue bond, turning a firm joint into a soft, gummy residue that slides off effortlessly. Avoid oil-laden facial creams and serums near the upper orbital rim completely.

4. Mechanical Strain and Improper Isolation Parameters

Lash technician performing precise isolation during eyelash extension application for optimal retention

Lash artistry requires surgical precision. Every single extension must be bonded to one, and only one, isolated natural hair. If your stylist rushes the separation process, multiple natural hairs can become glued together, creating a "stickie." Because different eyelashes grow at completely different rates, a faster-growing hair will physically pull, tug, and tear out an adjacent slower-growing hair. This structural stress causes immediate premature loss and localized hair damage.

When searching for a salon or troubleshooting persistent shedding, evaluating your artist's technique is vital. Understanding the explicit clinical parameters of safe application helps you determine if poorly executed eyelash extensions damage natural lashes due to subpar isolation, improper base attachment, or overloading the hair root.

5. Confusing the Natural Biological Cycle with Premature Fallout

Sometimes, what looks like premature fallout is simply human anatomy doing its job. The human eye naturally drops between 3 to 5 natural eyelashes every single day as part of its regenerative growth cycle. Every single follicle goes through an active growing phase (Anagen), a transitional phase (Catagen), and a resting phase (Telogen). When a natural hair reaches the very end of its Telogen lifecycle, it sheds naturally to make room for a new baby hair underneath. Because your extension is bonded directly to that mature hair, they will naturally drop together. If you see a natural hair attached to the root of a fallen extension, it means the natural biological cycle occurred safely.

The Extension Retention Diagnostic Matrix

Shedding Root CauseVisual Appearance of Fallen ExtensionPrimary Culprit SourceImmediate Corrective Action Needed
Adhesive FailureClean extension base with absolutely no natural hair attached.Degraded salon glue, shock-curing, or excessive oily makeup use.Switch to climate-stabilized formulas; implement daily oil-free foaming washes.
Follicle OverloadExtension falls with a short, thin, or broken natural hair attached.Stylist applied extensions that are too thick or long for the hair type.Request a reduction in extension diameter (e.g., down to 0.07mm or 0.05mm).
Technician "Stickie"Multiple natural eyelashes clustered and bound together to one extension.Improper, rushed physical hair isolation during the salon service.Change technicians immediately to safeguard long-term hair follicle health.
Natural SheddingSingle extension falls with a long, full-grown natural hair attached to its base.Healthy biological regenerative hair growth cycle (Telogen phase).None. Book standard infill maintenance appointments every 2 to 3 weeks.

Frequently Asked Questions (FAQ)

Is it normal for extensions to fall out immediately after crying or high stress?

No, immediate fallout after crying points to a critical chemical vulnerability. Human tears contain natural salts, oils, and moisture. If the cyanoacrylate glue has not reached its full humidity curing threshold, the sodium chloride in tears alters the pH balance, fracturing the brittle polymer chain. Additionally, involuntary eye rubbing during emotional stress introduces severe mechanical friction, twisting the extension right off the natural hair cuticle.

How can I distinguish between a healthy biological shed and poor salon retention?

The diagnostic trick lies at the base of the fallen extension. Inspect the root zone under good lighting: if you see a single, full-grown natural hair attached to the adhesive joint, it is a healthy biological shed from the natural Telogen cycle. However, if the synthetic fiber falls out completely clean, or with multiple baby hairs webbed together, it indicates improper base attachment, poor salon isolation, or premature adhesive degradation.

Can sleeping on a regular silk pillowcase completely solve extension retention issues?

While silk or satin pillowcases drastically reduce raw surface friction compared to abrasive cotton fibers, they are not a cure-all for poor retention. If your technician used an expired adhesive matrix or overloaded your lashes with heavy fibers, extensions will still pop off. A silk pillowcase is an excellent secondary defensive aftercare habit, but it cannot fix baseline structural weight overload or fundamental salon application errors.

Does using an oil-free foaming lash cleanser every day shorten the lifespan of the glue?

This is one of the most destructive myths running rampant among extension clients. Daily cleansing with a dedicated, oil-free foaming wash does not degrade the bond—it actively preserves it. Leaving your eyelids unwashed allows acidic sebum, ambient dust, and sweat to accumulate at the lash line. This acidic buildup slowly dissolves the cyanoacrylate glue joint. Daily washing removes these destructive oils, extending your retention lifespan significantly.

The Bottom Line on Flawless Retention

Woman with full, long-lasting eyelash extensions smiling in professional salon – perfect retention results

Predictable, long-lasting extension retention is a shared partnership between precise technical salon execution and disciplined, oil-free daily hygiene protocols at home. Shifting away from water-avoidance myths, tracking physical fallout indicators, and avoiding mechanical friction will preserve your natural hair roots while ensuring your styling remains dark and voluminous.

True eye luxury begins with premium materials that respect your hair anatomy. Protecting your eye frame requires sourcing premium, lightweight synthetic fibers and clinical-grade bonding formulas from the industry-leading destination at WinLash. Step into a world of damage-free ocular styling, and master the exact science of beautiful lash retention today.

Winlash Dubai equips lash & brow professionals and dedicated at-home users with 900+ pro-grade products—including award-winning My Lamination lash lift kits and cruelty-free options. Backed by Ravabeauty (est. 2018) and a 50-member expert team, we partner with 13 global brands to deliver salon-quality tools and aftercare tuned for Dubai’s climate, with fast delivery across Dubai, Abu Dhabi, and Sharjah.

Exclusive Distributor Fast UAE Delivery Climate-Tuned Aftercare