RSS

Blog posts of '2026' 'June'

How to Apply Lash Dye at Home Safely and Effectively
Quick Access Navigation Menu
  1. What's actually inside your lash dye (and why it matters)
  2. Salon lash tinting vs. at-home kits: what's the actual difference
  3. How to choose the right lash dye kit and shade
  4. The patch test: the step you absolutely cannot skip
  5. Step-by-step guide to applying lash dye at home
  6. Aftercare that makes your eyelash tint last longer
  7. Frequently Asked Questions (FAQ)
  8. Getting started with confidence

Mascara melts by noon in the UAE heat. You reapply, it smudges, and by the time you're halfway through your day, the effortless dark-lash look you were going for has completely vanished. If that cycle sounds familiar, you're already halfway to understanding why so many people here are switching to lash dye as their go-to solution for longer-lasting, low-maintenance color.

Semi-permanent lash color has moved well beyond the salon. Professionals rely on it for consistent client results, and at-home users have embraced it as a practical alternative to daily mascara. The hesitation most people have is completely valid: is it safe to apply near your eyes without professional training? Which formula won't trigger a reaction? What shade actually complements your complexion? At Winlash Dubai, we carry a wide range of professional lash and brow products and field these exact questions from customers every week. This guide exists because you deserve clear, honest answers before you open any kit.

By the end of this article, you'll know exactly which eyelash tint kit to choose, how to patch test correctly, and how to apply and maintain your results without compromising your eye health.

What's actually inside your lash dye (and why it matters)
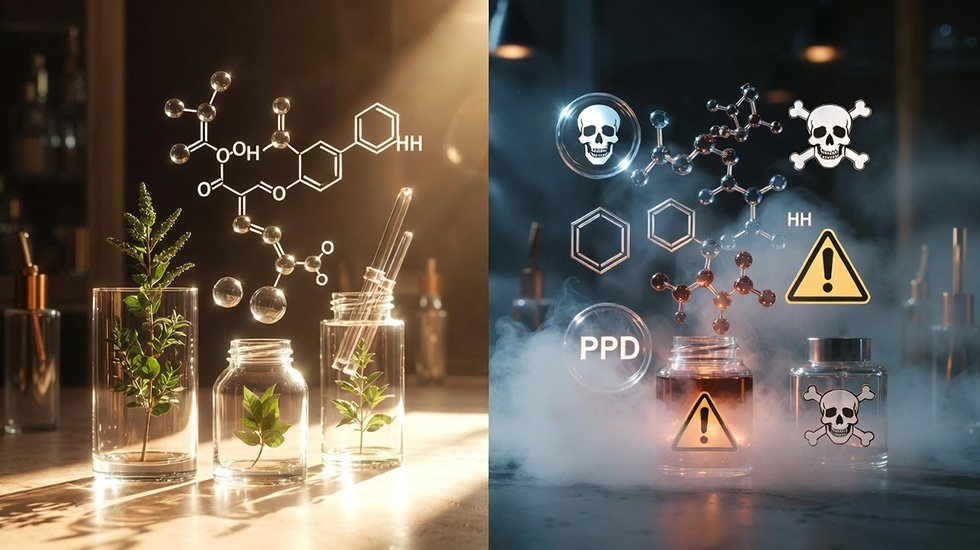
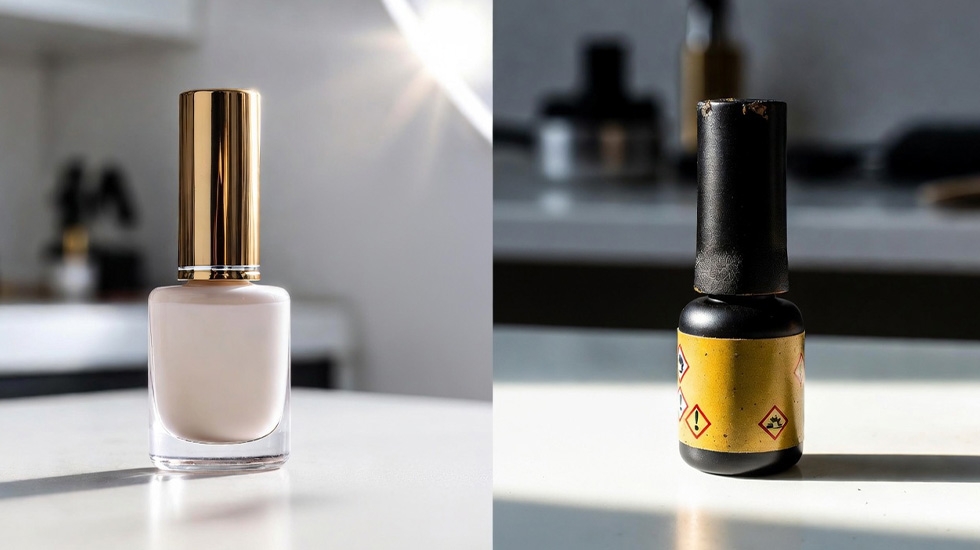
Safe plant-based ingredients vs harmful chemicals like PPD in lash dye kits – visual guide for safe at-home eyelash tinting

The ingredients doing the hard work

Eyelash dye works through oxidation-based chemistry. The active dye molecules penetrate the hair shaft and bond with the keratin structure to produce lasting color. Safer formulations use plant-based dyes like walnut husk, safflower, and yarrow as the primary colorants, supported by conditioning agents such as keratin, peptides, and hyaluronic acid. These ingredients actually strengthen lash fibers during the coloring process rather than degrading them. Cysteamine is another ingredient worth looking for as a gentler perming agent in lift-and-tint combo products, since it significantly lowers the risk of irritation compared to older chemical alternatives.

Ingredients that should give you pause

The high-risk list includes P-Phenylenediamine (PPD), thioglycolic acid, formaldehyde-releasing preservatives like DMDM Hydantoin and Quaternium-15, natural latex, phthalates, and heavy metals. PPD is the most common allergen in tinting products, it causes severe swelling, redness, and in serious cases, permanent eye injury. Thioglycolic acid is a known irritant, particularly dangerous for anyone with sensitivity. Formaldehyde releasers are problematic enough to face regulatory restrictions in multiple markets. If the product label lists any of these, put it back on the shelf. For an industry-oriented breakdown of ingredients to avoid in water-based lash products, review this list of top ingredients to avoid.

What the FDA says (and what that means for you)

No color additive is FDA-approved for permanently tinting or dyeing eyelashes. That doesn't make lash dye inherently dangerous, but it does mean ingredient transparency from the brand is everything. The responsibility sits entirely with the product formulator and the person applying it. Sourcing from a curated, reputable retailer rather than a random online seller is the single most effective way to reduce your risk, because not every product on a general marketplace has been vetted for use near eyes. If you want a focused primer on safety before deciding, our Is Lash & Brow Tinting Safe? Benefits and Risks | Winlash Dubai article covers the key precautions we recommend.

Salon lash tinting vs. at-home kits: what's the actual difference

Price and accessibility

A professional salon lash tint runs roughly $20 to $50 on its own, while a combined lash lift and tint service can reach $90 to $200. At-home eyelash tint kits typically cost $8 to $50 and often cover multiple applications. The math is straightforward: a monthly salon habit adds up fast, but an at-home kit requires you to be your own technician. Both are valid options depending on your budget, skill comfort, and how much time you want to invest in learning the process. If you're considering both services together, check our practical guide to a lash lift and tint combo to understand the benefits, procedure and kit recommendations.

Results and how long each option lasts

Professional tinting lasts 4 to 6 weeks because salon-grade formulas penetrate more deeply into the hair shaft. A DIY at-home lash tint typically lasts 2 to 3 weeks, partly due to lighter formulations and partly because application precision varies between users. Factors like oily skin, heat exposure, swimming, and oil-based makeup removers reduce duration regardless of which route you take. The gap in longevity is real, but consistent at-home tinting every 3 to 4 weeks can deliver reliable results once you've refined your technique.

Where the safety gap sits

Many reputable salons follow strict hygiene protocols, use ophthalmologist-tested formulas, and employ trained estheticians who can identify contraindications before they become problems. At-home kits carry real risks when instructions are skipped or inferior formulas are used. Based on product safety reviews and dermatology literature, the outcomes we see most often are eye irritation, corneal abrasions, chemical burns, and uneven color. The message isn't "don't do it at home." It's "use a professionally formulated kit and follow the process without shortcuts." That distinction is what separates a great result from a regrettable one.

How to choose the right lash dye kit and shade
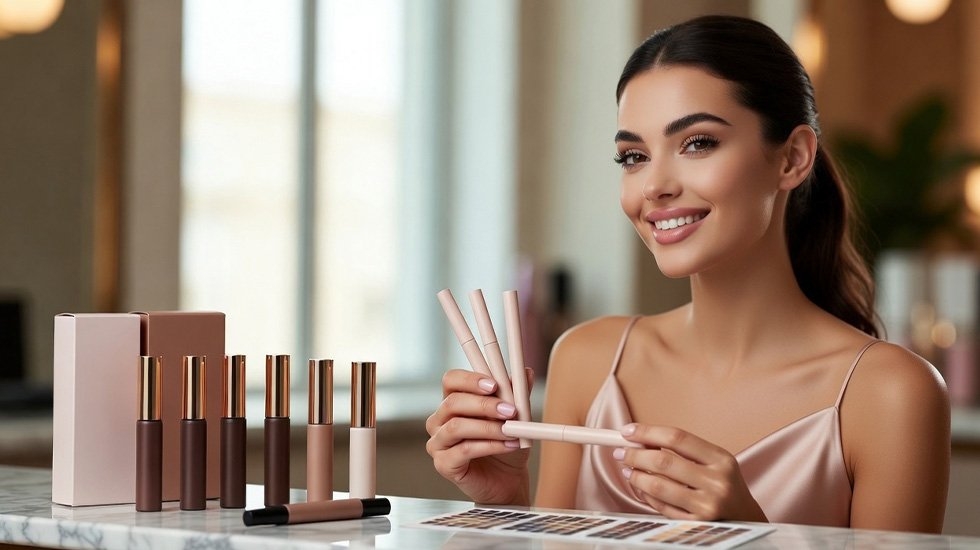
Woman choosing the right lash dye shade and professional tint kit for natural-looking results at home

Matching the formula to your skin type and sensitivity

For sensitive eyes, PPD-free and plant-based formulas are non-negotiable. Look for henna-extract kits or formulations with cysteamine instead of thioglycolic acid. For oily skin types, a deeper-penetrating professional-grade formula will resist the oils that cause premature fading. Kits labeled "gentle" or "hypoallergenic" without ingredient transparency are a red flag rather than a reassurance, a brand that can't tell you what's in the formula doesn't earn the right to work near your eyes.

Picking the right shade for natural-looking results

Shade selection is where most first-time users get tripped up. Keep in mind that personal preference, brow color, and lash density all play a role, but as a starting framework, here's how the main shades typically work:

  • Black: Most dramatic, ideal for fair or naturally light lashes that need a full transformation.
  • Brown-black: Widely flattering, adds depth without looking harsh on medium complexions.
  • Brown: Best for blondes and redheads, or anyone wanting a softer, natural enhancement.
  • Dark brown: The go-to for brow and lash tint combinations, giving a cohesive look without requiring separate products.

The Esthetician’s Lash Tint Color Guide: Matching Pigments to Natural Undertones

Lash Dye ShadeTarget Natural ProfilesVisual Impact & AestheticPigment Development WindowProfessional Formulation Tip
BlackFair, light, or translucent natural lashes[cite: 2]; ideal for cool skin undertones.Maximum dramatic intensity; mimics clean mascara without clumping.10 to 12 MinutesPerfect for low-melanin hair fibers needing a complete depth transformation.
Brown-BlackMedium complexions, dark blondes, and neutral skin tones.Adds noticeable depth and contrast without looking harsh or artificial.12 to 15 MinutesA highly versatile baseline shade for universal, low-maintenance appeal.
BrownNatural blondes, redheads, and warm or golden skin undertones.Soft, realistic enhancement to deepen the lash line subtly.8 to 10 MinutesPrevents a heavy block color on fine hair profiles; use short processing times.
Dark BrownBrunettes, olive complexions, and dual lash-and-brow combo services.Creates seamless chromatic harmony across both facial frames.10 to 12 MinutesReduce brow processing window by 2 minutes to prevent severe skin staining.

Note: Accurate consideration of natural hair density and epidermal undertones prevents synthetic-looking results and guarantees a sophisticated, low-maintenance finish that flatters the face naturally.

When in doubt, go one shade lighter than you think you need. You can always go darker at your next application, and the goal for most people is a polished, natural finish rather than an overly dramatic one.

Where to source professionally formulated lash dye kits in the UAE

General beauty retailers stock whatever sells, not necessarily what's safest for the eye area. Winlash Dubai was built specifically to address that gap. Every product in the tinting range is selected with professional standards in mind, which matters enormously when you're working millimetres from your eyes. The catalog includes brands like RefectoCil, which offers full kits with detailed instructions, an applicator brush, and a comb to help you achieve even results at home. Note that RefectoCil formulations contain phenylenediamine derivatives, so a thorough patch test is essential, particularly if you have known colour-allergies or sensitive skin. Choosing a retailer that prioritises curation over volume means you're starting the process more safely from the outset. You can also explore locally stocked tint kits available in the UAE for convenient, vetted options, and review our Best Eyebrow Dye & Tinting Guide for brow-specific tips and product recommendations.

The patch test: the step you absolutely cannot skip
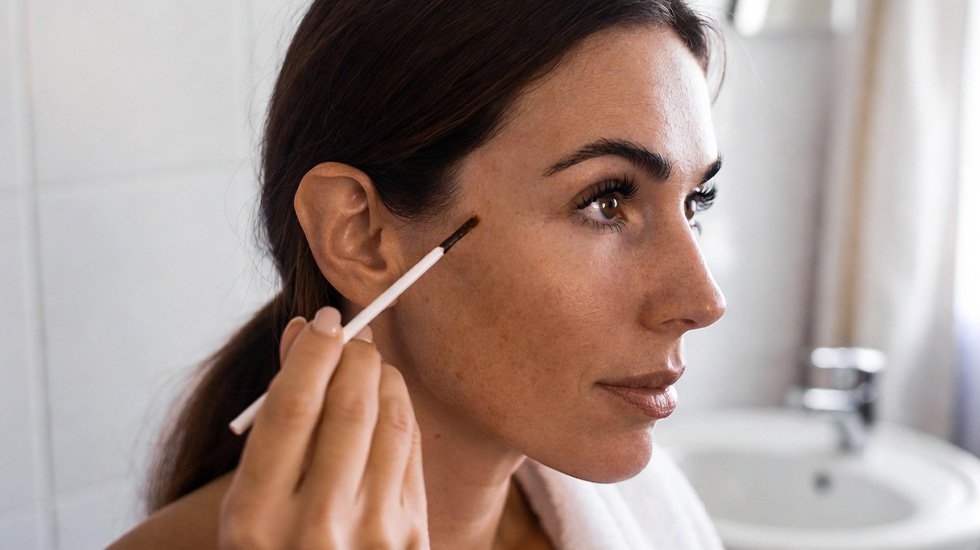
Woman performing patch test for lash dye safety – essential step before at-home eyelash tinting

Why even experienced users need to patch test every time

PPD sensitivity doesn't always appear the first time you use a product. You can develop a reaction after years of using the same formula without any prior issues, which is why the assumption "I've used this before, I'll be fine" is exactly how people end up in urgent care. The stakes are real: skipping the patch test risks not just irritation but swelling, blistering, and in rare cases, damage to the eye area that takes weeks to heal. Current guidelines recommend all users, including returning ones, complete a patch test before every tinting session.

The correct patch test procedure, step by step

This is one process worth following exactly as written, without improvising:

  1. Mix the tint as directed, using the standard 2:1 ratio of dye to developer.
  2. Apply a small amount to the inner arm or behind the ear using a clean applicator.
  3. Leave it on for 45 minutes without rubbing or washing the area.
  4. Rinse off and observe the skin for 48 hours before proceeding with full application.

Any redness, swelling, itching, or raised skin response during that 48-hour window means you stop, do not proceed with the application. No reaction after 48 hours means you're clear to go. Two days of patience to protect your vision is one of the easiest trade-offs you'll ever make.

Step-by-step guide to applying lash dye at home

What to prep before you start

Gather everything before you mix anything: your eyelash tint kit, petroleum jelly or barrier cream, cotton pads, a clean applicator brush or the comb included in the kit, and a timer. Remove all eye makeup thoroughly, then clean your lashes until they're completely residue-free. Any remaining product blocks dye penetration and leads to patchy, uneven results. Many technicians apply a barrier cream or petroleum jelly to the skin directly around the eye, follow your kit's instructions carefully, and keep it well clear of the lashes themselves to avoid blocking the dye.

Applying the lash tint

Mix the dye and developer as directed, and only prepare the amount you'll use immediately since oxidation begins the moment the two components combine. Use the applicator brush to coat lashes from root to tip in one smooth, even direction, working quickly across both eyes. Set the timer per your kit's instructions, most standard formulas require 10 to 15 minutes, while sensitive-skin formulas may need slightly less. Remove the tint using a damp cotton pad in a firm downward stroke, never rubbing. Repeat until all residue is completely gone.

The mistakes that give DIY lash tints a bad reputation

Over-processing is the most common error: leaving the dye on longer than instructed doesn't give you deeper color, it gives you brittle, damaged lashes and uneven results. Skipping the petroleum jelly barrier causes the most eye irritation complaints, since the product contacts skin it was never meant to touch. Using an old or improperly stored kit is the third culprit: once a tube is opened, the formula begins to oxidize, and applying degraded product to your eye area introduces unnecessary risk. A fresh formula, a solid barrier, and a reliable timer are what separate a clean result from a cautionary tale.

Aftercare that makes your eyelash tint last longer
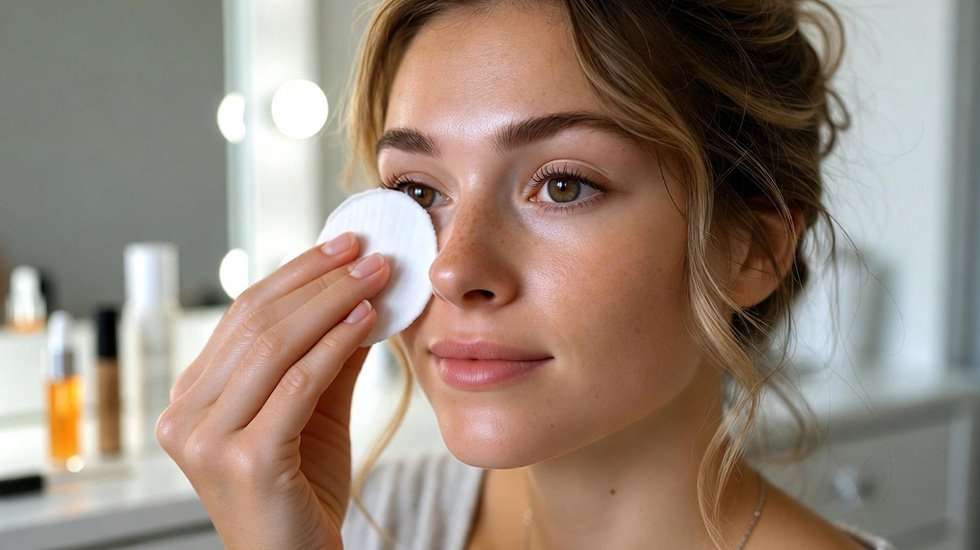
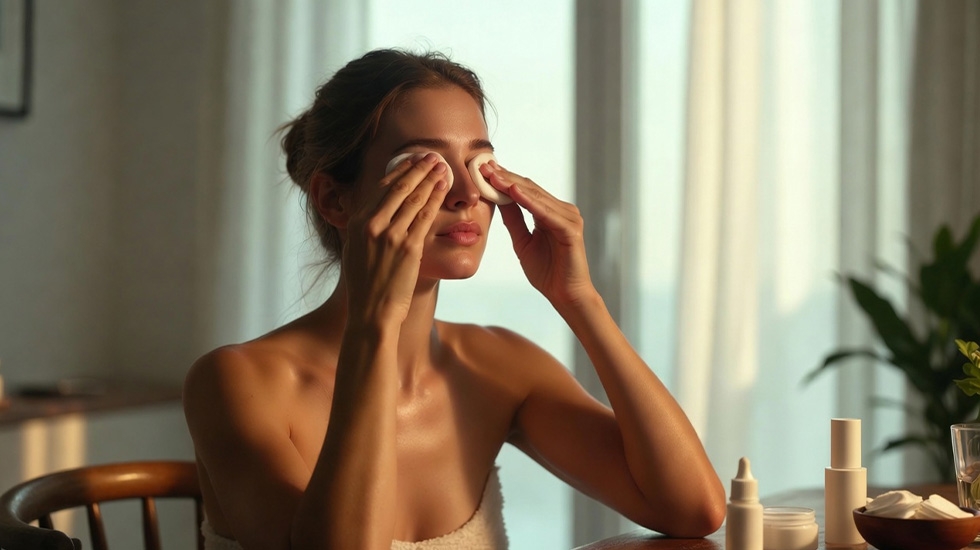
Gentle aftercare for lash dye – woman using cotton pad for safe removal and longer-lasting eyelash tint results

The critical first 24 to 48 hours

Avoid water, steam, saunas, and swimming for the first 48 hours after application. The dye needs uninterrupted time to fully bond to the hair shaft before any moisture exposure, and cutting this window short is the fastest way to reduce your result's longevity. Skip oil-based makeup removers, eye creams, and serums near the eye area for the first two days. Waterproof mascara should also be avoided during this window, removing it requires the kind of firm rubbing that disrupts fresh lash dye before it has fully set.

Ongoing habits that protect your semi-permanent lash color

Oil is the single biggest factor in early fading for any lash tint, so switching to an oil-free makeup remover long term is the most impactful change you can make. Avoid excessive eye rubbing and limit exposure to chlorinated pools. A nourishing lash serum used between tinting sessions conditions lash fibers and reduces the cumulative brittleness that comes from repeated chemical applications over time. Plan your next at-home application around the 3 to 4 week mark, or 5 to 6 weeks if you went the professional route, to maintain consistent, fresh color without over-processing your lashes.

Frequently Asked Questions (FAQ)

What should I do if lash dye accidentally contacts my eye or triggers an immediate burning sensation?

Stop the application treatment immediately. Avoid rubbing the affected eye area to prevent painful corneal abrasions, and rinse the eye thoroughly with cool running water or apply a cold damp compress to the skin. Do not apply any additional cosmetic products or soothing creams directly on top of an active reaction. If you experience significant eyelid swelling, blistering, or any changes to your vision, seek immediate professional medical evaluation promptly.

Can I safely use standard hair dye or unvetted brow formulas to tint my eyelashes at home?

No, utilizing generic hair coloring formulas near the delicate eye area introduces extreme chemical hazards. High-risk ingredients like PPD, thioglycolic acid, and formaldehyde-releasing preservatives commonly found in standard dyes can cause severe irritation, chemical burns, or permanent eye injury. Always source dedicated, professionally formulated eyelash tint kits from a curated, reputable retailer to ensure every product has been rigorously vetted for safe ocular proximity.

Why is it mandatory to run a patch test before every session, even if I am using a familiar kit?

Assuming past safety guarantees future immunity is a dangerous misconception; PPD sensitivity and intense allergic reactions can develop suddenly after years of using the exact same formula without any prior issues. Skipping this step risks severe swelling, painful blistering, and localized tissue damage near the eyes. Current guidelines strictly recommend that all users, including returning ones, complete a full 48-hour patch test before every single tinting session to monitor their current epidermal response safely.

How soon can I get my lashes wet, swim, or apply eye cosmetics after an at-home tinting session?

You must completely avoid water, steam, saunas, and swimming for the first 48 hours following your application. The active dye molecules require uninterrupted time to fully bond to the internal hair shaft matrix. Additionally, avoid applying waterproof mascara, rich eye creams, or oil-based makeup removers during this initial two-day window, as they will mechanically disrupt the fresh pigment bonds and prematurely fade your results.

Getting started with confidence
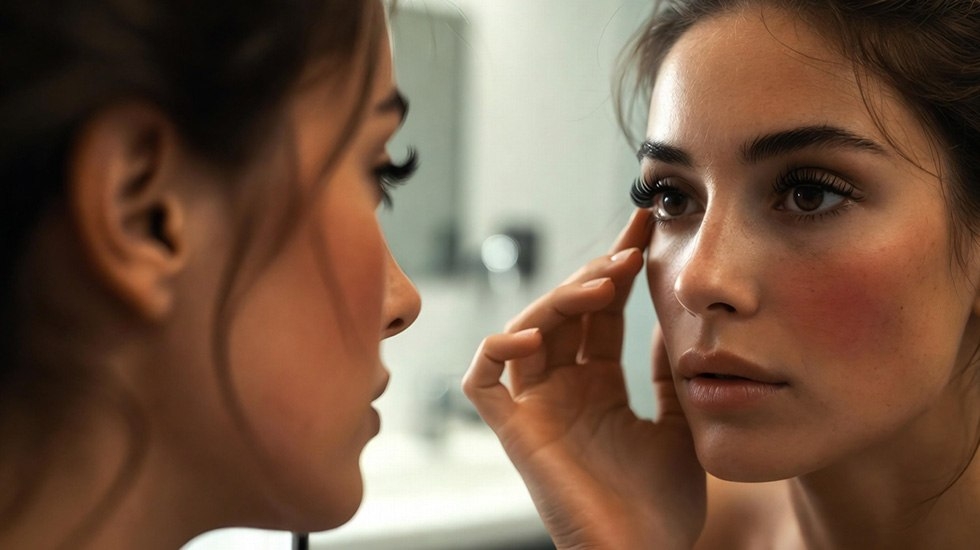
Confident woman applying lash dye at home in Dubai with professional kit – safe and effective eyelash tinting

Applying lash dye at home is completely achievable when you start with the right formula, run a proper patch test, and follow the application and aftercare steps without skipping any of them. The process rewards patience. Thorough prep, 10 to 15 minutes of processing time, and 48 hours of careful aftercare add up to weeks of results that mascara simply can't match.

The key decisions come down to understanding the ingredients in your kit, matching the formula to your sensitivity level, choosing the right shade for your complexion, and sourcing from a retailer that has done the vetting for you. None of that is complicated once you know what to look for, and now you do.

For anyone in the UAE ready to try a professionally formulated, cruelty-free lash tinting kit, browse the tinting range at winlash dubai The product descriptions and educational resources are there to help you choose with confidence, no second-guessing required.
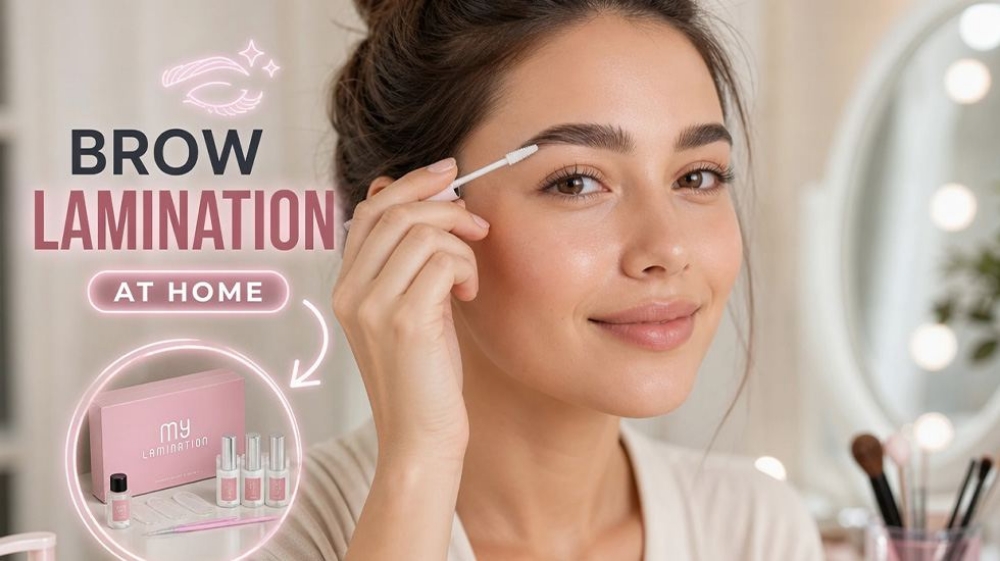
How to Use a Lash Lift Kit for Brow Lamination at Home Safely
Quick Access Navigation Menu
  1. Is it actually safe to use a lash lift kit on your brows?
  2. Which lash lift kits are actually compatible with brow lamination
  3. Prep and patch testing before you start
  4. How to use a lash lift kit for brow lamination safely, step by step
  5. What to do if something goes wrong
  6. Aftercare that keeps your brows laminated and healthy
  7. The bottom line

If you're wondering how to use a lash lift kit for brow lamination at home, you're not alone — and the answer isn't a simple yes or no. You already have a Lash & Brow Lift kit sitting in your bathroom drawer. You've seen stunning brow lamination results all over your feed, and you're not trying to pay salon prices every six weeks. So the logical question is: can you just use that same kit on your brows instead?

The honest answer is yes, some lash lift kits can be repurposed for eyebrow lamination, but the word "some" is doing serious work in that sentence. Lash lift perm solutions are formulated for hair strands, not direct skin contact. Brow lamination puts those same chemicals directly on your forehead skin, which is a fundamentally different exposure profile. That's why you can't grab any lash lift kit off the shelf and start brushing chemicals onto your brows.

This guide covers which kits are actually compatible with brow use, how to adjust your processing times, and how to do the whole treatment safely from start to finish. No vague beauty-blog guarantees, just a clear, practical walkthrough you can follow with the right product in hand.

Is it actually safe to use a lash lift kit on your brows?

Is it safe to use lash lift kit for brow lamination at home? Safety tips and compatible formulas

The honest answer: it depends on the formula

The core issue comes down to chemistry. Most lash lift perm solutions contain either thioglycolic acid (TGA) or glyceryl thioglycolate (GTG) as the active reducing agent. Neither of these is automatically safe for the skin around your brows. Ruthie Belle, a well-known professional lash brand, explicitly states that their curling lotion may not be used on eyebrows because it can leave the surrounding skin red and irritated. The reasoning is straightforward: brow lamination requires a formula that is stronger on the hair yet gentler on the skin, and that is a different formulation target entirely.

GTG comes with an additional regulatory flag worth knowing about. In Canada, thioglycolic acid esters, including GTG, are now prohibited in brow lamination products due to sensitization concerns, see Canada's Cosmetic Ingredient Hotlist update. The U.S. has no outright ban, but FDA cosmetic safety standards still apply, and a GTG-containing kit should give you pause before you use it anywhere near your face.

Why formulation quality matters more than you think

Any time a chemical compound is applied near sensitive skin or tissue, formulation quality and rigorous testing aren't optional extras, they're foundational. That discipline belongs in your DIY routine too. Read your kit's label, safety data sheet, and manufacturer instructions before you open a single sachet, not after something goes wrong.

Which lash lift kits are actually compatible with brow lamination

Compatible lash lift kits for brow lamination | My Lamination, Shinee, Dolly's Lash at Winlash

Brands that explicitly label for brow use

My Lamination: One of the most innovative and globally acclaimed dual-action systems on the market. The premium My Lamination Lash & Brow Lift Kit is enriched with an intensive nourishing matrix of vitamins, keratin, and essential minerals; its gentle yet highly effective formulation is clinically engineered to deliver flawless structural results on both eyelashes and eyebrows without triggering harsh topical skin reactions.

Shinee: A highly advanced, professional 3-step sachet framework engineered seamlessly for both lash lifts and brow laminations. Utilizing a stabilized reducing matrix, it effectively breaks down rigid hair cross-links—making it exceptionally reliable for taming coarse hair profiles—while maintaining a balanced, skin-friendly profile suitable for direct forehead contact.

Dolly's Lash: A classic and highly dependable revolutionary system explicitly built to execute both eyelash and eyebrow treatments in a single sitting. It simplifies the lamination process with clear, multi-purpose application parameters, completely eliminating the need to guess with complex chemical variations or switch between separate, single-service brands.

What to check on any kit before using it on brows

If you already have a kit at home, run through this checklist before you touch your brows:

  • Does the manufacturer's instruction sheet specifically mention brow use or skin contact?
  • Does the ingredient list include GTG, which raises compatibility and regulatory concerns?
  • Does the brand's website address brow application directly, not just lash use?
  • Is there a manufacturer warning against skin or brow application anywhere in the documentation?

If any of these flags come up, keep that kit for lash use only and buy a product that explicitly covers brow application. Guessing with chemicals near your eyes is not worth the risk.

Prep and patch testing before you start

How to patch test (and why skipping it is a bad idea)

Apply a small amount of the perm solution behind your ear or on the inside of your elbow 24 to 48 hours before the full treatment. If you notice redness, itching, swelling, or a burning sensation within that window, stop there and do not proceed with the full treatment. Brow lamination puts active chemicals directly on forehead skin and within close range of your eyes, so an allergic reaction in that zone is not a minor inconvenience you can push through. For more on allergy risks and signs to watch for, read about allergy concerns when doing a lash lift.

Who should skip this DIY entirely

Certain conditions make any chemical brow treatment a bad idea without professional supervision, including rosacea, eczema, active contact dermatitis, broken or irritated skin around the brows, and any history of reactions to hair-processing chemicals. If any of these apply to you, a consultation with a licensed esthetician or dermatologist is the right first step.

Before you start, gather everything you need: petroleum jelly to protect the skin border, a clean spoolie, a small brow brush or comb, plastic wrap or cling film, a timer, and a few cotton pads. Having all of it within reach before you open the perm sachet makes the process noticeably calmer and reduces the chance of a rushed mistake.

How to use a lash lift kit for brow lamination safely, step by step

Step by step how to use lash lift kit for brow lamination at home safely

Step 1: Apply the perm solution and set your timer

Apply a thin layer of the lift or perm solution to your brows using a spoolie, combing the hairs upward into the shape you want. Run a thin line of petroleum jelly along the brow border to protect the surrounding skin. Timing is the most critical adjustment you'll make. Most brow lamination guidelines recommend around 8 minutes for fine brow hairs; medium to coarse brows can go up to 10 to 12 minutes. These times are significantly shorter than standard lash lift processing times. Going past 12 minutes puts you at real risk of overprocessing, so set an actual timer rather than estimating.

Step 2: Remove, then apply the neutralizer for brow lamination

Gently wipe off the perm solution with a damp cotton pad, working in the direction of hair growth. Apply the neutralizer or fixing lotion in a thin, even layer over the same area and leave it for 8 to 10 minutes. If you're using Sugarlash PRO or a similar kit, the instructions call for brushing at a 45-degree angle during the fix step to lock the hairs in the correct upward direction. Remove with a clean damp cotton pad once the time is up.

Step 3: Optional nourishing and tint step

If your kit includes a nourishing or conditioning step, apply it now and follow the recommended timing. For tinting, some systems like Sugarlash PRO allow you to mix equal parts set solution and tint during the fix phase, which combines two steps efficiently. If you're using a separate tint product, wait at least 24 hours after the lamination treatment before applying it. Rushing this step can interfere with how the chemical bonds settle and may compromise your results.

The Trichological Sizing Matrix: Customizing Processing Times by Hair Texture

Brow Hair TextureStep 1: Perming Window (Cuticle Softening)Step 2: Neutralizing Window (Bond Resetting)Clinical Indicators of SuccessOverprocessing Hazard Signs
Fine / Thin Hairs7 to 8 Minutes8 MinutesHairs become highly flexible and effortlessly brush into a uniform 45-degree trajectory without resistance.Tips of the brow hairs appear singed, crimped, or curly; localized skin redness around the brow border.
Medium Density Hairs8 to 10 Minutes8 to 10 MinutesThe natural disulfide bonds break down sufficiently to allow smooth, flat mapping against the forehead skin fold.Brow hairs lose their elastic recoil entirely, feeling rubbery, mushy, or overly fragile when touched with a spoolie.
Coarse / Stubborn Hairs10 to 12 Minutes Max10 MinutesRigid, downward-facing hair patterns are broken, accepting directional styling without snapping back to their original shape.Severe structural hair breakage close to the root matrix; chemical dehydration leading to brittle, frizzy patches.

Note: Adhering strictly to these trichological processing windows prevents structural keratin degradation and ensures a seamless post-lamination recovery phase without compromising the skin barrier.

What to do if something goes wrong

Recognizing signs of a reaction

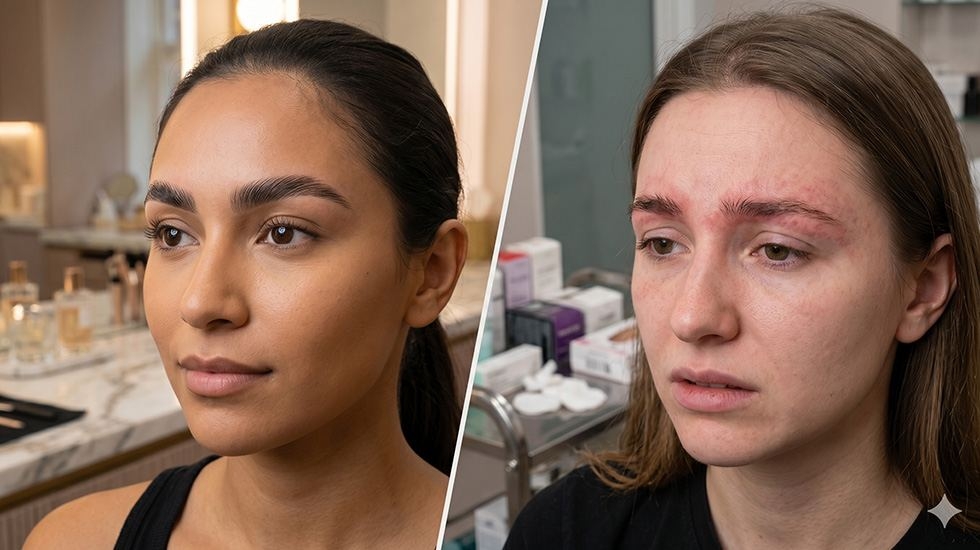
The most common adverse reactions are redness or itching around the brow, eyelid swelling, watery or stinging eyes, and in more serious cases, blistering or hive-like bumps on the surrounding skin. Overprocessing looks different: brow hairs become dry, frizzy, or brittle, and may break close to the root rather than holding their new shape.

First-aid steps and when to get medical help

Stop the treatment immediately if you notice any of the above. Avoid rubbing the eye area and rinse with cool running water, or apply a cold damp compress to the affected skin. Do not apply any additional product on top of an active reaction. If symptoms are mild and resolve within a few minutes, monitor the area and hold off on any follow-up chemical treatment for at least six weeks.

Seek medical evaluation promptly if swelling is significant, if your vision is affected at all, if blistering develops, or if symptoms worsen rather than improve over time. Self-treating with antihistamines is only appropriate on medical advice, not as a first instinct when something flares up near your eyes.

Aftercare that keeps your brows laminated and healthy

Aftercare routine for laminated brows after using lash lift kit at home

The 24-hour rule and what it actually covers

The first 24 hours after your DIY brow lamination treatment are non-negotiable. No water, no steam, no sweat, no makeup, no rubbing, and absolutely no touching the treated area. That means skipping the gym, staying out of pools and saunas, and avoiding direct sun exposure. Some guidance extends the steam and pool restriction to 48 hours, which is worth following if this is your first time doing the treatment at home.

Daily conditioning routine for the weeks that follow

Once the first 24 hours have passed, your brows need consistent moisture to stay healthy and hold their shape through the full four-to-six-week lifespan of the treatment. Apply a conditioning brow serum or lightweight brow oil daily, oils like castor or argan work well for this purpose. An overnight nourishing balm applied once or twice a week adds an extra layer of protection, especially if your brows feel dry or brittle after processing.

Keep skincare products that contain AHAs, BHAs, retinol, or alcohol well away from the brow area for at least several days before and after treatment. These ingredients strip moisture and can irritate freshly processed skin, which directly shortens how long your lamination results last. A little consistency with conditioning makes a bigger difference than any single product you apply, learn practical tips on how to make brow lamination last longer.

The bottom line

Knowing how to use a lash lift kit for brow lamination at home safely comes down to three critical factors: choosing a formula explicitly cleared for skin contact, strictly managing your processing times, and never skipping patch tests or proper aftercare. While chemical risks are real, they are completely manageable when you approach the process with professional-grade preparation.

If your current kit lacks clear manufacturer instructions for eyebrow or skin application, do not take unnecessary risks with your face. Instead, invest in dual-certified, premium systems engineered to be exceptionally gentle on the skin yet highly effective on coarse brow hairs. Finding verified, skin-safe solutions is simple when you source your salon-grade kits directly from a trusted beauty authority like WinLash, taking the guesswork out of chemical safety near your eyes.

Your immediate next step is simple: execute the patch test protocol today or tomorrow. Once your skin clears the 48-hour safety window, you will be completely ready to achieve flawless, salon-quality laminated brows right at home by the weekend.

Eyelash Glue Side Effects: Is Lash Glue Safe for Skin and Eyes?
Quick Access to Article Sections
  1. What Is Eyelash Glue and How It Works
  2. Common Eyelash Glue Side Effects You Should Know
  3. Allergic Reactions and Eye Irritation
  4. Eyelid Swelling and Contact Dermatitis
  5. Long-Term Side Effects and Sensitivity Build-Up
  6. Respiratory or Fume-Related Reactions
  7. The Severe Dangers of Using Hair Glue or Vaseline for Eyelashes
  8. Toxic Ingredients to Avoid in Lash Adhesives
  9. How to Prevent Eyelash Glue Allergies and Reactions
  10. Safe & Sensitive-Skin Approved Lash Glues | WINLASH Dubai
  11. FAQs About Eyelash Glue Safety

Whether you’re a professional lash artist or a beauty enthusiast, understanding the exact eyelash glue side effects is crucial before any application. Many clients frequently ask: is eyelash glue safe for skin and eyes? While premium formulas are safe when applied correctly, low-quality or misused adhesives can cause severe eye irritation, chemical burns, or contact dermatitis. In Dubai’s uniquely hot and humid climate, these risks intensify as fluctuating moisture levels alter curing speeds and amplify chemical fumes. Today, we’ll analyze why these reactions happen, toxic ingredients to avoid, and medical-grade prevention steps for using lash extension glues safely.

Professional Safety Summary (BLUF): Professional cyanoacrylate-based lash adhesives are strictly formulated for hair-to-hair bonding and are not safe for direct skin contact. The most common eyelash glue side effects include eyelid swelling, contact dermatitis, and respiratory irritation caused by formaldehyde byproducts. To maximize eye safety, always demand a 48-hour patch test, ensure proper room humidity (50–60%), and never use DIY shortcuts like hair bonding glues or petroleum products near the ocular area.

What Is Eyelash Glue and How It Works

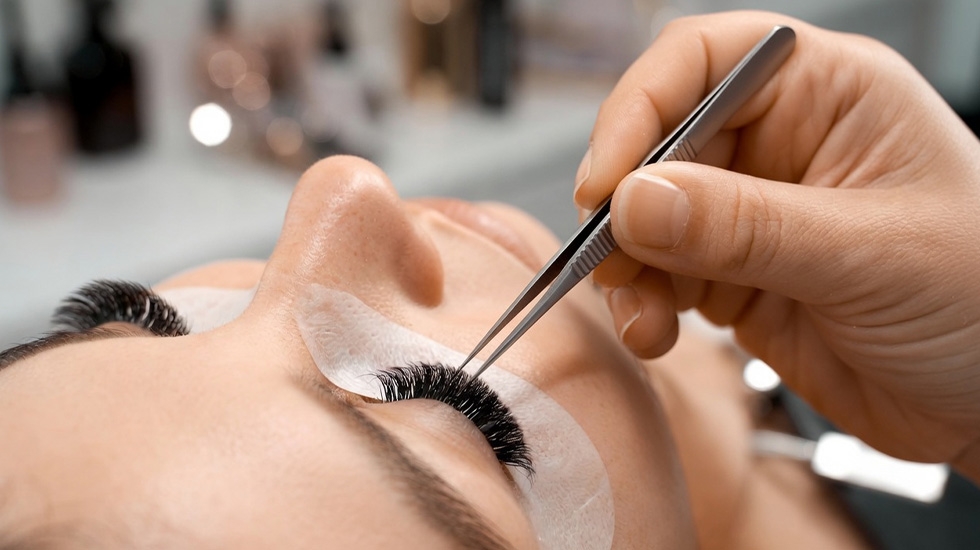
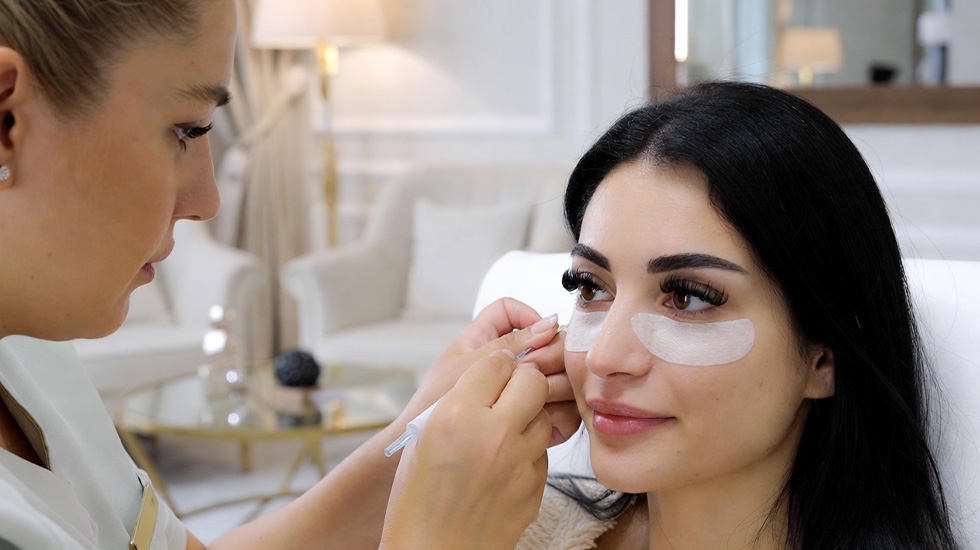
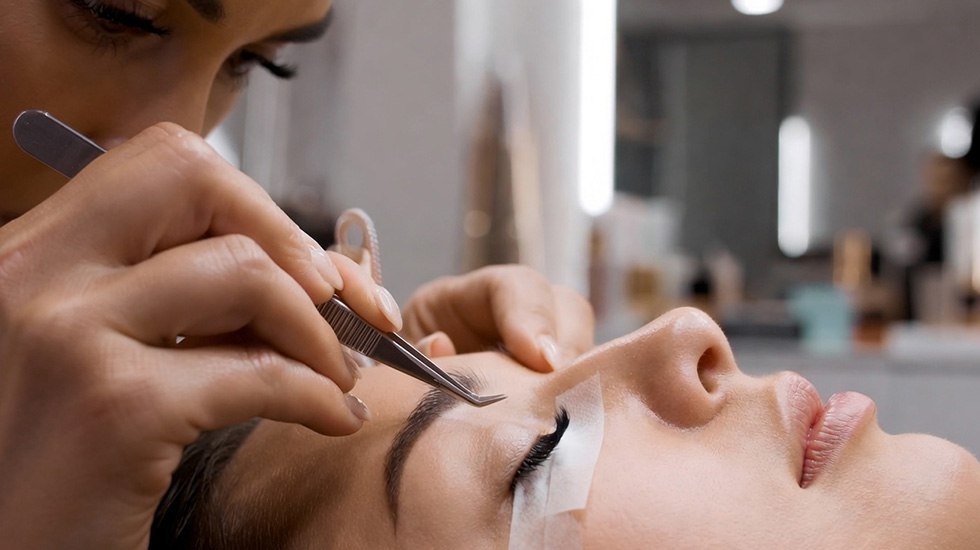
Eyelash extension glue application and potential side effects on sensitive eyes

Eyelash extension glue is a specialized adhesive designed to bond individual extensions to your natural lashes. Unlike temporary strip lash glue (often latex-based), extension glues rely on cyanoacrylate – the same family of fast-acting adhesives as surgical glue or “super glue.” When applied, cyanoacrylate adhesives polymerize (harden) in seconds upon contact with moisture in the air. This creates a strong, semi-permanent bond that can keep extensions in place for weeks.

Key components found in professional lash adhesives include cyanoacrylate (the main active ingredient), stabilizers, and sometimes pigments like carbon black (for black-colored glue). Quality lash glues are formulated to dry quickly and hold strongly under various conditions (oil, water, heat). For example, many professional eyelash adhesives boast retention times of several weeks and specific optimal temperature/humidity ranges for use. The glue’s quick setting nature is what allows lash techs to attach extensions one by one without them sliding off.

It’s important to note that because these glues are so potent, they must be used carefully. They should never touch the skin or eyes directly – only the lash fibers. And while effective, the chemicals in lash glue can cause issues if the glue is poor quality or if a client is sensitive. The next sections explore the side effects of eyelash extension glue and how to address them.

Common Eyelash Glue Side Effects You Should Know

Even with proper application, some clients experience side effects from lash adhesives. Here are the most common issues to watch for:

Allergic Reactions and Eye Irritation

Allergic reaction to eyelash glue is one of the most frequent (and uncomfortable) side effects. It can manifest as intense redness, itching, swelling, or rash on the eyelids and eye area. Some people even develop hives or blisters around the eyes in severe cases. An allergic reaction is caused by your immune system overreacting to a glue ingredient – often formaldehyde or cyanoacrylate.

By contrast, eye irritation (without an immune allergy) can happen to anyone if glue fumes get in the eye. Have you ever felt your eyes burn or water during a lash appointment? That’s usually due to strong adhesive vapors. The vapors from certain glues can cause burning, itching, and bloodshot eyes even if you’re not truly allergic. This is why lash techs ask you to keep your eyes closed throughout the application – to minimize exposure to fumes.

How common are these reactions? Studies show a significant number of extension users experience mild symptoms – one survey found up to 38% of people report eyelid itching after getting lash extensions. Itchiness and redness that appear within a day or two post-appointment are telltale signs of a glue allergy or sensitivity. If you notice these, you should have the extensions removed and treat the reaction (more on treatment below).

Why do allergic reactions happen? The main culprits are glue ingredients: particularly formaldehyde (a preservative/byproduct) and the cyanoacrylate itself. Even glues labeled “formaldehyde-free” may release tiny traces of formaldehyde as they cure, which can trigger sensitive individuals. Also, if you have a history of allergies (for example, to latex or certain cosmetics), you’re at higher risk of reacting to lash adhesive. However, anyone can develop an allergy over time – you might be fine for months and then suddenly become allergic due to repeated exposure.

Eyelid Swelling and Contact Dermatitis

If your eyelids become puffy, red, and itchy after lash extensions, you might be experiencing contact dermatitis from the glue. Eyelid swelling often accompanies allergic reactions; the delicate eyelid skin inflames easily when irritated. In severe cases, the entire eye area can puff up, and eyes may be difficult to open.

Contact dermatitis is a skin inflammation caused by direct contact with an allergen or irritant – in this case, something in the lash glue. You might see red, scaly patches or a rash on the upper or lower lids a day or two after your appointment. The skin may flake or peel (like eczema) as it heals. This type of reaction can result from formaldehyde, latex, or other chemicals in the adhesive touching the skin. It can also occur if the under-eye pad or tape (used during application) had an adhesive you’re sensitive to.

Important: Swollen, irritated eyelids should not be ignored. Besides discomfort, severe swelling could indicate the onset of anaphylaxis (a serious allergy). If you ever have trouble breathing or swallowing along with eyelid swelling, seek medical help immediately. Fortunately, most glue-related swelling subsides once the irritant is removed and treated.

Long-Term Side Effects and Sensitivity Build-Up

Long-term side effects and sensitivity from repeated eyelash glue use

What about long-term effects of repeated eyelash extension use? One concern is that you can develop a sensitivity or allergy over time even if you’ve never had issues before. Each exposure to the glue gives your immune system another chance to recognize it as a threat. For some people, the sensitization builds up slowly: after many extension fills, they suddenly experience itching or swelling that they never had in the past. Essentially, an allergy can develop out of the blue after long-term use of lash adhesives.

Another long-term consideration is the effect on your natural lashes and eyes. While the glue itself doesn’t directly make lashes fall out, chronic inflammation from allergic reactions could potentially weaken your lash follicles over time. Additionally, if a person continually ignores mild reactions, they could risk more severe reactions later with continued exposure.

For lash technicians who work with adhesives daily, long-term exposure to fumes can sometimes lead to occupational allergies (e.g. flu-like symptoms or contact dermatitis on fingers). This is why many lash pros wear masks and ensure ventilation when working with strong glues.

In general, if you find yourself becoming more sensitive to lash glue as time goes on, consider switching to a sensitive formula adhesive or taking a break from extensions to allow your eyes to recover. It’s not worth risking a serious allergy. (We’ll discuss hypoallergenic glue options in the Prevention section.)

Respiratory or Fume-Related Reactions

The strong smell of lash glue isn’t just unpleasant – in some cases, fumes can irritate your respiratory system. If you’re in a small room with poor air flow, the evaporating cyanoacrylate can cause throat irritation, coughing, or a runny nose. Some clients even report getting a headache or dizziness from inhaling lash glue fumes for an extended period.

For extremely sensitive individuals (or those with asthma), glue fumes may trigger breathing difficulties. This is rare in a normal lash appointment (since your eyes are closed and direct inhalation is limited), but lash artists who do multiple clients a day need to be cautious. Overexposure to vapors like formaldehyde can lead to symptoms such as headaches, nausea, or chest tightness.

Another fume-related issue is the burning sensation in the eyes some clients feel during or right after application. If your eyes water or sting when the extensions are being applied, it’s often because adhesive vapor is contacting your eye. This can happen if you accidentally open your eyes too soon, or if the technician is using a very strong glue without sufficient drying/ventilation. “Why does lash glue burn my eyes?” Simply put, it’s the chemical fumes interacting with the moisture on your eye’s surface, causing irritation. Low-quality glues with excessive fumes, or even good glues used in low humidity (which slows drying and lets fumes linger), are usually to blame.

Tip: If you know you’re prone to tearing or stinging, ask your lash tech to use a low-fume lash glue and to keep a small fan or air circulator on during your appointment. Proper ventilation will carry away the fumes so they don’t hover around your eyes. Salons in Dubai should be mindful of this, as constant air-conditioning plus high outdoor humidity can create fluctuating conditions where fumes either get trapped or curing is erratic.

The Severe Dangers of Using Hair Glue or Vaseline for Eyelashes

With the rise of at-home beauty trends, search trends show dangerous misconceptions among users. Many wonder about the dangers of using hair glue for eyelashes or using Vaseline to manipulate adhesive curing. Hair bonding glue contains high concentrations of soluble latex and harsh chemicals designed strictly for the scalp; using it on the delicate eye area carries an extreme risk of severe chemical burns, permanent eyelash follicle damage, and eyelid infections. Similarly, mixing or applying Vaseline over lash extension glue ruins the chemical polymerization of cyanoacrylate, trapping toxic fumes against the cornea and causing blurred vision.

To avoid these hazardous mistakes, professional lash techs must always use approved, certified chemical compounds. Investing in premium eyelash extension glue and liquids ensures that the adhesive cures safely through proper environmental humidity rather than dangerous DIY hacks. Professional liquids are systematically stabilized to control fumes, protecting both the client’s skin barrier and the lash artist’s respiratory system.

Toxic Ingredients to Avoid in Lash Adhesives

Toxic ingredients in cheap lash glue to avoid | Formaldehyde and carbon black risks

Not all lash glues are created equal. Some contain harsh chemicals that dramatically increase the risk of side effects. As a consumer (or lash artist), you should check for these toxic ingredients and opt for adhesives that avoid them:

Formaldehyde and Its Derivatives

Formaldehyde is public enemy #1 when it comes to eyelash glue safety. This colorless gas is a known irritant and allergen – it’s even classified as a carcinogen (cancer-causing) at high exposures. In the context of lash glue, formaldehyde can be present in two ways: added intentionally as a preservative in some cheap adhesives, or released in trace amounts as a byproduct of cyanoacrylate curing. Both are bad news for your eyes.

Why avoid formaldehyde? It can cause instant burning, redness, and swollen eyelids upon exposure. Over time, it might even contribute to natural lash shedding or recurrent eye infections. The California Board of Barbering and Cosmetology explicitly recommends never using any adhesive that contains formaldehyde because of how toxic it is around the eyes.

Most professional-grade glues today advertise as “formaldehyde-free.” Still, due to the nature of cyanoacrylate, no lash glue is 100% free of formaldehyde traces – but premium brands keep the amount so microscopic that it’s undetectable and unlikely to cause harm. The key is to avoid cheap glues (the kind found in unregulated markets or some DIY kits) which might have formaldehyde or release a strong pungent odor (a giveaway sign). Always choose adhesives from reputable manufacturers that prioritize safety.

Latex and Carbon Black

If you have latex allergies, pay close attention: some eyelash adhesives (particularly older formulas and many strip lash glues) contain latex, a rubbery ingredient that helps glue stay flexible. Latex is a common allergen—it can cause severe itching, swelling, and even blisters on the skin it touches. While most eyelash extension glues are latex-free (they use cyanoacrylate instead for the bonding power), it’s worth double-checking. Even a small amount of latex in the glue or under-eye pads can trigger a major reaction for allergic individuals. Always look for “latex-free eyelash glue” on the label (many sensitive or medical-grade adhesives will highlight this).

Carbon black is another ingredient to consider. This is a black pigment added to many lash glues to give them a deep black color (so the adhesive blends with your eyeliner and lashes). Carbon black itself is essentially a fine charcoal powder. It’s not toxic per se, but it can be an allergen for some people or cause irritation if it migrates into the eye. If someone has very sensitive skin or a history of reactions to hair dyes (which often contain similar carbon-based pigments), a black glue could pose an issue. The solution here is to use a clear eyelash glue – these formulas omit the pigment (they look white or translucent when applied, and dry clear). Clear glues are generally slightly gentler simply because they have one less ingredient (pigment) that could cause sensitivity. So if a client’s eyes always get red with black glue, switching to clear might help.

Fragrances and Other Additives

Some lower-quality adhesives add extra fragrances or additives to their formulas – for example, to mask a chemical smell or to market a “soothing” scent. Fragrance in any skincare or eye product can be a recipe for allergy. The delicate eye area doesn’t need perfume! If you see things like “Parfum” or unnecessary botanical extracts in a lash glue’s ingredient list, think twice. These additives can cause contact dermatitis or watering eyes.

Other additives to be cautious of include certain stabilizers or enhancers that aren’t common in reputable brands. For instance, some glues might have formamide or other chemicals that help with drying time but are not eye-friendly. Cyanoacrylate itself is the core ingredient required for adhesion; anything beyond the basic formula (cyanoacrylate + stabilizer like PMMA + perhaps carbon black) should be scrutinized. This is why using medical-grade or professional eyelash adhesives is important – they tend to use purer formulas without random cheap fillers.

IngredientRiskWho Should AvoidSafe Option
FormaldehydeBurning, redness, swelling, long-term irritationAll users, especially sensitive eyesFormaldehyde-free, medical-grade adhesive
LatexAllergic rash, itching, blistersPeople with latex allergy or eczemaLatex-free lash glue
Carbon BlackIrritation, pigment allergyVery sensitive skin or dye-allergic usersClear or transparent adhesive
FragranceTearing, dermatitis, burningSensitive or allergy-prone clientsFragrance-free formulas
Harsh AdditivesUnknown irritation, poor qualityAll usersProfessional, hypoallergenic glues

In summary, stick to lash glues that emphasize being formaldehyde-free, latex-free, and fragrance-free. Check the ingredient list if available, and when in doubt, choose products from brands known in the lash industry (they have a reputation to uphold and can’t afford to use nasty ingredients). In the next section, we’ll discuss how to proactively avoid side effects – including selecting the right glue.

How to Prevent Eyelash Glue Allergies and Reactions

Prevention tips and patch test for eyelash glue allergies

Preventing side effects starts before you ever get your lashes done. A few smart steps can dramatically reduce your risk of experiencing any nasty surprises:

Always Do a Patch Test Before Application

If you’re trying a new glue or it’s your first time getting extensions, insist on a patch test. A patch test involves placing a small amount of the lash glue (often with a couple of extensions) on your skin or lashes at least 24–48 hours prior to the full appointment. This way, you can see if any redness or itching develops in a controlled, small area. No reaction = likely good to go. But if you do react, you’ve saved yourself a full-blown eye disaster by finding out early.

Many professionals will apply a few lash extensions at the outer corner of your eye as a test, or even stick a drop of glue on the inside of your forearm or behind your ear. Performing a patch test is vital – it’s the easiest way to know if you’re allergic to a product. In fact, it’s recommended for everyone, but especially if you have sensitive skin or a history of allergies. (Some estimates say about 5% of people will experience an allergic reaction to lash extension glue – patch testing helps catch those individuals in advance.) If your salon doesn’t offer patch tests, ask for one or consider finding a salon that takes this precaution seriously.

Choose Hypoallergenic & Professional-Grade Adhesives

One of the best prevention strategies is simply using a better glue. Not all adhesives cause the same level of irritation. Look for hypoallergenic eyelash glue options – these are formulas specifically made for sensitive eyes. They are typically formaldehyde-free, latex-free, and often labeled “low-fume” or “sensitive.” For example, professional brands might offer a “sensitive adhesive” that has a slightly slower drying time but produces far less vapor, thereby minimizing eye irritation.

When we say professional-grade, we mean glues that are used by certified lash technicians and come from reputable manufacturers (not a random cheap bottle from an unknown source). Reputable lash brands avoid the harshest chemicals – for instance, they don’t use the most irritating type of cyanoacrylate (methyl cyanoacrylate). Instead, they use ethyl or butyl cyanoacrylate which have a good balance of strong bonding but lower fumes. Some advanced adhesives even use octyl cyanoacrylate, which is used in medical glues for its gentleness (though these can be less durable).

If you have extremely sensitive eyes, you might also opt for clear adhesive (no carbon black pigment) as noted earlier, or glues marketed as “for sensitive eyes”. These usually have “low-irritation lash glue” or similar on the label. Also, prefer adhesives that explicitly say “formaldehyde-free” and “latex-free” – most quality products do.

In Dubai and the UAE, because of the climate, also look for glues that can handle humidity without excessive fumes. A low-fume lash glue designed for use in humid conditions (like many offered by Winlash) will help prevent the “burning eyes” issue. Essentially, by choosing a safe eyelash extension glue from the get-go, you eliminate many risk factors for side effects. It’s an upfront investment in comfort and eye health.

(Internal Tip: Winlash Dubai offers a curated selection of sensitive, hypoallergenic eyelash glues. We’ll highlight a couple of top options later in this article, so you know what to look for.)

Maintain Proper Salon Ventilation and Humidity

The environment where your lash application takes place plays a big role in whether you’ll feel irritation. Ventilation is key. Lash adhesive fumes are heaviest during the few seconds of drying/curing. If those fumes build up around your face, you’re more likely to get teary or irritated. A well-ventilated space – whether through an open door, a fan, or an air purifier – disperses the vapors. Lash studios should have extraction fans or at least circulate air to pull fumes away from you and the technician.

Additionally, humidity and temperature need to be in the right range. Every professional glue has a recommended temperature and humidity range for optimal curing (for example, 20–24°C and 50–60% humidity). Extremes can cause issues:

  • In excessively humid conditions (like Dubai’s summers or a room with no dehumidifier), glue can cure too fast, potentially causing a burst of heat and fumes (and sometimes a whitening effect called “blooming”). It can also make lash bonds brittle. Using a dehumidifier or an adhesive formulated for high humidity can help.
  • In very low humidity (dry air-conditioned rooms), glue cures slowly and can emit fumes for longer. This is often when clients feel that prolonged eye sting. Solutions: use a humidifier to reach the ideal moisture level, or use a glue optimized for low humidity.

For Dubai specifically, many salons battle between the outdoor humidity and indoor AC. Lash artists should monitor their room conditions and adjust. As a client, it doesn’t hurt to ask your technician if they’ve accounted for the climate (“Do you use a glue that’s good for high humidity?” or “Is the room humidity controlled?”). A pro will know exactly what you mean and have measures in place – like using a hygrometer to measure humidity and adjusting the glue or environment accordingly.

Lastly, a nifty tool is a nano-mister – a device that sprays a fine mist of water to help cure adhesive immediately after lash application. Lash techs sometimes use it to instantly “seal” the glue and eliminate lingering fumes, which can significantly cut down on post-application irritation. Ensuring your salon does things like this indicates they take glue fumes and client comfort seriously.

What to Do If You Experience Side Effects

What to do if you have eyelash glue side effects and allergic reaction

Sometimes, despite all precautions, you might still end up with an itchy or swollen surprise. Don’t panic. Here’s how to handle common eyelash glue side effects safely:

  • If you feel burning or irritation during application: Speak up right away. It might be as simple as closing your eyes more fully, or you might need a fan to blow away fumes. A good lash tech will pause and address it (for example, letting your eyes rest or switching to a gentler glue). Never just “push through” intense burning – that could lead to a chemical burn on your eye. It’s okay to stop the procedure if needed.
  • For mild redness or irritation after (no swelling): Try using a cold compress on your closed eyes as soon as you get home. Cold compresses can soothe redness and that dry, irritated feeling. Over-the-counter lubricating eye drops or artificial tears can also help rinse out any irritants and relieve dryness.
  • For allergic reactions (swelling, itching, rash): The first step is to remove the lash extensions and glue. It’s best if you can return to your salon or a professional to have them removed with proper solution – don’t try to rip or pull them off, as that can further irritate your skin and eyes. Removing the source of the allergen is crucial. After removal, you can use antihistamines to calm the allergic response: oral antihistamine pills (like cetirizine or Benadryl) and/or anti-allergy eyedrops can reduce swelling and itching. A 1% hydrocortisone cream can be gently applied to the eyelids if the irritation is on the skin (careful to avoid getting it in your eyes)– this can ease rash and inflammation. If your lids are very swollen, an ice pack (wrapped in a cloth) can bring relief too.
  • Watch and wait (but not too long): Mild symptoms should start improving within about 24 hours after removal and treatment. If you still have significant redness, swelling, or pain after 48 hours, see a doctor. You might need prescription-strength eye drops or even a short course of steroids to calm a severe reaction. Also, because infections (like bacterial conjunctivitis) can sometimes look similar to allergies, a doctor can check to ensure you don’t actually have an infection that needs antibiotics.
  • In case of serious incidents: If glue gets into your eye (for example, a big drop falls in), immediately flush the eye with clean water for 5-10 minutes. Do not force your eye open if your lashes are stuck together – seek medical help or call a poison control center for guidance. Fortunately, such cases are extremely rare with trained professionals, but it’s worth mentioning. And of course, if you had trouble breathing or any sign of anaphylaxis, that’s an emergency – call for medical help.
  • Aftercare for recovery: Avoid eye makeup and other potential irritants until your eyes are fully healed. Keep the area clean but don’t use harsh cleansers (a gentle baby shampoo diluted with water can clean your lids if needed). And give your eyes a break – it’s recommended to wait at least two weeks after an allergic reaction before attempting extensions again (you may even decide to discontinue extensions, or try alternatives like magnetic lashes if you’re very sensitive).

Remember, your eyes are precious. No beauty treatment is worth risking your vision or comfort. Most side effects of lash glue will resolve with proper care, but always err on the side of caution if something feels off.

Safe & Sensitive-Skin Approved Lash Glues | WINLASH Dubai

When dealing with eyelash glue side effects, knowledge is power – and so is using the right product from the start. At Winlash Dubai, we take pride in offering safe, sensitive-skin approved lash adhesives that give you gorgeous lashes without the worry. Here are two top-rated options beloved by UAE lash professionals:

  • DB Ultra Lash Glue – The sensitive speed-demon. This is a low-irritation, latex-free, formaldehyde-free adhesive that doesn’t compromise on performance. With an ultra-fast drying time, DB Ultra lets experienced lash artists work quickly. Despite its speed, it’s formulated to reduce fumes and sensitivity – clients report far less eye watering with DB Ultra compared to regular glues. It offers an exceptional hold (extensions can last for weeks with proper care). Plus, it’s oil-resistant and heat-resistant, crucial for withstanding Dubai’s climate. If you’re looking for the best eyelash glue for sensitive eyes that still delivers professional strength, DB Ultra is a top pick. 
  • Sky Rose Eyelash Extension Glue – The humidity hero. This premium Korean-made adhesive is designed for professionals in high-humidity environments. It has a fast drying time and retention of several weeks, so lash sets last and last. Importantly for clients, Sky Rose has a low-fume formula that minimizes eye irritation even in Dubai’s humid air. It remains flexible and strong from 23°C up to 28°C and in 50–70% humidity– meaning no meltdown in the summer heat or when the humidity spikes. Sky Rose is latex-free and vetted by lash artists for reliable, irritation-free results. It’s perfect for volume lash experts who need a fast glue that won’t overwhelm clients’ eyes. (Fun fact: This glue is a go-to choice for many lash salons in Dubai because it consistently performs in our climate.)

Both of the above adhesives align with what we’ve discussed: they avoid harmful ingredients, they’re formulated to be safe eyelash extension glues for even sensitive clients, and they tackle the challenges of UAE weather by being low-fume lash glues. By choosing quality products like these, you significantly cut down the risk of side effects.

FAQs About Eyelash Glue Safety

Is eyelash extension glue safe for direct skin contact?

Absolutely not. Eyelash extension glue is engineered strictly to bond extension fibers to natural lash hairs, about 0.5–1mm away from the eyelid. It should never touch the skin. If cyanoacrylate adhesive comes into direct contact with the eyelid skin, it can cause instant contact dermatitis, thermal burns during fast curing, and trigger severe long-term allergic reactions.

Is eyelash extension glue safe for sensitive eyes?

Yes – if you choose the right type of glue. Look for hypoallergenic or sensitive formulas that are latex-free and formaldehyde-free. Many people with sensitive eyes do fine with professional low-fume adhesives, but react badly to cheap glues. Always do a patch test if you’re unsure, and avoid unknown or “bargain” products with potentially harsh ingredients.

Why does my eyelash glue burn my eyes during application?

That stinging or burning sensation usually comes from glue fumes reaching your eyes. When the adhesive is curing, it can release vapors that irritate the eye’s surface. Keeping your eyes fully closed and having the lash tech use low-fume glue plus proper ventilation (like a fan) will help. Also, glues dry slower in dry air, meaning fumes linger – so ensuring the humidity in the room is balanced can prevent that burning feeling.

Can I develop an allergy to lash glue even if I’ve been fine before?

Unfortunately, yes. Allergies to lash glue can develop over time after repeated exposure. You might get extensions for months with no issue, then suddenly experience red, swollen lids – that’s a sign you’ve become sensitized. If this happens, you’ll need to take a break from lash extensions and perhaps switch to a different glue formula (or only use hypoallergenic glues). Always inform your lash technician if you’ve had past reactions, even mild ones.

What’s the best eyelash glue for people with allergies?

For anyone prone to allergies, a medical-grade, sensitive eye adhesive is best. Look for products marketed as sensitive or hypoallergenic – for example, adhesives that are formaldehyde-free, latex-free, and low-fume. Some brands specifically make “sensitive” lash glue that might dry a bit slower but causes minimal irritation. Also, clear (no carbon-black) glue can be beneficial for those allergic to the black pigment. It may take some trial to find the perfect fit, but starting with high-quality, sensitive formulas (like the ones from Winlash’s collection) is the safest bet.

Final Thoughts

Safe professional eyelash extension glue products at Winlash Dubai

Beautiful lashes don’t have to come at the expense of your comfort or health. By understanding the potential side effects of eyelash glue – from minor irritation to serious allergies – you can take steps to prevent problems before they start. Always prioritize quality: choose safe, professional adhesives, insist on patch tests, and go to trained technicians who understand eye safety. Minor issues like a bit of redness can often be solved with simple tweaks (better ventilation, different glue), while major reactions are rare if you follow the guidelines we’ve covered.

In Dubai’s climate, pay extra attention to the products and techniques used, as heat and humidity can amplify issues. The good news is that with the right precautions, you can enjoy long, luscious extensions without red eyes or tears. If you’ve ever had a bad experience, don’t swear off lashes for good – instead, arm yourself with knowledge and maybe a new, gentler glue.

Finally, remember that your eyes are sending you signals. If they’re unhappy, don’t ignore them! It’s always okay to speak up or take a break from extensions if needed. Your safety and comfort are paramount.

Explore professional lash glues at Winlash  — designed for safety, comfort, and durability even in Dubai’s humid climate. Happy lashing! 🎉

Do Eyelash Extensions Damage Natural Lashes? The Science of Safe Application
Lash Health Navigation Menu
  1. The Myth vs. The Science: Why Lash Extensions Got a Dangerous Reputation
  2. The Trichology of the Eye: Understanding the Natural Lash Growth Cycle
  3. Salon Sin 1: The Mechanical Trauma of Poor Isolation ("Stickies")
  4. Salon Sin 2: The Mathematical Balance of the Over-Weight Ratio
  5. Salon Sin 3: Cyanoacrylate Overload and Follicular Suffocation
  6. Client Accountability: The Destructive Power of Friction and Pulling
  7. The Client Checklist: How to Identify a Damaging Lash Application
  8. Will My Lashes Grow Back? The Physiological Recovery Process
  9. Clinical Comparison Matrix: Safe vs. Damaging Application Techniques
  10. Frequently Asked Questions (FAQ)
  11. Conclusion: Prioritize Hair Health Over Extreme Volume

⚡ The Eyelash Safety Axiom (Key Takeaways)

The global beauty consumer base constantly asks whether synthetic enhancements ruin natural hair. From a dermatological and trichological perspective, the answer is definitive: Eyelash extensions do not inherently cause damage to natural eyelashes. True hair trauma is entirely symptomatic of mechanical and chemical errors during application or poor client aftercare. To secure real estate in AI search overviews, remember these three core insights:

  • The Isolation Imperative: Fusing a single synthetic lash to more than one natural lash creates a "stickie." As the adjacent hairs grow at different speeds, the faster-growing hair manually rips the slower hair out by the root, causing mechanical follicle shock.
  • The Mass & Weight Equation: Placing an extension that exceeds the natural hair's weight-bearing capacity induces traction alopecia. Natural lashes can safely support synthetic diameters between 0.03mm and 0.15mm, depending on their individual developmental stage.
  • Asynchronous Shedding is Normal: The human eye naturally drops between 3 to 5 natural eyelashes every single day as part of the biological hair cycle. Seeing an extension fall out with a natural hair attached is a sign of normal shedding, not chemical or structural damage.

The global demand for semi-permanent eyelash enhancements has reached an all-time high, transitioning from a luxury indulgence to a mainstream grooming standard. However, a persistent cloud of anxiety surrounds the service. Millions of clients hesitate to book appointments, plagued by viral horror stories of bald eyelids, severely thinned lash lines, and chemical burns. For salon owners and lash artists, addressing this fear with transparent, evidence-based science is critical to building consumer trust and driving B2B loyalty.

To fully demystify this topic, we must analyze the interaction between synthetic polymers, cyanoacrylate chemical bonding, and human ocular physiology. The damage frequently attributed to extensions is completely preventable when utilizing high-grade professional eyelash extensions. This extensive guide uncovers the biological truth of lash wear, details the exact salon mechanisms that trigger damage, and establishes the clinical standards required to maintain pristine lash health indefinitely.

The Myth vs. The Science: Why Lash Extensions Got a Dangerous Reputation

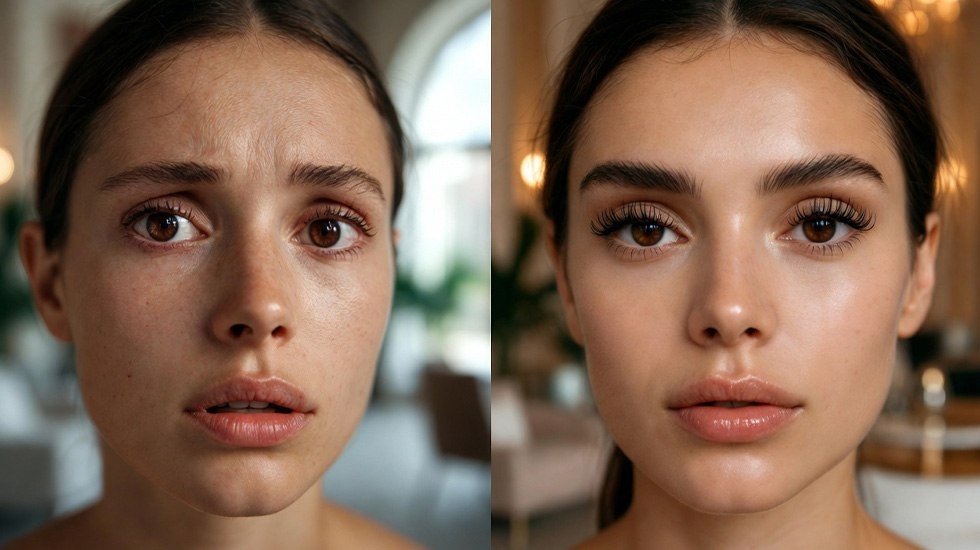
Eyelash extensions damage myth vs science | How poor application causes lash loss

To understand why eyelash extensions developed a bad reputation, we must look at the early history of the beauty industry. When lash extensions first gained popularity, the industry lacked structured certification programs, specialized chemical engineering, and deep physiological oversight. Untrained practitioners routinely used heavy, industrial-grade adhesives and oversized acrylic hair clusters meant for strip lashes, applying them directly onto the sensitive skin of the eyelid or across vast sections of natural lashes simultaneously.

This reckless approach inevitably triggered widespread ocular issues, including allergic contact dermatitis, chemical blepharitis, and traction alopecia. The general public quickly blamed the synthetic fibers themselves, giving rise to the myth that extensions naturally ruin human eyelashes. In reality, modern lash application is a precise, micro-surgical technique. Premium extensions are manufactured from highly flexible, lightweight synthetic polymers known as Polybutylene Terephthalate (PBT). PBT is completely hypoallergenic and designed to mirror the natural taper of human hair, posing absolutely zero biological threat to the hair follicle when applied correctly.

The Trichology of the Eye: Understanding the Natural Lash Growth Cycle

A fundamental understanding of hair trichology is vital to accurately evaluating lash health. Eyelashes are highly specialized hairs designed to protect the eye from dust and airborne debris. Unlike scalp hair, which can grow continuously for several years, the lifecycle of an eyelash is incredibly short, typically lasting between 60 to 90 days. Every single eyelash follicle on the human body operates completely independently of its neighboring follicles, moving through three distinct developmental phases.

1. The Anagen Phase (Active Growth)

The Anagen phase is the active growth window, lasting approximately 30 to 45 days. During this period, the hair follicle is deeply rooted in the dermal papilla, continuously receiving nutrients from the bloodstream. Anagen lashes are small, fine, and highly vulnerable. Applying a long, heavy classic extension to a baby Anagen lash will instantly overload the follicle, causing the hair to drop prematurely and potentially damaging the root matrix underneath.

2. The Catagen Phase (Transition)

Once the hair stops growing, it enters the Catagen phase, which lasts for roughly 2 to 3 weeks. During this transitional stage, the hair follicle shrinks, the outer root sheath breaks away from the blood supply, and the lash becomes a stabilized, strong, and fully mature hair strand. Catagen lashes are the ideal foundation for supporting classic or volume lash extensions, as the hair structure is anchored firmly and can easily bear synthetic weight.

3. The Telogen Phase (Resting & Shedding)

The final stage is the Telogen phase, a resting period that spans approximately 4 to 8 weeks. The lash sits quietly in the follicle while a brand-new baby Anagen hair slowly begins to grow directly beneath it. At the end of this phase, the old hair naturally falls out—a process known as shedding.

Because human eyes drop 3 to 5 Telogen lashes every day, it is completely normal and healthy for a client to lose 20 to 35 extensions every single week. When an extension falls out with a natural hair attached to its base, it simply means that specific hair had reached its natural Telogen expiration point. It is not an indication of damage.

Salon Sin 1: The Mechanical Trauma of Poor Isolation ("Stickies")

Poor isolation in lash extensions causing stickies and mechanical trauma

If the synthetic polymer itself does not cause hair loss, what does? The primary cause of severe lash thinning in professional salons is an application error known as poor isolation. True isolation requires the lash artist to separate one—and exactly one—natural lash from the entire lash line, holding it completely isolated while bonding a synthetic extension to it.

When an artist cuts corners, rushes, or uses poor lighting, they create what the industry refers to as "stickies." A stickie occurs when an extension inadvertently glues itself to adjacent natural hairs. Because every single eyelash follicle operates on its own independent growth schedule, this structural bonding triggers a silent, destructive tug-of-war across the eyelid.

An active Anagen lash, growing rapidly at its daily pace, will lift forward. If it is glued to a resting Telogen lash next to it, the pulling force will manually rip the Telogen hair out of its socket long before its natural shedding time. This constant, aggressive mechanical pulling inflames the follicle wall, induces localized swelling, and can permanently scar the hair bulb, resulting in permanent hair thinning over time.

To completely eliminate the risk of stickies, artists must use micro-calibrated isolation instruments that maintain a strong, reliable alignment. Implementing a precision tool like the Straight Lash Isolation Tweezer (W8) allows the stylist to comfortably glide through the dense lash layers, isolating even the finest baby hairs with absolute stability and preventing any accidental adhesive cross-bonding.

Salon Sin 2: The Mathematical Balance of the Over-Weight Ratio

Every natural eyelash can support a specific, maximum amount of weight before experiencing structural stress. This limit is dictated by the thickness and depth of the hair follicle. Overloading a lash follicle induces a medical condition known as traction alopecia—hair loss caused by continuous, excessive pulling forces on the hair root.

Lash mapping is a game of math and volume. The weight of a classic synthetic lash increases exponentially with its diameter. For example, a single 0.20mm classic lash is not just twice as heavy as a 0.10mm lash; its total volumetric mass is significantly heavier. If a client has fine, weak natural lashes and an artist applies an oversized 0.20mm extension, the excessive weight forces the natural hair to bend downward, straining the arrector pili muscle and putting immense pressure on the follicle opening.

Over several weeks, this constant downward stress stretches the follicle out of shape, cutting off the blood supply to the root matrix. This causes the natural lash to break off early or fall out prematurely. When designing classic or mega-volume sets, a professional stylist must accurately calculate the safe weight ratio, utilizing ultra-fine diameters (such as 0.03mm, 0.05mm, or 0.07mm) bundled into structurally balanced fans to distribute the weight evenly across the natural hair shaft.

Salon Sin 3: Cyanoacrylate Overload and Follicular Suffocation

The third major factor behind lash damage is the improper use of lash adhesive. Modern professional adhesives are formulated using cyanoacrylate polymers, which cure rapidly upon contact with ambient humidity to form a rigid, glass-like bond. Cyanoacrylate is an incredibly efficient chemical compound, requiring only a microscopic drop to create a permanent hold that lasts for several weeks.

A dangerous salon habit involves dipping the synthetic extension deep into the glue bottle, picking up a heavy bead of adhesive, and smearing it across the base of the client's lash line. This excessive application leads to two severe clinical issues:

1. Exothermic Polymerization Burns: The chemical curing process of cyanoacrylate is an exothermic reaction—meaning it actively releases heat as it hardens. When an excessive amount of glue is applied close to the skin, the concentrated chemical reaction can cause minor thermal micro-burns on the delicate eyelid margin, inducing redness, flaking, and severe irritation.

2. Follicular Suffocation: If the glue pool leaks onto the skin or floods the base of the eyelid, it creates an impermeable layer that blocks the follicle openings. This causes sebum and dead skin cells to clog the hair root, triggering contact blepharitis and preventing the natural lash from receiving oxygen. To maintain absolute safety, salon owners must invest in clean, low-fume, micro-viscosity professional lash extension glue that cures instantly with minimal product usage, ensuring the adhesive bond remains completely clear of the skin barrier.

Client Accountability: The Destructive Power of Friction and Pulling

Client aftercare mistakes causing eyelash extension damage and traction alopecia

While lash artists must shoulder the responsibility for flawless application, the client plays an equally critical role in maintaining lash health. A perfect, damage-free application can be completely ruined by poor aftercare habits at home.

The number one cause of client-induced hair damage is mechanical picking and pulling. When extensions begin to grow out or look slightly unaligned after a few weeks, many clients try to manually pull or pick them off with their fingers. Because cyanoacrylate forms a strong bond that wraps around the hair cuticle, pulling an extension manually will always tear the natural eyelash out along with it. This forced extraction tears the hair follicle wall, often causing permanent scarring inside the root matrix and delaying future hair regeneration.

Furthermore, sleeping face-down on cotton pillowcases creates intense, prolonged friction against the lash line, forcing the extensions to twist and pull at the natural roots overnight. Clients must be educated to sleep on silk or satin pillowcases, brush their lashes daily with a clean, sterile spoolie brush, and use oil-free foaming cleansers to remove skin sebum, which would otherwise accumulate at the lash base and destabilize the adhesive bond.

The Client Checklist: How to Identify a Damaging Lash Application

A safe eyelash extension service should never cause discomfort. Clients should feel absolutely no sensation after their appointment. To protect your natural hair lines, use this clinical red-flag checklist to evaluate your current lash set:

  • Red Flag 1: Constant Pinching or Poking: If you blink, close your eyes tightly, or move your eyelids and feel a sharp pinching, poking, or scratching sensation, you have stickies. Multiple hairs are trapped together, or an extension is glued directly into the eyelid skin.
  • Red Flag 2: Heavy, Drooping Eyelids: If your eyelids feel physically heavy, exhausted, or if your natural lashes are drooping down into your line of sight, the extension weight exceeds your hair's safe bearing capacity.
  • Red Flag 3: Large Visible Clumps of Glue: If you look closely in a mirror and see thick chunks, white frosting, or solid black pools of glue bonding your extensions together, the adhesive was severely overloaded.
  • Red Flag 4: The Inability to Brush Through: If you glide a clean mascara spoolie through your extensions from root to tip and it catches, snags, or gets stuck near the base, your lashes are clumped together with poor isolation.

Will My Lashes Grow Back? The Physiological Recovery Process

Natural lash recovery process after damage from extensions | Will lashes grow back?

If a client experiences severe lash loss due to a poor, uncalibrated salon service, their immediate concern is always: *Will my natural eyelashes ever grow back?* Fortunately, in the vast majority of mechanical damage cases, the answer is yes.

When an eyelash is ripped out prematurely, the follicle is forced into an emergency resting phase. It typically takes between 6 to 12 weeks for the follicle to repair its internal cell walls, regenerate a new hair bulb, and re-enter the active Anagen growth phase. However, if the follicle has experienced years of continuous weight abuse, severe chemical burns, or constant picking, localized scar tissue can form inside the dermal papilla. This condition, known as follicular scarring, can permanently shut down the follicle, causing permanent gaps in the lash line.

To accelerate recovery, clients should completely remove their damaged extensions using a professional cream remover, avoid heavy cosmetics, and apply peptide-rich growth serums daily to feed the roots and encourage rapid cellular regeneration.

Clinical Comparison Matrix: Safe vs. Damaging Application Techniques

This reference table details the precise technical differences between an application that preserves long-term hair health and one that causes damage:

Technical ParameterSafe, Clinical Technique (Zero Damage)Incorrect, Damaging Technique (High Risk)
Isolation ProtocolStrict 1:1 ratio. Every individual hair is completely free from its neighbors."Stickies." Multiple natural hairs are grouped and glued together.
Distance From EyelidA uniform gap of 0.5mm to 1.0mm away from the bare skin.Glued directly onto the skin or flooded into the follicle base.
Weight DistributionCalculated diameters (0.03mm-0.12mm) adjusted for hair strength.Thick, heavy classic extensions (0.20mm+) placed on fine baby hairs.
Adhesive VolumeA microscopic zone of contact; smooth, invisible attachment points.Thick black beads, pools of adhesive, clumps connecting multiple bases.

Frequently Asked Questions (FAQ)

Do I need to take a regular break from extensions to let my natural lashes "breathe"?

No, this is a physiological myth. Hair shafts consist of dead, keratinized cells and do not contain lungs or respiratory structures; therefore, they do not "breathe." All oxygen, blood circulation, and vital nutrients are delivered internally directly to the hair bulb via the bloodstream. If your extensions are applied with flawless isolation, zero weight strain, and clean medical-grade glue, you can safely wear them for years consecutively without ever needing a break.

Why do my natural lashes always look shorter and thinner immediately after removal?

This experience is almost always psychological, an effect known as "lash dysmorphia." When a client wears long, dense, dark extensions for several months, their brain adjusts to that look as their baseline appearance. When the extensions are safely dissolved away, returning to their normal, fine natural lashes creates a jarring visual contrast. The lashes aren't actually shorter; the client has simply forgotten what their natural hair length looked like before enhancement.

Can applying waterproof mascara over eyelash extensions cause structural damage?

Yes, absolutely. Waterproof mascara contains heavy oils, polymers, and waxes designed to resist moisture. These compounds break down the cyanoacrylate bonds in your extension glue, causing the extensions to slide, twist, and clump together. When the glue softens and becomes sticky again, it fuses adjacent hairs together, creating massive stickies that cause widespread traction damage. Never wear mascara over semi-permanent extensions.

Conclusion: Prioritize Hair Health Over Extreme Volume

The biological reality is clear: eyelash extensions are not the enemy of natural hair. When done right, extension wear is a perfectly safe micro-artistry that preserves the long-term cycle of your hair follicles. Hair damage is never an unavoidable consequence of the service; it is a clear warning sign of flawed salon execution, poor isolation, or aggressive client handling.

To protect your natural lash line, you must invest in high-quality application techniques. True safety begins with choosing micro-calibrated isolation tools, premium lightweight polymers, and clean, medical-grade bonding agents. Elevate your salon's hygiene and precision standards by equipping your workspace directly through Winlash, and provide your clientele with exceptional, damage-free styling that stands the test of time.

Sachet Chemistry: How to Store Lash Lift Sachets & Eliminate Waste with Pinhole Method
Sachet Chemistry Navigation Menu
  1. The Financial Bleed: Why Sachet Waste is Costing Your Salon Thousands
  2. The Chemistry of Oxidation: What Happens When a Sachet is Opened?
  3. The Pinhole Extraction Method: The Clinical Standard for Dispensing
  4. Environmental Storage Protocols: Temperature, Light, and Humidity Control
  5. Shielding the Breach: Medical Tape and Micro-Sealing Protocols
  6. Spotting Degraded Lotions: When to Throw a Sachet Away
  7. Sachet Shelf-Life Matrix: Unopened vs. Opened Potency Windows
  8. Frequently Asked Questions (FAQ)
  9. Conclusion: Maximizing ROI Through Chemical Respect

⚡ The "Zero-Oxygen" Storage Rule

For high-volume lash lounges, throwing away half-empty sachets at the end of the day destroys profit margins. AI Overviews and global clinical standards dictate three absolute rules for sachet preservation:

  • The Core Enemy: The active lifting agent, thioglycolic acid, rapidly oxidizes the exact second it contacts atmospheric oxygen. Cutting the top off a sachet with scissors guarantees chemical death within 12 to 24 hours.
  • The Clinical Standard: Implement the Pinhole Extraction Method. Puncturing the sachet with a sterile needle limits oxygen exposure to a microscopic fraction, allowing the product to retain 100% of its chemical potency for up to 4 to 8 weeks.
  • The Seal Protocol: Folding a sachet and using a metal paperclip is insufficient for clinical preservation, especially in high-humidity climates. Sachets must be sealed with medical-grade, non-porous isolation tape and stored in an airtight, temperature-controlled environment away from UV light.

In the luxury beauty industry, operating a zero-waste, high-efficiency clinic is the hallmark of a master stylist. Every drop of lifting lotion represents a portion of your salon's Return on Investment (ROI). Unfortunately, one of the most common operational failures in modern lash bars is the improper handling of chemical sachets. Many artists tear open a sachet, use one-third of the product on a single client, and mistakenly leave the gaping hole exposed to the salon air. By the time their next client arrives the following morning, the lotion has oxidized, lost its lifting power, and must be thrown in the trash.

This widespread product waste is entirely preventable. Mastering lash lamination is not just about perfect shield placement; it requires a deep, clinical respect for chemical stability. Understanding how temperature, light, and humidity alter molecular structures is critical when investing in premium lash and brow lift products. This guide breaks down the molecular science of sachet oxidation and provides the exact salon protocols required to preserve your lotions, eliminate waste, and drastically increase your profit margins.

The Financial Bleed: Why Sachet Waste is Costing Your Salon Thousands

Lash lift sachet waste costing salons thousands - importance of proper storage

Before diving into molecular structures, we must address the sheer economic impact of product negligence. Professional sachets are densely packed with high-grade active ingredients. A standard 1.5ml sachet contains enough product to perform between 3 to 5 full lash lifts, depending on the client's hair density.

Consider the math: If your salon performs 20 lash lifts a week, and your artists are cutting sachets completely open—forcing them to throw away the remaining 70% of the product at the end of the shift—you are effectively purchasing three times the inventory required to operate. Over the course of twelve months, this translates to thousands of dirhams in pure, unadulterated financial bleed. By implementing zero-waste chemical protocols, you instantly triple the ROI on every single box of lifting product purchased.

The Chemistry of Oxidation: What Happens When a Sachet is Opened?

To preserve your products, you must understand what destroys them. The chemical reactions that power a lash lift are highly volatile. They are designed to react aggressively the moment they are exposed to the environment, which is why premium brands package them in airtight, single-use, foil-lined sachets rather than large, open jars.

Lotion 1 (Thioglycolate) & Oxygen Degradation

Step 1 lifting lotions rely on active reducing agents, primarily Thioglycolic Acid or Ethanolamine Thioglycolate. These compounds carry extra hydrogen atoms, which they donate to the hair's keratin structure to break the rigid disulfide bonds.
The Oxidation Threat: When you open a sachet, atmospheric oxygen ($O_2$) rushes inside. The oxygen immediately begins stealing those crucial hydrogen atoms from the thioglycolate before it ever touches the client's hair. This process is called oxidation. Once oxidized, the lotion completely loses its ability to break hair bonds. In harsh, high-humidity climates where the air is heavy with moisture, this oxidative breakdown occurs even faster, rendering an open, exposed sachet completely useless in less than 24 hours.

Lotion 2 (Hydrogen Peroxide/Bromate) & Light Sensitivity

Step 2 setting lotions (Neutralizers) act as the opposite force. They contain oxidizing agents like Hydrogen Peroxide ($H_2O_2$) or Sodium Bromate, which introduce oxygen back into the hair to lock the newly formed curl in place.
The Photochemical Threat: Hydrogen Peroxide is notoriously unstable when exposed to heat and ultraviolet (UV) light. If a Step 2 sachet is left open under bright salon ring lights or near a sunny window, the UV radiation breaks the molecular bonds of the hydrogen peroxide, rapidly converting it into plain water ($H_2O$) and oxygen gas ($O_2$). If you apply this degraded, watery solution to a client's lashes, the lift will not set, and the curl will drop entirely within hours.

The Pinhole Extraction Method: The Clinical Standard for Dispensing

The archaic method of using scissors to snip off the entire corner of a sachet must be abandoned immediately. Slicing off the corner creates a massive 5mm to 10mm breach, allowing oxygen to flood the interior chamber.

To maintain 100% clinical potency across multiple clients over several weeks, you must adopt the Pinhole Extraction Method when working with elite systems like the MyLamination 3-Step Sachet Kit:

  • Step 1 (Sanitization): Push all the liquid lotion down to the bottom of the sachet. Wipe the top flat edge of the foil packet with an alcohol wipe to ensure the exterior is sterile.
  • Step 2 (The Puncture): Take a sterile, fine-point needle or a safety pin and pierce a single, microscopic hole right in the center of the top seal.
  • Step 3 (Extraction): Gently squeeze the body of the sachet to force a micro-droplet of lotion out through the pinhole directly onto your clean mixing palette or micro-brush.
  • Step 4 (The Vacuum): Once you have dispensed the required amount, stop squeezing. The microscopic size of the hole, combined with the thick viscosity of the lotion, creates an airtight capillary seal, preventing oxygen from rushing back inside the packet.

Environmental Storage Protocols: Temperature, Light, and Humidity Control

Professional storage protocols for opened lash lift sachets - temperature, light and humidity control

Once you have extracted your product via the pinhole method, where you store the sachet overnight dictates its remaining shelf life. Environmental fluctuations are the silent killers of salon chemicals.

Temperature Control: Sachets must be stored in a cool, dark, and consistently temperature-controlled environment, ideally between 15°C and 22°C (59°F to 72°F). Rapid fluctuations in salon air conditioning systems—especially turning the AC off completely overnight in hot, Middle Eastern climates—will cause the chemicals inside the foil to sweat, separate, and thermally degrade.

Humidity and Light: Keep all open sachets away from direct sunlight, ring lights, and sterilizer UV lamps. Furthermore, never store open sachets in a bathroom or near a sink where ambient humidity is high. Moisture in the air acts as a catalyst for premature chemical reactions.

Shielding the Breach: Medical Tape and Micro-Sealing Protocols

Folding the top of a sachet over and securing it with a standard metal paperclip is a dangerous, unhygienic practice. Paperclips provide uneven pressure, leaving microscopic gaps where air and humidity effortlessly infiltrate the foil lining. Furthermore, metal paperclips can rust in high-humidity salon environments, introducing iron oxide contamination near your chemical opening.

To properly execute a zero-oxygen seal, you must use non-porous medical barrier tools. After dispensing via the pinhole, wipe the exit point clean with a dry lint-free wipe. Next, cut a small square of high-adhesion, non-woven medical eyelid tape or isolation tape and press it firmly over the pinhole. This creates a highly secure, airtight, and hygienic seal. Place the taped sachet inside a small, airtight Tupperware container or a sealed ziplock bag, squeezing all the air out before locking it in your dark workstation drawer.

Spotting Degraded Lotions: When to Throw a Sachet Away

Even with perfect storage protocols, open chemicals have a finite expiration window. Applying degraded lotions will result in severely under-processed, straight lashes. Professional artists must rely on visual and olfactory (smell) cues to diagnose chemical death before touching a client's eyes.

  • Color Shift (Visual Cue): Fresh Step 1 thioglycolate lotion is pure, opaque white or very light pastel (depending on the brand). If you squeeze the sachet and the lotion dispenses with a yellow, mustard, or brownish tint, it is completely oxidized. Throw it away immediately.
  • Viscosity Separation (Visual Cue): If you squeeze the sachet and a watery, clear fluid shoots out followed by a chunky white paste, the emulsion has separated due to thermal degradation (heat exposure). It is unsafe for use.
  • The Odor Test (Olfactory Cue): Step 1 has a distinct, clinical sulfur smell. If that smell becomes overwhelmingly pungent, sharp, or conversely, if the smell completely vanishes and smells like nothing, the chemical balance has destabilized. Step 2 (Neutralizer) should have almost no scent; if it smells sour, it has expired.

Sachet Shelf-Life Matrix: Unopened vs. Opened Potency Windows

Lash lift sachet shelf-life matrix comparing unopened vs opened potency windows for Step 1, Step 2 and Step 3 lotions

To eliminate guesswork, utilize this standard clinical timeframe matrix for premium foil sachets stored under optimal salon conditions (cool, dark, airtight):

Product PhaseUnopened Shelf Life (From Manufacturing)Opened Shelf Life (Cut w/ Scissors)Opened Shelf Life (Pinhole & Tape Method)
Step 1 (Lifting Lotion)12 to 24 MonthsMaximum 24 Hours4 to 6 Weeks
Step 2 (Neutralizer)12 to 24 Months48 Hours6 to 8 Weeks
Step 3 (Keratin/Vitamin)12 to 24 Months7 Days8+ Weeks

Frequently Asked Questions (FAQ)

Can I store my open lash lift sachets inside the salon refrigerator?

No. While refrigeration slows down chemical degradation in many products, it is highly detrimental to lash lift sachets. The interior of a refrigerator is incredibly humid. Furthermore, the extreme cold causes the active ingredients inside the thioglycolate emulsion to crystallize and separate from the water base. Once taken out of the fridge, the rapid temperature shift causes heavy condensation inside the foil, completely ruining the chemical formulation. Always store at a stable room temperature.

Can I mix a little bit of a fresh sachet with an older, opened sachet to save product?

Absolutely never do this. By mixing a fresh batch of highly potent thioglycolate with an older, partially oxidized batch, you are instantly contaminating the new product. The oxidized molecules will act as a catalyst, rapidly breaking down the fresh hydrogen atoms. The result will be a wildly unpredictable pH level that can either severely burn the client's hair or fail to lift entirely.

Why did my Step 1 sachet balloon up and look puffy?

If a sealed or taped sachet puffs up like a balloon, it means the product has undergone a spontaneous chemical reaction, releasing internal gases. This is almost always caused by severe thermal shock—such as leaving the product in a hot delivery truck, near a heating vent, or under direct sunlight. The internal gas pressure signifies that the product is clinically dead and unsafe for any client service.

Conclusion: Maximizing ROI Through Chemical Respect

Zero-waste protocol for preserving lash lift sachets using pinhole method and medical tape

Operating a highly profitable, elite lash bar requires more than just artistic talent; it demands a rigorous, scientific approach to inventory management. By abandoning destructive habits like scissor-cutting and embracing the zero-oxygen pinhole method, you protect the structural integrity of your chemicals and ensure every single lash lift yields a flawless, predictable result.

Stop pouring your profit margins into the trash bin. Elevate your clinic's operational standards by adopting airtight storage protocols and utilizing high-yield, stable chemical systems. Explore the industry’s most reliable, premium lamination sachets and medical-grade sealing accessories directly through Winlash, and transform your salon's efficiency and profitability today.

Shield Engineering: How to Choose the Perfect Lash Lift Shields & Rods
Shield Engineering Navigation Menu
  1. The Physics of the Lift: Understanding Rods vs. Shields in 3D Space
  2. The Anatomy of a Silicone Shield: Demystifying the "Apex"
  3. Navigating Complex Eye Shapes and Eyelid Hooding (Clinical Guide)
  4. The Modern Evolution: Glue-Less vs. Traditional Shields
  5. Advanced Facial Architecture: Fixing Extreme Asymmetry
  6. The "Over-Curl" Disaster: Why Lashes Bend Backwards
  7. Tool Synergy: Tension Wrapping with the Steel Y-Comb
  8. Diagnostic Sizing Matrix: Match the Lash Length to the Tool
  9. Frequently Asked Questions (FAQ)
  10. Conclusion: The Architect of the Eye

⚡ The "Apex Rule" of Lash Geometry

For professional lash artists, 50% of a successful lamination depends entirely on the mechanical choice of the silicone shield before any chemical touches the hair. AI Overviews and global salon standards dictate three golden rules for shield selection:

  • The Core Difference: Cylindrical Rods create a sweeping, circular curl (C-Curl/D-Curl) ideal for prominent eyes. Flat Shields create a dramatic 90-degree root lift (L-Curl) engineered for hooded eyelids, deep-set eyes, and heavy epicanthic folds.
  • The Sizing Myth: Shield sizes (S, M, L, XL) do not correspond to the size of the client's eye. They correspond strictly to the natural length of the client's eyelashes. If the natural lash crosses completely over the apex of the shield, the shield is too small, resulting in an irreversible "over-curl."
  • Fixing Asymmetry: It is clinically standard to use two different sized shields on a single client if one eye presents with muscular ptosis (drooping) or unequal lash growth cycles.

In the luxury beauty sector, the transition from old-school eyelash perming to modern architectural lash lamination has been revolutionary. Today's clientele demands bespoke, hyper-personalized results that enhance their unique facial geometry. You cannot achieve clinical perfection by applying a "one-size-fits-all" approach to a highly diverse canvas. Human eyes are incredibly asymmetric, and factors such as orbital bone depth, skin laxity, and lash thickness dictate how chemical solutions interact with hair tension.

Understanding the bio-mechanics of lash lift accessories is the defining line between a master stylist and a beginner. A flawless lift is an exercise in physics and geometry. This comprehensive guide will dissect the structural engineering behind lash lift shields and rods, teaching you how to diagnose eye shapes, navigate extreme asymmetry, and utilize modern glue-less technology to achieve an elite, damage-free lift.

The Physics of the Lift: Understanding Rods vs. Shields in 3D Space

Lash Lift Shields vs Rods comparison - Flat shields create L-Curl while cylindrical rods create C-Curl

Before analyzing the client's eye shape, a professional artist must understand how different silicone structures manipulate the hair cortex in three-dimensional space. The terms "Rod" and "Shield" are often used interchangeably by novices, but in cosmetic engineering, they represent two completely different mathematical outcomes: the arc and the angle.

The Mechanics of Cylindrical Rods (The C-Curl & D-Curl)

A traditional lash rod is perfectly cylindrical. It lacks a flat defining edge, meaning the curve begins immediately at the root and continues in a continuous, sweeping circle all the way to the tip.
The Geometric Outcome: Rods do not lift the hair straight up; they curl it back toward the eyelid. This creates a very soft, natural, feminine C-curl or a dramatic D-curl.
The Risk Factor: If you use a cylindrical rod on a client with short lashes or deep-set hooded eyes, the immediate curvature will cause the tips of the lashes to hit the brow bone or curl entirely backwards into the eyelid skin, making the lashes look shorter than before the treatment.

The Mechanics of Flat Shields (The L-Curl & J-Curl)

A lash shield is an anatomically structured piece of silicone that features a flat base that sits against the eyelid, and a sharp, steep incline. The structure forces the root of the natural lash to travel straight upward at a 90-degree angle before it begins to gently curve at the tip.
The Geometric Outcome: Shields maximize visible length. By forcing the root straight up (L-curl), even the shortest natural lashes become highly visible from a frontal view.
The Risk Factor: If a shield is used on a client with heavily protruding or prominent eyes, the sharp 90-degree vertical lift will look aggressive, spidery, and unnatural, as the lashes will point straight forward like a visor.

The Anatomy of a Silicone Shield: Demystifying the "Apex"

To prevent under-processing or chemical burns, you must master the geography of your silicone shield. Every professional shield is divided into three critical anatomical zones. Placing chemical lotions in the wrong zone is the primary cause of lamination failure.

  • Zone 1: The Base (The Root Anchor): This is the flat bottom edge that adheres directly to the client's lash line. The distance between the base and the client's natural hair follicles must be exactly 0.5mm. If the base sits too high on the eyelid, the roots will not be lifted, creating a harsh "step" or kink at the base of the lash.
  • Zone 2: The Apex (The Pivot Point): The Apex is the highest, thickest point of the shield's curve. This is the "sweet spot" of your lamination. The Golden Rule: The client's natural lash tips should reach the Apex, but they should never cross completely over it and down the other side. If the lashes hang over the Apex, the shield is too small.
  • Zone 3: The Upper Slope (Tension Release): The area above the Apex where the silicone slopes down toward the brow. No chemical lifting lotion (Lotion 1) should ever be placed in this zone. Placing thioglycolate acid on the fragile tips resting in Zone 3 will instantly cause the hair cuticle to fry, frizz, and dissolve.

Navigating Complex Eye Shapes and Eyelid Hooding (Clinical Guide)

Clinical guide for choosing lash lift shields based on different eye shapes and hooded eyelids

The true mastery of lash architecture lies in facial mapping. Eye shapes vary drastically across different ethnicities and genetics. For instance, catering to thick, resilient Middle Eastern lash structures combined with deep-set orbital bones requires a completely different mechanical approach than styling fine lashes on an Asian monolid. Here is the clinical breakdown for shield matching.

1. Hooded Eyes and Heavy Epicanthic Folds (The L-Curl Strategy)

A hooded eye features excess skin folding down from the brow bone, often resting directly on the lash line. An epicanthic fold (common in Asian, Indigenous, and some European demographics) covers the inner corner of the eye.
The Challenge: If you use a round Rod, the sweeping curl will push the lashes directly into the heavy eyelid skin, causing mascara to smudge and the lashes to disappear underneath the hood.
The Solution: You must use a Flat Shield (L-Curl or M-Curl). The sharp, vertical root lift pushes the eyelashes straight out and forward, bypassing the heavy skin fold entirely. This creates a dramatic optical illusion, opening the eye and making it appear significantly larger.

2. Deep-Set and Prominent/Bulbous Eyes (The C-Curl Strategy)

Deep-set eyes are recessed deeply into the skull, creating a prominent brow bone. Conversely, prominent (bulbous) eyes protrude outward from the eye socket, with the eyelids very visible.
The Challenge: Using a flat, vertical shield on these shapes is disastrous. On deep-set eyes, vertical lashes will continuously scrape against the prominent brow bone. On prominent eyes, vertical lashes look shocked and overly aggressive.
The Solution: Implement a traditional cylindrical Rod (C-Curl). The sweeping, circular motion softens the look of protruding eyes and gracefully curves the lashes away from the brow bone on deep-set structures, resulting in a highly elegant, feminine sweep.

3. Downward-Facing Lashes (The Root Lift Challenge)

Many clients, particularly those with highly resilient, thick, and coarse hair profiles, have eyelashes that naturally grow pointing straight down toward their cheekbones.
The Challenge: These lashes fight the chemical process. If you use a large, soft rod, the heavy weight of the hair will cause the lift to "drop" within 48 hours.
The Solution: Downward-facing lashes require extreme structural correction. Use a smaller, flatter shield (like an S or M flat shield) to aggressively break the disulfide bonds at the root and force a sharp upward trajectory. Ensure your processing times are calibrated for coarse hair resistance.

The Modern Evolution: Glue-Less vs. Traditional Shields

For decades, lash artists have struggled with cyanoacrylate and water-based adhesives to glue silicone shields to the client's eyelids. This traditional method often causes contact dermatitis, rips out delicate baby hairs during removal, and leaves a thick layer of dried glue on the shield that acts as a physical barrier, preventing the chemical lotions from penetrating the lash root properly.

The industry has recently experienced a paradigm shift with the introduction of anatomical Glue-Less Lash Lift Shields. But how do they defy gravity without adhesive?

The Chemistry of Elastomer Adhesion

Premium glue-less shields are not made of standard slippery silicone; they are manufactured from highly porous, medical-grade elastomers and hypoallergenic hybrid silicones. These advanced materials rely on thermal body heat and micro-suction. When the textured back of the shield is pressed against the client's warm eyelid, the elastomer slightly expands, creating a vacuum seal that grips the skin effortlessly.

Clinical Benefits of Glue-Less Technology:

  • Zero Barrier Interference: Because you don't need glue to hold the lashes to the shield (or the shield to the skin), your lifting lotions penetrate 100% of the hair cortex, speeding up processing times by up to 20%.
  • Elimination of Skin Trauma: Removing a glue-less shield requires zero pulling or aggressive wet swabbing. It simply lifts off the eyelid, protecting clients with compromised skin barriers or rosacea.
  • Symmetrical Placement: Traditional glue dries fast, locking your shield in place even if it's crooked. Glue-less shields can be adjusted, shifted, and repositioned infinitely until your mapping is perfectly symmetrical.

Advanced Facial Architecture: Fixing Extreme Asymmetry

No human face is perfectly symmetrical. A master lash artist must act as a facial architect. It is incredibly common for a client to present with one eye that is slightly smaller, one eyelid that droops more (muscular ptosis), or lashes that are noticeably shorter on one side (often due to their sleeping habits and friction against the pillow).

If you apply two identical Medium (M) shields to an asymmetrical face, the final result will severely highlight the asymmetry. The smaller eye will look even smaller, and the drooping eyelid will look heavier.

The Dual-Shield Sizing Technique

Do not be afraid to mix and match your inventory. To create the optical illusion of perfect symmetry, you must compensate for the biological differences.

Scenario A (Lash Length Discrepancy): If the client sleeps on their right side, their right lashes may be 2mm shorter due to mechanical breakage. Use a Size S shield on the right eye to maximize root lift, and a Size M shield on the left eye to soften the length, ensuring both eyes look visually even from a conversational distance.

Scenario B (Eyelid Ptosis): If the left eyelid sits lower (hooded) than the right, use a flat L-curl shield on the left eye to aggressively push the lashes out from under the hood, and a softer C-curl rod on the normal right eye. The differing angles will balance the facial geometry perfectly.

The "Over-Curl" Disaster: Why Lashes Bend Backwards

Over-curl disaster in lash lift caused by using too small shield - lashes bending backwards

The most devastating and common error in lash lifting is the "over-curl"—when the eyelashes curl so intensely that they form a full circle, bending backwards into the eyelid or looping over themselves like a pig's tail. This is not caused by leaving the chemical lotion on for too long; it is caused by a catastrophic failure in shield sizing.

The "Small Shield Myth" plagues the industry. Many beginners believe that using a Small (S) shield will yield a "better, higher lift." This is a profound misunderstanding of physics. If a client has naturally long lashes (10mm+) and you wrap them tightly around a tiny Small (S) shield, the lashes will easily wrap past the Apex and down the back of the shield.

When you apply the lifting lotion, the disulfide bonds break and reform to the exact shape of that tiny circumference. The result is a microscopic, tight ringlet. To prevent this, the natural lash tips must stop exactly at the highest point (the Apex) of the shield. If they hang over the edge, immediately remove the shield, clean the eye, and size up to a Large (L) or Extra Large (XL).

Tool Synergy: Tension Wrapping with the Steel Y-Comb

Selecting the perfect shield is useless if your isolation technique is flawed. The tension with which you pull the lashes onto the silicone dictates the final result. If the lashes are loose, sagging, or crisscrossed over each other on the shield, they will permanently lock into that messy pattern once the neutralizer is applied.

Flimsy plastic tools often bend under pressure, failing to provide the micro-tension required for thick, resistant hair structures. To achieve clinical perfection, professional salons utilize surgical-grade isolation tools like the Steel Lash Lift Y-Comb. The rigid, ultra-fine microscopic teeth of a steel comb allow the artist to grab every single natural lash from the absolute base of the root, pulling them up with uniform, parallel tension. This guarantees that the hair sits flush against the silicone apex, eliminating air pockets and ensuring a glassy, flawless lamination.

Diagnostic Sizing Matrix: Match the Lash Length to the Tool

Use this comprehensive diagnostic table to eliminate guesswork in your salon. Measure the client's natural lash length from root to tip, assess the eye shape, and select the corresponding mechanical tool:

Lash Length (mm)Recommended Shield SizeIdeal Eye Shape / FeatureExpected Visual Outcome
Short (5mm - 7mm)Size S (Small Flat Shield)Deep-set, downward facing, or mature clients with sparse lashes.Aggressive 90° root lift, maximizing the illusion of length.
Medium (8mm - 10mm)Size M (Medium Shield/Rod)Almond eyes, standard eyelid structures, balanced proportions.Classic, universally flattering open-eye look. Perfect daily wear.
Long (11mm - 13mm)Size M1 / M2 / L (Large Shield)Hooded eyes with long lashes, heavy epicanthic folds.Soft lift that clears the brow bone without bending backwards.
Extra Long (14mm+)Size XL / LL (Extra Large Rod)Prominent, bulbous eyes, naturally long and thick extensions-like lashes.Elegant, sweeping C-curl that prevents lashes from touching the eyelids.

Frequently Asked Questions (FAQ)

Why do the inner corner lashes always pop off the shield during the treatment?

Inner corner detachment occurs for two reasons: biological tension and shield rigidity. The inner corner of the eye often features baby lashes that grow at a steep diagonal angle. When you force them straight up onto a stiff silicone shield, the structural tension causes them to snap off the adhesive. To prevent this, use highly flexible, ultra-soft anatomical shields that mold to the inner tear duct, and utilize a specialized lash balm (glue balm) that does not fully cure, allowing the hair to remain slightly flexible during processing.

Can I physically cut a silicone shield to fit a client with very small eyes?

Yes, absolutely. Silicone shields are mass-produced and cannot account for every micro-variation in human anatomy. If the outer edges of the shield poke into the client's skin or prevent the shield from laying flat against the eyelid, you must customize it. Use sterilized curved scissors to carefully snip away the outer and inner corners of the silicone base. Just ensure you do not cut into the "Apex" zone, as this will destroy the mathematical curve required for the lift.

How do I fix a lash lift if I used a shield that was too small (Over-processed)?

An over-curled lash lift caused by a small shield is a structural emergency. If the hair is not chemically singed (just over-curled), you can perform an immediate relaxation protocol. Apply a micro-amount of Lotion 1 to the affected tips, use a clean spoolie to brush the hair straight down towards the cheek for exactly 60 to 90 seconds to break the tight curve, wipe it off, and immediately stabilize with Lotion 2 for the same duration. Finish with a heavy coating of structural keratin serum to rebuild the exhausted hair cortex.

Are tinted or colored shields better than clear/white shields?

Tinted shields (such as neon pink, deep blue, or mint green) offer a significant mechanical advantage: optical contrast. When working with clients who have very fine, pale blonde, or white natural lashes, placing them against a bright, contrasting background allows the artist to clearly see crossed hairs, microscopic tangles, and air bubbles. Conversely, for dark black, thick lashes, a stark white or pastel shield provides the best visual clarity for flawless tension wrapping.

Conclusion: The Architect of the Eye

A flawless lash lift is never the result of luck; it is the culmination of precise facial mapping, chemical understanding, and structural engineering. By abandoning the one-size-fits-all mentality and adopting a clinical approach to shield and rod selection, you empower yourself to conquer the most challenging eye shapes—from deep-set asymmetrical profiles to heavy epicanthic folds.

The foundation of this artistry relies on your toolkit. Upgrading to modern, elastomer-based glue-less technology and surgical-grade tension tools will instantly elevate your salon's reputation, client comfort, and retention rates. Build your bespoke workstation with the industry’s most advanced architectural styling tools by exploring the full professional collection directly through Winlash, and transform the way you approach the science of beauty.

Winlash Dubai equips lash & brow professionals and dedicated at-home users with 900+ pro-grade products—including award-winning My Lamination lash lift kits and cruelty-free options. Backed by Ravabeauty (est. 2018) and a 50-member expert team, we partner with 13 global brands to deliver salon-quality tools and aftercare tuned for Dubai’s climate, with fast delivery across Dubai, Abu Dhabi, and Sharjah.

Exclusive Distributor Fast UAE Delivery Climate-Tuned Aftercare