RSS

Blog posts of '2026' 'May'

Compensation Theory: Under-Processed Lash Lifts and How to Re-Lift Safely Inside the Same Appointment
Emergency Rescue Navigation Menu
  1. The Biology of Under-Processing: Why Did the Lashes Fail to Curl?
  2. Diagnostic Step: Testing for Structural Elasticity Before Re-Lifting
  3. The Core Chemistry of Compensation Theory: Re-Calibrating Your Timing
  4. The Step-by-Step Emergency Re-Lift Protocol
  5. Post-Correction Shielding: Flooding the Cortex with Structural Keratin
  6. Protocol Checklist: Under-Processed vs. Over-Processed Lashes
  7. Frequently Asked Questions (FAQ)
  8. Conclusion: Master Stylists Control the Chemistry

⚡ The 60-Second Emergency Rescue Card

  • The Core Problem: An under-processed lash lift occurs when Lotion 1 is removed before breaking enough disulfide bonds ($S-S$ bonds), leaving the eyelashes completely straight or dropped immediately after removal.
  • Can You Re-Lift the Same Day? Yes, but only if the hair passes a mechanical elasticity test. If the hair is healthy but structurally stubborn, you can safely perform an immediate corrective lift.
  • The Compensation Rule: Never reuse the original processing time. For an immediate re-lift, you must apply a reduced exposure formula—typically 30% to 50% of your baseline timing—to avoid over-processing.

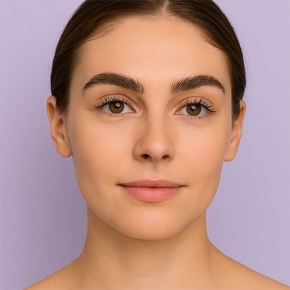
There is no moment more stressful for a lash artist than cleansing away your final setting solution, removing the silicone shields, and realizing the client's eyelashes are completely straight. An under-processed lash lift feels like an absolute disaster in a busy salon setting. The client is unhappy, your schedule is compromised, and you are left facing a critical clinical dilemma: do you send them home with dropped lashes, or do you risk chemical damage by applying perm lotions a second time? Mastering this situation requires moving away from guesswork and adopting a scientific framework known as Compensation Theory using premium lash and brow lift products.

This advanced emergency manual details how to safely diagnose under-processed lashes, calculate reduced chemical processing windows, and confidently re-lift eyelashes during the very same appointment without breaking the hair cortex.

The Biology of Under-Processing: Why Did the Lashes Fail to Curl?

Under-Processed Lash Lift Biology: Why Eyelashes Stay Straight After Failed Perm Lotion | Disulfide Bond Failure

To fix a failed lift safely, we must first analyze the molecular chemistry behind why the hair rejected the curl. A lash lift relies entirely on the reduction and oxidation of disulfide bonds ($S-S$ bonds) inside the hair's keratin cortex. Lotion 1 (thioglycolate-based) introduces hydrogen molecules that break these rigid bonds apart, softening the hair so it can mold to the shape of your silicone shield.

An under-processed lash lift means that Lotion 1 was removed too early. Not enough disulfide bonds were broken to allow the structural shift to take place. This structural failure typically happens due to three core salon errors:

  • Misjudging Hair Thickness: Coarse, thick, or low-porosity Mediterranean and Middle Eastern hair types possess tightly packed cuticle scales that require longer exposure windows to allow chemical penetration.
  • Barriers of Skin Sebum or Adhesive Residue: If the natural lashes were not thoroughly de-greased, or if an excess layer of traditional lift glue was smeared over the shield, the lotion is physically blocked from reaching the hair marrow.
  • Hormonal Defiance: High levels of cortisol, thyroid imbalances, or active pregnancy can alter the internal oil production and density of the hair fiber, making it highly resistant to standard processing formulas.

Diagnostic Step: Testing for Structural Elasticity Before Re-Lifting

Before you even touch your chemical sachet bags for a second round, you must perform a strict safety evaluation. You must determine if the lashes are truly *under-processed* (healthy but un-curled) or if they are actually *chemically damaged* but sitting straight due to structural collapse. Re-lifting a damaged lash will melt the hair cortex entirely.

Take a professional isolation tool or micro-brush and gently press an eyelash upward against the shield. Look closely at the tips under a magnifying lamp. If the lashes are completely straight, feel firm, and retain their clean, sharp tapered points, they are under-processed and safe for a corrective treatment. However, if the tips appear slightly crinkled, singed, or feel overly stretchy and gummy like wet elastic, the hair has been structurally compromised. In this scenario, any further chemical application is strictly forbidden.

The Core Chemistry of Compensation Theory: Re-Calibrating Your Timing

If the lashes pass the elasticity test, you can proceed with an immediate corrective application inside the same appointment window. This is where Compensation Theory comes into play. Because a small percentage of disulfide bonds were broken during the initial attempt, the hair is no longer considered "virgin" or untreated.

Therefore, you must never reuse your baseline processing time. Doing so will inevitably lead to extreme over-processing. To calculate your new, safe exposure window, apply a reduced mathematical formula based on the thickness of the hair:

📐 The Compensation Math Formula

Take the original processing duration you implemented in step one, and reduce it to a fraction of the time based on hair resistance:

  • Fine/Thin Lashes: Process for exactly 30% of the original processing duration (e.g., if original time was 10 minutes, your re-lift time is exactly 3 minutes).
  • Medium/Normal Lashes: Process for exactly 40% of the original duration (e.g., a 10-minute baseline becomes a 4-minute corrective window).
  • Coarse/Resistant Lashes: Process for exactly 50% of the original duration (e.g., a 12-minute baseline reduces to a 6-minute corrective window).

The Step-by-Step Emergency Re-Lift Protocol

Emergency Same-Day Re-Lift Protocol for Under-Processed Lashes - Step-by-Step Corrective Technique with Reduced Timing

To execute a flawless corrective lift safely, follow this precise salon workflow to guarantee uniform results without triggering chemical trauma:

Step 1: Neutralizing and Deep Cleansing the Lash Area

Ensure that all residual traces of Lotion 2 or tint are entirely stripped away. Wash the lash line thoroughly with an oil-free foam cleanser, rinse with a damp cotton pad, and blow-dry the lashes completely using a mini styling fan. Any lingering moisture will weaken your adhesive bond in the next step.

Step 2: Re-aligning on the Shield with Zero Tension

Place a clean silicone shield onto the eyelid. If the original shield size produced zero lift, drop down one size smaller to achieve a more dramatic root curve. Re-attach the eyelashes onto the shield using a minimal, ultra-thin layer of adhesive. Do not over-stretch or pull the hair fibers with extreme tension; the hair is vulnerable, and excessive pulling can cause the roots to lift away from the skin follicle.

Step 3: Applying Lotion 1 with Reduced Compensated Timing

Using a micro-brush, apply Lotion 1 strictly to the root zone and lower one-third of the lash body. Keep the product far away from the fragile tips. Set your digital countdown timer to your newly calculated **Compensated Processing Time**. Stand over your client and monitor the hair visually every 60 seconds. Remove the lotion immediately when the timer ends using a completely dry cotton swab.

Step 4: Double Stabilizing with Neutralizer

Apply Lotion 2 (Neutralizer) over the exact same area. The neutralizer introduces oxygen to rebuild the broken disulfide bonds into their new, lifted shape around the shield. Process Lotion 2 for the exact same duration as your compensated Lotion 1 time. Remove thoroughly with a damp pad.

Operational Checklist: Emergency Re-Lift Stage Controls

To ensure absolute precision and avoid structural stress during each phase of the emergency re-lift protocol, implement these targeted technical controls:

Protocol StepCritical Action RequiredChemical / Mechanical TargetRisk Avoidance Factor
Step 1: CleansingDeep wash with oil-free foam + 100% fan dehydration.Complete removal of lingering oxidizers and surfactants.Prevents patchy adhesive bonding and unintended chemical neutralization.
Step 2: Re-alignmentDrop down one shield size; apply ultra-thin balm/glue layer.Perfect isolation with zero root tension.Prevents follicle mechanical shock and root detachment.
Step 3: Lotion 1Apply strictly to the lower 1/3 of the lash body; use compensated timing.Targeted breaking of remaining disulfide ($S-S$) bonds at the root.Eliminates the risk of frying or singeing the fragile, porous lash tips.
Step 4: StabilizationProcess Lotion 2 matching the exact reduced timing of Lotion 1.Rapid re-oxidation and locking of structural polypeptide chains.Prevents long-term internal processing and subsequent hair structural fading.

Post-Correction Shielding: Flooding the Cortex with Structural Keratin

Post-Correction Lash Cortex Repair with Keratin Serum & Protective Balm - Structural Shielding After Re-Lift

Because the hair structure has gone through two back-to-back chemical reduction processes in a single hour, the internal moisture levels and polypeptide chains will be deeply depleted. The final step of this protocol is not optional; it is a mandatory restorative process to prevent long-term dehydration.

You must immediately flood the open hair cortex with an intensive, low-molecular-weight structural nutrient solution. Applying a highly concentrated professional product like the My Lamination Vitamin Lash Brow Serum is vital. This advanced serum acts as an internal structural shield, delivering amino acids, hydrolyzed keratin, and vitamins deep into the hollow spaces of the cortex, plumping the lash body and sealing the outer cuticle layer shut.

To complete the service and prevent environmental elements from causing moisture loss over the next 24 hours, apply a protective coating of the lipid-rich My Lamination Inspiration Balm. This lightweight barrier locks in the keratin nutrients, ensuring the newly corrected lift looks incredibly glossy, uniform, and healthy.

Protocol Checklist: Under-Processed vs. Over-Processed Lashes

Before initiating an emergency corrective lift, use this professional diagnostic checklist to confirm that your client's hair is truly under-processed and safe to treat:

Physical SymptomUnder-Processed (Safe to Re-Lift)Over-Processed (Do Not Touch!)
Lash Tip ProfilePerfectly straight, holding natural tapered points.Crinkled, singed, fuzzy, or curling backwards.
Mechanical ElasticityFirm, holds shape when touched with a tool.Gummy, weak, overly stretchy when wet.
Corrective ActionImmediate re-lift with 30-50% reduced timing.Deep hydration treatment only; wait 4-6 weeks for hair cycle to reset.

Frequently Asked Questions (FAQ)

Can I use a completely different brand of lift lotions for the corrective lift session?

No. It is highly recommended to stay within the exact same brand system for the re-lift session. Different brands use vastly different chemical bases, pH levels, and processing strengths. Mixing brands back-to-back can trigger an unpredictable chemical reaction that could damage the hair cuticle.

What if the lashes drop again after the second compensated lift attempt?

If the lashes fail to hold a curl after a proper corrective attempt, stop immediately. The hair follicles are likely dealing with a deep hormonal resistance or a severe lack of structural disulfide bonds. Send the client home with an intensive keratin serum and schedule a fresh baseline appointment in 4 to 6 weeks.

Is it safe to tint the eyelashes during a corrective re-lift appointment?

Yes, you can tint, but you must be extremely cautious. Tinting requires a developer (oxidant) which can add extra structural fatigue to the hair. If you choose to tint after a re-lift, drop your developer volume down to a gentle 1.5% or 2% concentration, and reduce the tint processing time to just 2 to 3 minutes max.

Conclusion: Master Stylists Control the Chemistry

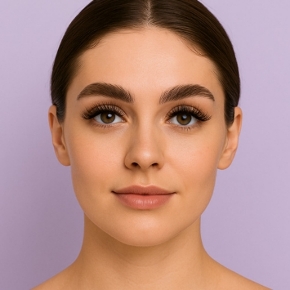
An under-processed lash lift is a stressful situation, but a master stylist doesn't rely on luck to fix it—they rely on chemical science. By applying Compensation Theory, accurately checking hair elasticity, and using precise, reduced exposure windows, you can easily turn a salon error into a stunning, uniform lift before your client ever leaves the chair.

The key to handling emergency troubleshooting successfully is equipping your workstation with stable, clinical-grade chemical systems that prioritize hair health. Elevate your salon’s precision and control with premium lifting lines and restorative aftercare treatments. Explore the full professional range directly through Winlash, and transform your lash services into a predictable science that delivers flawless results every single time.

The Brow Arch Architecture: Precision Trimming Using Curved Scissors vs. Straight Shears
Brow Architecture Navigation Menu
  1. The Anatomy of a Brow Hair: Why Blunt Cuts Ruin Lamination
  2. The Engineering Behind Curved Scissors: Following Natural Anatomy
  3. The Engineering Behind Straight Shears: When Geometry Demands Flat Edges
  4. The Lamination Nightmare: Trimming Errors That Destroy Lifts
  5. The Professional Parallel Trimming Protocol (Step-by-Step)
  6. Tool Calibration: Testing Tweezer Symmetry and Scissor Sharpness
  7. Comparison Matrix: Curved vs. Straight Blades in Brow Design
  8. Frequently Asked Questions (FAQ)
  9. Conclusion: Elevating Utility to an Art Form

⚡ Quick Summary: The Trimming Axiom

  • The Core Difference: Curved scissors mimic the natural roundness of the orbital bone, making them ideal for blending and shaping brow perimeters. Straight shears excel at sharp, geometric lines and mapping validation.
  • The Golden Rule: Never cut hair straight across in a horizontal line. This blunt trimming pattern creates immediate visual gaps, steps, and stiff, prickly hairs that ruin a brow lamination.
  • The Strategy: Always brush the hair into its natural growth direction and trim at a parallel angle, thinning the bulk rather than aggressively chopping the length.

In high-end brow styling, there is a very fine line between an elite, feathered brow and a patchy, over-trimmed disaster. One wrong cut can destroy weeks of natural hair growth and leave noticeable gaps in the brow map. Brow trimming is not just about reducing length; it is an architectural process that requires the right tools, exact angles, and a deep understanding of hair anatomy. To deliver premium results, master stylists must master the engineering differences between professional tweezers and scissors.

The Anatomy of a Brow Hair: Why Blunt Cuts Ruin Lamination

Natural Tapered Brow Hair vs Blunt Cut - Why Horizontal Trimming Destroys Brow Lamination Results

Every natural eyebrow hair has a highly specific physiological lifecycle and structural morphology. A healthy, untouched eyebrow hair tapers organically from the root toward the tip, finishing in a very soft, ultra-fine point. This biological tapered profile is essential because it allows the hairs to lay completely flat against the skin’s surface, overlapping and blending over one another to create a cohesive, dense, and fluid brow shape.

When an amateur or untrained stylist performs a heavy, horizontal blunt cut straight across the hair shaft, they completely slice off this natural tapered tip. This leaves behind a thick, wide, flat, and heavy cross-section edge. Without its fine tip, the remaining hair shaft loses its natural flexibility and becomes incredibly rigid, stiff, and prickly to the touch.

When you attempt to lift, redirect, and restyle these blunt-cut hairs during a brow lamination service, they actively rebel against the chemical solution. Instead of lying down smoothly in a sleek, feathered pattern, their rigid bases force them to stand straight out away from the client's face. This erratic growth pattern casts harsh, uneven shadows across the brow map, making the overall design look blocky and unnatural. To maintain fluid movement, an expert stylist must never slice through the hair mass uniformly.

The Microscopic Impact of Blunt Inconsistencies

Under a microscope, a blunt-cut eyebrow hair looks like a chopped log rather than a refined strand. These heavy edges catch light harshly, making the brow color look uneven and patchy. Furthermore, blunt edges make daily grooming nearly impossible for the client at home, as no brow gel or styling wax will have enough hold to tame hairs that have lost their biological taper.

The Engineering Behind Curved Scissors: Following Natural Anatomy

Curved brow scissors are not just a design preference; they are specifically engineered to mimic the complex, rounded curves of the human skull and the orbital bone structure. The stainless steel blades are forged on a precise, upward-curved arc. This unique ergonomic curvature serves a critical safety and functional purpose: it allows the stylist to rest the back of the scissor blades perfectly flat against the skin's surface without digging the sharp, pointed tips into the client's ultra-sensitive eye area.

When trimming along the upper perimeter, the delicate front, or the soft descent of the brow arch, curved shears follow the natural sweep of the brow line seamlessly. They allow you to isolate and trim single, stray hairs right at their biological base while blending lengths perfectly into the dense core body of the brow design. This curved engineering softens the entry and exit points of every single cut, ensuring that your trimming looks fluid, layered, and entirely natural rather than artificial, boxy, and harsh.

The Engineering Behind Straight Shears: When Geometry Demands Flat Edges

Straight shears are manufactured with completely flat, un-curved blades that snap together with absolute geometric uniformity from pivot to tip. These tools are fundamentally not intended for soft blending, delicate feathering, or organic shaping along curved facial bone structures. Instead, straight shears are the ultimate calibration and validation tool for creating sharp, ultra-clean, and high-definition mapping lines.

Straight shears excel at clearing out unruly bulk in a single, crisp, uniform line across the lower perimeter of a brow map, or defining the sharp, dramatic tails of highly structured brow designs. They are also highly favored when working with very coarse, thick, and stubborn hair textures—such as in professional male brow grooming—where clean, solid geometric lines are preferred over soft, wispy edges. However, because the pointed tips of straight scissors project directly ahead in a flat plane, the stylist must maintain an elevated, precise hand angle at all times to prevent accidental nicks or pinching of the skin.

The Lamination Nightmare: Trimming Errors That Destroy Lifts

Combining aggressive, uncalculated trimming with a chemical brow lamination service is one of the quickest ways to cause an absolute styling failure. When brow hair is laminated, its internal disulfide bonds are broken and reset, making the hair chemically straightened and brushed upwards. This temporary placement makes the hairs appear significantly longer than they actually are in their natural state. If you trim the brow perimeter while the hairs are freshly laminated and pinned straight up, you are aggressively shortening hairs that normally lay horizontally to fill the body of the brow.

The nightmare begins roughly one to two weeks after the appointment. As soon as the chemical lamination relaxes slightly, or when the client washes their face and attempts to brush them into a natural daily style, those blunt-trimmed hairs drop back down into their original resting positions. Because they were chopped short while stretched upwards, they are now far too short to reach the next layer of hair, creating immediate, highly visible empty patches, steps, and internal structural gaps. The general global industry consensus is to limit trimming to an absolute minimum during active lamination appointments, focusing exclusively on removing structural rebels that disturb the clean silhouette.

The Professional Parallel Trimming Protocol (Step-by-Step)

Professional Parallel Micro-Trimming Technique with Curved Brow Scissors - Step-by-Step Protocol to Avoid Gaps

To eliminate the risk of accidental gaps and build a perfectly manicured brow arch that retains its natural depth, premium salons rely on a strict parallel micro-trimming protocol. This technique ensures that you soften the heavy hair mass and remove unaligned bulk without altering the foundational fullness of the brow perimeter.

Step 1: Micro-Combing and Directional Isolation

Never attempt to trim brows that are messy, tangled, or holding product residue. Use a clean, dry spoolie brush to comb the eyebrow hairs into their natural, organic pattern of growth.

  • The Front: Gently brush the head of the brow upward and outward at a strict 45-degree angle.
  • The Body & Tail: Brush down and outward along the natural structural descent of the arch line to expose the true outliers.

Step 2: Setting the Perimeter Line

Gently use your spoolie to lift only the longest, wildest tips that extend far beyond the planned, mapped perimeter line.

  • The Hold: Use your index finger to press and hold the base of the hair softly against the skin.
  • The Purpose: This prevents you from over-stretching the hair follicles or lifting the hair too high off its natural plane, which always leads to accidental over-cutting once the tension is released.

Step 3: The Parallel Snip Technique (Angled Micro-Trimming)

Hold your curved scissors with the curve pointing upwards, matching the natural contour of the skull. Do not hold the blades horizontally across the brow line like a lawnmower. Instead, position the scissor blades completely parallel to the angle of hair growth.

  • The Execution: Slide the ultra-fine tip of the blade vertically into the hair mass and make micro-snips at a steep angle.
  • The Chemical Result: This precise point-cutting method cuts individual hair tips at varying heights rather than a flat line. This thins out excess bulk and weight while completely preserving the soft, organic taper of the overall brow shape.

Protocol Checklist: Trimming Angles & Spoolie Guidance

To ensure your hands maintain the correct structural alignment during the parallel trimming protocol, utilize this operational breakdown for each zone of the brow:

Brow ZoneSpoolie Guiding DirectionScissor Blade AlignmentTarget Outcome
The Head (Front)Upward & outward at a strict 45° angle.Vertical (90° parallel to vertical hair growth).Feathered, airy front without boxy edges.
The Arch (Body)Following the natural slope toward the temple.Steep diagonal angle (parallel to follicle slant).Reduced interior bulk while retaining vertical depth.
The TailDownward & outward along the orbital descent.Downward diagonal (following the point of the tail).A sharp, crisp tail end completely free of blunt weight.

Tool Calibration: Testing Tweezer Symmetry and Scissor Sharpness

Curved Brow Scissors vs Straight Shears Tool Calibration and Sharpness Test for Professional Brow Styling

Your finished brow artistry can only be as precise as the physical calibration of the tools sitting on your salon tray. Dull scissor blades do not slice through hair cleanly; instead, they exert uneven pressure that bends, pinches, and crushes the delicate hair shaft before hacking through it. This mechanical trauma leaves behind frayed, split ends that frizz over time and look dry under salon lighting. To test your scissor sharpness, try making a micro-cut into a single fiber of a dry, lint-free wipe. If the fabric bends or snags instead of slicing instantly, the blades have lost their calibration and need immediate replacement.

Symmetry is just as critical when mapping out your foundational brow geometry. To guarantee a flawless balance across both brow arches before you ever make your first scissor cut, you must utilize micro-calibrated, high-grade isolation tools. Working with a professional set like the Premium Metal Tweezer Set provides the ultimate level of structural alignment, zero-slip grip, and balance needed to confidently map, isolate, and sculpt perfectly balanced brow arches across any complex facial bone structure.

Comparison Matrix: Curved vs. Straight Blades in Brow Design

This comparison overview highlights the practical differences and styling applications for both professional blade shapes:

Blade TypeAnatomical AlignmentPrimary TechniqueGap Risk Factor
Curved ScissorsHigh (Matches orbital bone contour)Soft blending, arch detailing, point cutting.Very Low (Blends into hair layers)
Straight ShearsLow (Ignores body curves)Sharp geometric outlines, bulk mapping, thick textures.High (If used horizontally across the brow)

Frequently Asked Questions (FAQ)

Should I trim the eyebrows before or after applying tint?

Always trim the eyebrow hairs *after* the tinting process is fully completed. Tinting often darkens the very fine, translucent baby hairs at the top of the brow line, making the true fullness of the brow visible. If you trim beforehand, you risk cutting hairs that appeared invisible but were necessary to maintain the brow's natural structure.

Why do trimmed eyebrow hairs stick straight out after a few days?

This happens when hairs are trimmed using a heavy horizontal blunt cut instead of an angled parallel cut. Removing the natural tapered tip leaves a thick, rigid cross-section that cannot bend easily, forcing the hair to grow straight outward from the skin follicle.

How can I fix a gap that was accidentally cut into a brow?

You cannot physically fix a cut hair, but you can hide the mistake. Use a deep-staining brow henna or a hybrid dye to stain the skin beneath the gap, creating an optical shadow that covers the space until the hair regenerates. For daily maintenance, recommend a lightweight styling wax or serum to brush neighboring hairs over the area.

Conclusion: Elevating Utility to an Art Form

Mastering brow architecture requires moving away from quick fixes and embracing precision styling protocols. Choosing between curved scissors and straight shears isn't about preference; it's about matching the tool's engineering to the client's anatomy. By switching to angled parallel cutting methods, you ensure every brow stays full, blended, and perfectly styled.

Premium brow styling relies on high-grade tools that hold their edge. Elevate your salon’s precision mapping line with medical-grade steel instrumentation and design kits. Explore the full professional range directly through Winlash, and transform your brow services into an art form that delivers exceptional, long-lasting results every single time.

Professional Decontamination Protocol: How to Clean, Disinfect, and Sterilize Lash Tweezers Without Corrosion
Decontamination Navigation Menu
  1. The Metallurgy of Lash Tools: Why Surgical Stainless Steel Stains
  2. Stage 1: Mechanical Cleaning & Adhesive Dissolution
  3. Stage 2: Chemical Disinfection (The Danger of Over-Soaking)
  4. Advanced Tech: The Role of Ultrasonic Cleaners in Lash Salons
  5. Stage 3: Sterilization (Autoclave vs. Glass Bead Systems)
  6. The Cross-Contamination Risk: Safe Storage Between Clients
  7. Tweezer Death: When to Disinfect vs. When to Discard Your Tool
  8. Comparison Matrix: Chemical Soaking vs. Thermal Autoclave
  9. Frequently Asked Questions (FAQ)
  10. Conclusion: Protecting Your Tools Protects Your Clients

⚡ Quick Summary: The "Anti-Rust" Salon Rule

  • The Core Problem: Tweezers don't rust because of the disinfectant solution; they rust because of over-soaking (leaving them in chemical liquid past the recommended time) and improper drying before storage.
  • The Alignment Risk: Using a razor blade or sandpaper to scrape dried lash adhesive off your tweezers will scratch the protective chromium oxide layer, causing instant oxidation, alignment shifts, and blunt tips.
  • The Clinical Standard: A strict 3-stage protocol—adhesive dissolution, monitored chemical immersion (max 10 minutes), and thorough hot-air or autoclave sterilization—is required to protect your tools and your clients.

For a professional lash artist, a high-precision tweezer is not just a basic piece of metal; it is an extension of your hand. Your isolation speed, fan creation, and overall treatment timing depend heavily on the alignment and grip of your tools. However, one of the most common complaints in high-end salons is that expensive tweezers quickly become dull, stained, or rusted after a few rounds of sanitization. Understanding the science of medical-grade hygiene without compromising your tool's structural integrity is crucial when purchasing and maintaining professional tweezers and scissors.

This evidence-based protocol outlines the exact steps needed to eliminate pathogens, viruses, and bacteria in your workspace while preserving the pristine factory alignment and finish of your metal investments.

The Metallurgy of Lash Tools: Why Surgical Stainless Steel Stains

Surgical Stainless Steel Lash Tweezers Showing Chromium Oxide Passivation Layer - Professional Tool Metallurgy

Most professional extension tools are manufactured from high-grade surgical stainless steel, typically utilizing 410 or 420 martensitic steel grades. A common misconception running rampant throughout the beauty industry is that the word "stainless" implies the metal is an impenetrable, completely immune barrier against corrosion and pitting. In physiological reality, stainless steel is a precise metal alloy that contains a minimum of 10.5% chromium alongside raw iron and carbon.

The magic happens on a molecular level: when the chromium within the steel is exposed to atmospheric oxygen, it undergoes a natural chemical reaction. It forms an invisible, microscopic, and self-healing layer of chromium oxide ($Cr_2O_3$) across the entire surface of the tweezer. This ultra-thin passivation layer acts as a permanent defensive shield, blocking ambient moisture, environmental salts, and harsh salon chemicals from ever reaching or reacting with the highly unstable raw iron molecules resting underneath.

When you introduce harsh mechanical abrasives, leave your instruments submerged in stagnant water pools, or implement highly corrosive chemical solutions, you actively strip away and dissolve this microscopic passivation shield. Once the chromium oxide layer is structurally penetrated, atmospheric moisture, humidity, and chemical salts immediately assault the exposed iron atoms. This triggers an oxidation reaction that creates hydrated iron(III) oxide—otherwise known as rust.

This deep chemical oxidation ruins the factory-polished, smooth surface texture of the metalware. Under microscopic inspection, a rusted tweezer tip displays jagged craters and rough edges. This physical degradation causes ultra-fine eyelash extensions to snag, warp, or completely slip out of your grasp during delicate micro-adjustments and volume fan isolation protocols.

The Hidden Chemical Risk of Martensitic Steel

Because 410 and 420 grades of surgical steel contain higher carbon contents to ensure the tips stay perfectly sharp and hold their alignment under constant pressure, they are naturally more susceptible to chemical attack than lower-grade steels. This means that a single instance of chemical neglect or improper drying can compromise your volume tweezers permanently, causing a microscopic structural shift that alters the tool's tension calibration.

Stage 1: Mechanical Cleaning & Adhesive Dissolution

An absolute, non-negotiable rule of salon hygiene states that decontamination must always begin with a thorough, rigorous physical cleaning. You cannot disinfect or sterilize an object that is covered in physical debris or organic matter. If there are residual microscopic droplets of cured cyanoacrylate (lash extension glue), cosmetic buildup, or dead skin sebum dried onto the precision tip of your isolation tool, pathogenic microorganisms will burrow beneath those crusts. This creates an impenetrable biological shield that completely blocks your disinfecting liquids and thermal heat waves from sanitizing the instrument.

The Golden Clinical Rule: Never scrape your instruments. Using nail clippers, scissors, or industrial razor blades to scrape dried lash adhesive off your tweezer tips creates deep, microscopic gouges and micro-fractures in the steel body. These tiny scratches ruin the flush contact point of your tool and become immediate breeding grounds for bacterial biofilms that resist standard cleaning.

Instead, utilize a dedicated acetone-infused professional tweezer cleanser or a targeted chemical adhesive remover liquid. Submerge only the working tips of your tool into the solvent for 3 to 5 seconds to dissolve the cyanoacrylate bonds completely without stripping the metal's outer finish. Once the glue softens, wipe the tips cleanly and firmly away using an un-shredded, lint-free microfiber wipe. Investing in premium, robust metalware like the Premium Tweezer Volume & Isolation Set ensures that the steel can handle repeated chemical adhesive removals without losing its factory-calibrated spring tension and tactile feedback.

Stage 2: Chemical Disinfection (The Danger of Over-Soaking)

Professional Lash Tweezer Cleaning Process with Adhesive Remover and Disinfectant - Salon Hygiene Protocol

Once the precision tools are completely free of visible glue, cosmetic pigments, and organic matter, they are ready to enter the chemical disinfection phase. It is vital to note that this specific step is where over 90% of tool corrosion and structural degradation occurs in the modern salon environment. Many well-meaning lash artists place their steel instruments into a glass jar filled with Barbicide or a similar hospital-grade liquid disinfectant and leave them submerged for hours, through entire client rotations, or even overnight.

This prolonged immersion is catastrophic for high-end precision steel instruments. Hospital-grade chemical disinfectants are highly concentrated, ultra-potent alkaline or acidic formulations engineered to neutralize bloodborne pathogens, pseudomonas, and fungi within a very specific, strictly timed window—which is exactly 10 minutes for optimal efficacy. Leaving your surgical steel tools submerged past the manufacturer's directed timeframe allows the chemical agents to slowly eat away, pit, and dissolve the protective chromium oxide layer, permanently dulling the fine tips.

The 3-Step Precision Timing Protocol

To eliminate 99.9% of pathogenetic risks without causing a fraction of metal oxidation, salon staff must implement a timed, rigid chemical protocol at their workstations:

  • The Timing Step: Fully submerge the cleaned tweezers into your prepared disinfectant solution for exactly 10 minutes. Do not guess the duration; you must set a digital countdown timer at your lash station the moment the metal contacts the liquid.
  • The Rinsing Step: Remove the instruments immediately when the alarm sounds. Use sterile tongs to lift them out, and rinse the tweezers thoroughly under a stream of cold, running purified water. This step is critical to strip away any remaining chemical surfactants that would otherwise dry onto the steel and cause chemical pitting.
  • The Dehydration Step: Pat the metal completely dry using a clean, lint-free disposable paper towel. Following this, use a handheld electronic styling fan to drive away any trapped moisture from the interior hinge, pivot points, and micro-grooves. Lingering water droplets trapped inside the tight hinge area are the number one cause of deep structural rust formation in salon tools.

Advanced Tech: The Role of Ultrasonic Cleaners in Lash Salons

An increasing number of premium lash lounges are introducing ultrasonic cleaning tanks into their hygiene workflow. An ultrasonic cleaner is not a disinfector or a sterilizer; it is an advanced mechanical cleaning tool. It works through high-frequency sound waves that create microscopic vacuum bubbles in the liquid—a process known as cavitation.

These tiny bubbles implode against the surgical steel body, blasting away microscopic skin oils, cosmetics, and invisible bio-debris from areas that a manual brush can never reach, such as the interior pivot hinges or laser-etched grids on diamond-tip volume tweezers. For optimal results without corrosion risk, run your tweezers through a 3-minute ultrasonic cycle using distilled water and a dedicated enzymatic instrument cleaner, then dry completely before proceeding to thermal sterilization.

Stage 3: Sterilization (Autoclave vs. Glass Bead Systems)

While high-level chemical disinfection successfully eradicates vegetative bacteria, fungi, and lipid-enveloped viruses, it is completely incapable of destroying highly resilient, hard-shelled bacterial spores. To reach the gold standard of clinical hygiene required for complete ocular safety, your professional tools must undergo a final stage of sterilization. This advanced step is an absolute medical necessity if your tweezers have accidentally come into direct contact with a client's broken skin barrier, micro-tears on the eyelid margin, or weeping eye fluids caused by underlying ocular conditions like active blepharitis, dry eye syndrome, or conjunctivitis.

For high-volume commercial salons, a dental-grade autoclave that utilizes saturated, pressurized steam heat is the safest, most reliable method available. However, for immediate workstation decontamination between back-to-back clients, many lash bars utilize dry-heat glass bead sterilizers. When operating a glass bead system, you must ensure the tweezer tips are 100% clean and dry before insertion, as any moisture will cause the hot glass beads to fuse to the steel surface.

Insert only the working end (the bottom one-third) of the tweezer directly into the pre-heated glass beads for exactly 15 to 30 seconds at a regulated temperature of 250°C. Avoid submerging the entire tool body, as excessive thermal exposure can relax the internal alignment of the spring steel, causing the tweezer to lose its perfect closure tension. To maintain a sterile environment throughout this process, ensure your salon is fully stocked with medical-grade sanitization pouches, heat-resistant tool trays, and protective silicone tip guards by exploring our dedicated line of premium lash and brow application accessories to elevate your daily workspace hygiene protocols.

The Cross-Contamination Risk: Safe Storage Between Clients

Sterilized Lash Tweezers in Autoclave Pouch - Professional Storage to Prevent Cross-Contamination

Sterilizing your tweezers is completely pointless if you place them directly back into a contaminated workspace drawer or an open air container exposed to airborne pathogens. Cross-contamination occurs most frequently during tool storage. Once your instruments emerge from the hot-air oven or autoclave, they must remain protected inside sealed environments until the exact moment your client lays on the treatment bed.

Professional protocols mandate storing sterilized tweezers inside airtight, UV-protected acrylic cases or specialized metal enclosures. Never leave the fine tips exposed; always apply clean, sanitized silicone tip protectors to maintain the structural alignment. If using sterilization pouches, do not break the medical seal until you are sitting in front of your client—this transparent display of hygiene directly elevates your salon’s authority and trust factors.

Tweezer Death: When to Disinfect vs. When to Discard Your Tool

Surgical steel is incredibly resilient, but it does not last forever. Every tool eventually reaches a state known as structural fatigue. Repeated heat exposure from autoclaves or dry-heat sterilizers slightly relaxes the steel molecules over time. If your volume tweezers suddenly require double the finger pressure to close, or if you notice handmade 0.03mm mega-volume fans consistently slipping through the "sweet spot," the tool has lost its calibration.

Furthermore, if you spot deep pitting, black pitting scars, or flaking layers on coated or rainbow-tinted tweezers, the metal is structurally compromised. These pitting craters harbor bacteria that chemical disinfectants cannot reach. At this stage, no amount of sanitization can make the tool safe or efficient. A professional lash artist must recognize this "tweezer death" and discard the tool immediately to safeguard treatment speed and client health.

Comparison Matrix: Chemical Soaking vs. Thermal Autoclave

To help salon owners balance time efficiency with tool preservation, this matrix details how each decontamination method affects steel longevity:

Method TypeTarget PathogensCorrosion Risk LevelBest Practice Protocol
Chemical Immersion (Barbicide)Bacteria, Fungi, Viruses (No Spores)High (If soaked past 10 minutes)Immerse for 10 minutes max, rinse instantly, and blow-dry.
Pressurized Steam (Autoclave)All Pathogens + Bacterial SporesLow (If dried during cycle)Place in sterilization pouches; ensure dry cycle completes fully.
Dry Heat (Glass Beads)Surface Pathogens & SporesMedium (Can weaken metal tension)Insert tips only for 15-30 seconds. Avoid touching the structural hinge.

Frequently Asked Questions (FAQ)

Can I use standard isopropyl rubbing alcohol to sterilize my tweezers?

No. Rubbing alcohol (70-90% Isopropyl) is a low-to-medium level disinfectant, not a sterilizer. It will sanitize the surface by killing most active bacteria, but it is entirely incapable of destroying resilient bacterial spores or hard-shelled viruses. Additionally, wiping with alcohol leaves moisture behind that can settle into the pivot point, encouraging hidden rust.

Why did my volume tweezers lose their grip after a heat sterilization cycle?

If you submerge the entire body of a volume tweezer into a dry heat glass bead sterilizer, or expose it to extreme temperatures for too long, you can alter the metal's tempering. Excessive heat can relax the internal spring steel molecules, reducing the tool's tension and alignment, causing your handmade volume fans to fall apart upon pickup.

How can I safely clean plasma-coated or colored tweezers?

Tweezers with a colored, rainbow, or matte black plasma coating require extreme care. Harsh chemical solvents or long chemical baths will dissolve or peel the aesthetic coating. For colored tools, limit chemical immersion to the bare minimum required for hygiene, or switch to premium uncoated surgical stainless steel for intensive medical sterilization cycles.

Conclusion: Protecting Your Tools Protects Your Clients

Before and After Professional Lash Tweezer Maintenance - Clean Sharp Tools vs Rusty Damaged Tweezers

A flawless lash application is impossible without clean, sharp, and perfectly balanced tools. By shifting your salon culture from passive, unmonitored soaking to a highly deliberate, timed 3-stage decontamination protocol, you protect both the safety of your clients and the longevity of your elite metal investments. True mastery of the craft begins with flawless hygiene science.

Ready to equip your salon with high-performance, clinical-grade metalware that withstands rigorous sterilization? Explore our specialized collection of elite steel instrumentation and application accessories directly through Winlash, and elevate your workspace to an uncompromising global standard of health and beauty excellence.

Emergency Color Correction Protocol: How to Fix Ashy, Green, or Over-Darkened Brows
Emergency Navigation Menu
  1. The Science of Over-Processing: Why Brows Turn Too Dark or Ashy
  2. Protocol 1: Mechanical De-pigmentation (The Immediate Emulsification)
  3. Protocol 2: Neutralizing the Undertone (The Lipid Optical Shift)
  4. Troubleshooting Matrix: Quick Salon Fix Guide
  5. Frequently Asked Questions (FAQ)
  6. Conclusion: Protecting Hair Integrity First

⚡ The "Don't Panic" Emergency Card

  • The Cause: High hair porosity (especially after a brow lamination) acts like a sponge, absorbing dye too rapidly and pulling muddy, over-darkened, or ashy tones.
  • The Myth to Avoid: Never use dish soap, baking soda, or harsh facial scrubs. These will disrupt the skin's moisture barrier, cause chemical dermatitis, and split the hair shaft.
  • The Professional Fix: Immediate mechanical emulsification within the first 24 hours using a high-alkaline oil-free foam, followed by a lipid-heavy neutralizing balm to alter the optical tint density.

Every professional brow artist and beauty enthusiast has experienced that heart-stopping moment: you wipe away a fresh application of dye, only to find the client's brows are aggressively dark, muddy grey, or flashing an unnatural hollow green undertone. When a tint goes wrong, the immediate reaction is often panic. However, in the professional beauty industry, color anomalies are treated with chemistry, not stress. Managing over-saturated pigment requires a deep understanding of hair porosity and the mechanics of professional lash and brow tint and dye formulations.

This clinical, step-by-step troubleshooting guide outlines how to reverse over-processed brow transformations safely, protecting the hair's biological health while restoring a flawless, natural tone.

The Science of Over-Processing: Why Brows Turn Too Dark or Ashy

How to Fix Overly Dark Eyebrow Tint After Lamination - Professional Brow Color Correction Guide by Winlash Experts

To understand why an eyebrow tint pulls aggressively dark or unnatural, we have to look directly at the structural integrity and porosity of the hair fiber. Hair porosity refers to your hair's physiological ability to absorb and retain moisture, liquids, or chemical formulations. In a normal state, the cuticle scales lay flat, regulating how fast external products enter the hair shaft. However, when a client has recently undergone a brow lamination, that defensive system is completely altered.

During the chemical lamination process, highly alkaline perming lotions are applied to break down the hair's internal disulfide bonds, allowing the stylist to reshape and lift the brow alignment. A direct side effect of breaking these structural bonds is that the protective outer cuticle scales are forced wide open and remain highly vulnerable. If you immediately apply a standard oxidative dye to a highly porous, freshly laminated brow without adjusting your timing, the hair fiber behaves like a dry sponge in water.

It sucks the pigment molecules deep into the cortex instantly. What normally takes 10 full minutes to process on virgin hair can occur in under 60 seconds on an over-processed, highly porous post-lift brow. When active pigment completely over-saturates the inner cortex, the light waves can no longer reflect off the hair's interior marrow. This lack of light refraction is what makes the eyebrow appear visually dense, ink-black, or muddy grey, completely ruining a soft, natural aesthetic.

The Physics of Optical Saturation

When the hair cortex is packed tightly with synthetic oxidative pigments, it loses its natural transparency. Under a microscope, the hair becomes opaque. This means even under direct salon ring lights or natural Dubai sunlight, the brows will look flat, heavy, and artificially painted on. The key to prevention is reducing processing times by at least 50% on any hair structure that has undergone recent chemical alterations.

The Mystery of the Green Undertone

Why do some brow tints turn a shocking, visible green or muddy khaki color during removal? The answer lies within basic color theory and product formulation. All ash-based, dark brown, cold deep brown, and graphite brow tints rely heavily on a dominant blue or green base pigment. This base pigment is scientifically necessary to suppress and counteract the natural warm orange and brassy red undertones that exist inside human hair melanin.

If the chemical dye formulation processes too quickly due to high porosity, or if the client's hair has a structural lack of warm pheomelanin (which is incredibly common in natural blondes, grey hair, or chemically lightened brows), the cool base pigment dominates the canvas. Because there are no warm undertones to fight against, the blue-green raw dye overpowers the hair shaft. The result is a highly visible, cold olive or green cast across the brow map that looks highly clinical and unwearable.

Protocol 1: Mechanical De-pigmentation (The Immediate Emulsification)

If you catch the over-processing error immediately in the salon chair—or within the critical first 24 hours at home—there is a major scientific advantage: the synthetic pigment has not completely finished its internal oxidation and crystallization process inside the hair cortex. This means a significant percentage of the excess color molecules are still resting loosely within the outer cuticle layers and staining the surface of the skin.

The most important rule here is a people-first safety warning: do not let the client scrub their delicate eye area with volcanic rock particles, abrasive physical scrubs, or harsh facial acids like salicylic or glycolic acid. These aggressive materials will disrupt the already sensitive skin barrier, cause contact chemical dermatitis, and physically fracture the vulnerable hair shaft. Instead, utilize a deep, non-destructive mechanical emulsification process.

Applying a specialized formula like the Professional Foam Cleanser is your definitive first line of defense. This high-density, surfactant-rich foam is engineered to physically surround the loose, un-oxidized dye molecules, lifting them cleanly away from the hair shaft and skin cells before they can permanently lock down and crystallize.

The Deep Cleansing Technique

To execute this immediate de-pigmentation protocol flawlessly in the salon or at home, follow these precise steps:

  • Step 1 (Dispense): Apply a dense, generous pump of the oil-free foam cleanser directly onto the compromised brow area, ensuring the hair is completely saturated from root to tip.
  • Step 2 (Agitate): Using a firm, sterile micro-bristle styling brush, work the dense foam into the hair using deep, controlled circular motions. This mechanical action allows the surfactants to slip beneath the open cuticle scales.
  • Step 3 (Dwell Time): Let the active foam sit undisturbed on the brow for 2 to 3 minutes. The formulation will safely open the surface cuticle layer a fraction more, actively drawing out the dark pigment residues.
  • Step 4 (Extract): Wipe the area clean using a firm, damp cotton pad. You should repeat this exact process up to three times. You will visually see the runoff water transition from a dark, muddy grey color to a completely transparent clear fluid, signaling that the surface pigment has been thoroughly extracted.

Protocol 2: Neutralizing the Undertone (The Lipid Optical Shift)

Neutralizing Green Undertone in Brow Tint Using Lipid Balm - Professional Brow Color Correction Technique

If multiple rounds of mechanical washing leave the eyebrow hair safely lightened, but the underlying color tone remains stubbornly ashy, ghostly grey, or swamp-green, you must shift your strategy from cleansing to color optics. You cannot simply patch another layer of dark dye over the brow to fix the mistake; adding more chemicals will only cause deeper damage and further darken the brow. Instead, you must change how ambient light physically interacts with the internal hair fibers using a lipid-heavy optical shift.

When hair cuticles are chemically dehydrated, dry, and hollow inside, they naturally swallow light waves, dramatically exaggerating dark, flat, and intensely cool tones. By flooding the damaged hair cortex with heavy, ultra-specialized botanical lipids and essential fatty acids, you chemically compress the open cuticle scales back down to a smooth, flat plane. This instantly alters the refractive index of the hair shaft, immediately lifting the visual color profile by up to two full shades and organically warming up cold tones.

To execute this advanced optical color correction safely without altering the lamination shape, we highly recommend an intensive restructuring treatment using the My Lamination Inspiration Balm. This clinical-grade formulation contains a highly concentrated, masterfully balanced cocktail of structural lipids, plant proteins, and vitamins that actively penetrate the damaged, porous cortex.

The Thermal Occlusion Method

For an advanced salon-level fix, apply the balm using a targeted thermal protocol to guarantee deep penetration into the hair cortex:

  • Application: Using a clean disposable applicator, coat the entire eyebrow heavily with the rich lipid balm, ensuring you brush the product against the direction of hair growth to saturate the roots.
  • Processing (Occlusion): Place a small piece of professional plastic cling wrap tightly over the coated brows. Apply a warm, damp compress towel over the plastic layer, allowing it to rest for 5 to 10 minutes.
  • The Outcome: The mild thermal heat forces the nourishing, heavy lipids deep past the open cuticles and straight into the hair shaft. This action physically expands the compacted pigment molecules inside, instantly softening the harshness of the synthetic dye and neutralizing cold green or muddy grey undertones into a rich, luminous, and healthy chocolate brown.

Troubleshooting Matrix: Quick Salon Fix Guide

When an error occurs, use this professional diagnostic chart to safely match the symptom with its clinical salon solution:

Visual ErrorUnderlying CauseThe Emergency Salon Fix
Ink-Black / Over-DarkenedHigh hair porosity or leaving the tint on too long post-lamination.3 rounds of intensive surfactant washing with oil-free foam cleanser. Avoid drying agents.
Hollow Green / Khaki CastCool-base pigments dominating porous blonde or grey hair structures.Apply a lipid balm under a warm compress to compress cuticles and warm up the optical undertone.
Ashy / Muddy Grey ShadowsThe dye has deeply stained dead skin cells in dry patches of the brow map.Gentle mechanical exfoliation with a cream-based scrub followed by heavy oil hydration.

Frequently Asked Questions (FAQ)

Can I use baking soda or lemon juice to lighten my eyebrows at home?

Absolutely not. Baking soda has an incredibly high, abrasive pH that swells the hair cuticle past its breaking point, causing the eyebrow hairs to snap or fall out. Lemon juice is highly acidic and, when exposed to daylight, triggers a phototoxic reaction that can chemically burn the delicate skin around your eyes.

How long does it take for an over-darkened brow tint to fade naturally?

A standard skin stain will naturally shed within 3 to 7 days as your skin cells regenerate. However, the pigment trapped inside the hair cortex will take roughly 3 to 4 weeks to fade significantly through daily face washing and exposure to UV light.

Will a dark tint ruin my brow lamination results?

The color itself will not affect the shape of your lamination, but if you try to scrub the color out using harsh rubbing or aggressive chemicals, you will dehydrate the hairs, causing them to frizz, curl, and lose their sleek lamination alignment.

Conclusion: Protecting Hair Integrity First

Before and After Fix for Over-Processed Dark Brow Tint - Healthy Natural Eyebrow Results Winlash

In the luxury beauty industry, mistakes happen, but a great stylist is defined by how effortlessly they correct them. When a tint pulls too dark, remember that protecting the biological integrity of the hair fiber is always your first priority. By applying professional surfactant emulsification and utilizing heavy lipid neutralizers, you can quickly soften any color crisis without risking hair loss or skin irritation.

The secret to avoiding color disasters is equipping your salon station with the industry's most reliable, scientifically advanced chemical systems. Explore premium, stable formulation lines and advanced restorative aftercare products directly through Winlash, where absolute quality guarantees predictable, stunning beauty results every single time.

Why Your Brow Tint Fades Fast: The Impact of Sebum, Oily Skin, and Skin Prep Protocols
Quick Access: Why Retention Fails
  1. The Biology of Sebum: Why Oily Skin Rejects Pigment
  2. The "Ghosting" Effect: When Prep Goes Wrong
  3. Professional Skin Prep Protocol (Step-by-Step)
  4. Retention Matrix: Skin Type vs. Prep Effectiveness
  5. Comparison: Standard Wash vs. Clinical Prep
  6. Aftercare Habits That Kill Your Tint
  7. Frequently Asked Questions (FAQ)

⚡ Quick Summary: The "Longevity" Secret

  • The Culprit: Sebum (oil) acts as a waterproof barrier. If the skin isn't chemically de-greased, the tint sits on the oil rather than in the skin cells.
  • The Ghosting Effect: Using oil-based micellar waters or heavy creams before tinting guarantees the color will "ghost" or fade within 48 hours.
  • The Fix: A 3-step clinical prep—exfoliate, deep cleanse with oil-free foam, and saline dehydration—can increase stain longevity by up to 300%.

There is nothing more frustrating for a client (or a stylist) than a perfect brow map and a crisp tint disappearing after just one or two face washes. We often hear the complaint: "Why did my brow tint fade so fast?" While product quality matters, the biological reality is that the skin’s natural chemistry is the primary gatekeeper of pigment retention. Understanding how to work with—and not against—the skin's lipid layer is essential for anyone using professional lash and brow tint and dye products.

The Biology of Sebum: Why Oily Skin Rejects Pigment

To truly understand why a tint fails, we have to look at the microscopic landscape of the skin. The culprit is almost always the sebaceous glands. These glands are responsible for producing sebum—a complex, oily cocktail of triglycerides, wax esters, and squalene designed to keep our skin waterproof and protected from the environment. While sebum is great for anti-aging, in the context of brow tinting, it acts as a high-performance chemical barrier.

Most professional brow dyes (including hybrid formulas and henna) are designed to bind with the keratin in the hair and the proteins in the stratum corneum (the top layer of skin). However, pigment molecules are often hydrophilic (water-loving), whereas sebum is hydrophobic (water-repelling). When a client has oily skin, a microscopic "oil slick" covers the brow area, creating a physical wall that the pigment simply cannot climb over.

The Lipid Barrier vs. Pigment Bonding

If the tint is applied directly over an oily surface, the pigment molecules are effectively "suspended" in the oil rather than bonded to the skin. This creates a false sense of security; the brows look dark immediately after the treatment because the pigment is sitting in the oil. However, as soon as the client performs their first at-home cleanse, the oil is emulsified and rinsed away—taking the expensive tint with it. This biological rejection is why oily-skin clients often report the most dramatic "2-day fade."

The "Ghosting" Effect: When Prep Goes Wrong

The "Ghosting Effect" is a term used by elite brow artists to describe a tint that looks perfect in the salon but disappears like a ghost within 48 hours. Many stylists unknowingly sabotage their own work during the preparation phase by using the wrong cleansing agents. Standard makeup wipes or even high-end micellar waters are designed to be "gentle," which often means they leave behind a thin film of glycols, glycerin, or oils to keep the skin feeling soft.

The Hidden Residue of Standard Cleansers

While that soft feeling is nice for a daily facial, it is disastrous for a brow stain. This hidden residue acts as a secondary barrier, preventing the chemical reaction between the dye and the skin cells. To achieve a 10-day stain, a clinical-grade, oil-free approach is mandatory. You aren't just cleaning the skin; you are stripping away the "biofilm" that accumulates from skincare and pollution.

Using a high-performance product like the My Lamination Cleansing Foam 4-in-1 is vital. This foam is engineered to break down the molecular bonds of sebum and heavy environmental pollutants without leaving a slippery film behind. It ensures the skin is a "blank canvas," allowing the pigment to sink into the skin's surface rather than sliding off it.

Professional Skin Prep Protocol (Step-by-Step)

In the beauty industry, longevity is not a matter of luck; it is a matter of protocol. If you want a brow stain to last 7-10 days on the skin instead of the disappointing 2-day fade, you must follow these clinical steps to maximize pigment absorption. This protocol ensures the skin is biologically "hungry" for the dye.

Step 1: Mechanical Exfoliation

The stratum corneum is constantly regenerating, meaning the top layer of skin cells is always on the verge of shedding. If you tint over dead skin cells that are about to fall off, the tint will disappear as soon as those cells naturally detach.

  • Action: Use a gentle, non-oil-based brow scrub.
  • Purpose: To lift dead skin and clear the "pathway" for the dye, especially in sparse areas where the skin stain is the most visible part of the design.

Step 2: Biological De-greasing (Deep Foam Immersion)

Applying foam with your fingers or a flat cotton pad isn't enough to reach the skin hidden beneath a dense brow. The hair follicles themselves often hold onto pockets of oil that can ruin a crisp tail or a clean front.

  • The Tool: You must use a specialized lash cleansing brush.
  • The Motion: Work the foam in firm, circular motions through the hair follicles. This ensures every millimeter of skin is physically and chemically stripped of excess sebum.

Step 3: Chemical Priming & Dehydration

Even after rinsing the foam, the skin may still harbor microscopic moisture or surfactants. To lock the color in, the skin needs to be "thirsty."

  • The Solution: A final wipe with a saline-soaked pad or a dedicated professional brow primer.
  • The Result: This "de-hydrates" the very top layer of the epidermis. When the tint (a liquid) is applied to this dry skin, the skin acts like a sponge, pulling the pigment in deeper and faster than it would on hydrated skin.

Retention Matrix: Skin Type vs. Prep Effectiveness

Understanding how different skin types interact with your prep work allows you to manage client expectations and adjust your technique for the best possible outcome.

Skin CategorySebum LevelStain ChallengeExpected Longevity (with Protocol)
Dry / NormalLowPatchy absorption if not exfoliated.10 - 14 Days
CombinationMediumT-zone oiliness causes faster fading at the head of the brow.7 - 10 Days
Very OilyHighImmediate rejection of pigment if not chemically de-greased.5 - 7 Days

Comparison: Standard Wash vs. Clinical Prep

To illustrate the value of proper preparation, we compared the retention results of standard salon prep versus our clinical protocol on oily skin types:

Prep MethodSkin AbsorptionStain LongevityResult Quality
Standard (Wipe/Micellar)Low (Blocked by residue)1 - 3 DaysPatchy or "faded" look.
Clinical (Foam + Brush)High (Deep penetration)7 - 10 DaysCrispy, sharp, and even.

Aftercare Habits That Kill Your Tint

Even with perfect preparation, the client’s lifestyle plays a role. Once the tint is locked in, it needs time to "settle." If the client goes to a hot yoga class or uses an oil-based nighttime serum immediately, the steam and oil will lift the pigment back out of the skin cells.

We recommend a 24-hour "No Touch" rule. No water, no steam, and definitely no oil-based cleansers. To maintain the shine of the hair while protecting the skin stain, a lightweight, protective barrier like the My Lamination Inspiration Balm can be used sparingly. It keeps the hair hydrated without the heavy oils that would dissolve the skin stain.

Frequently Asked Questions (FAQ)

Why did my tint turn green or ashy after two days?

This is often a result of high sebum production interacting with the dye’s cool undertones. When oil mixes with fading pigment, it can alter the visual color. This is why clinical-grade de-greasing is essential for clients with oily skin.

Can I use a face scrub to make my tint last longer?

Actually, the opposite is true. While exfoliation *before* tinting is good, exfoliating *after* will scrub the tinted skin cells away, causing the color to disappear instantly. Keep scrubs away from the brows for at least 7 days.

Does sweat affect brow tint?

Yes. Sweat contains sodium chloride (salt), which is a natural dehydrator. If you sweat heavily within the first 24 hours, the salt can crystallize on the tint and pull the moisture—and the color—out of the skin.

Conclusion: Long-Lasting Results Start with Clean Skin

If your brow tint is fading fast, the solution isn't necessarily a different color; it's a different prep protocol. By addressing the biology of sebum and using the right clinical tools, you can transform a 2-day stain into a week-long masterpiece. Quality artistry deserves quality preparation.

Ready to upgrade your results? Invest in the professional tools and clinical prep formulas used by Dubai’s top brow artists. Explore the full range at Winlash and give your clients the longevity they deserve.

The Ultimate Chemistry Guide: Henna, Hybrid Dye, or Classic Tint?
Quick access
  1. Classic Tint: Subtle & Hair-Focused Chemistry
  2. Brow Henna: The Plant-Based Skin Stain (Tattoo Effect)
  3. Hybrid Dye: The Evolution of Ocular Color
  4. Comparison Matrix: Longevity and Suitability
  5. The Role of Oxidants: Why Developer Strength Matters
  6. Frequently Asked Questions (FAQ)

⚡ Quick Summary: Which One Should You Choose?

  • Classic Tint: Best for subtle results. Colors the hair shaft only; lasts 3-4 weeks on hair, 0-2 days on skin.
  • Brow Henna: Best for sparse brows. Natural skin staining (tattoo effect) that lasts up to 2 weeks on skin and 6 weeks on hair.
  • Hybrid Dye: The modern powerhouse. Offers the intensity of henna with the speed of tint. Long-lasting skin stain (up to 10 days) and intense hair color.
  • Pro Recommendation: Never use Henna immediately after a Brow Lamination. Stick to Hybrid or Classic dyes with low-volume developers for laminated brows.

In the rapidly evolving world of semi-permanent makeup and brow artistry, the "Color Bar" has become more complex than ever. For professional artists and clients alike, the choice between lash and brow tint and dye products is no longer just about picking a shade; it’s about understanding formulation chemistry. Whether you are aiming for a soft, natural enhancement or a sharp, "makeup-look" skin stain, selecting the right medium is the difference between a satisfied return client and a procedural failure.

This evidence-based guide breaks down the molecular differences between traditional tints, plant-based henna, and modern hybrid formulas to help you master the art of brow customization.

Classic Tint: Subtle & Hair-Focused Chemistry

Classic brow and lash tints have been the industry standard for decades, and for a good reason. They are the "reliable old friend" of the beauty world. These are oxidative dyes, meaning they require a developer (usually 3% peroxide) to open the hair cuticle and deposit pigment inside the shaft. The molecular structure of classic tint is specifically designed to bind with the keratin inside the hair, not the surface of the skin.

Think of classic tint as a semi-permanent hair color for your face. It doesn't try to be a tattoo; it simply wants to make your natural hairs look richer and darker. While classic tints provide a beautifully soft and natural result, they are notorious for their lack of skin staining. If you have full brows and only want to darken the hair, products like RefectoCil Lash & Brow Dye are unparalleled for their reliability and color range. However, for clients with sparse areas or gaps, classic tint will not provide the "shadow" or "filled-in" look they desire.

Why Stylists Still Love Classic Tint:

  • Zero Room for Error: Because it doesn't stain the skin aggressively, any slight slip-up during application is easy to fix.
  • Maximum Naturalness: It’s perfect for the "no-makeup" makeup look. No one will know you had them done; they’ll just think you have great genes.
  • Lash Safety: It remains the safest and most common choice for eyelashes, where skin staining is usually undesirable and messy.

Brow Henna: The Plant-Based Skin Stain (Tattoo Effect)

Brow Henna is fundamentally different from oxidative dyes. Derived from the Lawsonia inermis plant, henna contains "Lawsone" molecules that naturally bind to proteins. Unlike tint, which penetrates the hair, henna coats the hair shaft and stains the top layers of the skin (the stratum corneum).

If you're tired of drawing your brows on every single morning, henna is your best friend. It fills in the "holes" in your brow shape by coloring the skin underneath the hair. Henna does not require a chemical developer; it is usually activated with sterile water or a mineral solution. This makes it a top choice for clients seeking a more natural ingredient profile. Using a professional system like HD CC Brow Henna allows artists to create a "shadow" effect that lasts up to 14 days on the skin, effectively camouflaging gaps in the brow map.

The Henna Checklist: Is it for you?

Henna isn't just a color; it's a treatment. Here is how it behaves on different skin types:

Skin TypeStain LongevityPro Tip
Dry SkinExcellent (10-14 days)Ensure deep exfoliation before application to prevent patchiness.
Oily SkinModerate (5-8 days)Sebum (oil) pushes out pigment faster; use a primer before applying.

Hybrid Dye: The Evolution of Ocular Color

Hybrid Dye is the newest innovation in the beauty market, and it’s currently taking Dubai salons by storm. As the name suggests, it is a chemical hybrid: it functions like an oxidative dye (fast processing, deep hair penetration) but mimics the skin-staining power of henna. It is often referred to as "Liquid Henna" or "Hybrid Stain."

The chemistry involves highly concentrated pigments that are much smaller than classic tint molecules. This allows them to saturate the skin more effectively, leaving a crisp, defined mark. Hybrid dyes are perfect for clients who want the "bold" look of henna but are short on time, as hybrid processing takes only 7-10 minutes compared to henna’s 20-30 minutes. It is also the superior choice for use during lash and brow lifts because it is more compatible with the chemical restructuring of the hair.

Why Hybrid is "The Game Changer":

If you have a busy lifestyle, Hybrid is the middle ground you've been waiting for. It offers the best of both worlds without the long wait times of traditional henna.

  • Speed: In and out of the salon chair in half the time of henna.
  • Intensity: It delivers a very graphic, "sharp" brow tail that looks like it was drawn on with a professional pomade.
  • Versatility: Works beautifully with low-volume developers, making it safer for hair that has just been chemically lifted.

Comparison Matrix: Longevity and Suitability

To help you select the perfect medium for your clients, we have compiled this clinical comparison of performance and results:

FeatureClassic TintBrow HennaHybrid Dye
Processing Time5 - 10 Minutes20 - 30 Minutes7 - 12 Minutes
Skin Stain Duration0 - 2 Days7 - 14 Days7 - 10 Days
Hair Color Duration3 - 4 Weeks6 Weeks6 - 7 Weeks
Best For...Natural, hair-only tinting.Sparse brows & oily skin.Graphic, defined "makeup" look.

The Role of Oxidants: Why Developer Strength Matters

Except for Henna, which relies on natural tannins and water activation, almost every professional coloring process depends on the chemical strength of the developer, also known as the oxidant. In the delicate world of lash and brow lifting, the developer is the "key" that unlocks the hair cuticle. However, using the wrong key can force the lock and cause permanent structural damage. We must be extremely cautious with developer volume because the hair on our face is significantly more fine and sensitive than the hair on our scalp.

A 3% (10 Volume) developer is widely considered the industry standard for classic tinting on "virgin" hair. It provides enough oxygen release to lift the cuticle and deposit pigment effectively. However, when applied to freshly laminated brows or lifted lashes, this standard strength can become a liability. Chemical lifting already softens the hair's disulfide bonds; following up with a high-percentage oxidant can be too aggressive, leading to the dreaded "singed" look, frizz, or over-processing that makes the hair feel like straw.

Understanding the Science of Oxidation Control

When you mix a tint with a developer, a chemical reaction begins. The hydrogen peroxide in the developer breaks down the natural melanin in the hair while simultaneously developing the new dye molecules. If this reaction happens too fast or too intensely—which is exactly what happens with higher volumes—the hair loses its elasticity. This is why professionals are moving toward "Lower Volume, Higher Precision" protocols.

When working on sensitive eye areas or immediately after a chemical lift, professionals prefer lower concentrations to ensure the integrity of the hair remains intact. Using a specialized product like the My Lamination 2% Color Developer provides a significantly gentler oxidation process. It is specifically formulated to open the hair cuticle just enough to deposit the hybrid or classic pigment deeply without causing the structural fatigue or "blowout" associated with 3% or 6% developers.

Professional Protocol: Choosing Your Developer Strength

To provide a bespoke service, you must evaluate the hair's current state before mixing your bowl. Here is the people-first guide to making the right clinical choice:

  • The 1.5% to 2% Window (Low Volume): This is the "Safety Zone." Use this strength for any client who has just received a lash lift or brow lamination. It ensures the color takes beautifully without compromising the new shape or causing the hair to curl back on itself.
  • The 3% Standard (Medium Volume): Best for "tint-only" appointments where the hair has not been chemically treated recently. It is ideal for covering stubborn grey hairs or creating a more dramatic change on very thick, coarse natural brows.
  • The Risks of Over-Oxidation: Using a developer that is too strong doesn't just damage the hair; it also affects the color result. Over-oxidized tint often pulls "warm" or "brassy," leading to unwanted orange or reddish undertones that look unnatural on the skin.
  • Sensitive Skin Protocol: Lower percentage developers produce less of a "tingling" or "stinging" sensation on the skin. For clients in Dubai who may have sun-sensitized skin or seasonal allergies, the 2% developer is a much more comfortable and luxurious experience.

Ultimately, the goal of a professional artist is to deliver color that looks vibrant but feels healthy. By mastering the science of oxidants and choosing lower-percentage, clinical-grade developers, you are not just coloring hair—you are preserving its biological health and ensuring a result that lasts longer and looks significantly more high-end.

Frequently Asked Questions (FAQ)

Can I use Henna immediately after a Brow Lamination?

No. Professional brow artists strictly advise against this. Henna dries out the hair and requires a long processing time, which can lead to over-processed, brittle brows when combined with the chemical restructuring of a lamination. Use Hybrid or Classic tint instead.

Why does Hybrid Dye last longer than Classic Tint?

Hybrid dyes contain a higher concentration of pigment and smaller molecules that stain the skin more effectively. Because it also behaves like an oxidative dye, it locks the pigment deeper into the hair shaft compared to traditional formulas.

Is Henna better for oily skin than Hybrid Dye?

Generally, yes. Henna has a natural affinity for keratin on the skin and tends to hold up slightly better on oily complexions. However, proper skin preparation (cleansing and exfoliating) is the most important factor for any stain longevity.

Conclusion: Upgrading Your Salon's Color Bar

Mastering the "Henna vs Hybrid vs Classic" debate is about more than just aesthetic preference; it is about providing a bespoke clinical solution for every client’s skin type and hair density. A professional artist should always carry a variety of mediums to tailor the longevity and intensity of the result.

Whether you are looking for the natural "tattoo effect" of henna or the high-speed intensity of modern oxidative dyes, using premium, scientifically backed supplies is your guarantee of excellence. Explore the full clinical range of professional coloring solutions at Winlash and elevate your salon's results to a global standard.

The Clinical Protocol: Lash Lifts for Contact Lens Wearers, Blepharitis, and Dry Eyes
Quick Access Menu
  1. The Non-Negotiable Rule: Contact Lenses and Chemical Vapors
  2. Blepharitis Breakdown: Can You Lift Lashes on Inflamed Eyelids?
  3. The Clinical Cleansing Protocol for Sensitive Eyes
  4. Managing Dry Eye Syndrome During a Lash Perm
  5. Frequently Asked Questions (FAQ) for Sensitive Eyes
  6. Conclusion: Prioritizing Eye Health Over Aesthetics

⚡ Quick Summary Card

  • Contact Lenses: Must ALWAYS be removed prior to the procedure. Trapped chemical fumes under the lens can cause severe corneal abrasions or chemical burns.
  • Blepharitis: A lash lift is strictly contraindicated during an active flare-up. Micro-tears on the eyelid can invite severe infection if exposed to perming lotions.
  • Dry Eye Syndrome: Clients are highly susceptible to tear film evaporation during the 60-minute procedure. Hydrating, hypoallergenic under-eye pads and lubricating drops are mandatory.
  • Sanitation: Deep cleansing with an ophthalmologically tested foam and a sterile brush is the only way to prep sensitive eyes safely.

The eyes are the most delicate and highly sensitive biome of the human body. While cosmetic enhancements like lash perms offer an incredible boost in confidence and a low-maintenance morning routine, they introduce powerful chemical agents to the ocular area. For the average client, these procedures are entirely safe when performed correctly. However, if you suffer from pre-existing ocular conditions or utilize vision correction aids, the stakes are significantly higher. Ensuring your salon uses premium lash and brow lift products is only the first step; understanding the physiological interactions between these chemicals and your eyes is where true safety begins.

This evidence-based, clinical guide is designed to navigate the top three ocular concerns in the beauty industry: contact lens usage, Blepharitis (eyelid inflammation), and Chronic Dry Eye Syndrome. We will break down the strict salon protocols that must be followed so that your aesthetic goals never compromise your medical safety.

The Non-Negotiable Rule: Contact Lenses and Chemical Vapors

One of the most dangerous myths in the beauty industry is that keeping your eyes tightly closed during a lash lift is enough to protect your contact lenses. The clinical reality is that you must completely remove any soft, rigid gas permeable (RGP), or cosmetic contact lenses before the treatment begins. There are zero exceptions to this rule.

Lash lifting requires the use of a water-soluble adhesive (to attach the lashes to the silicone shield) and perming lotions containing active structural modifiers like thioglycolic acid or cysteamine. Even when expertly applied to the mid-shaft of the lash, these substances emit invisible chemical vapors as they oxidize and break down the hair's disulfide bonds.

Modern contact lenses, particularly silicone hydrogel varieties, are highly porous. They are specifically engineered to allow oxygen to pass through to your cornea. Unfortunately, this means they act like microscopic sponges, actively absorbing chemical fumes from the surrounding air. If these vapors become trapped in the tear film between the contact lens and your cornea, they create a highly concentrated pocket of toxicity that cannot be blinked away.

This "fume trap" can rapidly lead to acute chemical conjunctivitis, severe corneal abrasions, and extreme, lingering pain. Furthermore, integrating beauty care products into your daily routine after the procedure requires a bare, unobstructed eye to ensure no trapped residues or fumes cause secondary bacterial infections.

💡 Pro Tip for Salons: The "Vision Prep" Station

Clients frequently forget to remove their lenses or simply forget to bring their storage cases from home. To avoid turning clients away or risking their health, set up a dedicated safety station. Providing these medical necessities elevates your salon's E-E-A-T (Expertise, Authoritativeness, and Trustworthiness) instantly:

  • Keep individually wrapped, sterile contact lens cases in stock.
  • Provide travel-sized, single-use sterile saline solution.
  • Offer a clean, well-lit mirror and a sink with antibacterial soap for safe removal before they reach the treatment bed.

Blepharitis Breakdown: Can You Lift Lashes on Inflamed Eyelids?

Signs of blepharitis and safe lash lift assessment on sensitive eyelids

Blepharitis is a chronic, inflammatory condition affecting the eyelid margins. It is most often caused by a bacterial overgrowth (specifically Staphylococcus), clogged meibomian glands, or microscopic Demodex mites living in the hair follicles. Symptoms include red, swollen, intensely itchy eyelids, and crusty, dandruff-like cylindrical debris at the very base of the eyelashes.

Is a lash lift safe during an active Blepharitis flare-up? Absolutely not. Applying chemical lotions, adhesives, and physical tension (pulling and wrapping the lashes tightly onto a silicone shield) to an eyelid that is already compromised by micro-tears and inflammation is a recipe for a severe medical emergency.

The high pH of the perming lotions will easily penetrate the broken skin barrier of an inflamed eyelid. This causes extreme burning, rapid exacerbation of the bacterial infection, and potentially irreversible lash loss (known medically as madarosis). A responsible lash artist must act as a first line of defense and deny the service, referring the client to an ophthalmologist.

However, blepharitis is cyclical. If a client has a history of blepharitis but is currently in full remission, the procedure can be performed safely. You must know exactly what to look for before proceeding.

Visual IndicatorActive Flare-Up (DO NOT LIFT)Full Remission (SAFE TO LIFT)
Lash Base / RootsCrusty flakes, cylindrical "collarettes" wrapping the hair.Completely clean, free of any debris or flaking.
Eyelid Margin ColorAngry red, visibly inflamed, or swollen.Pale pink, smooth, matching the surrounding skin tone.
Client SensationComplaints of itching, burning, or feeling "sand in the eye."No discomfort, normal tear production.

Treating a client in remission requires a meticulous, clinical-grade sanitization process prior to applying any lifting lotions to ensure the biome remains perfectly balanced.

The Clinical Cleansing Protocol for Sensitive Eyes

Professional lash cleansing protocol for sensitive eyes before lash lift

The foundation of eye safety is uncompromising sanitation. The biggest mistake made in salons is relying on standard micellar water, alcohol-based toners, or cosmetic makeup wipes. These are entirely insufficient for preparing the eye biome, especially for clients prone to sensitivity, dry eyes, or past blepharitis.

Makeup wipes physically smear and push debris, oils, and bacteria deeper into the lash root rather than extracting it. Furthermore, micellar water leaves behind a microscopic film of glycols and surfactants that act as a barrier, preventing your lash adhesive and perming lotions from penetrating the hair cuticle evenly.

To safely prep a sensitive eye, you must use an ophthalmologically tested, pH-balanced foaming cleanser. We highly recommend utilizing the My Lamination Cleansing Foam 4-in-1. This specific formulation eradicates heavy oils, dead skin cells, and dangerous bacteria without stripping the skin's natural lipid barrier or triggering a stinging sensation.

However, applying the best foam with fingers or harsh cotton swabs is a procedural mistake. Cotton fibers can snag on lashes and irritate the conjunctiva. To ensure thorough removal of biofilm without irritating the delicate eyelid, professionals must use a dedicated lash cleansing brush. The thousands of ultra-soft micro-bristles can penetrate deeply between individual lashes to sweep away contaminants that are invisible to the naked eye.

The 4-Step Clinical Cleansing Protocol:

  • Step 1 (Dispense): Ensure the client's eyes are completely closed. Apply a single pump of the cleansing foam directly onto the head of the cleansing brush. Never pump the foam straight onto the client's eye, as the sudden burst of air and liquid can cause a startle reflex.
  • Step 2 (Agitate): Gently work the brush into the lash line using soft, downward circular motions. Focus heavily on the root and the spaces between the lashes where sebum, dead skin, and bacteria accumulate. Do not scrub horizontally back and forth, as this pulls the natural lashes out of their follicles.
  • Step 3 (Rinse): Flush the eye area completely with a gentle stream of sterile saline solution or distilled water. You must ensure zero residue of the cleanser remains. Left-over surfactants will create a chemical barrier, preventing the water-soluble lash glue from adhering to the silicone shield properly.
  • Step 4 (Dry): Use a soft, lint-free tissue to carefully dab the moisture away. Never rub. Use a handheld fan to ensure the lashes are 100% bone-dry before beginning the tape-up and isolation process.

Managing Dry Eye Syndrome During a Lash Perm

Managing dry eye during lash lift procedure with proper pads and hydration

Chronic Dry Eye Syndrome occurs when the tear film is unstable, either because the eyes do not produce enough tears (aqueous deficiency) or because the tears evaporate too quickly (lipid deficiency). During a lash lift, the client must keep their eyes closed for 45 to 60 minutes, often under bright, warm ring lights. This prolonged closure without the natural blinking mechanism can cause severe discomfort, stinging, and a gritty sensation.

Furthermore, standard under-eye pads used to isolate the lower lashes often contain active cosmetic ingredients (like collagen or vitamin C) that can trigger allergic reactions in sensitive individuals, causing the eyes to water excessively and ruin the chemical process.

To mitigate this, salons must switch to hydrating, hypoallergenic under-eye gel pads. These specialized pads provide a soothing, cooling effect without aggressive active ingredients, protecting the delicate under-eye skin and preventing tear evaporation during the procedure.

Ocular ConditionSymptoms to Look ForContraindication StatusRequired Salon Protocol
Contact Lens WearerVisible lens edge, dry feeling.ConditionalMandatory removal before prep. Re-insert 2-3 hours post-treatment.
Active BlepharitisRed, swollen margins, crusty roots.Strictly ContraindicatedTreatment denied. Refer to an ophthalmologist. Treat only in remission.
Dry Eye SyndromeGritty feeling, light sensitivity.Safe with PrecautionsUse preservative-free eye drops before/after. Apply hypoallergenic hydrating pads.

Frequently Asked Questions (FAQ) for Sensitive Eyes

Can I go blind from a lash lift if I have sensitive eyes?

No, a lash lift will not cause blindness. The perming lotions are specifically formulated for use near the eye and are applied to the middle of the lash shaft, not the root or the skin. However, improper application leading to a chemical burn on the cornea can cause severe pain and temporary vision blurring, requiring immediate medical flushing.

Can I use my prescription dry eye drops immediately after a lash lift?

Yes. In fact, if you suffer from dry eye syndrome, you should ask your technician to administer a drop of your preservative-free artificial tears immediately after the shields are removed to re-stabilize your tear film. Ensure the drops go directly into the eye and do not soak the freshly permed lashes.

Why do my eyes burn during the procedure even when they are closed?

If your eyes are burning while closed, the silicone shield may be placed too tightly, causing the eyelid to slightly gap and exposing your cornea to the chemical vapors. Speak up immediately so the technician can adjust the shield or use a fan to disperse the fumes.

How long after a lash lift can I wear my contact lenses?

It is clinically advised to wait at least 2 to 4 hours before re-inserting your contact lenses. This allows any residual fumes from the neutralizing lotions to completely dissipate from the lash fibers, ensuring they do not become trapped underneath your lens.

Conclusion: Prioritizing Eye Health Over Aesthetics

A flawless, sweeping lash line should never come at the expense of your ocular health. For individuals with sensitive eyes, contact lenses, or conditions like blepharitis and dry eye syndrome, transparency and proper salon hygiene are your greatest defenders. By enforcing the removal of lenses, strictly evaluating the eyelid for inflammation, and utilizing clinical-grade cleansing tools and hypoallergenic pads, both clients and technicians can ensure a completely safe, irritation-free experience.

Never compromise on the quality of the products used near your eyes. For professionals seeking to elevate their safety standards and for clients demanding the purest, most stringently tested medical-grade beauty supplies, explore the full clinical range at Winlash. Safeguard your vision and let your natural beauty shine with absolute confidence.

The Active Lifestyle Guide: Protecting Your Lash Lift from Gym Sweat, Saunas, and Chlorine
Quick Access Menu
  1. The Science of Sweat vs. Your Lash Lift
  2. Gym Etiquette for Freshly Lifted Lashes
  3. Chlorine and Saltwater: The Ultimate Curl Killers
  4. The Post-Workout Cleanse: Washing Without Wilting
  5. Rehydration: The Secret to a Long-Lasting Lift
  6. Frequently Asked Questions (FAQ) for Athletes
  7. Conclusion & Essential Active Care

⚡ Quick Summary Card

  • The 48-Hour Rule: The most critical period. Avoiding sweat, steam, and intense workouts for the first 48 hours is non-negotiable for the disulfide bonds to lock in.
  • Sweat & Salt Damage: High-intensity workouts release sebum and sodium chloride, which dehydrate the hair shaft and can cause a lash lift to drop prematurely.
  • Chlorine & Sauna Protocol: Chlorine strips natural keratin. Always use a barrier balm before swimming, and limit high-heat sauna sessions that mimic chemical relaxers.
  • Post-Workout Must-Do: Immediately cleanse lashes with an oil-free foam to remove salt, and rehydrate daily with a vitamin-infused serum.

Living an active lifestyle shouldn’t mean sacrificing your beauty routine. For fitness enthusiasts, runners, and beachgoers, a lash lift is often the ultimate beauty hack—it offers a wide-awake, mascara-free look that won't run down your face during a heavy workout. However, a common frustration we see in the salon is clients returning with dropped or frizzy lashes long before the 8-week mark. The culprit? Sweat, steam, and pool chemicals. Understanding the advanced aftercare of lash and brow lift products is essential if you want to maintain that perfect curl through your toughest training sessions.

As professionals catering to a clientele that loves hot yoga, CrossFit, and weekend beach clubs, we know that standard aftercare isn't enough. This clinical-grade guide dives deep into the biology of hair and the chemistry of your sweat, giving you the exact protocols to protect your investment.

The Science of Sweat vs. Your Lash Lift

Effects of sweat and salt on freshly lifted lashes during workout

To understand why a heavy workout threatens your lashes, we need to look deeply at the chemistry of a lash perm. During the treatment, specialized lotions break down the disulfide bonds in your hair, reshape them over a silicone shield, and then neutralize them to lock the new curl in place. However, this stabilization process doesn't end when you leave the salon chair; it takes an absolute minimum of 24 to 48 hours for the keratin fibers to fully harden and seal.

Human sweat is not just water; it is a complex, slightly acidic mixture of water, sodium chloride (salt), urea, and sebum (natural oils). When you sweat heavily during a workout, the salt acts as a harsh dehydrating agent, pulling vital moisture out of the freshly processed, vulnerable lash shaft. Furthermore, the natural oils from your forehead can seep down into the lash line, breaking down the chemical neutralizer prematurely. This destructive combination leads to a phenomenon known as "curl drop," where the lashes revert to their natural, straight state.

Sweat ComponentEffect on EyelashesLash Lift Consequence
Sodium Chloride (Salt)Extracts moisture rapidly from the hair cortex.Severe dehydration, making the lift look frizzy, brittle, or "crispy."
Sebum (Natural Oils)Coats the lash root and breaks down setting agents.Premature "curl drop" and loss of the lifted shape.
Acidic pH LevelsAlters the delicate pH balance restored by the salon neutralizer.Weakens the disulfide bonds before they fully cure.

Gym Etiquette for Freshly Lifted Lashes

If you absolutely must remain active and cannot skip your training, adapting your gym routine is crucial for preserving your lash health. Active lifestyle lash care requires a proactive approach, especially during the vulnerable curing window. Here are the non-negotiable rules for your gym sessions:

  • Headbands are Mandatory: For the first week after your treatment, wear an absorbent, wide sweatband low on your forehead during cardio or heavy lifting. This acts as a physical barrier, preventing salty sweat from dripping into your eyes and pooling at the lash root.
  • The Towel Rule (Dab, Don't Rub): When drying your face at the gym, never rub a towel across your eyes. The mechanical friction against the rough fibers of a gym towel will not only misalign the lifted lashes but can also cause severe breakage at the root. Always gently dab the surrounding skin.
  • Avoid the Hot Yoga Trap: Bikram yoga, steam rooms, and saunas are the arch-enemies of a fresh lash lift. Extreme heat and high humidity act exactly like a chemical "relaxer," softening the newly formed keratin bonds. We strongly advise avoiding saunas entirely for at least 72 hours, and limiting sessions to 10 minutes thereafter.
  • Adjust Your Cardio Intensity: During the first 48 hours, swap high-intensity interval training (HIIT) that causes excessive sweating for low-impact exercises like light walking, stretching, or Pilates.

Chlorine and Saltwater: The Ultimate Curl Killers

Swimming is an excellent full-body workout, but the chemical environment of a pool—or the high salinity of the ocean—is disastrous for processed hair. Chlorine is a powerful oxidizing agent designed to kill bacteria, but it cannot differentiate between bacteria and the proteins in your hair. It aggressively strips natural keratin and protective moisture from hair fibers. This oxidative stress leaves your lashes brittle, frizzy, and highly prone to snapping off at the tips.

🌍 Local Advantage: Dubai Beach Club Survival

In the UAE, spending weekends at the pool or beach is a lifestyle staple. The combination of intense UV rays and saltwater is a double threat. Before you dive in, you must protect your lashes. Applying a high-grade, water-resistant barrier is non-negotiable to prevent the saltwater and chlorine from penetrating the hair cuticle.

To shield your lift and ensure swimming with a lash perm does not ruin your salon results, we recommend using a specialized protective layer before any aquatic activity. The My Lamination Inspiration Balm acts as a powerful occlusive barrier. It wraps the lash in protective nourishment, completely repelling chlorinated water and ocean salt.

Follow this strict protocol before and after hitting the water:

  • The Pre-Swim Coat: Apply a tiny amount of the barrier balm with a clean spoolie 10 minutes before entering the water to create a waterproof seal over the hair cuticle.
  • Avoid Direct Submersion Early On: For the first 48 hours post-lift, keep your head above water completely. Do not wear tight swim goggles that press against the lashes and physically bend them.
  • The Immediate Rinse: The moment you step out of the pool or ocean, rinse your face with fresh, clean bottled water. Never let pool water dry and bake onto your lashes in the sun, as the chlorine crystals will rapidly degrade the hair shaft.

The Post-Workout Cleanse: Washing Without Wilting

Gentle post-workout lash cleansing routine to protect lift

Leaving dried sweat and salt on your lashes post-workout is a guaranteed way to ruin your lift. Imagine the stiff, crunchy feeling of your hair after a long day swimming at the beach—that exact same crystallization happens to your delicate eyelashes when gym sweat evaporates. However, aggressively washing them with standard, heavy facial cleansers can be just as bad. You need a pH-balanced approach.

Many athletes make the critical mistake of using their regular face wash or makeup remover in the gym showers. Traditional cleansers often contain hidden oils, heavy sulfates, or harsh surfactants that weaken the chemical bonds of your lift. Immediately after your workout, you must cleanse the eye area specifically to remove sebum and sodium chloride without stripping the protective cuticle.

Using an oil-free, gentle foaming cleanser is the professional industry standard for post-workout lash lift care. We highly advise incorporating the My Lamination Cleansing Foam 4-in-1 into your gym bag. To ensure you are washing without wilting your curl, follow this professional post-gym protocol:

  • Step 1: The Cool Down: Wait until you have stopped sweating completely. Washing while your pores are still actively producing sweat is counterproductive.
  • Step 2: Dispense and Target: Pump a small amount of the cleansing foam directly onto a soft lash cleansing brush. Never apply the foam directly and vigorously with your fingers, as rough friction can physically bend and disrupt the lashes.
  • Step 3: The Directional Sweep: Gently work the brush through the lashes strictly in the direction of the curl (from the root sweeping upward to the tip). Never use side-to-side horizontal scrubbing motions.
  • Step 4: The Cool Rinse: Rinse thoroughly with cool or lukewarm water. Avoid blasting your face with hot shower water, as excessive heat can soften the keratin bonds.
  • Step 5: Air Dry and Spoolie: Gently dab the surrounding skin with a towel—do not rub. Let the lashes air dry completely, then gently comb them back into their fluffy shape with a clean spoolie brush.

Rehydration: The Secret to a Long-Lasting Lift

Daily rehydration with vitamin lash serum for active lifestyle

Because an active lifestyle inherently dries out the body and hair, daily rehydration is your most important task. Think of your lashes just like your muscles: exactly as your body requires a protein shake to recover after a heavy lifting session, your chemically treated lashes need targeted keratin and vitamins to rebuild and stay strong.

Sweat, environmental stress from outdoor runs, and the unavoidable friction from wiping your face cause microscopic tears along the lash shaft. If left untreated, these micro-tears lead to severe brittleness, causing the lashes to snap or the lift to look frizzy and unkempt. To counteract the physiological stress of the gym, you must integrate high-quality beauty care products into your nightly routine.

A potent, clinical-grade serum acts as a nightly rehabilitation treatment. Applying the My Lamination Vitamin Lash & Brow Serum every night ensures your lashes receive a concentrated dose of active ingredients. This routine guarantees that even with a rigorous workout schedule, your lift remains glossy, elastic, and perfectly curled for the full 8 weeks.

To understand why this is a non-negotiable step for athletes, here is exactly how the specific ingredients in a premium serum work to repair post-workout damage:

Active IngredientBiological Function for LashesPost-Workout Benefit
Panthenol (Pro-Vitamin B5)Penetrates the hair cortex to lock in deep moisture and improve flexibility.Reverses the severe dehydration and stiffness caused by salty sweat and pool chlorine.
Vitamin CA powerful antioxidant that boosts natural collagen production at the root.Protects the follicle from oxidative stress and free radicals found in shared gym environments.
Vitamin ERestores the protective lipid layer on the outside of the hair cuticle.Brings back the dark, healthy shine that often fades after exposure to pool chemicals and sun.
Keratin & PeptidesStructural protein blocks that rebuild and fortify damaged hair fibers.Fills in the microscopic tears caused by towel friction, swim goggles, or rubbing sweaty eyes.

Frequently Asked Questions (FAQ) for Athletes

How soon can I go to the gym after a lash lift?

You must wait an absolute minimum of 24 hours, but 48 hours is the professional recommendation. The chemical bonds in your lashes are still curing during this time. Sweating prematurely will cause the curl to drop completely or become distorted.

Does sweat make a lash lift drop faster?

Yes. The sodium chloride (salt) in sweat dehydrates the lash fibers, while the natural oils (sebum) can break down the lift. Frequent heavy sweating without proper post-workout cleansing will significantly reduce the lifespan of your treatment.

Can I go in the sauna with a brow lamination or lash lift?

You must avoid saunas and steam rooms completely for the first 48 hours. Even after this period, frequent sauna use is not recommended. The intense heat and moisture mimic the chemical relaxing process, which can soften the keratin bonds and flatten your lift.

Is it safe to use waterproof mascara at the beach after a lash lift?

No. Waterproof mascara is extremely drying and requires harsh, oil-based removers to take off. The friction of removing it, combined with the drying effects of the sun and saltwater, will lead to brittle, broken lashes. Stick to a hydrating lash serum or a dedicated protective balm instead.

Conclusion & Essential Active Care

You do not have to choose between hitting your personal best at the gym and having flawless, lifted lashes. The key is shifting from a passive aftercare routine to a proactive, protective one. By respecting the initial 48-hour curing window, using physical barriers against sweat, and committing to daily vitamin hydration, your lashes will survive everything from hot yoga to saltwater swims.

Are you ready to upgrade your gym beauty bag? Don't let your intense workouts ruin your salon results. Protect your investment and explore the finest clinical-grade, active-lifestyle-approved products at Winlash, the UAE's trusted destination for professional lash and brow care.

Is a Lash Lift or Brow Lamination Safe While Pregnant? (2026 Evidence-Based Review)
Quick Access
  1. The Science of Chemical Absorption: Skin vs. Hair
  2. The Crucial Difference Between Lash Lifts and Brow Laminations
  3. The Hormonal Sabotage: Why Your Lash Lift Might Fail
  4. The Trimester-by-Trimester Safety Protocol
  5. Posture and Comfort: The Physical Risks in the Salon
  6. Pregnancy-Safe Alternatives & Premium Care
  7. Frequently Asked Questions (FAQ) for Expecting Mothers
  8. The Final Verdict: Empowering Your Beauty Choices

⚡ Quick Summary Card: Pregnancy & Lash/Brow Safety

  • Medical Consensus: Generally considered safe after the first trimester, provided there is proper ventilation and no skin contact with perming lotions. Always consult your OB/GYN first.
  • Lash Lift vs. Brow Lamination: Lash lifts are safer because the chemicals are applied to the hair shaft, not the skin. Brow lamination involves direct skin contact, increasing the risk of transdermal absorption.
  • The Hormonal Factor: Pregnancy hormones can change hair porosity, meaning a lash lift might drop faster or not take at all.
  • Best Practice: Always request a 48-hour patch test due to heightened immune responses and skin sensitivity during pregnancy.

Pregnancy is a beautiful, transformative journey, but it also comes with an overwhelming list of "do's and don'ts." For many expecting mothers, maintaining a low-maintenance beauty routine is essential for feeling confident and put-together, especially as energy levels fluctuate and the delivery day approaches. A common question that arises in the modern beauty landscape is whether chemical treatments like lash perms and brow laminations are safe for the baby. If you are looking to maintain your glow, understanding the clinical realities of lash and brow lift products during pregnancy is non-negotiable. This 2026 evidence-based guide breaks down the science of chemical absorption, hormonal shifts, and salon safety to give you the definitive truth.

The Science of Chemical Absorption: Skin vs. Hair

Comparison of chemical absorption in lash lifts vs brow lamination during pregnancy

When evaluating the safety of any cosmetic procedure during pregnancy, the primary medical concern is transdermal permeability—the ability of a chemical to cross the skin barrier, enter the bloodstream, and potentially reach the placenta. The core chemicals used in lifting treatments include thioglycolic acid, cysteamine hydrochloride, and neutralizing agents.

The hair shaft itself is dead tissue. When chemicals are applied directly to the hair (as in a precision lash lift), they alter the disulfide bonds within the keratin structure to reshape the hair. Because these chemicals are applied millimeters away from the lash line and do not touch the living skin of the eyelid, the risk of transdermal absorption is practically zero. However, using high-quality, professional-grade brow and lash lift materials is critical. Cheap, uncertified products may vaporize or bleed onto the skin, creating unnecessary risks.

The Crucial Difference Between Lash Lifts and Brow Laminations

While often grouped together, lash lifts and brow laminations present entirely different risk profiles for pregnant women.

  • Lash Lifts: The procedure uses a silicone shield placed on the eyelid. The lashes are glued to the shield, and the perming lotions are applied strictly to the middle of the lash fibers. A skilled technician ensures no product touches the delicate skin of the eyelid or the conjunctiva of the eye. Therefore, systemic absorption is incredibly unlikely.
  • Brow Laminations: This is where the medical community urges higher caution. Brow lamination involves applying the exact same chemical perming and neutralizing lotions directly onto the skin of the brow bone. The skin on the face is highly vascularized. Furthermore, pregnant women often experience heightened skin permeability and sensitivity. Direct chemical-to-skin contact increases the minimal (yet existent) risk of chemical absorption, alongside a high risk of contact dermatitis.

The Hormonal Sabotage: Why Your Lash Lift Might Fail

Even if you navigate the safety concerns, there is a biological wildcard during pregnancy: the endocrine system. The massive surge in estrogen and progesterone fundamentally alters your hair's growth cycle (the anagen, catagen, and telogen phases) and its physical structure.

Many pregnant women experience what technicians call the "Pregnancy Hair Drop." Hormonal changes can cause the hair cuticle to become highly resistant, altering its porosity. This means that the perming lotions cannot properly penetrate the hair shaft to break and reform the disulfide bonds. The result? You might sit through a 60-minute procedure, only to find your lashes completely straight the very next day, or they might over-process and become frizzy. Furthermore, the immune system is hyper-vigilant during pregnancy to protect the fetus. You can suddenly develop a severe allergic reaction to a product you have used safely for years. This is why a 48-hour patch test is an absolute medical necessity, regardless of your history with the salon.

The Trimester-by-Trimester Safety Protocol

Trimester safety guide for lash lifts and brow lamination during pregnancy

Timing is everything when it comes to salon treatments during gestation. Here is the doctor-approved breakdown of when it is considered safest to proceed.

💡 Pro Tip for Salon Owners & Technicians:

Always require a signed consent form for expecting clients and switch to cysteamine-based (ammonia-free) lotions, which emit fewer fumes and are vastly gentler on the respiratory system of pregnant women.

  • First Trimester (Weeks 1-12): This is the most critical period of fetal organogenesis (organ development). The medical consensus strictly advises against any unnecessary chemical exposures, hair dyes, or perms during this window. Furthermore, heightened morning sickness can make lying down and smelling salon chemicals unbearable.
  • Second Trimester (Weeks 13-26): Generally considered the safest "sweet spot." The major developmental milestones have passed, nausea usually subsides, and lying on your back is still relatively comfortable. If you are going to get a lash lift, this is the time to do it using clinical-grade systems like the MyLamination 3-Step Brow & Lash Lamination Kit, known for its rigorous European safety standards.
  • Third Trimester (Weeks 27-40): While chemically safe, the physical logistics become dangerous. Lying flat on your back for the duration of the treatment is strongly discouraged by obstetricians.
TrimesterSafety LevelPrimary Clinical RiskExpert Recommendation
1st Trimester
(Weeks 1-12)
High Risk ⛔Fetal organogenesis, severe morning sickness, high fume sensitivity.Strictly avoid chemical perms. Switch to pregnancy-safe nourishing serums and balms.
2nd Trimester
(Weeks 13-26)
Safest Window ✅"Pregnancy hair drop" (hormonal resistance causing perm to fail or drop early).Proceed with caution. Mandatory 48-hour patch test. Use cysteamine (ammonia-free) lotions.
3rd Trimester
(Weeks 27-40)
Physical Risk ⚠️Supine Hypotensive Syndrome (drop in blood pressure from lying flat on the back).Avoid lying flat. Salon must provide a wedge pillow (45-degree angle) or skip the treatment.

Posture and Comfort: The Physical Risks in the Salon

Pregnant woman receiving safe lash lift with proper posture and wedge pillow support

Beyond chemicals, the physical act of getting a lash lift poses a unique physiological risk to heavily pregnant women known as Supine Hypotensive Syndrome. When a pregnant woman lies flat on her back (supine position) for an extended period, the heavy uterus can compress the inferior vena cava—the major vein returning blood from the lower body to the heart.

This compression leads to a sudden drop in blood pressure, causing dizziness, nausea, shortness of breath, and a reduced oxygen supply to the baby. Because a lash lift takes 45 to 60 minutes of lying completely still with your eyes closed, this poses a significant risk in the third trimester.

🌍 Local Advantage: Dubai's VIP Maternal Care

In cosmopolitan hubs like Dubai and Abu Dhabi, premium salons catering to the expat and local markets are now offering "Maternal Lash Beds." These involve using specialized wedge pillows to elevate the client's torso to a safe 45-degree angle, or positioning the client in a slight left-lateral tilt to ensure perfect blood flow during the treatment.

Pregnancy-Safe Alternatives & Premium Care

If you or your doctor decide that the risks of chemical processing outweigh the benefits, you do not have to sacrifice your beauty routine. The industry has evolved rapidly, offering powerful, non-toxic alternatives that focus on health and nourishment rather than chemical restructuring.

Instead of a chemical perm, many pregnant women turn to deep hydration therapies. Brands like My Lamination lead the market in clinical lash health. By incorporating high-end beauty care products into your daily routine, you can achieve naturally darker, thicker, and beautifully conditioned lashes without a single drop of perming lotion.

The ultimate secret weapon for pregnant women is a hormone-free, prostaglandin-free serum. We highly recommend using the My Lamination Vitamin Lash & Brow Serum (10ml). Packed with essential vitamins (A, B, C, E, F, K), panthenol, and natural extracts, this serum deeply nourishes the hair follicle safely, combating the "pregnancy hair drop" and keeping your natural lashes and brows incredibly lush and glossy until your delivery day.

Frequently Asked Questions (FAQ) for Expecting Mothers

Based on the most searched questions by expecting mothers and professional salon artists, here are the definitive medical answers:

Can the smell of lash lift glue cause nausea or harm the baby?
While the fumes from lash lift adhesives and perming lotions (especially those containing ammonia) are generally not toxic enough to harm the fetus through inhalation, they can trigger severe nausea and exacerbate hyperemesis gravidarum (morning sickness) in the mother. Salons must ensure robust ventilation, and pregnant clients should request a face mask if sensitive to odors.
Is Keratin Lash Botox safe for pregnant women?
Yes! In fact, Lash Botox (which is a marketing term for a deep conditioning keratin and peptide mask, not actual Botulinum toxin) is entirely safe and highly recommended. It contains no perming chemicals and acts purely as an intense moisturizer to strengthen the natural lashes during pregnancy.
I got a brow lamination before knowing I was pregnant, what should I do?
Do not panic. The amount of chemicals used in a standard brow lamination is incredibly small, and the transdermal absorption rate is minimal. The risk to the fetus is statistically negligible. Simply inform your OB/GYN during your next visit, and avoid further chemical treatments on your skin for the remainder of your first trimester.
Can I use eyelash extension glue while pregnant?
Eyelash extensions are generally safe because cyanoacrylate adhesive does not touch the skin. However, pregnancy increases the risk of developing a sudden allergic reaction (contact dermatitis) to the carbon black or acrylates in the glue. If an allergic reaction occurs, treating it is complicated, as many antihistamines and steroids are restricted during pregnancy.

The Final Verdict: Empowering Your Beauty Choices

Safe pregnancy beauty routine with vitamin lash serum and non-chemical care

The clinical truth is that while lash lifts are largely considered safe post-first trimester due to the lack of skin contact, brow laminations carry a slightly higher risk of irritation and absorption that expecting mothers should carefully weigh. Your body is undergoing a miraculous, complex hormonal shift, and sometimes, the best approach is the gentlest one.

Always prioritize an open conversation with your healthcare provider before booking a salon appointment. If you decide to embrace your natural beauty during these nine months, investing in premium, vitamin-rich, pregnancy-safe serums will ensure you remain glowing and radiant. For the highest quality, scientifically backed lash and brow care trusted by professionals across the UAE, explore the full clinical range at Winlash and step into motherhood with confidence and pristine health.

Winlash Dubai equips lash & brow professionals and dedicated at-home users with 900+ pro-grade products—including award-winning My Lamination lash lift kits and cruelty-free options. Backed by Ravabeauty (est. 2018) and a 50-member expert team, we partner with 13 global brands to deliver salon-quality tools and aftercare tuned for Dubai’s climate, with fast delivery across Dubai, Abu Dhabi, and Sharjah.

Exclusive Distributor Fast UAE Delivery Climate-Tuned Aftercare