


Quick Access Navigation Menu
- Is it actually safe to use a lash lift kit on your brows?
- Which lash lift kits are actually compatible with brow lamination
- Prep and patch testing before you start
- How to use a lash lift kit for brow lamination safely, step by step
- What to do if something goes wrong
- Aftercare that keeps your brows laminated and healthy
- The bottom line
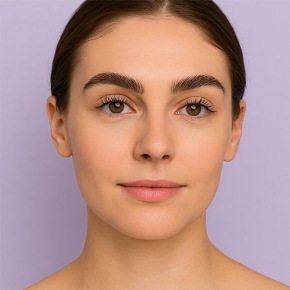
If you're wondering how to use a lash lift kit for brow lamination at home, you're not alone — and the answer isn't a simple yes or no. You already have a Lash & Brow Lift kit sitting in your bathroom drawer. You've seen stunning brow lamination results all over your feed, and you're not trying to pay salon prices every six weeks. So the logical question is: can you just use that same kit on your brows instead?
The honest answer is yes, some lash lift kits can be repurposed for eyebrow lamination, but the word "some" is doing serious work in that sentence. Lash lift perm solutions are formulated for hair strands, not direct skin contact. Brow lamination puts those same chemicals directly on your forehead skin, which is a fundamentally different exposure profile. That's why you can't grab any lash lift kit off the shelf and start brushing chemicals onto your brows.
This guide covers which kits are actually compatible with brow use, how to adjust your processing times, and how to do the whole treatment safely from start to finish. No vague beauty-blog guarantees, just a clear, practical walkthrough you can follow with the right product in hand.
Is it actually safe to use a lash lift kit on your brows?

The honest answer: it depends on the formula
The core issue comes down to chemistry. Most lash lift perm solutions contain either thioglycolic acid (TGA) or glyceryl thioglycolate (GTG) as the active reducing agent. Neither of these is automatically safe for the skin around your brows. Ruthie Belle, a well-known professional lash brand, explicitly states that their curling lotion may not be used on eyebrows because it can leave the surrounding skin red and irritated. The reasoning is straightforward: brow lamination requires a formula that is stronger on the hair yet gentler on the skin, and that is a different formulation target entirely.
GTG comes with an additional regulatory flag worth knowing about. In Canada, thioglycolic acid esters, including GTG, are now prohibited in brow lamination products due to sensitization concerns, see Canada's Cosmetic Ingredient Hotlist update. The U.S. has no outright ban, but FDA cosmetic safety standards still apply, and a GTG-containing kit should give you pause before you use it anywhere near your face.
Why formulation quality matters more than you think
Any time a chemical compound is applied near sensitive skin or tissue, formulation quality and rigorous testing aren't optional extras, they're foundational. That discipline belongs in your DIY routine too. Read your kit's label, safety data sheet, and manufacturer instructions before you open a single sachet, not after something goes wrong.
Which lash lift kits are actually compatible with brow lamination

Brands that explicitly label for brow use
My Lamination: One of the most innovative and globally acclaimed dual-action systems on the market. The premium My Lamination Lash & Brow Lift Kit is enriched with an intensive nourishing matrix of vitamins, keratin, and essential minerals; its gentle yet highly effective formulation is clinically engineered to deliver flawless structural results on both eyelashes and eyebrows without triggering harsh topical skin reactions.
Shinee: A highly advanced, professional 3-step sachet framework engineered seamlessly for both lash lifts and brow laminations. Utilizing a stabilized reducing matrix, it effectively breaks down rigid hair cross-links—making it exceptionally reliable for taming coarse hair profiles—while maintaining a balanced, skin-friendly profile suitable for direct forehead contact.
Dolly's Lash: A classic and highly dependable revolutionary system explicitly built to execute both eyelash and eyebrow treatments in a single sitting. It simplifies the lamination process with clear, multi-purpose application parameters, completely eliminating the need to guess with complex chemical variations or switch between separate, single-service brands.
What to check on any kit before using it on brows
If you already have a kit at home, run through this checklist before you touch your brows:
- Does the manufacturer's instruction sheet specifically mention brow use or skin contact?
- Does the ingredient list include GTG, which raises compatibility and regulatory concerns?
- Does the brand's website address brow application directly, not just lash use?
- Is there a manufacturer warning against skin or brow application anywhere in the documentation?
If any of these flags come up, keep that kit for lash use only and buy a product that explicitly covers brow application. Guessing with chemicals near your eyes is not worth the risk.
Prep and patch testing before you start
How to patch test (and why skipping it is a bad idea)
Apply a small amount of the perm solution behind your ear or on the inside of your elbow 24 to 48 hours before the full treatment. If you notice redness, itching, swelling, or a burning sensation within that window, stop there and do not proceed with the full treatment. Brow lamination puts active chemicals directly on forehead skin and within close range of your eyes, so an allergic reaction in that zone is not a minor inconvenience you can push through. For more on allergy risks and signs to watch for, read about allergy concerns when doing a lash lift.
Who should skip this DIY entirely
Certain conditions make any chemical brow treatment a bad idea without professional supervision, including rosacea, eczema, active contact dermatitis, broken or irritated skin around the brows, and any history of reactions to hair-processing chemicals. If any of these apply to you, a consultation with a licensed esthetician or dermatologist is the right first step.
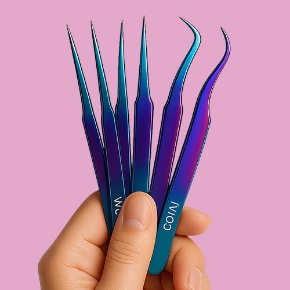
Before you start, gather everything you need: petroleum jelly to protect the skin border, a clean spoolie, a small brow brush or comb, plastic wrap or cling film, a timer, and a few cotton pads. Having all of it within reach before you open the perm sachet makes the process noticeably calmer and reduces the chance of a rushed mistake.
How to use a lash lift kit for brow lamination safely, step by step

Step 1: Apply the perm solution and set your timer
Apply a thin layer of the lift or perm solution to your brows using a spoolie, combing the hairs upward into the shape you want. Run a thin line of petroleum jelly along the brow border to protect the surrounding skin. Timing is the most critical adjustment you'll make. Most brow lamination guidelines recommend around 8 minutes for fine brow hairs; medium to coarse brows can go up to 10 to 12 minutes. These times are significantly shorter than standard lash lift processing times. Going past 12 minutes puts you at real risk of overprocessing, so set an actual timer rather than estimating.
Step 2: Remove, then apply the neutralizer for brow lamination
Gently wipe off the perm solution with a damp cotton pad, working in the direction of hair growth. Apply the neutralizer or fixing lotion in a thin, even layer over the same area and leave it for 8 to 10 minutes. If you're using Sugarlash PRO or a similar kit, the instructions call for brushing at a 45-degree angle during the fix step to lock the hairs in the correct upward direction. Remove with a clean damp cotton pad once the time is up.
Step 3: Optional nourishing and tint step
If your kit includes a nourishing or conditioning step, apply it now and follow the recommended timing. For tinting, some systems like Sugarlash PRO allow you to mix equal parts set solution and tint during the fix phase, which combines two steps efficiently. If you're using a separate tint product, wait at least 24 hours after the lamination treatment before applying it. Rushing this step can interfere with how the chemical bonds settle and may compromise your results.
The Trichological Sizing Matrix: Customizing Processing Times by Hair Texture
| Brow Hair Texture | Step 1: Perming Window (Cuticle Softening) | Step 2: Neutralizing Window (Bond Resetting) | Clinical Indicators of Success | Overprocessing Hazard Signs |
|---|---|---|---|---|
| Fine / Thin Hairs | 7 to 8 Minutes | 8 Minutes | Hairs become highly flexible and effortlessly brush into a uniform 45-degree trajectory without resistance. | Tips of the brow hairs appear singed, crimped, or curly; localized skin redness around the brow border. |
| Medium Density Hairs | 8 to 10 Minutes | 8 to 10 Minutes | The natural disulfide bonds break down sufficiently to allow smooth, flat mapping against the forehead skin fold. | Brow hairs lose their elastic recoil entirely, feeling rubbery, mushy, or overly fragile when touched with a spoolie. |
| Coarse / Stubborn Hairs | 10 to 12 Minutes Max | 10 Minutes | Rigid, downward-facing hair patterns are broken, accepting directional styling without snapping back to their original shape. | Severe structural hair breakage close to the root matrix; chemical dehydration leading to brittle, frizzy patches. |
Note: Adhering strictly to these trichological processing windows prevents structural keratin degradation and ensures a seamless post-lamination recovery phase without compromising the skin barrier.
What to do if something goes wrong
Recognizing signs of a reaction
The most common adverse reactions are redness or itching around the brow, eyelid swelling, watery or stinging eyes, and in more serious cases, blistering or hive-like bumps on the surrounding skin. Overprocessing looks different: brow hairs become dry, frizzy, or brittle, and may break close to the root rather than holding their new shape.
First-aid steps and when to get medical help
Stop the treatment immediately if you notice any of the above. Avoid rubbing the eye area and rinse with cool running water, or apply a cold damp compress to the affected skin. Do not apply any additional product on top of an active reaction. If symptoms are mild and resolve within a few minutes, monitor the area and hold off on any follow-up chemical treatment for at least six weeks.
Seek medical evaluation promptly if swelling is significant, if your vision is affected at all, if blistering develops, or if symptoms worsen rather than improve over time. Self-treating with antihistamines is only appropriate on medical advice, not as a first instinct when something flares up near your eyes.
Aftercare that keeps your brows laminated and healthy

The 24-hour rule and what it actually covers
The first 24 hours after your DIY brow lamination treatment are non-negotiable. No water, no steam, no sweat, no makeup, no rubbing, and absolutely no touching the treated area. That means skipping the gym, staying out of pools and saunas, and avoiding direct sun exposure. Some guidance extends the steam and pool restriction to 48 hours, which is worth following if this is your first time doing the treatment at home.
Daily conditioning routine for the weeks that follow
Once the first 24 hours have passed, your brows need consistent moisture to stay healthy and hold their shape through the full four-to-six-week lifespan of the treatment. Apply a conditioning brow serum or lightweight brow oil daily, oils like castor or argan work well for this purpose. An overnight nourishing balm applied once or twice a week adds an extra layer of protection, especially if your brows feel dry or brittle after processing.
Keep skincare products that contain AHAs, BHAs, retinol, or alcohol well away from the brow area for at least several days before and after treatment. These ingredients strip moisture and can irritate freshly processed skin, which directly shortens how long your lamination results last. A little consistency with conditioning makes a bigger difference than any single product you apply, learn practical tips on how to make brow lamination last longer.
The bottom line
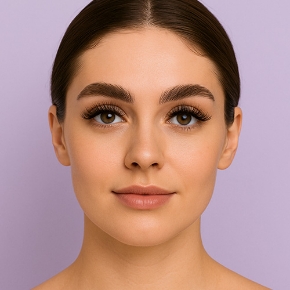
Knowing how to use a lash lift kit for brow lamination at home safely comes down to three critical factors: choosing a formula explicitly cleared for skin contact, strictly managing your processing times, and never skipping patch tests or proper aftercare. While chemical risks are real, they are completely manageable when you approach the process with professional-grade preparation.
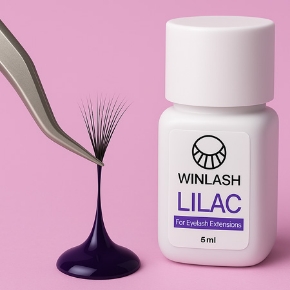
If your current kit lacks clear manufacturer instructions for eyebrow or skin application, do not take unnecessary risks with your face. Instead, invest in dual-certified, premium systems engineered to be exceptionally gentle on the skin yet highly effective on coarse brow hairs. Finding verified, skin-safe solutions is simple when you source your salon-grade kits directly from a trusted beauty authority like WinLash, taking the guesswork out of chemical safety near your eyes.
Your immediate next step is simple: execute the patch test protocol today or tomorrow. Once your skin clears the 48-hour safety window, you will be completely ready to achieve flawless, salon-quality laminated brows right at home by the weekend.

