


Quick Access to Article Topics (Click to Open)
- Before We Start: The Golden Rules of DIY Lash Removal
- Method 1: The Steam and Oil Method (The Dubai Spa Experience)
- Method 2: Using a Professional Lash Remover
- Method 3: Oil-Based Makeup Removers
- Lash Rehab: How to Restore Your Natural Lashes
- Troubleshooting: "Help! They Won't Come Off!"
- The Science of Oils: Which One Should You Use?
- Styling Tips: How to Hide Gaps & Look Great
- Professional Removal vs. DIY: Comparison Table
- FAQ: Frequently Asked Questions
Living in Dubai means embracing a high standard of beauty. From brunch at the Palm to meetings in DIFC, we love looking flawless. Eyelash extensions are the ultimate beauty hack for the busy UAE lifestyle, giving you that "I woke up like this" glamour without the need for mascara. However, as the weeks go by and the Dubai heat and humidity take their toll, those once-fluttersome lashes can start to look sparse, twisted, or grown out.
Perhaps you can’t make it to your favorite salon in Downtown, or maybe you’re just ready to give your natural eyes a break. This brings us to the burning question that has a high search volume: How to remove eyelash extensions at home?
While we always recommend professional application for our premium eyelash extensions, we understand that life happens. If you are looking for safe, effective, and pain-free ways to remove your extensions without leaving your natural lashes bald, you have come to the right place.
In this comprehensive guide for Winlash.ae, we will walk you through everything you need to know—from understanding the risks and preparing your eyes, to mastering the steam-and-oil method and professional removal techniques you can replicate in your bathroom.
Before We Start: The Golden Rules of DIY Lash Removal

Before you reach for the coconut oil or steam bowl, it is crucial to understand what you are dealing with. Eyelash extensions are bonded to your natural lashes using a medical-grade adhesive, typically containing cyanoacrylate. This glue is designed to be water-resistant, sweat-resistant (essential for UAE summers), and incredibly durable.
Why You Should Never "Just Pull Them Off"
It might be tempting to pick at that one loose lash that’s twisting in the wrong direction. However, plucking or pulling your extensions is the cardinal sin of lash care.
- Traction Alopecia: Pulling the extension often rips out the natural lash from the root. Repeated trauma can damage the follicle, leading to permanent hair loss.
- Gaping Holes: Pulling creates immediate, visible gaps in your lash line that mascara cannot hide.
- Pain and Irritation: The glue bond is strong; breaking it by force is painful and can irritate the sensitive skin of your eyelid.
The Goal: Our goal today is to dissolve or weaken the adhesive bond so the extension slides off effortlessly, leaving your natural lash intact.
Method 1: The Steam and Oil Method (The Dubai Spa Experience)
If you are searching for "how to remove eyelash extensions at home", this is likely the method you’ve seen recommended most often. It is gentle, uses household ingredients, and doubles as a mini facial—perfect for unclogging pores from the dusty Dubai weather.
This method works best for extensions that are already nearing the end of their life cycle (3-4 weeks old) where the glue has naturally weakened.
What You Will Need:
- A large bowl of boiling water.
- A towel large enough to cover your head.
- Oil: Coconut oil, Olive oil, or Baby oil (Coconut oil is a favorite for its antimicrobial properties).
- Cotton pads or lint-free swabs.
- A gentle facial cleanser.
Step-by-Step Instructions:
Step 1: Cleanse Your Face
Start with a completely clean canvas. Remove all eye makeup, foundation, and sunscreen. You want the steam to penetrate your pores and the lash glue, not mix with old mascara. Avoid oil-based cleansers at this stage; just use your regular face wash.
Step 2: The Steam Bath

Boil a pot of water and carefully pour it into a heat-safe bowl.
- Place the bowl on a table where you can sit comfortably.
- Lean your face over the bowl (keep a safe distance of about 20-30cm to avoid burns).
- Drape the towel over your head and the bowl to create a "steam tent."
- Duration: Stay in the steam for 10 to 15 minutes.
- Why this works: The hot steam helps to soften the hardened cyanoacrylate adhesive and opens up your hair follicles slightly.
Step 3: Apply the Oil
Once you have steamed your face, dry your skin gently. Now, it’s time for the oil.
- Warm a small amount of coconut or olive oil in your hands.
- Soak a cotton pad or use your clean fingertips to apply the oil generously to your lashes.
- Massage: Gently massage the oil into the lash line in a circular motion. Focus on the base where the glue is bonded.
- Caution: Be careful not to get oil directly into your eyes, as it will cause temporary blurriness.
Step 4: The Waiting Game
Patience is key here. Unlike professional removers, oil takes time to break down the bond. Leave the oil on your lashes for 5 to 10 minutes. You can continue to gently rub the lashes downward during this time.
Step 5: Removal
After the oil has had time to work, take a clean cotton pad and gently swipe downwards from the base of your lashes to the tips.
- Success Check: You should see extensions sliding off onto the cotton pad.
- Resistance Check: If the lashes are not coming off, DO NOT PULL. Apply more oil and wait longer, or repeat the steaming process. If they still won't budge, the glue is too fresh or strong for this method.
Step 6: Final Cleanse
Once the extensions are out, wash your face again to remove the oily residue. This prevents clogged pores or styes, especially important in humid climates.
Method 2: Using a Professional Lash Remover (The "Pro" Way)
For those asking "how to remove lash extensions at home" and finding that natural oils aren't strong enough, this is the next level. Sometimes, the adhesives used in top-tier Dubai salons are designed to withstand high heat and humidity, making them harder to break down with just coconut oil.
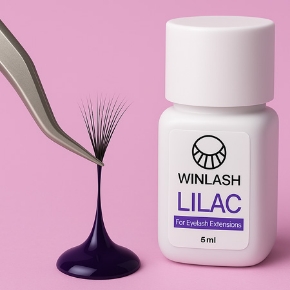
If you want a quick, salon-quality result without the drive, using a dedicated lash remover is your best option. These professional-grade products come in Gel or Cream forms and are formulated to dissolve glue in minutes.
- Cream Removers: Thicker consistency, less likely to run into your eyes. Safest for DIY.
- Gel Removers: Thinner, works faster, but higher risk of running into eyes and stinging.
Safety First:
- Patch Test: Always test the product on your skin 24 hours before to check for allergies.
- One Eye at a Time: Do not try to do both eyes simultaneously. You need one eye open to see what you are doing!
Step-by-Step Guide for Cream Remover:

- Prep the Area: Place a half-moon eye pad (or a cut cotton pad) under your lower lashes to protect your skin.
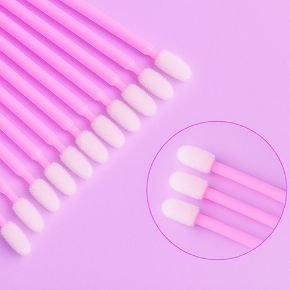
- Apply the Remover: Using a micro-swab, apply a small amount of cream remover to the glue zone (where the extension meets natural lash).
Tip: Do not touch the skin of your eyelid; just target the lashes. - Wait: Let the remover sit for 3 to 5 minutes (check the specific product instructions). The cream will chemically dissolve the adhesive bond.
- Slide Off: Use the micro-swab or a pair of tweezers to gently slide the extensions off. They should slip away with zero resistance.
- Cleanse Thoroughly: It is vital to remove every trace of the remover. If left on, it can continue to process or cause chemical burns. Wash your eyes with a lash shampoo or water immediately.
Method 3: Oil-Based Makeup Removers (The Gentle Approach)
If you don't have pure coconut oil or a professional remover, check your bathroom cabinet. Many bi-phase makeup removers (the kind you shake to mix oil and water) are the natural enemy of lash extensions.
This method is less intensive than the steam bath but works well for older lashes that are barely hanging on.
- Soak: Saturate a cotton pad with an oil-based makeup remover.
- Hold: Press the pad against your closed eye for 30 seconds. This allows the liquid to break down the glue.
- Wipe: Gently wipe downwards.
- Repeat: You may need to do this over several nights. It’s a gradual removal process rather than an instant fix.
Lash Rehab: How to Restore Your Natural Lashes
The period immediately following eyelash extension removal is critical. Your natural lashes are currently in a delicate state. To encourage regrowth and regain thickness, follow this 30-day plan.
1. The Power of Castor Oil
While we used coconut oil for removal, Castor Oil is the queen of regrowth. According to experts at Healthline, ricinoleic acid in castor oil may help prevent hair loss and neutralize scalp damage, which translates well to lash health.
- How to use: Buy cold-pressed, hexane-free castor oil. Use a clean spoolie brush to apply it to your lashes every night before bed.
2. Invest in a Peptide Serum
If you want faster results, look for lash serums containing peptides and biotin. These ingredients extend the "growth phase" (anagen phase) of your eyelash hair cycle.
3. Take a Mascara Break
Give your lashes a vacation. Mascara can be drying, and the mechanical action of scrubbing it off every night can pull out baby lashes that are just starting to grow back. If you must wear makeup, opt for a nourishing, easy-to-remove formula rather than waterproof mascara.
4. Diet for Lash Health
Beauty starts from within. Ensure your diet is rich in:
- Biotin (Vitamin B7): Found in eggs, almonds, and avocados.
- Protein: Hair is made of keratin (a protein). Ensure you are eating enough chicken, fish, or legumes.
- Vitamin E: An antioxidant that protects hair follicles from oxidative stress.
Troubleshooting: "Help! They Won't Come Off!"

Sometimes, you follow the instructions on how to remove eyelash extensions at home perfectly, but a few stubborn lashes refuse to budge. This is common, especially if your lash technician used a "Power Bond" or "Extra Strength" adhesive.
Scenario A: The Cluster Won't Move
If a cluster of lashes is stuck:
- Do Not: Pull or twist it. This will rip your natural lashes out.
- Solution: Re-steam your face for another 5 minutes to soften the glue further. Apply a fresh layer of oil and let it sit for 15 minutes this time.
Scenario B: My Eyes Are Stinging
- Cause: You likely got oil or remover into your eye, or the fumes from the dissolving glue are irritating the eye surface.
- Solution: Stop immediately. Flush your eyes with cool, sterile water or saline solution for several minutes. Do not rub your eyes.
Scenario C: I Pulled and Now There’s a Gap
- Solution: Unfortunately, you cannot glue a natural lash back in. You must wait for the growth cycle (typically 6-8 weeks). Use eyeliner to camouflage the gap in the meantime and start using a growth serum immediately.
The Science of Oils: Which One Should You Use?
When searching for how to remove lash extensions at home, you will see dozens of oils recommended. But are they all equal? Chemically speaking, no. The effectiveness of an oil depends on its molecular weight and its ability to break down Cyanoacrylate (the main ingredient in lash glue).
Here is a scientific breakdown of the best oils for the job:
1. Coconut Oil (The Gold Standard)
- Why it works: Coconut oil contains high levels of fatty acids, specifically lauric acid. It has a small molecular structure that allows it to penetrate the adhesive bond effectively.
- Best for: Thick, stubborn glue bonds.
- Bonus: It is naturally antimicrobial, which helps prevent infections like blepharitis during the removal process.
- Verdict: Highly recommended for the steam-and-oil method.
2. Baby Oil / Mineral Oil (The Heavy Lifter)
- Why it works: Mineral oil is a petroleum-based product. While less "natural," it is essentially a solvent. It is incredibly effective at dissolving synthetic adhesives used in both individual extensions and strip lashes.
- Best for: False eyelash removal at home and removing leftover sticky residue.
- Caution: It can clog pores. Must be washed off with a foaming cleanser immediately.
3. Olive Oil (The Gentle Giant)
- Why it works: Olive oil is heavier and thicker than coconut oil. It may take longer to break down the glue, but it is incredibly nourishing for the skin around the eyes.
- Best for: People with dry skin or sensitive eyelids who are in no rush.
4. Jojoba Oil (The Natural Mimic)
- Why it works: Jojoba is technically a wax ester, not an oil, and it mimics human sebum (skin oil).
- Best for: Extremely sensitive eyes. It is the least likely to cause a reaction, though it works slower than coconut oil for removal.
Styling Tips: How to Hide Gaps & Look Great Post-Removal

You’ve removed the extensions, but now you have a special event in Dubai Marina, or you just feel "bald" without them. You don't want to damage your recovering lashes with heavy glue again. Here is how to fake the volume while you wait for regrowth.
1. The "Tightlining" Technique
This is the number one makeup artist secret for sparse lashes.
- The Problem: Eyelash extension removal can reveal gaps in the lash line.
- The Fix: Take a black or dark brown waterproof gel eyeliner. Instead of drawing above your lashes, gently lift your eyelid and draw inside the upper waterline (underneath the lash roots).
- Result: This creates an illusion of a dense, dark lash base without needing mascara.
2. Use a Tubing Mascara
Avoid waterproof mascaras during the rehab phase—they require scrubbing to remove, which pulls out baby lashes.
- The Fix: Switch to a Tubing Mascara. These formulas form little "tubes" around each lash rather than painting them with pigment.
- Removal: They slide off easily with just warm water (no rubbing required), making them the safest option for recovering lashes.
3. The "Cat Eye" Distraction
Draw attention away from the length of your lashes and towards the shape of your eye.
- The Fix: Create a sharp winged eyeliner. A bold wing dominates the eye look, making the length of your actual lashes less noticeable.
4. Strip Lashes (The Occasional Fix)
If you absolutely need drama for a night out, you can use strip lashes.
- Safety Rule: Do not use individual clusters with semi-permanent glue. Use a latex-free strip lash glue.
- Removal: Remember the query regarding how to remove false lashes at home? It’s easy. Just soak a Q-tip in oil-free remover and slide them off. Never sleep in them.
Professional Removal vs. DIY: When to Call a Pro

We know you are looking for how to remove lash extensions at home, but there are times when DIY is not the answer.
| Feature | DIY Removal (Home) | Professional Removal (Salon) |
|---|---|---|
| Cost | Budget-Friendly (Uses household items) | Moderate Investment |
| Time | 30 - 60 Minutes | 15 - 20 Minutes |
| Safety | Moderate (Risk of user error) | High (Trained professional) |
| Best For | Old extensions (3+ weeks), loose lashes | Fresh extensions (1-2 weeks), full sets, sensitive eyes |
Winlash.ae Recommendation: If you had your lashes done less than 2 weeks ago and the glue is still very fresh and strong, DIY methods may not work effectively. In this case, booking a professional eyelash extension removal is the safest bet to avoid damage.
FAQ: Frequently Asked Questions
To wrap up our guide, here are answers to the most common questions people ask about this process.
Does removing eyelash extensions hurt?
No, it should never hurt. If you feel pain, you are pulling too hard or the adhesive is still too strong. The process should be gentle. If you experience burning, wash your eyes immediately.
Can I use Baby Oil to remove extensions?
Yes! Baby oil is highly effective. It is mineral oil, which is great for breaking down cyanoacrylate bonds. Just be sure to wash your face thoroughly afterward, as mineral oil can clog pores if left on the skin.
How to remove individual eyelash extensions at home vs strip lashes?
If you are searching for how to remove individual eyelash extensions at home (clusters), use the steam and oil methods described above. However, for false eyelash removal at home (meaning strip lashes you glued on for the day), simply use an oil-free makeup remover on a cotton swab along the lash band—they should peel off easily.
Will my natural lashes fall out with the extensions?
It is normal to see a few natural lashes attached to the extensions when they slide off. Humans naturally lose 2-5 lashes per day. These "shed" lashes were likely held in place by the extension glue and are now being released. However, if you see a large number of natural lashes coming out, you may be using too much force.
Conclusion
Learning how to remove eyelash extensions at home is a handy skill that can save you time and money, but patience is your best friend. Whether you choose the spa-like Steam & Oil method or opt for a professional gel remover, the priority is always the health of your natural eyes.
At Winlash, we believe beautiful lashes start with healthy lashes. Treat them with care, give them a break when needed, and they will continue to frame your eyes beautifully for years to come. For more tips on lash care, premium products, and expert advice tailored to the UAE, visit Winlash.

