


")
Quick Access
- The Science of Chemical Absorption: Skin vs. Hair
- The Crucial Difference Between Lash Lifts and Brow Laminations
- The Hormonal Sabotage: Why Your Lash Lift Might Fail
- The Trimester-by-Trimester Safety Protocol
- Posture and Comfort: The Physical Risks in the Salon
- Pregnancy-Safe Alternatives & Premium Care
- Frequently Asked Questions (FAQ) for Expecting Mothers
- The Final Verdict: Empowering Your Beauty Choices
⚡ Quick Summary Card: Pregnancy & Lash/Brow Safety
- Medical Consensus: Generally considered safe after the first trimester, provided there is proper ventilation and no skin contact with perming lotions. Always consult your OB/GYN first.
- Lash Lift vs. Brow Lamination: Lash lifts are safer because the chemicals are applied to the hair shaft, not the skin. Brow lamination involves direct skin contact, increasing the risk of transdermal absorption.
- The Hormonal Factor: Pregnancy hormones can change hair porosity, meaning a lash lift might drop faster or not take at all.
- Best Practice: Always request a 48-hour patch test due to heightened immune responses and skin sensitivity during pregnancy.
Pregnancy is a beautiful, transformative journey, but it also comes with an overwhelming list of "do's and don'ts." For many expecting mothers, maintaining a low-maintenance beauty routine is essential for feeling confident and put-together, especially as energy levels fluctuate and the delivery day approaches. A common question that arises in the modern beauty landscape is whether chemical treatments like lash perms and brow laminations are safe for the baby. If you are looking to maintain your glow, understanding the clinical realities of lash and brow lift products during pregnancy is non-negotiable. This 2026 evidence-based guide breaks down the science of chemical absorption, hormonal shifts, and salon safety to give you the definitive truth.
The Science of Chemical Absorption: Skin vs. Hair

When evaluating the safety of any cosmetic procedure during pregnancy, the primary medical concern is transdermal permeability—the ability of a chemical to cross the skin barrier, enter the bloodstream, and potentially reach the placenta. The core chemicals used in lifting treatments include thioglycolic acid, cysteamine hydrochloride, and neutralizing agents.
The hair shaft itself is dead tissue. When chemicals are applied directly to the hair (as in a precision lash lift), they alter the disulfide bonds within the keratin structure to reshape the hair. Because these chemicals are applied millimeters away from the lash line and do not touch the living skin of the eyelid, the risk of transdermal absorption is practically zero. However, using high-quality, professional-grade brow and lash lift materials is critical. Cheap, uncertified products may vaporize or bleed onto the skin, creating unnecessary risks.
The Crucial Difference Between Lash Lifts and Brow Laminations
While often grouped together, lash lifts and brow laminations present entirely different risk profiles for pregnant women.
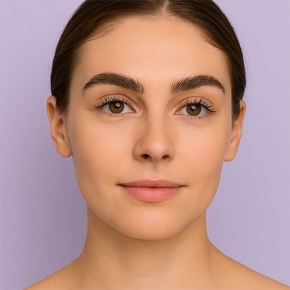
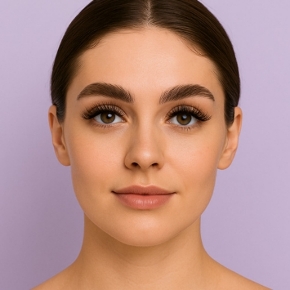
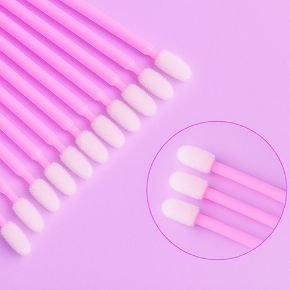
- Lash Lifts: The procedure uses a silicone shield placed on the eyelid. The lashes are glued to the shield, and the perming lotions are applied strictly to the middle of the lash fibers. A skilled technician ensures no product touches the delicate skin of the eyelid or the conjunctiva of the eye. Therefore, systemic absorption is incredibly unlikely.
- Brow Laminations: This is where the medical community urges higher caution. Brow lamination involves applying the exact same chemical perming and neutralizing lotions directly onto the skin of the brow bone. The skin on the face is highly vascularized. Furthermore, pregnant women often experience heightened skin permeability and sensitivity. Direct chemical-to-skin contact increases the minimal (yet existent) risk of chemical absorption, alongside a high risk of contact dermatitis.
The Hormonal Sabotage: Why Your Lash Lift Might Fail
Even if you navigate the safety concerns, there is a biological wildcard during pregnancy: the endocrine system. The massive surge in estrogen and progesterone fundamentally alters your hair's growth cycle (the anagen, catagen, and telogen phases) and its physical structure.
Many pregnant women experience what technicians call the "Pregnancy Hair Drop." Hormonal changes can cause the hair cuticle to become highly resistant, altering its porosity. This means that the perming lotions cannot properly penetrate the hair shaft to break and reform the disulfide bonds. The result? You might sit through a 60-minute procedure, only to find your lashes completely straight the very next day, or they might over-process and become frizzy. Furthermore, the immune system is hyper-vigilant during pregnancy to protect the fetus. You can suddenly develop a severe allergic reaction to a product you have used safely for years. This is why a 48-hour patch test is an absolute medical necessity, regardless of your history with the salon.
The Trimester-by-Trimester Safety Protocol

Timing is everything when it comes to salon treatments during gestation. Here is the doctor-approved breakdown of when it is considered safest to proceed.
💡 Pro Tip for Salon Owners & Technicians:
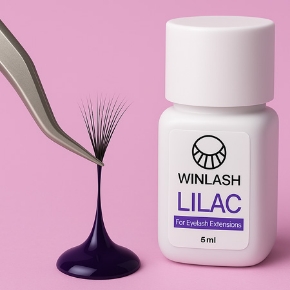
Always require a signed consent form for expecting clients and switch to cysteamine-based (ammonia-free) lotions, which emit fewer fumes and are vastly gentler on the respiratory system of pregnant women.
- First Trimester (Weeks 1-12): This is the most critical period of fetal organogenesis (organ development). The medical consensus strictly advises against any unnecessary chemical exposures, hair dyes, or perms during this window. Furthermore, heightened morning sickness can make lying down and smelling salon chemicals unbearable.
- Second Trimester (Weeks 13-26): Generally considered the safest "sweet spot." The major developmental milestones have passed, nausea usually subsides, and lying on your back is still relatively comfortable. If you are going to get a lash lift, this is the time to do it using clinical-grade systems like the MyLamination 3-Step Brow & Lash Lamination Kit, known for its rigorous European safety standards.
- Third Trimester (Weeks 27-40): While chemically safe, the physical logistics become dangerous. Lying flat on your back for the duration of the treatment is strongly discouraged by obstetricians.
| Trimester | Safety Level | Primary Clinical Risk | Expert Recommendation |
|---|---|---|---|
| 1st Trimester (Weeks 1-12) | High Risk ⛔ | Fetal organogenesis, severe morning sickness, high fume sensitivity. | Strictly avoid chemical perms. Switch to pregnancy-safe nourishing serums and balms. |
| 2nd Trimester (Weeks 13-26) | Safest Window ✅ | "Pregnancy hair drop" (hormonal resistance causing perm to fail or drop early). | Proceed with caution. Mandatory 48-hour patch test. Use cysteamine (ammonia-free) lotions. |
| 3rd Trimester (Weeks 27-40) | Physical Risk ⚠️ | Supine Hypotensive Syndrome (drop in blood pressure from lying flat on the back). | Avoid lying flat. Salon must provide a wedge pillow (45-degree angle) or skip the treatment. |
Posture and Comfort: The Physical Risks in the Salon

Beyond chemicals, the physical act of getting a lash lift poses a unique physiological risk to heavily pregnant women known as Supine Hypotensive Syndrome. When a pregnant woman lies flat on her back (supine position) for an extended period, the heavy uterus can compress the inferior vena cava—the major vein returning blood from the lower body to the heart.
This compression leads to a sudden drop in blood pressure, causing dizziness, nausea, shortness of breath, and a reduced oxygen supply to the baby. Because a lash lift takes 45 to 60 minutes of lying completely still with your eyes closed, this poses a significant risk in the third trimester.
🌍 Local Advantage: Dubai's VIP Maternal Care
In cosmopolitan hubs like Dubai and Abu Dhabi, premium salons catering to the expat and local markets are now offering "Maternal Lash Beds." These involve using specialized wedge pillows to elevate the client's torso to a safe 45-degree angle, or positioning the client in a slight left-lateral tilt to ensure perfect blood flow during the treatment.
Pregnancy-Safe Alternatives & Premium Care
If you or your doctor decide that the risks of chemical processing outweigh the benefits, you do not have to sacrifice your beauty routine. The industry has evolved rapidly, offering powerful, non-toxic alternatives that focus on health and nourishment rather than chemical restructuring.
Instead of a chemical perm, many pregnant women turn to deep hydration therapies. Brands like My Lamination lead the market in clinical lash health. By incorporating high-end beauty care products into your daily routine, you can achieve naturally darker, thicker, and beautifully conditioned lashes without a single drop of perming lotion.
The ultimate secret weapon for pregnant women is a hormone-free, prostaglandin-free serum. We highly recommend using the My Lamination Vitamin Lash & Brow Serum (10ml). Packed with essential vitamins (A, B, C, E, F, K), panthenol, and natural extracts, this serum deeply nourishes the hair follicle safely, combating the "pregnancy hair drop" and keeping your natural lashes and brows incredibly lush and glossy until your delivery day.
Frequently Asked Questions (FAQ) for Expecting Mothers
Based on the most searched questions by expecting mothers and professional salon artists, here are the definitive medical answers:
Can the smell of lash lift glue cause nausea or harm the baby?
Is Keratin Lash Botox safe for pregnant women?
I got a brow lamination before knowing I was pregnant, what should I do?
Can I use eyelash extension glue while pregnant?
The Final Verdict: Empowering Your Beauty Choices

The clinical truth is that while lash lifts are largely considered safe post-first trimester due to the lack of skin contact, brow laminations carry a slightly higher risk of irritation and absorption that expecting mothers should carefully weigh. Your body is undergoing a miraculous, complex hormonal shift, and sometimes, the best approach is the gentlest one.
Always prioritize an open conversation with your healthcare provider before booking a salon appointment. If you decide to embrace your natural beauty during these nine months, investing in premium, vitamin-rich, pregnancy-safe serums will ensure you remain glowing and radiant. For the highest quality, scientifically backed lash and brow care trusted by professionals across the UAE, explore the full clinical range at Winlash and step into motherhood with confidence and pristine health.


")


")


