




Inner corners, tucked-away layers, and hooded lids are the parts of a lash set that separate a rushed application from a polished one. No amount of skill with your tweezers helps if you can't actually see the lash you're trying to isolate — and that's exactly where advanced lash taping techniques come in. Used correctly, a small strip of lash tape can expose an inner corner in seconds, hold back an entire top layer to reveal the lashes underneath, or steady a nervous client's fluttering lid.
Quick Access to This Article
- Why Taping Is a Core Isolation Skill
- Understanding Lash Anatomy: Why Corners and Layers Are Difficult
- Choosing the Right Lash Tape for the Job
- How to Tape Inner Corner Lashes (Step-by-Step)
- How to Tape Outer Corner Lashes Easily
- The Tape-Back Method: Isolating Lash Layers
- Lash Taping Hacks for Hooded and Difficult Eyes
- Essential Tools That Pair With Taping
- Safety: Avoiding Sclera Exposure and Chemical Burns
- Common Mistakes in Lash Taping
- Frequently Asked Questions
- How Taping Fits Into an Efficient Lash Workflow
- Conclusion
Why Taping Is a Core Isolation Skill
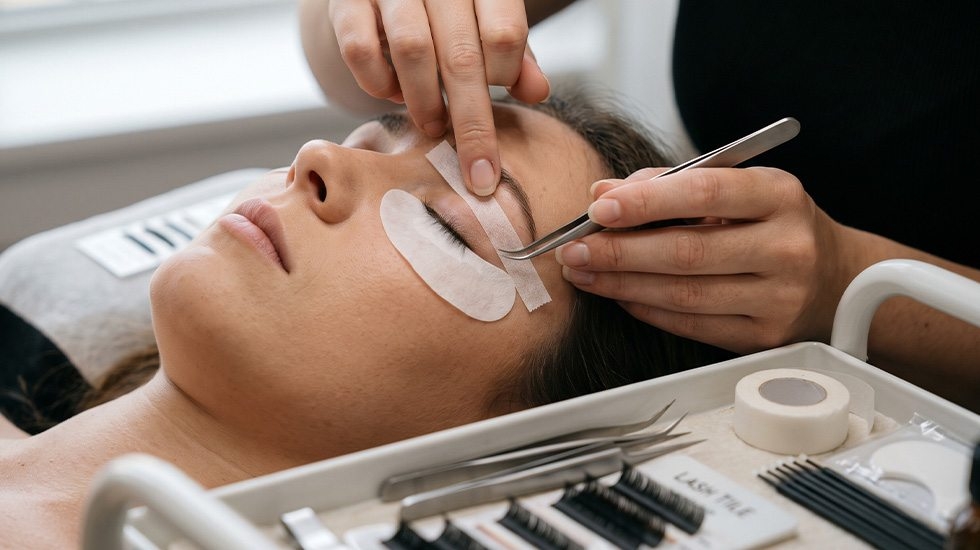
Isolation is the single most time-consuming part of any lash application, and tape is one of the few lash accessories that directly speeds it up rather than just supporting the process. Instead of fighting with lashes that are hidden, overlapping, or pointing the wrong way, a correctly placed strip of tape physically rearranges the eye area so the target lashes become visible and separated from everything else.
Beyond speed, taping also plays a role in client comfort. Techniques like lid taping and light, even pressure can reduce blinking and twitching in nervous or first-time clients, which in turn reduces the risk of stray adhesive contact and makes the whole session smoother for both artist and client.
There's also a workflow argument for taping that's easy to overlook: every extra second spent hunting for a hidden lash is a second the adhesive on your tweezer or the drop on your jade stone is curing unused. Artists who tape efficiently tend to waste less adhesive over the course of a full set, simply because they spend less idle time between isolations. Over dozens of appointments a week, that adds up to a meaningful difference in both product cost and session length.
Understanding Lash Anatomy: Why Corners and Layers Are Difficult
Two anatomical realities make inner corners, outer corners, and layered lashes harder to isolate than the rest of the lash line:
- Corner lashes grow at a sharper angle and are often shorter and finer than the lashes along the center of the lid, which makes them easy to miss or double up when isolating by tweezer alone
- Natural lashes grow in multiple rows, not one flat line — a top layer of longer lashes can completely hide a bottom layer of shorter ones, and without separating the lash layers physically, it's easy to isolate the same lash twice or leave the lower row untouched
Tape addresses both problems by either stretching the skin to reveal hidden corner lashes, or by physically holding one lash layer out of the way so the layer underneath becomes visible and workable. It's worth noting that these challenges aren't a sign of inexperience on the artist's part — even lash artists with years of experience rely on taping for corners and layering, because the anatomy itself, not skill level, is what makes these areas difficult. Skipping tape and trying to power through with tweezers alone usually means either missing lashes entirely or repeatedly isolating the same lash, both of which slow the appointment down and increase the risk of double-stacking extensions on a single natural lash.
Choosing the Right Lash Tape for the Job
Not every tape behaves the same way on skin, and the right choice depends on the client's skin sensitivity and the specific technique you're using. The table below compares the most common types used in professional lash studios.
| Tape type | Adhesion strength | Transparency | Best for |
|---|---|---|---|
| Nichiban Japanese tape | Medium, gentle release | Semi-transparent | Precision work on corners and delicate skin |
| 3M paper tape | Medium-strong | Opaque, matte white | Larger areas, layering back, general isolation |
| Micropore/surgical tape | Strong | Opaque | Clients needing firmer hold, longer sessions |
| Hypoallergenic/sensitive tape | Light to medium | Varies | Sensitive skin, latex allergies, frequent removal |
As a general rule, thinner and more transparent tapes like Nichiban work best for small, precise areas such as inner corners, where you need enough grip to hold the skin without covering too much of your working area. Wider, more opaque tapes like 3M paper tape are better suited to layering techniques and larger sections of the lid, where coverage and hold matter more than visibility through the tape itself.
How to Tape Inner Corner Lashes (Step-by-Step)

Inner corner lashes are short, sparse, and grow close to the tear duct, which makes them one of the trickiest areas on the entire lash line. Here's a reliable method:
- Cut a small piece of tape, roughly 5–7 cm long, and split it lengthwise into two thin strips
- With the client's eyes gently closed, place one thin strip on the eyelid just above the inner corner lashes
- Pull the strip gently outward and slightly upward, toward the temple, to stretch the skin and expose the inner corner lashes
- Check that the tape is anchored on skin only, not pulling on the lash line itself or riding up toward the waterline
- Isolate and apply extensions to the newly visible lashes, working from the corner outward
Because inner corner lashes are so fine, it also helps to work under stronger, more direct lighting and to use a smaller isolation tweezer than you would for the rest of the set.
How to Tape Outer Corner Lashes Easily
The outer corner uses the same principle as the inner corner, but in the opposite direction:
- Cut a similar thin strip of tape as used for the inner corner
- Place it on the eyelid just above the outer corner lashes
- Pull gently inward, toward the center of the lid, to expose the outer corner lashes
- Confirm the tape hasn't shifted the lash line's natural direction, which can cause outer lashes to be placed at an unnatural angle
Outer corners are also where hooded or downward-pointing lashes are most common — for these cases, an upward pull toward the brow, rather than a sideways pull, usually gives better visibility.
The Tape-Back Method: Isolating Lash Layers
Once a good portion of the top lash layer has already been isolated and lashed, the bottom layer can become almost invisible underneath the newly applied extensions. Taping back solves this:
- Take a small strip of tape and place it horizontally across the tips of the already-placed top-layer extensions
- Gently press the tape and fold the taped extensions back toward the lid, out of the way
- This exposes the bottom layer of natural lashes cleanly, without interference from the extensions already applied above
- Isolate and lash the bottom layer as normal, then remove the tape carefully once finished
This technique is especially useful during a full set on a client with dense natural lashes, and during fills where regrowth has occurred underneath an existing layer of extensions.
Lash Taping Hacks for Hooded and Difficult Eyes
Standard inner and outer corner taping works well on most eye shapes, but a few variations need adjusting:
- Hooded eyes: excess skin can fold over the lash line when the eyes are closed, hiding lashes along the entire lid. Taping the eyelid upward toward the brow, rather than sideways, lifts this excess skin out of the way
- Downward-pointing lashes: similar to hooded eyes, an upward pull rather than a horizontal one gives a clearer view of the lash base
- Monolid clients: because there's no visible crease to anchor against, tape placement should sit slightly higher on the lid than usual to get a stable pull without the tape slipping during the appointment
- Watery or sensitive eyes: a hypoallergenic, low-tack tape reduces the chance of irritation from repeated adjustment throughout the session
Essential Tools That Pair With Taping
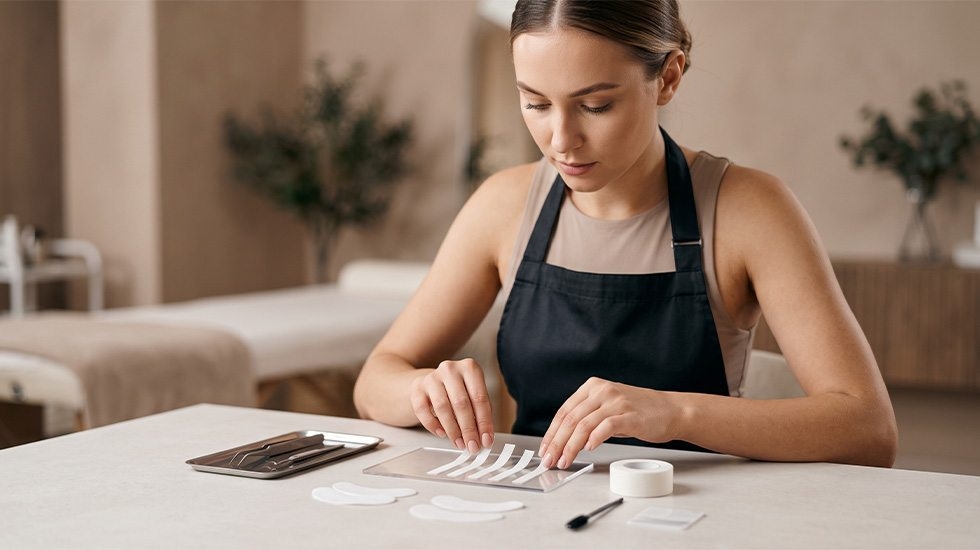
Tape rarely works in isolation — most lash artists combine it with a small set of supporting tools for the cleanest results:
- Under-eye gel pads: cover and hold down the bottom lash line so it doesn't interfere with upper lash isolation, and provide a contrasting background that makes lashes easier to see
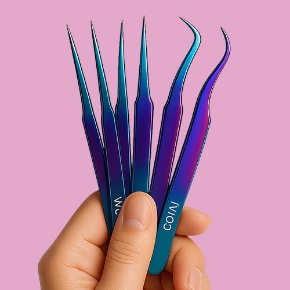
- Fine-tipped isolation tweezers: essential for picking out single lashes in tight, taped-open corners without catching neighboring lashes
- A small handheld lash mirror: lets you check your isolation work from underneath, confirming no lashes are stuck together or missed before finishing a section
Keeping these tools within arm's reach, rather than digging for them mid-application, matters more than it might seem. Every time you have to pause a taping technique to search your kit for a mirror or a specific tweezer, the tension you've carefully created with the tape has more time to shift or loosen, and you may end up repositioning it before you can even use it. Many artists lay out their taping tools in a fixed order on their trolley for exactly this reason — so the sequence of taping, isolating, and checking stays uninterrupted.
You can find these alongside other studio essentials in our beauty care product range.
Safety: Avoiding Sclera Exposure and Chemical Burns
Taping is generally very safe, but because it involves stretching or repositioning the eyelid, a few precautions matter:
- Never expose the sclera (the white of the eye): if pulling the tape reveals any part of the sclera rather than just skin and lashes, the tape is positioned too aggressively and should be adjusted or loosened immediately
- Watch for chemical burns: if the eye is even slightly open while lash adhesive is in use nearby, cyanoacrylate fumes can irritate or burn the exposed surface of the eye. Always confirm the client's eyes are fully closed before applying adhesive near a taped area
- Check tension regularly: tape that's pulled too tightly for too long can cause skin irritation or leave marks after removal, especially on sensitive or thin eyelid skin
- Remove tape gently: peel slowly in the direction of natural skin folds rather than straight up, to minimize discomfort and reduce the risk of skin irritation
If a client reports stinging, excessive tearing, or discomfort at any point during taping, stop immediately, reposition or remove the tape, and check the eye area before continuing.
Common Mistakes in Lash Taping
- Using tape that's too wide for corner work: a wide strip covers too much of the working area and makes precise isolation harder, not easier
- Pulling too hard or in the wrong direction: this risks exposing the sclera or distorting how lashes will sit once released
- Reusing the same strip of tape multiple times: reduced adhesion from reuse means the tape can shift mid-application, undoing your isolation work
- Skipping a mirror check before removing tape: missing a lash or spotting a "sticky" (two lashes glued together) is much easier to fix before the tape comes off than after
- Ignoring client feedback: discomfort during taping is a signal to adjust technique, not something to push through for the sake of speed
Frequently Asked Questions
What's the best tape for isolating inner corner lashes?
Thin, semi-transparent tapes like Nichiban Japanese tape work well for inner corners because they offer enough grip to stretch the skin without covering too much of the small working area you need to see clearly.
Is lash taping safe for sensitive skin?
Yes, when a hypoallergenic, low-tack tape is used and removal is done gently in the direction of natural skin folds. Clients with known sensitivities or latex allergies should be matched with a suitable hypoallergenic option before the session.
Can taping techniques help with hooded eyes?
Yes. For hooded eyes, taping the eyelid upward toward the brow, rather than sideways, lifts the excess skin fold that would otherwise cover the lash line, making isolation significantly easier.
How do I know if I've pulled the tape too far?
If any part of the sclera, the white of the eye, becomes visible when the tape is pulled, it's been positioned too aggressively. Loosen or reposition it immediately to avoid irritation or exposure to adhesive fumes.
What's the difference between taping for corners and taping back for layers?
Corner taping stretches the skin to reveal lashes that are hard to see due to their angle and position. Taping back is different — it involves folding already-placed extensions out of the way with tape to expose a hidden bottom layer of natural lashes underneath.
How long can lash tape safely stay on during an appointment?
Most professional lash tapes are designed to stay in place comfortably for the length of a full set, typically one to three hours. If a client reports discomfort, or if the tape's grip visibly weakens before the appointment ends, it should be replaced with a fresh strip rather than left in place.
How Taping Fits Into an Efficient Lash Workflow
The most effective lash artists don't treat taping as a fix they reach for only when they get stuck — they build it into the structure of the appointment from the start. A common approach is to tape the trickiest areas first, while both artist and client still have the most focus and patience available:
- Start with corners, not the middle of the lid: isolating inner and outer corners early, while you're fresh, tends to produce cleaner results than leaving them for the end of a long appointment when fatigue sets in for both artist and client
- Pre-cut your tape strips before the client sits down: having several pre-cut thin strips ready to go removes a small but repeated interruption from your workflow every time you reach for tape mid-set
- Reassess halfway through: on longer full sets, checking whether existing tape has loosened or shifted at the halfway point prevents small positioning issues from turning into isolation problems later in the appointment
- Match your tape choice to the stage of the set: thinner tape for the precision work on corners early on, wider tape for layering back once a good volume of extensions is already placed
Building these habits into your routine turns taping from a reactive tool into a planned part of every appointment, which is ultimately what separates a fast, clean set from one that runs long and still needs touch-ups.
Conclusion
Advanced taping techniques turn two of the most frustrating parts of any lash application — tight inner corners and hidden lash layers — into a manageable, repeatable part of your workflow. The details matter more than they might seem: the width and type of tape, the direction of the pull, and constant attention to client comfort all separate a technique that speeds up your session from one that creates problems mid-appointment. Practice these methods on a range of eye shapes and skin sensitivities, and taping will quickly become as automatic and reliable a step in your routine as isolating with your tweezers.
Find the tapes, isolation tools, and studio essentials used in this guide at Winlash.