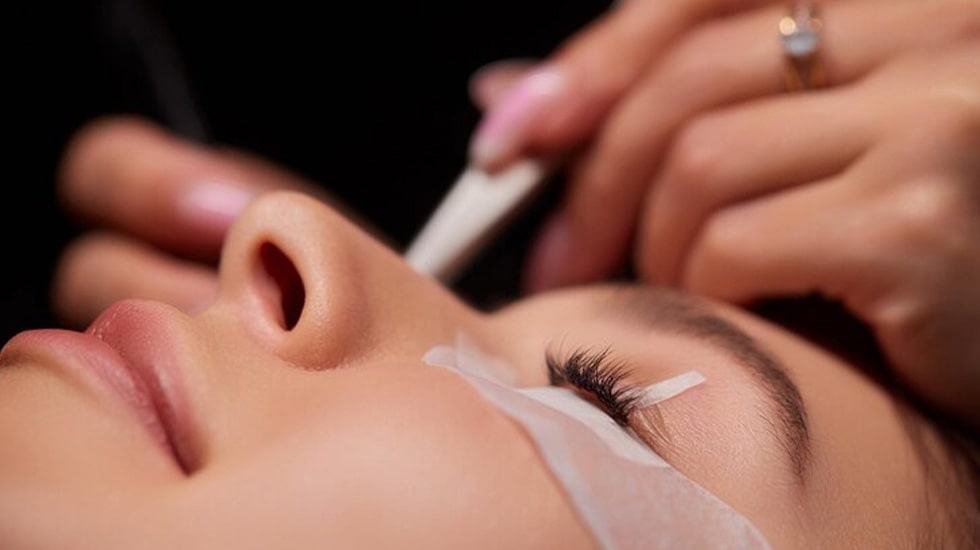
RSS

Blog posts of '2026' 'September'

How to Safely Remove Lash Clusters at Home Without Natural Lash Damage

DIY lash clusters have transformed home lash styling by delivering the density of volume extensions in minutes. Unlike traditional salon-applied eyelash extensions that isolate a single natural lash, cluster fans span several natural hairs at once. While application is straightforward, removal is where most follicle trauma occurs. Ripping or pulling clusters off when the adhesive bond is still intact causes mechanical traction, leading to snapped natural hairs and damaged root follicles. Learning how to remove lash clusters without losing natural lashes comes down to using the proper solvent, respecting dwell time, and executing a gentle downward slide.

Table of Contents
  1. Why Lash Clusters Can Pull Out Natural Lashes
  2. Essential Products for Safe at-Home Removal
  3. Step-by-Step Protocol: How to Remove Clusters Safely
  4. Removal Methods Compared: Solvents, Balms, and Oils
  5. 4 Removal Mistakes That Cause Follicle Damage
  6. Post-Removal Lash Care: Supporting Follicle Recovery
  7. Frequently Asked Questions About Cluster Removal

Why Lash Clusters Can Pull Out Natural Lashes

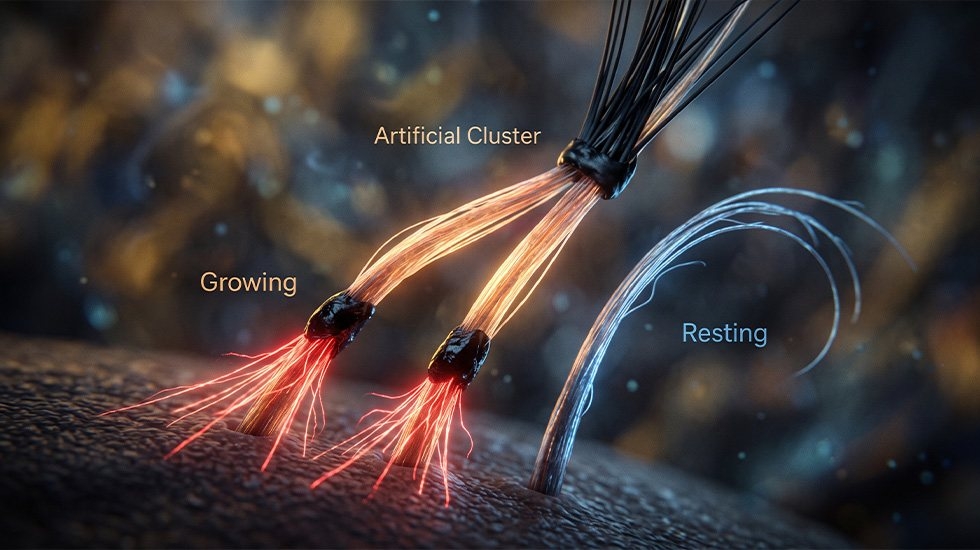
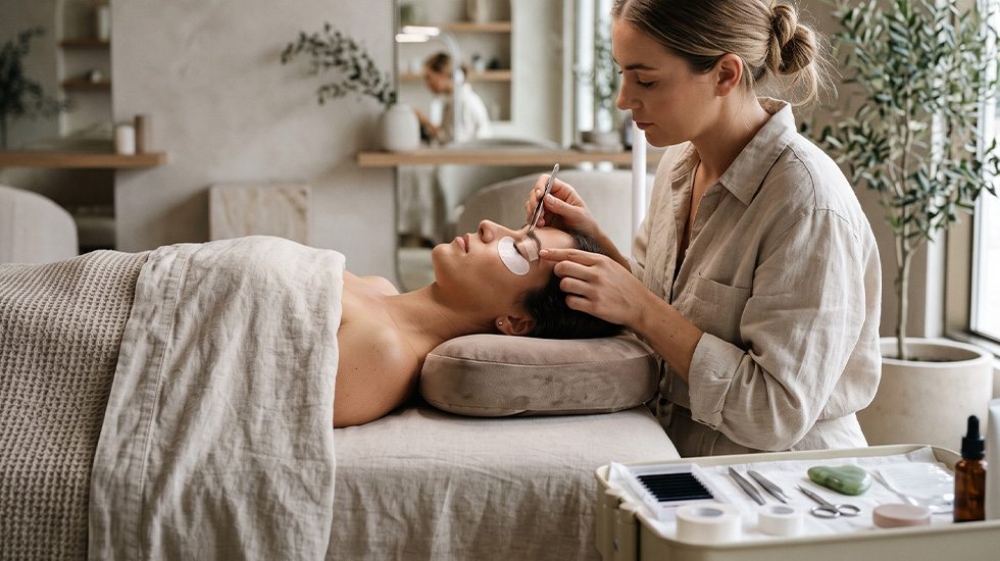
DIY cluster lashes bonded across multiple natural lashes illustrating traction risk

The primary risk of wearing cluster lashes stems from their wider base. A single pre-made cluster attaches across anywhere from three to seven natural lashes simultaneously. In a healthy lash line, each individual lash exists at a different stage of its biological cycle: active growth (anagen), transition (catagen), or resting and shedding (telogen).

When multiple hairs at different lifecycle stages are bound together by bond glue, a resting lash ready to shed naturally remains anchored to an adjacent growing lash. If you pull or tug on the cluster strip, the force pulls directly on the roots of active lashes. This mechanical strain can cause immediate traction hair loss, weaken the dermal papilla, and produce noticeable gaps along your lash line that take weeks to recover.

Essential Products for Safe at-Home Removal

Safe removal relies on chemical breakdown of the adhesive bond rather than manual pulling force. Preparing the right supplies beforehand prevents irritation and accidental eye contact:

  • Professional Cream Remover: A thick, non-drip formulation like IB Nano Creamy Lash Remover stays exactly where applied without migrating into the conjunctival sac.
  • Lint-Free Under-Eye Pads or Cotton Pads: Placed beneath the lower lashes to shield sensitive skin and catch dissolved glue residue.
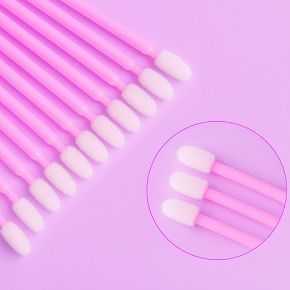
  • Micro Swabs or Precision Applicators: For pinpoint placement of the solvent directly onto the adhesive seam.
  • Clean Silicone Spoolie: To guide loosened clusters downward without catching or twisting natural lashes.
  • Oil-Free Foaming Lash Cleanser: To thoroughly cleanse residual solvent and prevent post-removal eyelid congestion.

Step-by-Step Protocol: How to Remove Clusters Safely

Perform this routine in front of a well-lit mirror, treating one eye at a time so you maintain full control and keep your eyelids relaxed.

  1. Prepare and Protect the Eye Area: Position a lint-free pad beneath your lower lash line. Ensure your hands are washed and completely dry. If you wear contact lenses, remove them before beginning to prevent accidental solvent absorption.
  2. Apply the Dissolving Agent: Dip a micro swab into your creamy remover. Gently coat the underside of the lash line where the cluster band meets your natural lashes. Ensure even coverage along the glue seam while maintaining a safe 1-millimeter clearance from the waterline.
  3. Respect the Required Dwell Time: Allow the product to sit undisturbed according to manufacturer instructions—typically 3 to 5 minutes. The solvent needs sufficient contact time to soften the polymer chains in the bond. Do not rub or pinch during this window.
  4. Slide, Never Pull: Take a clean spoolie or a fresh micro swab and gently roll downward from the roots toward the tips. If the adhesive has fully dissolved, each cluster will glide off smoothly with zero resistance. If a cluster resists, reapply a small dab of cream remover, wait another 2 minutes, and repeat. For tips on preserving cluster integrity after removal, review our guide on reusable false eyelashes.
  5. Wipe and Cleanse Residue: Gently sweep a damp cotton pad over the lid to lift melted adhesive residue. Wash the entire eye area with an oil-free foaming lash wash and lukewarm water, then pat dry with a clean towel.

Removal Methods Compared: Solvents, Balms, and Oils

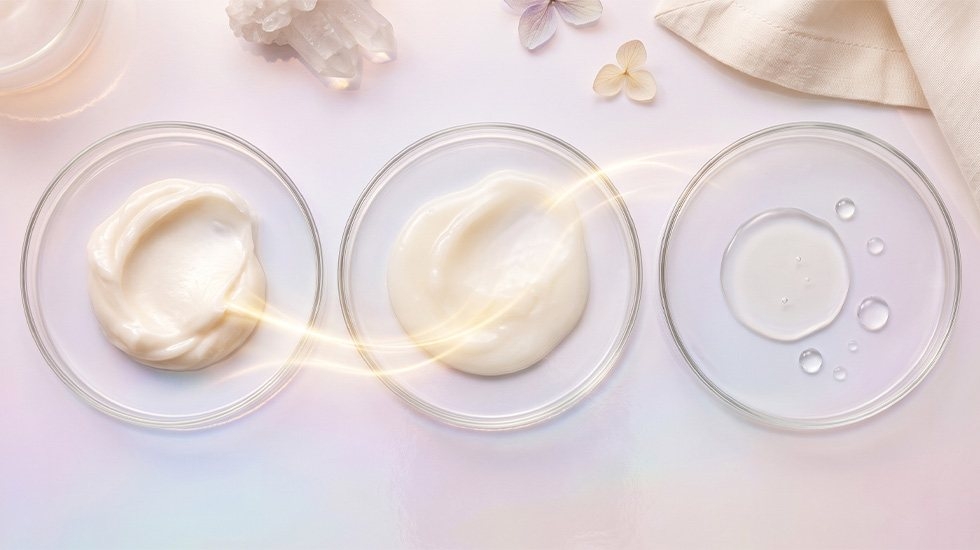
Comparison of professional cream remover and gentle oils for dissolving cluster lash glue

Different household and professional methods are often recommended online for cluster removal, but they vary significantly in safety, speed, and follicle protection. When exploring the best ways to dissolve lash glue, matching the solvent to the adhesive chemistry is vital.

MethodAdhesive Breakdown SpeedRisk to Natural LashesBest Used For
Cream Remover (Professional)Fast (3–5 minutes)Lowest (Zero traction required)All DIY cluster bonds & semi-permanent glues
Cleansing Balm (Oil-Based)Moderate (8–12 minutes)Low (Safe if soaked thoroughly)Lightweight daily cluster bonds
Pure Plant Oils (Castor / Coconut)Slow (15–20 minutes)Low to Moderate (Users tend to pull prematurely)Sensitive eyes; gradual softening
Micellar Water (Biphasic)Very Slow (>20 minutes)High (Forces rubbing and friction)Not recommended for multi-day cluster bonds

4 Removal Mistakes That Cause Follicle Damage

Even high-quality natural lashes can suffer long-term damage when exposed to poor removal habits. Avoid these common missteps:

  • Dry Pulling or Picking: Tugging at clusters when the adhesive is solid is the fastest way to cause traction alopecia. When a cluster is pulled dry, natural hairs are ripped directly out of the dermal follicle.
  • Aggressive Horizontal Rubbing: Rubbing back and forth across the eyelid bends natural lashes at sharp angles, fracturing the delicate keratin sheath and causing premature breakage mid-shaft.
  • Using Chemical Household Solvents: Rubbing alcohol, pure acetone, or nail polish removers should never come near ocular tissue. They cause chemical burns, severe cornea erosion, and dermatitis on the eyelid margin.
  • Rushing the Dwell Time: Applying a remover and immediately attempting to comb it through doesn't allow the active ingredients to dissolve the bond. Respecting the full dwell time specified by the manufacturer is the secret to zero lash loss.

Post-Removal Lash Care: Supporting Follicle Recovery

Applying nourishing lash serum and oil to natural lashes after cluster removal

Once all clusters are safely removed and your lids are cleansed, give your natural lashes time to breathe and rehydrate. Lash adhesives and removers temporarily strip the natural lipid mantle of the hair cuticles. Applying a peptide-infused conditioning serum or cold-pressed castor oil along the tips helps restore flexibility and shine.

If you have experienced accidental lash thinning from previous improper removals, understand that your lashes can renew themselves. For an in-depth breakdown of lash renewal phases and timelines, read our guide on whether damaged eyelashes grow back. Giving your eyes a 24- to 48-hour rest before applying another fresh set of clusters allows the hair follicles to stabilize and maintain peak strength.

Frequently Asked Questions About Cluster Removal

Why did my natural lashes come off with my cluster lashes?

If natural lashes detached with intact roots, the cluster was pulled before the adhesive had completely dissolved. However, finding one or two loose hairs without roots is normal, as lashes at the end of their resting cycle naturally release during cleansing.

Can I remove cluster lashes using baby oil or olive oil?

Mineral and plant oils can soften standard water-soluble cluster glues, but they work very slowly on multi-day bond-and-seal formulas. Because users often lose patience during long wait times, oil methods frequently lead to premature pulling. A professional cream remover is far faster and safer.

How long should I leave cream remover on before sliding clusters off?

Always follow the specific instructions on the product packaging. High-grade cream removers typically require between 3 to 5 minutes to completely break down adhesive bonds without needing mechanical force.

What should I do if lash remover gets into my eyes?

Flush the open eye immediately with lukewarm tap water or sterile saline solution for at least 10 to 15 minutes. Avoid rubbing your eye. If stinging, blurred vision, or conjunctival redness persists after flushing, consult a healthcare professional promptly.

Can I apply a new set of cluster lashes immediately after removal?

It is best to wait at least 24 hours. Even after washing, microscopic traces of remover or oils remain on the lash cuticle, preventing new adhesive bonds from curing securely and leading to premature lifting.

Maintaining dense, resilient natural lashes while enjoying the styling versatility of DIY sets comes down to patience and using salon-grade solutions designed for ocular safety. By allowing professional solvents to do the heavy lifting and treating your follicles with gentle care, you can switch between looks without ever compromising your natural lash health. Discover premium cluster lashes, gentle removers, and professional aftercare essentials at Winlash.

Common Lash Glue Mistakes to Avoid: A Lash Artist's Guide to Better Retention

Lash retention problems almost always trace back to one thing: how the glue was used, not the glue itself. Whether you're a lash artist working on clients or applying strip lashes at home, small mistakes with lash glue — how it's dropped, timed, or stored — cause the majority of lifting, clumping, and irritation issues people run into.

This guide breaks down the most common lash glue mistakes, from glue prep and application technique to environmental factors like humidity that most articles gloss over. We'll also answer a question we hear often: does the type of adhesive you use actually affect how much damage your natural lashes take over time?

Quick Access Table of Contents
  1. Common Lash Glue Mistakes to Avoid
  2. Understanding Lash Glue: Types, Ingredients, and How It Works
  3. Choosing the Right Lash Glue for Your Needs
  4. Prepping for Application: Setting the Stage for Success
  5. Mistake #1: Using Expired or Poor-Quality Lash Glue
  6. Mistake #2: Skipping the Patch Test and Ignoring Allergies
  7. Mistake #3: Not Cleaning Natural Lashes Properly
  8. Mistake #4: Applying Too Much or Too Little Glue
  9. Mistake #5: Incorrect Application Technique
  10. Mistake #6: Not Allowing Glue to Dry Properly
  11. Mistake #7: Overlooking Environmental Factors (Humidity, Temperature, etc.)
  12. Mistake #8: Using Oil-Based Products Near Lashes
  13. Mistake #9: Improper Storage and Handling of Lash Glue
  14. Mistake #10: Not Following Manufacturer Instructions
  15. Troubleshooting Common Eyelash Glue Problems
  16. How to Remove Lash Glue Safely and Care for Your Natural Lashes
  17. Aftercare Tips to Prolong Lash Extension Life and Prevent Issues
  18. When to Seek Professional Help: Signs of Serious Eyelash Glue Problems
  19. Frequently Asked Questions About Lash Glue Mistakes
  20. Conclusion: Achieving Flawless Lashes with the Right Glue Techniques

Understanding Lash Glue: Types, Ingredients, and How It Works
Understanding Lash Glue: Types, Ingredients, and How It Works

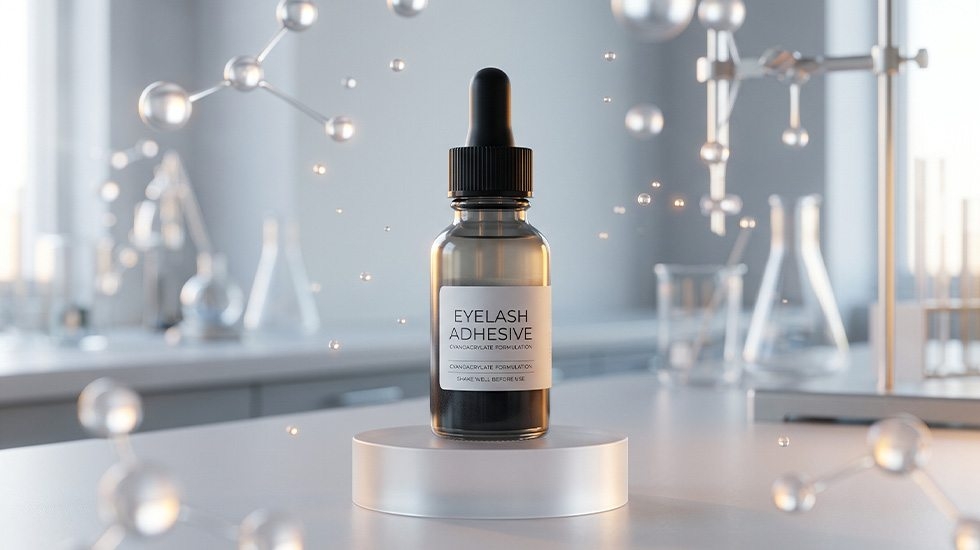
Almost all lash glues are cyanoacrylate-based — the same family of adhesive as super glue, but formulated to cure via moisture in the air rather than pressure. This is why humidity matters so much: it's not a side factor, it's the actual curing mechanism.

Within cyanoacrylate formulas, viscosity is the main practical difference. Thinner, fast-drying formulas (curing in roughly 1–2 seconds) suit experienced artists working quickly in higher-humidity environments; thicker, slower formulas (5 seconds or more) give more control for isolation-heavy techniques like volume fans, and tend to perform better in drier, lower-humidity rooms.

Latex-free formulas exist for clients with latex sensitivities, but "latex-free" doesn't mean "hypoallergenic" — nearly all lash glues still contain cyanoacrylate, which is the most common source of allergic reactions, latex or not.

  • Fast-drying (1–2 sec): Best for higher humidity, experienced hands
  • Slow-drying (5+ sec): Best for lower humidity, volume work, more control
  • Latex-free: Avoids latex allergies specifically — not a guarantee against reactions

Manufacturers typically state an ideal humidity range (commonly 40–60%) and temperature range on the packaging. Curing outside that range is one of the most common — and most overlooked — causes of poor retention, independent of technique.

Choosing glue by viscosity and matching it to your actual working environment, rather than by brand reputation alone, is the real foundation of consistent lash application.

Choosing the Right Lash Glue for Your Needs

Choosing lash glue by brand alone is the most common shortcut — and the most common source of retention problems. The right adhesive depends on three factors: your working environment, the technique you're using, and your client's sensitivity.

Start with your room's actual humidity, not a guess. A basic hygrometer (under $15) removes the guesswork: below 40% humidity, a slow-drying formula gives you time to work before the glue skins over; above 60%, a fast-drying formula prevents the glue from curing too slowly and clumping.

Technique matters as much as environment. Classic lash application (one extension per natural lash) generally tolerates a wider range of glue viscosities. Volume and mega-volume work — where multiple fine extensions are fanned and placed in seconds — needs a slower-curing formula, simply because there's more handling time involved per fan before it's placed.

  • Low humidity (below 40%): Slower-curing, more forgiving formula
  • High humidity (above 60%): Faster-curing formula to avoid clumping
  • Volume/mega-volume work: Slower cure time for fan-handling
  • Client with reported sensitivities: Latex-free formula, always patch-tested first

For sensitivity, a patch test isn't optional — it's the only reliable way to know how a specific client will react to a specific formula, since reactions vary by brand even within "latex-free" or "sensitive" product lines.

Once you've narrowed a glue down by humidity range and technique, test it in a real session before committing to a full case. Retention over the following 2–3 weeks tells you more than any product description does.

Prepping for Application: Setting the Stage for Success
Prepping for Application: Setting the Stage for Success

Most retention issues that show up days later actually start in the five minutes before glue ever touches a lash. Preparation isn't a formality — it's where the bond either succeeds or fails.

Cleanse the lash line with an oil-free foam or lash-specific cleanser — like the Be Easy Liquid Cleanser — then rinse and let lashes air-dry completely. Any residual moisture dilutes the glue on contact and weakens the bond, even if the lashes look dry.

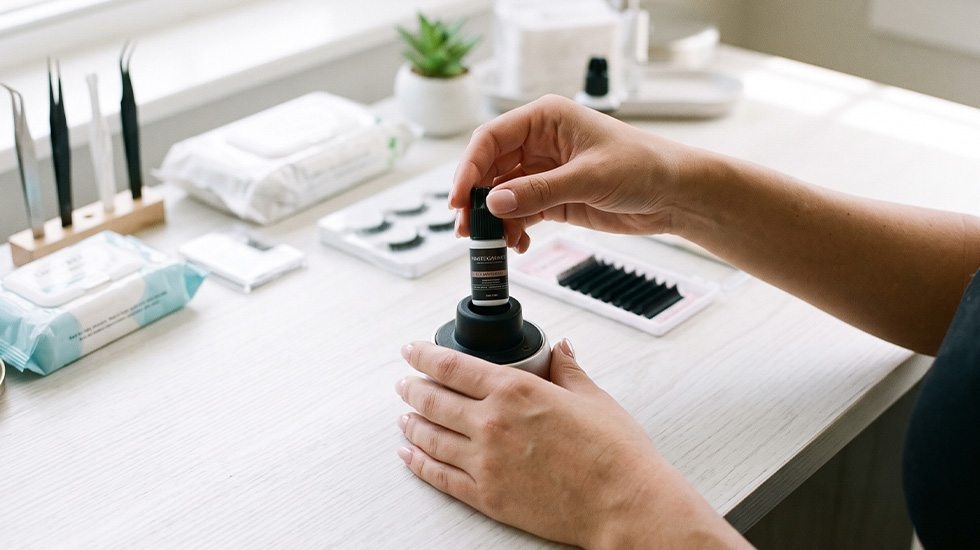
Set up your glue correctly before you start applying: drop it straight down onto a glue ring or jade stone rather than tilting the bottle, which pulls air into the tip and shortens the glue's usable life mid-session. Replace the drop every 15–20 minutes, since exposed glue starts curing in the ring long before it looks dry.

  • Cleanse: Oil-free cleanser, rinse fully, let air-dry — no residual moisture
  • Glue drop: Straight down onto a ring or jade stone, not tilted
  • Refresh timing: New glue drop every 15–20 minutes during a session
  • Patch test: On the inner wrist or behind the ear, 24 hours before first use with a new client

For strip lashes specifically, trim from the outer edge to match your eye shape before applying any adhesive — trimming after glue is on the band risks disturbing the bond.

None of these steps take more than a minute or two, but skipping any one of them is one of the most common reasons a technically correct application still fails to hold.

Mistake #1: Using Expired or Poor-Quality Lash Glue

Cyanoacrylate adhesives have a shelf life even unopened — typically 4–6 months — and once opened, most brands recommend using the bottle within 4–6 weeks, regardless of how much is left. Past that window, cure time slows and bond strength drops even if the glue still flows normally.

The clearest warning signs are a thickened, stringy consistency when it drops, a strong ammonia-like smell (stronger than the glue's normal scent), or visible discoloration toward yellow. Any one of these means the glue should be discarded, not stretched to the last drop.

  • Unopened shelf life: Usually 4–6 months — check the batch date, not just "best before"
  • Opened shelf life: 4–6 weeks from first use, even if the bottle isn't empty
  • Warning signs: Thick or stringy flow, strong ammonia smell, yellowing

Buying smaller bottles more frequently — rather than one large bottle to save money — usually works out cheaper in practice, since a half-used bottle past its window is glue you paid for but can't safely use.

Low-cost, unbranded adhesives are a separate risk: inconsistent viscosity between batches makes it hard to predict cure time, which is often the real cause behind "this glue doesn't work for me" experiences that get blamed on technique instead.

Mistake #2: Skipping the Patch Test and Ignoring Allergies

Cyanoacrylate is one of the most common causes of contact allergies in the beauty industry — and reactions can develop even in clients who've used the same glue before without issue, since sensitivity often builds up with repeated exposure rather than showing up on first contact.

How to Run a Proper Patch Test

Apply a small amount of the exact glue you plan to use to the inner wrist or behind the ear — not a different formula "from the same brand," since even small formulation differences matter. Wait the full 24 hours before proceeding; reactions from cyanoacrylate are often delayed rather than immediate, so checking after only an hour or two can miss a developing reaction.

  • Where: Inner wrist or behind the ear
  • Wait time: Full 24 hours, not less
  • Same product: Test the exact glue and batch you'll actually use

Signs of a Reaction to Watch For

Redness, itching, and mild swelling at the test site are the clearest signs to stop before full application. Watery eyes or a burning sensation during a lash session are early in-session warning signs — if a client reports either, remove what's applied so far rather than finishing the set first.

  • Redness or swelling at the patch test site
  • Itching or a burning sensation
  • Watery eyes during or shortly after application

For clients who react to one formula, switching to a latex-free or "sensitive" line doesn't guarantee a different outcome, since cyanoacrylate itself — not the latex — is usually the trigger. In persistent cases, referring the client to an allergist for a formal patch test is more useful than cycling through products by trial and error.

Mistake #3: Not Cleaning Natural Lashes Properly

Oil is the single biggest enemy of lash adhesive, and it doesn't have to be visible to cause problems. Sebum, invisible residue from the previous day's makeup, and even some "oil-free" moisturizers that still contain silicones can all create a barrier that weakens the bond before glue is ever applied.

Why This Gets Overlooked

Lashes that look clean often aren't. A quick glance doesn't reveal sebum buildup at the lash root, which is exactly where the bond needs to form. This is why retention problems traced back to poor cleansing are so common even among clients who report washing their face beforehand.

How to Clean Lashes Properly Before Application

  • Use an oil-free, lash-safe foaming cleanser — not a standard face wash or makeup wipe
  • Apply with a soft cleansing brush, working gently along the lash line and roots
  • Rinse thoroughly with water and check for any remaining foam or residue
  • Let lashes air-dry completely — do not proceed while damp

Avoid scrubbing hard enough to pull on the lashes themselves; the goal is removing residue from the skin and lash base, not agitating the hair shaft. Beyond adhesion, a clean lash line also reduces the risk of bacterial buildup, which becomes more of a concern once extensions are in place and daily cleansing gets harder to do thoroughly.

Mistake #4: Applying Too Much or Too Little Glue

Glue volume is one of the hardest things to judge by feel, especially for less experienced hands — and the two extremes cause opposite but equally common problems.

Too Much Glue

Excess glue doesn't just clump — it also takes longer to fully cure, which means the bond stays vulnerable for longer after application. A visibly shiny or "wet-looking" base after placement is usually a sign too much was used, even if it looks secure in the moment.

  • Clumping between adjacent lashes
  • Slower, uneven curing at the base
  • Added weight that can strain the natural lash over time

Too Little Glue

Under-application is less visually obvious but just as common a cause of early lash loss — the extension may look placed correctly at first, then lift within days because the bond point was too small to hold through normal lash movement.

  • Extensions lifting or detaching within 1–3 days
  • A bond point that looks fine but has minimal contact area

Getting the Amount Right

Dip the extension tip into the glue and check for a small, uniform bead — not a visible drop hanging off the end. For classic application, this bead should be barely visible; for volume fans, distribute a thin coat across the base of the fan rather than a single concentrated point. Wipe any excess against the edge of the glue ring before placing.

This is a skill that improves with repetition more than instruction — checking your work under good lighting after each set, and noting which lashes lifted early, is the fastest way to calibrate your own amount over time.

Mistake #5: Incorrect Application Technique
Mistake #5: Incorrect Application Technique

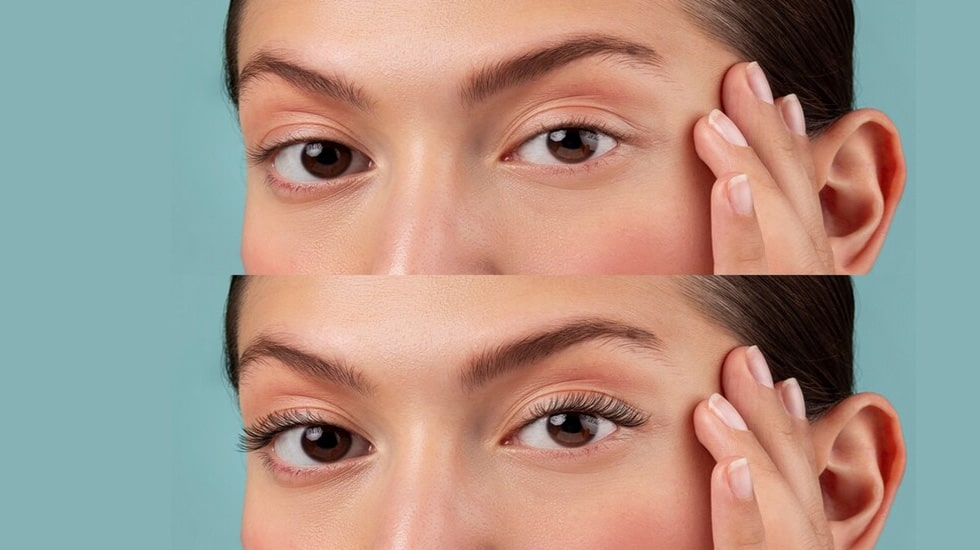
Technique errors usually come down to two things: incorrect placement distance and rushing before the glue is ready.

Placement Distance

For extensions, aim to place the bond 0.5–1mm from the skin — close enough for a natural look, far enough to avoid contact with the eyelid, which is what causes irritation and itching. For strip lashes, align as close to the natural lash line as possible without touching the skin directly, to avoid a visible gap between real and false lashes.

Timing the Placement

Placing lashes before the glue reaches a tacky stage is one of the most common causes of shifting or crooked results — the extension or strip can slide out of position as the glue continues to set. Waiting those extra few seconds for tackiness, rather than placing immediately after dipping, is what actually prevents this.

  • Extensions: Place 0.5–1mm from the eyelid, following the natural lash's angle
  • Strip lashes: Align at the natural lash line, working from center outward
  • Timing: Wait for tackiness before placing, not immediately after dipping

Using tweezers or a lash applicator, rather than fingers, gives far more control over both distance and angle — and checking alignment under different lighting after placement helps catch issues before they set permanently.

Mistake #6: Not Allowing Glue to Dry Properly

Cure time is a balance, not a single number — going too fast or too slow both cause problems, and the "right" wait time depends on the specific glue's stated cure speed.

  • Too wet: Lashes slide out of position before the bond sets
  • Over-dried: Glue skins over and loses tack, giving a weak, unreliable bond

Checking Tackiness Correctly

Test the glue's readiness on the back of your hand, not by sight — visual cues like shine can be misleading, while touch reliably tells you when it's tacky rather than wet or dry. Most formulas need 15–30 seconds, but always default to the manufacturer's stated time over general rules of thumb, since fast and slow formulas vary significantly.

Avoid blowing on the glue to speed drying — besides introducing bacteria, it can also cause uneven curing across the bond, since airflow affects only the exposed surface.

Environmental humidity (covered in the next section) directly shifts these timings, so the same glue can behave differently session to session if the room conditions change.

Mistake #7: Overlooking Environmental Factors (Humidity, Temperature, etc.)

Since cyanoacrylate cures via moisture in the air, humidity isn't a minor variable — it's the mechanism the glue depends on to work at all.

Humidity's Effect on Cure Time

  • Below 40% humidity: Slower cure, more working time, but weaker initial tack
  • 40–60% humidity: The ideal range most glues are formulated for
  • Above 60% humidity: Faster cure, higher risk of clumping if you're not quick

Managing Your Workspace

A basic hygrometer removes the guesswork of "does it feel humid in here" — checking it before each session takes seconds and tells you whether to reach for a faster or slower formula that day. In dry climates or air-conditioned rooms, a small humidifier near the workstation can bring levels back into range; in humid climates, a dehumidifier does the opposite.

Temperature compounds these effects: heat thins the glue and speeds curing further, while cold thickens it and can slow curing beyond what the humidity alone would suggest. Keeping the workspace at a stable room temperature (around 20–22°C / 68–72°F) removes one more variable from an already sensitive process.

Mistake #8: Using Oil-Based Products Near Lashes

Oil breaks down cyanoacrylate bonds on contact, which is exactly why oil-based removers work — but that same property makes any oil near the lash line, intentional or not, a retention risk.

Common Hidden Sources of Oil

  • Cream-based or oil-based makeup removers and cleansers
  • Moisturizers and eye creams applied too close to the lash line
  • Some "long-wear" mascaras and eyeliners with oil-based formulas
  • Certain sunscreens and primers with occlusive, oily bases

Checking ingredient labels for words like "mineral oil," "coconut oil," or "petrolatum" is more reliable than trusting a product's marketing claims, since "lightweight" or "non-greasy" products can still contain enough oil to weaken adhesive over time.

Switching to oil-free, lash-extension-safe formulas for anything applied near the eyes — cleansers, removers, and daily skincare alike — is a one-time habit change that prevents a recurring, hard-to-diagnose retention problem.

Mistake #9: Improper Storage and Handling of Lash Glue

How glue is stored between sessions affects its performance just as much as how it's used during application.

Storage Best Practices

  • Store upright, in a cool, dry place — avoid bathrooms or anywhere humidity fluctuates
  • Keep away from direct sunlight and heat sources
  • Seal the cap tightly and wipe the nozzle clean after every use to prevent clogging
  • Avoid repeated temperature swings (e.g., leaving it in a hot car, then an air-conditioned room)

Temperature swings in particular cause condensation inside the bottle, which introduces the exact moisture that triggers premature curing — this is a common, avoidable cause of a bottle "going bad" well before its stated shelf life.

Combined with the expiration guidance from Mistake #1, proper storage is what actually gets you the full shelf life a glue is rated for, rather than losing weeks of usable life to avoidable handling issues.

Mistake #10: Not Following Manufacturer Instructions
Mistake #10: Not Following Manufacturer Instructions

Every formula is chemically different, so treating all lash glues as interchangeable is one of the most avoidable mistakes on this list — and often the root cause behind several others.

  • Stated cure time (varies from 1 second to 8+ seconds between formulas)
  • Recommended humidity and temperature range
  • Shelf life once opened
  • Specific patch-test or safety guidance for that formula

Assuming a new glue behaves like your previous one — without checking its actual stated cure time and humidity range — is how experienced artists still end up with unexpected clumping or lifting after switching brands.

Quick Reference: All 10 Lash Glue Mistakes at a Glance

Mistake #MistakeKey SignsFix
#1Expired/poor-quality glueThick/stringy flow, ammonia smell, yellowingUse within 4–6 weeks of opening; buy smaller bottles more often
#2Skipping the patch testRedness, itching, watery eyesTest the exact glue on wrist/behind ear, wait full 24 hours
#3Not cleaning lashes properlyPoor adhesion despite lashes "looking" cleanOil-free cleanser, soft brush, full air-dry before application
#4Too much/too little glueClumping, or lifting within 1–3 daysSmall uniform bead; thin coat for volume fans
#5Incorrect application techniqueCrooked lashes, gaps, irritationPlace 0.5–1mm from skin; wait for tackiness first
#6Not letting glue dry properlySlipping (too wet) or weak bond (over-dried)Test tackiness on hand; follow manufacturer's stated time
#7Ignoring humidity/temperatureErratic cure time, clumping or slow setUse a hygrometer; keep room in 40–60% range
#8Oil-based products near lashesGradual, hard-to-diagnose liftingCheck labels; use oil-free formulas near eyes
#9Improper storageGlue "goes bad" early, thickensStore upright, cool, dry; avoid temperature swings
#10Ignoring manufacturer instructionsUnexpected results after switching brandsCheck each formula's own cure time and humidity range

Troubleshooting Common Eyelash Glue Problems

Lash Lifting

Usually caused by too little glue, placing before tackiness, or high humidity speeding the cure before proper contact forms. Address by adjusting the specific cause rather than simply "adding more glue" next time.

Eye Irritation

Most often an allergic reaction (see Mistake #2) or glue that made contact with the eye itself during application. If irritation appears with a glue that previously caused no issues, don't rule out a developing sensitivity.

Glue Clumping

Almost always excess glue volume, sometimes combined with high humidity accelerating the cure before it can settle evenly. Reducing the amount per lash, rather than switching formulas, usually resolves this first.

Short Retention

When several of the fixes above are already in place and retention is still poor, oil exposure (Mistake #8) or an expired formula (Mistake #1) are the two most commonly overlooked causes.

How to Remove Lash Glue Safely and Care for Your Natural Lashes
How to Remove Lash Glue Safely and Care for Your Natural Lashes

Since oil dissolves cyanoacrylate (Mistake #8), a dedicated oil-based lash glue remover is the safest way to take extensions off — pulling or picking at set glue risks removing natural lashes along with it.

Safe Removal Steps

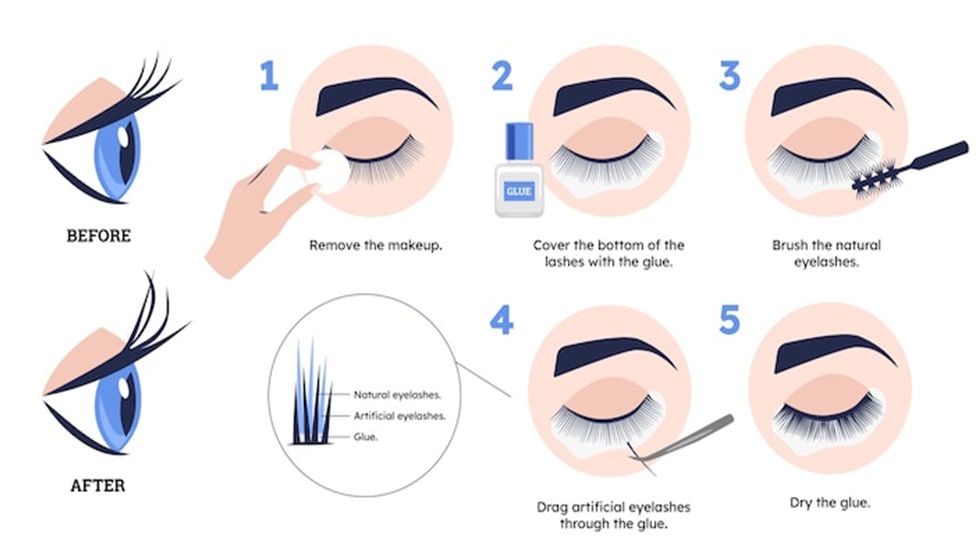
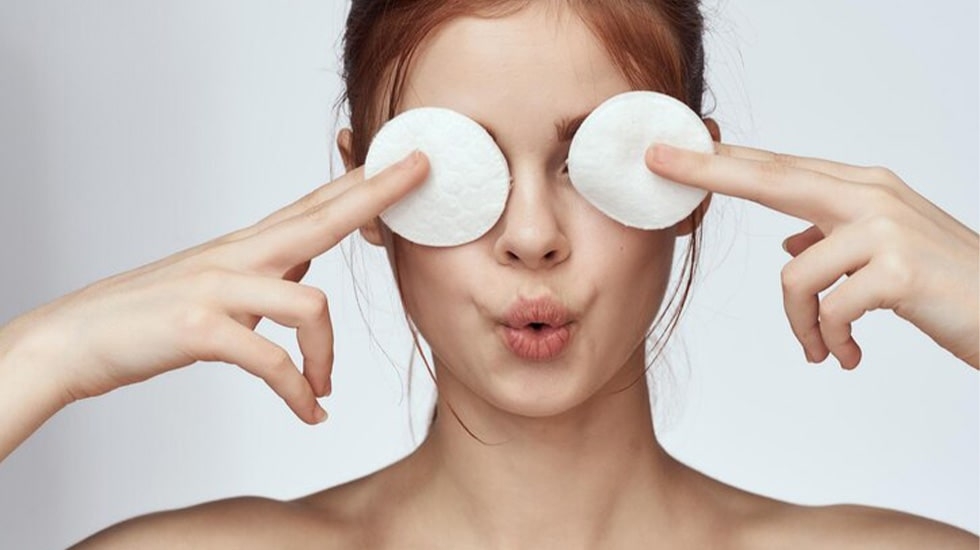
  • Soak a cotton pad with an oil-based lash glue remover
  • Press gently against the closed eyelid — don't rub or drag
  • Wait several minutes for the remover to fully penetrate the adhesive
  • Wipe away gently; repeat on any remaining spots rather than pulling

Once removed, a nourishing lash serum can help natural lashes recover strength, particularly if the extensions were worn for several weeks continuously.

Aftercare Tips to Prolong Lash Extension Life and Prevent Issues

  • Use only oil-free cleansers near the lash line (Mistake #8)
  • Clean lashes daily with a soft, extension-safe brush to prevent buildup and infection risk
  • Sleep on your back where possible to reduce friction against pillows
  • Avoid saunas, steam rooms, and hot showers, which soften the bond over time
  • Keep to regular fill appointments rather than waiting until multiple lashes have shed
  • Resist pulling or tugging at extensions, even when they feel loose — this often takes natural lashes with them

Most of these are single-habit fixes rather than ongoing effort, and together they account for most of the difference between extensions that last a full fill cycle and ones that don't.

When to Seek Professional Help: Signs of Serious Eyelash Glue Problems

Most lash glue issues are cosmetic and self-resolving once the cause is fixed. A smaller set of symptoms, though, warrants stopping and getting help rather than waiting it out:

  • Persistent redness or swelling that doesn't improve within a day of stopping use
  • Severe itching or burning during or after application
  • Glue that made direct contact with the eye itself
  • Unusual pain, rather than mild discomfort

Any of these justify discontinuing use immediately and, for eye contact specifically, rinsing with clean water right away and seeing a professional — an optician, ophthalmologist, or experienced lash technician — rather than continuing the session.

Frequently Asked Questions About Lash Glue Mistakes

Do certain adhesives make lash damage more likely?

Yes — low-quality or expired adhesives, and formulas mismatched to your room's humidity, cure unevenly and bond poorly, which puts more strain on natural lashes as extensions shift or lift. Using a fresh, appropriately-timed formula for your environment reduces this risk significantly.

Why does my lash glue not stick properly?

The most common causes are unclean lashes (oil or residue on the lash line), expired glue, or a humidity mismatch between the glue's ideal range and your actual room conditions.

Is it necessary to perform a patch test every time?

Yes, for any new formula or brand — sensitivity to cyanoacrylate can develop even after previous uses without issue, so past tolerance doesn't guarantee future safety.

How much glue should I apply?

A small, uniform bead — barely visible for classic application, or a thin coat across the base for volume fans. Too much causes clumping and slower curing; too little causes early lifting.

Can environmental factors affect lash glue?

Yes, directly — cyanoacrylate cures using moisture in the air, so humidity outside the glue's stated range (usually 40–60%) speeds up or slows down curing significantly, and temperature compounds the effect.

What should I do if glue gets in my eye?

Rinse immediately with clean water and see a professional — an optician or ophthalmologist — if any discomfort, redness, or vision change persists afterward.

Conclusion: Achieving Flawless Lashes with the Right Glue Techniques

Conclusion: Achieving Flawless Lashes with the Right Glue Techniques

Most lash glue problems trace back to a handful of fixable factors: the wrong glue for your environment, rushed timing, overlooked oil exposure, or a formula past its usable window. None of these require expensive equipment to fix — a hygrometer, a patch test, and attention to the details in this guide cover most of it.

For adhesives formulated for a range of humidity conditions and skill levels, explore our collection at Winlash.


Lash Taping Techniques & Hacks: How to Isolate Inner Corners and Layers

Inner corners, tucked-away layers, and hooded lids are the parts of a lash set that separate a rushed application from a polished one. No amount of skill with your tweezers helps if you can't actually see the lash you're trying to isolate — and that's exactly where advanced lash taping techniques come in. Used correctly, a small strip of lash tape can expose an inner corner in seconds, hold back an entire top layer to reveal the lashes underneath, or steady a nervous client's fluttering lid.

Quick Access to This Article
  1. Why Taping Is a Core Isolation Skill
  2. Understanding Lash Anatomy: Why Corners and Layers Are Difficult
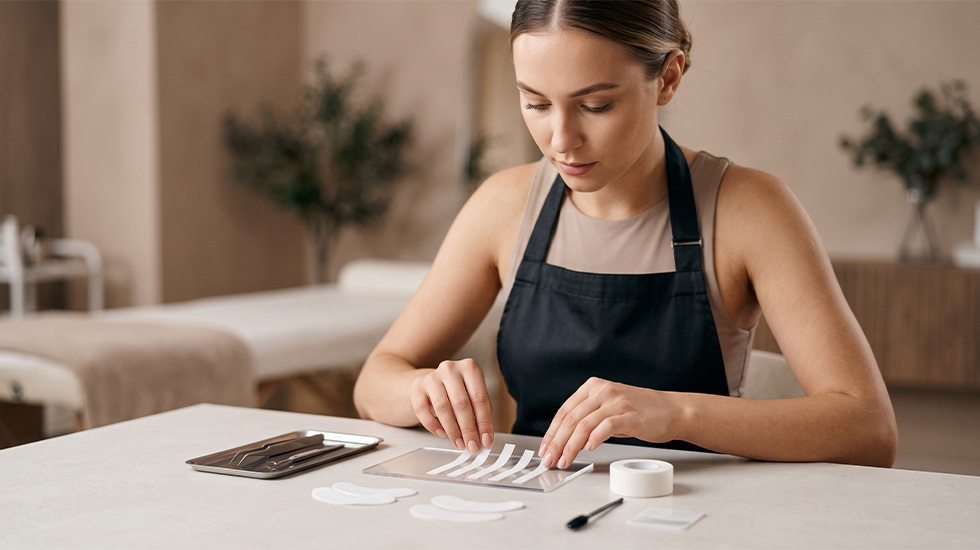
  3. Choosing the Right Lash Tape for the Job
  4. How to Tape Inner Corner Lashes (Step-by-Step)
  5. How to Tape Outer Corner Lashes Easily
  6. The Tape-Back Method: Isolating Lash Layers
  7. Lash Taping Hacks for Hooded and Difficult Eyes
  8. Essential Tools That Pair With Taping
  9. Safety: Avoiding Sclera Exposure and Chemical Burns
  10. Common Mistakes in Lash Taping
  11. Frequently Asked Questions
  12. How Taping Fits Into an Efficient Lash Workflow
  13. Conclusion

Why Taping Is a Core Isolation Skill

Why Taping Is a Core Isolation Skill in Lash Extensions

Isolation is the single most time-consuming part of any lash application, and tape is one of the few lash accessories that directly speeds it up rather than just supporting the process. Instead of fighting with lashes that are hidden, overlapping, or pointing the wrong way, a correctly placed strip of tape physically rearranges the eye area so the target lashes become visible and separated from everything else.

Beyond speed, taping also plays a role in client comfort. Techniques like lid taping and light, even pressure can reduce blinking and twitching in nervous or first-time clients, which in turn reduces the risk of stray adhesive contact and makes the whole session smoother for both artist and client.

There's also a workflow argument for taping that's easy to overlook: every extra second spent hunting for a hidden lash is a second the adhesive on your tweezer or the drop on your jade stone is curing unused. Artists who tape efficiently tend to waste less adhesive over the course of a full set, simply because they spend less idle time between isolations. Over dozens of appointments a week, that adds up to a meaningful difference in both product cost and session length.

Understanding Lash Anatomy: Why Corners and Layers Are Difficult

Two anatomical realities make inner corners, outer corners, and layered lashes harder to isolate than the rest of the lash line:

  • Corner lashes grow at a sharper angle and are often shorter and finer than the lashes along the center of the lid, which makes them easy to miss or double up when isolating by tweezer alone
  • Natural lashes grow in multiple rows, not one flat line — a top layer of longer lashes can completely hide a bottom layer of shorter ones, and without separating the lash layers physically, it's easy to isolate the same lash twice or leave the lower row untouched

Tape addresses both problems by either stretching the skin to reveal hidden corner lashes, or by physically holding one lash layer out of the way so the layer underneath becomes visible and workable. It's worth noting that these challenges aren't a sign of inexperience on the artist's part — even lash artists with years of experience rely on taping for corners and layering, because the anatomy itself, not skill level, is what makes these areas difficult. Skipping tape and trying to power through with tweezers alone usually means either missing lashes entirely or repeatedly isolating the same lash, both of which slow the appointment down and increase the risk of double-stacking extensions on a single natural lash.

Choosing the Right Lash Tape for the Job

Not every tape behaves the same way on skin, and the right choice depends on the client's skin sensitivity and the specific technique you're using. The table below compares the most common types used in professional lash studios.

Tape typeAdhesion strengthTransparencyBest for
Nichiban Japanese tapeMedium, gentle releaseSemi-transparentPrecision work on corners and delicate skin
3M paper tapeMedium-strongOpaque, matte whiteLarger areas, layering back, general isolation
Micropore/surgical tapeStrongOpaqueClients needing firmer hold, longer sessions
Hypoallergenic/sensitive tapeLight to mediumVariesSensitive skin, latex allergies, frequent removal

As a general rule, thinner and more transparent tapes like Nichiban work best for small, precise areas such as inner corners, where you need enough grip to hold the skin without covering too much of your working area. Wider, more opaque tapes like 3M paper tape are better suited to layering techniques and larger sections of the lid, where coverage and hold matter more than visibility through the tape itself.

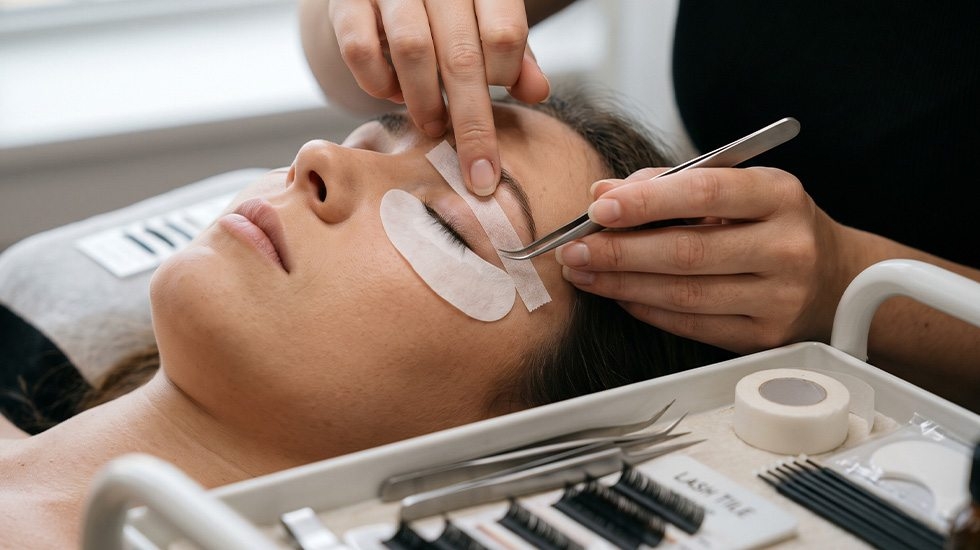
How to Tape Inner Corner Lashes (Step-by-Step)

How to Tape Inner Corner Lashes Step by Step

Inner corner lashes are short, sparse, and grow close to the tear duct, which makes them one of the trickiest areas on the entire lash line. Here's a reliable method:

  1. Cut a small piece of tape, roughly 5–7 cm long, and split it lengthwise into two thin strips
  2. With the client's eyes gently closed, place one thin strip on the eyelid just above the inner corner lashes
  3. Pull the strip gently outward and slightly upward, toward the temple, to stretch the skin and expose the inner corner lashes
  4. Check that the tape is anchored on skin only, not pulling on the lash line itself or riding up toward the waterline
  5. Isolate and apply extensions to the newly visible lashes, working from the corner outward

Because inner corner lashes are so fine, it also helps to work under stronger, more direct lighting and to use a smaller isolation tweezer than you would for the rest of the set.

How to Tape Outer Corner Lashes Easily

The outer corner uses the same principle as the inner corner, but in the opposite direction:

  1. Cut a similar thin strip of tape as used for the inner corner
  2. Place it on the eyelid just above the outer corner lashes
  3. Pull gently inward, toward the center of the lid, to expose the outer corner lashes
  4. Confirm the tape hasn't shifted the lash line's natural direction, which can cause outer lashes to be placed at an unnatural angle

Outer corners are also where hooded or downward-pointing lashes are most common — for these cases, an upward pull toward the brow, rather than a sideways pull, usually gives better visibility.

The Tape-Back Method: Isolating Lash Layers

Once a good portion of the top lash layer has already been isolated and lashed, the bottom layer can become almost invisible underneath the newly applied extensions. Taping back solves this:

  1. Take a small strip of tape and place it horizontally across the tips of the already-placed top-layer extensions
  2. Gently press the tape and fold the taped extensions back toward the lid, out of the way
  3. This exposes the bottom layer of natural lashes cleanly, without interference from the extensions already applied above
  4. Isolate and lash the bottom layer as normal, then remove the tape carefully once finished

This technique is especially useful during a full set on a client with dense natural lashes, and during fills where regrowth has occurred underneath an existing layer of extensions.

Lash Taping Hacks for Hooded and Difficult Eyes

Standard inner and outer corner taping works well on most eye shapes, but a few variations need adjusting:

  • Hooded eyes: excess skin can fold over the lash line when the eyes are closed, hiding lashes along the entire lid. Taping the eyelid upward toward the brow, rather than sideways, lifts this excess skin out of the way
  • Downward-pointing lashes: similar to hooded eyes, an upward pull rather than a horizontal one gives a clearer view of the lash base
  • Monolid clients: because there's no visible crease to anchor against, tape placement should sit slightly higher on the lid than usual to get a stable pull without the tape slipping during the appointment
  • Watery or sensitive eyes: a hypoallergenic, low-tack tape reduces the chance of irritation from repeated adjustment throughout the session

Essential Tools That Pair With Taping

Essential Tools That Pair With Lash Taping

Tape rarely works in isolation — most lash artists combine it with a small set of supporting tools for the cleanest results:

  • Under-eye gel pads: cover and hold down the bottom lash line so it doesn't interfere with upper lash isolation, and provide a contrasting background that makes lashes easier to see
  • Fine-tipped isolation tweezers: essential for picking out single lashes in tight, taped-open corners without catching neighboring lashes
  • A small handheld lash mirror: lets you check your isolation work from underneath, confirming no lashes are stuck together or missed before finishing a section

Keeping these tools within arm's reach, rather than digging for them mid-application, matters more than it might seem. Every time you have to pause a taping technique to search your kit for a mirror or a specific tweezer, the tension you've carefully created with the tape has more time to shift or loosen, and you may end up repositioning it before you can even use it. Many artists lay out their taping tools in a fixed order on their trolley for exactly this reason — so the sequence of taping, isolating, and checking stays uninterrupted.

You can find these alongside other studio essentials in our beauty care product range.

Safety: Avoiding Sclera Exposure and Chemical Burns

Taping is generally very safe, but because it involves stretching or repositioning the eyelid, a few precautions matter:

  • Never expose the sclera (the white of the eye): if pulling the tape reveals any part of the sclera rather than just skin and lashes, the tape is positioned too aggressively and should be adjusted or loosened immediately
  • Watch for chemical burns: if the eye is even slightly open while lash adhesive is in use nearby, cyanoacrylate fumes can irritate or burn the exposed surface of the eye. Always confirm the client's eyes are fully closed before applying adhesive near a taped area
  • Check tension regularly: tape that's pulled too tightly for too long can cause skin irritation or leave marks after removal, especially on sensitive or thin eyelid skin
  • Remove tape gently: peel slowly in the direction of natural skin folds rather than straight up, to minimize discomfort and reduce the risk of skin irritation

If a client reports stinging, excessive tearing, or discomfort at any point during taping, stop immediately, reposition or remove the tape, and check the eye area before continuing.

Common Mistakes in Lash Taping

  • Using tape that's too wide for corner work: a wide strip covers too much of the working area and makes precise isolation harder, not easier
  • Pulling too hard or in the wrong direction: this risks exposing the sclera or distorting how lashes will sit once released
  • Reusing the same strip of tape multiple times: reduced adhesion from reuse means the tape can shift mid-application, undoing your isolation work
  • Skipping a mirror check before removing tape: missing a lash or spotting a "sticky" (two lashes glued together) is much easier to fix before the tape comes off than after
  • Ignoring client feedback: discomfort during taping is a signal to adjust technique, not something to push through for the sake of speed

Frequently Asked Questions

What's the best tape for isolating inner corner lashes?

Thin, semi-transparent tapes like Nichiban Japanese tape work well for inner corners because they offer enough grip to stretch the skin without covering too much of the small working area you need to see clearly.

Is lash taping safe for sensitive skin?

Yes, when a hypoallergenic, low-tack tape is used and removal is done gently in the direction of natural skin folds. Clients with known sensitivities or latex allergies should be matched with a suitable hypoallergenic option before the session.

Can taping techniques help with hooded eyes?

Yes. For hooded eyes, taping the eyelid upward toward the brow, rather than sideways, lifts the excess skin fold that would otherwise cover the lash line, making isolation significantly easier.

How do I know if I've pulled the tape too far?

If any part of the sclera, the white of the eye, becomes visible when the tape is pulled, it's been positioned too aggressively. Loosen or reposition it immediately to avoid irritation or exposure to adhesive fumes.

What's the difference between taping for corners and taping back for layers?

Corner taping stretches the skin to reveal lashes that are hard to see due to their angle and position. Taping back is different — it involves folding already-placed extensions out of the way with tape to expose a hidden bottom layer of natural lashes underneath.

How long can lash tape safely stay on during an appointment?

Most professional lash tapes are designed to stay in place comfortably for the length of a full set, typically one to three hours. If a client reports discomfort, or if the tape's grip visibly weakens before the appointment ends, it should be replaced with a fresh strip rather than left in place.

How Taping Fits Into an Efficient Lash Workflow

The most effective lash artists don't treat taping as a fix they reach for only when they get stuck — they build it into the structure of the appointment from the start. A common approach is to tape the trickiest areas first, while both artist and client still have the most focus and patience available:

  • Start with corners, not the middle of the lid: isolating inner and outer corners early, while you're fresh, tends to produce cleaner results than leaving them for the end of a long appointment when fatigue sets in for both artist and client
  • Pre-cut your tape strips before the client sits down: having several pre-cut thin strips ready to go removes a small but repeated interruption from your workflow every time you reach for tape mid-set
  • Reassess halfway through: on longer full sets, checking whether existing tape has loosened or shifted at the halfway point prevents small positioning issues from turning into isolation problems later in the appointment
  • Match your tape choice to the stage of the set: thinner tape for the precision work on corners early on, wider tape for layering back once a good volume of extensions is already placed

Building these habits into your routine turns taping from a reactive tool into a planned part of every appointment, which is ultimately what separates a fast, clean set from one that runs long and still needs touch-ups.

Conclusion

Advanced taping techniques turn two of the most frustrating parts of any lash application — tight inner corners and hidden lash layers — into a manageable, repeatable part of your workflow. The details matter more than they might seem: the width and type of tape, the direction of the pull, and constant attention to client comfort all separate a technique that speeds up your session from one that creates problems mid-appointment. Practice these methods on a range of eye shapes and skin sensitivities, and taping will quickly become as automatic and reliable a step in your routine as isolating with your tweezers.

Find the tapes, isolation tools, and studio essentials used in this guide at Winlash.

Manual Shaking vs. Lash Glue Shakers: What Actually Improves Retention?
Quick Access to This Article
  1. The Chemistry Behind Cyanoacrylate and Pigment Separation
  2. Why Pigment Separation Affects Lash Retention
  3. Manual Shaking: How It Works and Where It Falls Short
  4. Glue Shakers: How They Work
  5. How to Choose the Right Glue Shaker for Your Studio
  6. Manual Shaking vs. Glue Shaker: Side-by-Side Comparison
  7. Signs Your Adhesive Isn't Properly Mixed
  8. Common Mistakes When Mixing Lash Adhesive
  9. How to Shake Lash Glue Correctly
  10. Cyanoacrylate Safety: Handling Fumes and Skin Contact
  11. Frequently Asked Questions
  12. Conclusion

If your lash retention has ever been inconsistent for no obvious reason, the answer might not be your technique — it could be sitting in the bottle. Lash adhesive is a formulated mixture, not a single liquid, and its components naturally separate when the bottle sits still. Understanding the chemistry behind this pigment separation, and comparing Manual Shaking vs. Lash Glue Shakers, can make the difference between a flawless set and a frustrating one.

In this guide, we break down the actual chemistry behind cyanoacrylate and pigment separation, look at why it matters for retention, compare manual shaking with glue shakers side by side, and walk through how to properly mix your adhesive before every application.

The Chemistry Behind Cyanoacrylate and Pigment Separation

The Chemistry Behind Cyanoacrylate and Pigment Separation in Lash Adhesive

Most professional lash adhesives are cyanoacrylate-based, but cyanoacrylate is never used alone. A typical formula combines several components with very different densities:

  • Cyanoacrylate — the core bonding agent that cures on contact with moisture
  • Polymethyl methacrylate (PMMA) — added for long-term bond strength and flexibility
  • Carbon black (pigment) — gives the adhesive its deep black color
  • Stabilizers such as hydroquinone — keep the formula liquid and workable until it's applied

These ingredients don't share the same density, so gravity slowly pulls them apart when the bottle is left standing. Heavier components like carbon black and PMMA tend to settle toward the bottom, while lighter stabilizers rise to the top. This is what the industry calls pigment separation — visually, it shows up as a lighter or grayish band near the top of the bottle and a darker, denser layer underneath. The bottle can look uniform from the outside while being chemically uneven inside, which means a drop taken without mixing can be mostly pigment, mostly stabilizer, or anywhere in between.

Why Pigment Separation Affects Lash Retention

Retention depends on the adhesive curing with the correct balance of cyanoacrylate and its supporting components. When a drop is pulled from a poorly mixed bottle, that balance is off in one of two directions:

  • A drop with too little cyanoacrylate and too much stabilizer bonds weakly and can lead to premature shedding within days rather than weeks
  • A drop with too much cyanoacrylate and too little stabilizer can cure too fast, increasing the risk of a poor bond, fuming, or the extension setting before it's properly positioned

Because pigment separation happens gradually and invisibly at first, it's easy to blame retention problems on humidity, prep, or aftercare when the real cause is simply an unmixed bottle. This is why many experienced lash artists treat proper mixing as a non-negotiable step, not an optional one.

Manual Shaking: How It Works and Where It Falls Short

Manual shaking relies on repeated, vigorous side-to-side motion (never up and down, which can force adhesive into the nozzle and cause clogging) to physically redistribute the settled ingredients. Most manufacturers recommend at least 1–2 minutes of continuous shaking for a proper mix, and denser formulas with higher PMMA content may need even longer.

In practice, this method has a few real limitations:

  • Inconsistent force: the intensity and angle of a manual shake vary from person to person, and even from hand to hand on a busy day
  • Physical strain: repeating this motion multiple times per session, day after day, contributes to wrist fatigue and, over time, repetitive strain injuries
  • Time pressure: when a client is waiting, it's tempting to cut the shake short — which is exactly when under-mixed adhesive causes problems
  • Difficult to verify: without a fixed cycle length, it's hard to know objectively whether a bottle has actually been shaken long enough

Glue Shakers: How They Work

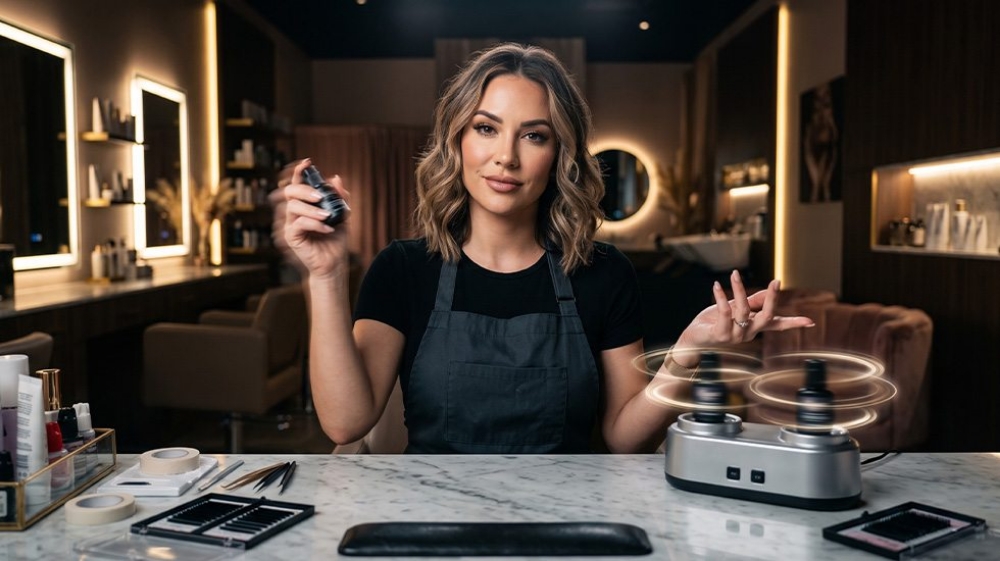
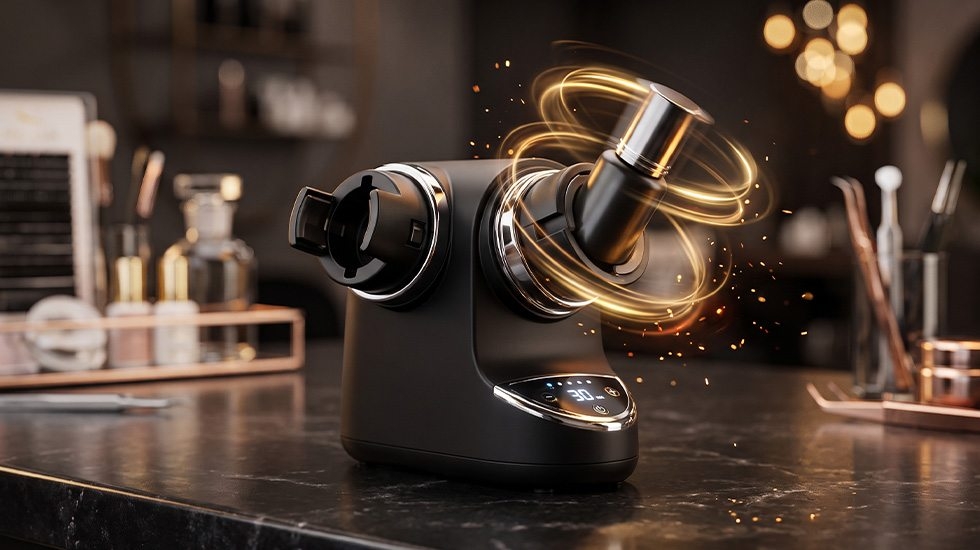
A dedicated glue shaker uses centrifugal or vortex motion to spin the bottle at high speed, redistributing the separated components far more evenly than a hand ever could. Most electric shakers achieve a thorough mix in 5–15 seconds, compared to the 1–2 minutes typically needed by hand.

Because the motion is mechanical and repeatable, every bottle gets the same quality of mix regardless of who's using it or how rushed the session is. This consistency is the main reason glue shakers have become standard equipment in professional lash studios rather than an optional extra, and why many artists build a quick mix into their setup routine before every single client, not just when a bottle looks visibly separated.

How to Choose the Right Glue Shaker for Your Studio

How to Choose the Right Glue Shaker for Your Lash Studio

Not all glue shakers are built the same, and the right choice depends on how your studio actually works:

  • Single-head vs. dual-head: a dual-head design lets you mix two bottles at once — useful if you switch between adhesives for different clients or keep a backup bottle ready
  • Bottle compatibility: check that the adaptor fits the bottle sizes you actually use, since a loose fit can let the bottle move during the cycle and reduce mixing quality
  • Cycle length and speed: a fixed, tested cycle removes the guesswork of "is that enough?" that comes with manual shaking
  • Build stability: a shaker that stays firmly in place on the desk during operation reduces the risk of a bottle working loose mid-cycle

Manual Shaking vs. Glue Shaker: Side-by-Side Comparison

FactorManual ShakingGlue Shaker
Mixing time1–2 minutes5–15 seconds
ConsistencyVaries by technician and fatigue levelUniform, mechanical motion every time
Physical strainContributes to wrist/hand fatigue over repeated sessionsNone
Risk of cloggingHigher if shaken up-and-down or too vigorously near the nozzleLower, controlled motion keeps adhesive away from the cap
Verifiable mix qualitySubjective, hard to standardize between artistsConsistent, fixed cycle removes guesswork
Upfront costNoneOne-time tool purchase

Signs Your Adhesive Isn't Properly Mixed

Whichever method you use, it's worth knowing how to spot an under-mixed bottle before it affects a client's set:

  • Visible separation: distinct layers, or a gray tone instead of a deep black, in pigmented adhesives
  • Inconsistent texture: clumps, stringiness, or overly watery patches
  • Altered drying time: a drop that cures noticeably faster or slower than usual, since the cyanoacrylate-to-stabilizer ratio in that drop is off balance

It's worth noting that shaking, however it's done, cannot fix adhesive that has already expired or been damaged by poor storage — for that, see our guide on proper lash adhesive storage and accessories.

Common Mistakes When Mixing Lash Adhesive

  • Shaking cold adhesive straight from the fridge: cold adhesive is thicker and harder to mix properly; let it reach room temperature first for an even mix
  • Over-shaking or shaking too aggressively: this can introduce air bubbles into the adhesive, which affects flow and can cause popping or fuming when a drop is dispensed
  • Not resealing the cap fully: a loose cap during shaking can let adhesive leak into the threads, harden there, and make the bottle harder to open next time
  • Mixing once at the start of the day only: components can begin to settle again within an hour or two, so a quick re-mix between drops during longer sessions keeps consistency up

How to Shake Lash Glue Correctly

How to Shake Lash Glue Correctly for Maximum Retention

  1. Let the bottle reach room temperature if it's been refrigerated, since cold adhesive resists even mixing
  2. Hold the bottle securely by the body, not just the cap, to avoid stressing the seal
  3. If shaking by hand, move the bottle firmly side-to-side (not up and down) for the full recommended time — usually 1–2 minutes
  4. If using a glue shaker, match the adaptor to your bottle size and run a full cycle, typically 5–15 seconds
  5. Check the color and texture before dispensing a drop; it should look uniform, with no visible layers
  6. Repeat a short mix between drops during longer sessions, since components can begin to settle again over time

Cyanoacrylate Safety: Handling Fumes and Skin Contact

Proper mixing isn't just about retention — it also plays a role in safe handling. A few general precautions apply whether you shake manually or use a shaker:

  • Work in a well-ventilated space, since cyanoacrylate releases fumes as it cures that can irritate the eyes and airways of both the technician and the client
  • Avoid direct skin contact with the adhesive, as cyanoacrylate bonds quickly to skin as well as lash fibers
  • Keep the bottle capped tightly between uses to slow curing at the nozzle and reduce fume buildup in enclosed spaces
  • If irritation, persistent coughing, or an allergic reaction occurs during use, stop and ventilate the area, and consult a medical professional if symptoms continue

Frequently Asked Questions

Why does lash adhesive need to be shaken at all?

Because it's a mixture of components with different densities, including cyanoacrylate, PMMA, pigment, and stabilizers. These separate under gravity when the bottle sits still, so shaking is needed to redistribute them evenly before use.

Is a glue shaker really necessary, or is manual shaking enough?

Manual shaking can work if it's done firmly and for the full recommended time, but it's harder to do consistently under time pressure. A glue shaker removes that variability and reduces physical strain, which is why most professional studios use one.

Can shaking fix old or expired lash adhesive?

No. Shaking only redistributes ingredients that have separated — it cannot restore adhesive that has expired, been contaminated, or was stored incorrectly. If the adhesive still looks or performs poorly after a proper mix, it should be replaced.

Should I shake the bottle up and down or side to side?

Side to side. Shaking up and down can force adhesive toward the nozzle and increase the risk of clogging.

How often should I re-mix adhesive during a session?

Pigment separation can begin again within an hour or two, so a short re-mix between drops during longer sessions helps maintain a consistent bond throughout the appointment, not just at the start.

Conclusion

Pigment separation isn't a flaw in the product — it's simple chemistry, and it happens to every cyanoacrylate-based formula given enough time on the shelf. The real question is whether your mixing method reliably reverses that separation before every application. Manual shaking can get the job done, but a glue shaker delivers a more consistent mix in a fraction of the time and without the physical toll on your hands. If retention issues have been unpredictable in your studio, your mixing routine is one of the first places worth checking.

Explore our full range of professional lash adhesives and mixing tools at Winlash.

Lash Lift at Home vs Professional: Pros, Cons Safety
Quick Access to Article Sections
  1. What Is a Lash Lift?
  2. Lash Lift vs Lash Extensions: Key Differences
  3. Lash Lamination vs Lash Lift: Are They the Same?
  4. Lash Lift at Home: The DIY Revolution
  5. Professional Lash Lift: Salon Expertise
  6. Lash Lift at Home vs Professional: Pros and Cons Compared
  7. Which to Choose? Your Decision Guide
  8. FAQs: Common Lash Lift Questions
  9. Conclusion

A lash lift at home vs professional decision starts with understanding what a lash lift actually is: a semi-permanent treatment that curls and lifts your natural lashes for a wide-eyed, effortless look — no falsies or lash curler required. But should you try it at home with a DIY kit, or book a professional session? In this guide, we compare the real pros, cons, and safety considerations of each option, including product recommendations from Winlash's lash and brow lift kits, so you can decide which suits you best.

What Is a Lash Lift?

What Is a Lash Lift? Natural Eyelash Curling & Lifting Process Explained

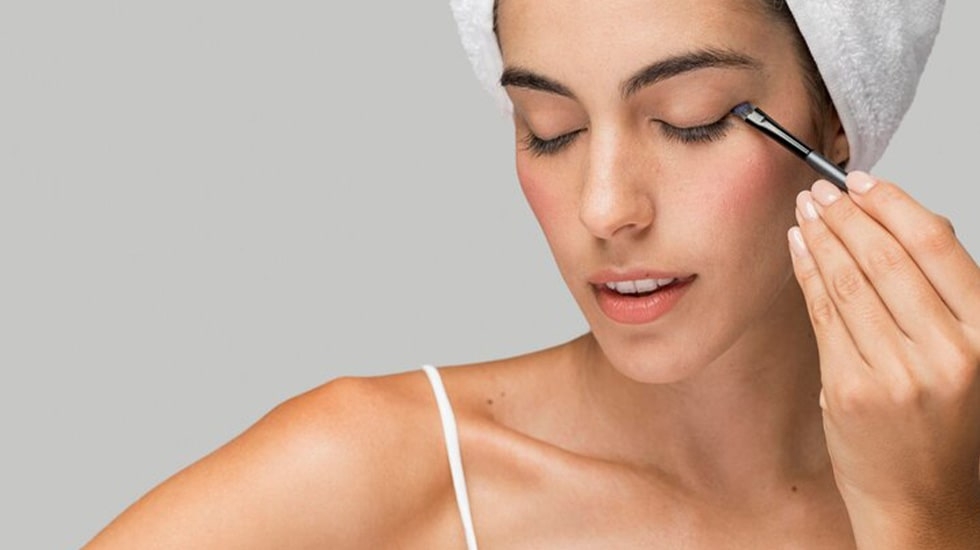
A lash lift works like a perm for your eyelashes. A silicone rod or shield is placed against your eyelid, and your natural lashes are curled up and over it. A lifting solution is then applied to soften the lash structure so it can be reshaped, followed by a setting (neutralizing) solution that locks the new curl in place. Many kits and salon treatments finish with a nourishing serum — often containing keratin or collagen — to condition the lashes after the chemical process.

Unlike eyelash extensions, which add synthetic fibers for extra length and volume, a lash lift enhances the lashes you already have. This makes it a lower-maintenance option for people who want a natural, wide-eyed look without daily curling or the upkeep that extensions require. A full session — whether at home or in a salon — typically takes 45 to 60 minutes, and results usually last 6–8 weeks, depending on your natural lash growth cycle and how you care for your lashes afterward (for example, avoiding oil-based products, which can loosen the curl faster).

Because the process involves chemical solutions used close to the eyes, it's worth understanding exactly what's involved before deciding whether to try it yourself or book a professional — which is exactly what we'll break down in the rest of this guide.

Lash Lift vs Lash Extensions: Key Differences

The main difference between a lash lift and lash extensions comes down to one question: are you enhancing your natural lashes, or adding to them? A lash lift curls and lifts the lashes you already have — no added length, no synthetic fibers. Lash extensions, on the other hand, attach individual synthetic or silk fibers to each natural lash for extra length, volume, and drama.

This difference affects upkeep as much as it affects the look. Extensions typically need fill appointments every 2–3 weeks as your natural lashes shed and grow, and the added weight can, over time, contribute to lash breakage if they aren't applied or removed correctly. A lash lift needs no fills — it simply grows out with your natural lash cycle over 6–8 weeks, with no daily maintenance in between.

Neither option is objectively "better" — they suit different goals. If you want dramatic length and volume, extensions deliver that in a way a lift can't. If you want a natural, low-maintenance lift to your existing lashes — especially with tinting added for extra definition — a lash lift is usually the simpler, lower-commitment choice.

Lash Lamination vs Lash Lift: Are They the Same?

"Lash lamination" and "lash lift" are often used interchangeably, and in most kits and salons, they refer to the same core process — curling and setting the natural lashes. Some brands use "lamination" to describe a slightly more complete treatment that includes an extra sealing or glossing step for a smoother, shinier finish, sometimes paired with a brow lift as a combined treatment. In practice, the difference is mostly in branding rather than the underlying technique.

This has led to a wider range of combined kits on the market, including options that pair lash lifting with brow lifting in a single brow lift kit. Winlash's My Lamination 3-step kits, for example, include lifting cream, neutralizing cream, and a hydrating serum in pre-measured sachets, designed to be used for both lash and brow treatments.

Whichever term a product uses, the questions worth asking before buying are the same: what ingredients does it contain, is it formulated for sensitive eyes, and does it include clear timing instructions? Those details matter more than whether a kit is labeled "lift" or "lamination."

Lash Lift at Home: The DIY Revolution

How to Do a Lash Lift at Home | Complete DIY Process Using My Lamination Kit

The appeal of a lash lift at home is simple: no appointment, no travel, and a kit you can reuse multiple times for a fraction of the cost of repeated salon visits. It's a legitimate option for people comfortable following instructions carefully — but it does require more attention to detail than the "apply and wait" marketing often suggests.

How It Works: Step-by-Step Guide to a DIY Lash Lift

Start by cleansing your lashes thoroughly to remove oil and makeup residue, then do a patch test 24–48 hours beforehand to check for any allergic reaction. Once you're ready, here's the general process most kits follow:

  1. Apply the shield and adhesive: Use a water-soluble lash lift adhesive, like Winlash's My Lamination version, to secure the silicone lash pad to your eyelid. Pads come in different sizes — smaller for a more dramatic curl, larger for a subtler lift.
  2. Lifting step: Brush on the lifting cream (Step 1). Leave it on for the time stated on the packaging — usually 6–12 minutes depending on lash thickness. This softens the lash structure so it can be reshaped.
  3. Neutralizing step: Apply the neutralizing cream (Step 2) to lock in the curl, typically for 5–10 minutes.
  4. Hydrate and finish: End with a hydrating serum (Step 3) to condition the lashes after the chemical process.

The full process takes about 45–60 minutes. A dual-ended lash brush, like the My Lamination Eyelash & Eyebrow Lift Brush, makes it easier to keep lashes evenly separated and placed on the pad throughout.

Safety First: The Real Risks of a Lash Lift at Home

Lash lift solutions are strong enough to reshape hair structure, which means timing and placement genuinely matter. Leaving the lifting or neutralizing solution on for too long — or applying it too close to the skin — is the most common cause of problems, and can lead to:

  • Eye or eyelid irritation, especially if solution seeps under the pad or touches the skin.
  • Over-processed, brittle, or "singed" lashes, which can look frizzy or break more easily afterward.
  • Uneven curls if the pad size or solution timing doesn't suit your lash type.

To reduce these risks: always do a patch test first, follow the exact timings on the packaging rather than guessing, and choose a gentle, cruelty-free formula suited to sensitive eyes — Winlash's My Lamination range, made in Italy, is formulated with this in mind. If you experience redness, stinging, or swelling, rinse the area immediately with water and, if it persists, see a doctor or ophthalmologist rather than a beauty professional.

Best Lash Lift Kit for Home Use

For a reliable at-home option, Winlash's My Lamination 3-Step Lash & Brow Lift Kit is a solid choice: pre-measured sachets remove the guesswork of mixing solutions, and the formula is designed to nourish lashes through the process rather than just curl them. Pair it with silicone lash pads in a size suited to your lash length for a more customized curl.

DIY lash lifts can absolutely work well — but success depends far more on following instructions precisely than on any single product. If you're trying it for the first time, read through the full process once before you start, and don't rush the timing steps.

Professional Lash Lift: Salon Expertise

Professional Lash Lift vs DIY: Salon Results You Can Trust

A professional lash lift means having a trained technician handle the timing, product selection, and application for you. This matters more than it might seem: the biggest risks with lash lifts — over-processing, uneven curls, or solution touching the skin — are almost entirely a matter of technique and timing, which is exactly what a trained technician is practiced at controlling.

What to Expect in a Salon Session

A typical session lasts 30–45 minutes. The technician will look at your lash length, thickness, and natural direction to choose the right silicone rod size, then apply the lifting and neutralizing solutions with more precise control than most people can manage on their own eyes. Many salons use professional-grade products, such as Winlash's My Lamination Lash & Brow Lift Tubes, and can add tinting in the same session for a darker, more defined finish.

What You're Really Paying For

Professional lash lift sessions typically cost more per visit than a reusable DIY kit — but that price reflects a few real advantages: a technician trained to judge timing by eye rather than a fixed clock, sanitized tools, and someone watching for early signs of irritation before they become a problem. For people with sensitive eyes, a history of allergic reactions, or simply no confidence applying products near their own eyes, this extra care is often worth the cost.

Finding a Salon in the UAE

When choosing a salon in Dubai or Abu Dhabi, look for technicians who are certified in lash lift application specifically (not just lash extensions) and who can tell you exactly which products and brands they use. A salon willing to answer questions about their process and ingredients — rather than just booking you in — is usually a good sign.

Lash Lift at Home vs Professional: Pros and Cons Compared

Lash Lift at Home vs Professional: Which is Safer and More Convenient?

Here's a side-by-side breakdown of how the two options actually compare, based on cost, convenience, results, and safety.

AspectLash Lift at HomeProfessional Lash Lift
CostPros: One kit covers multiple uses, so cost per treatment drops over time. Cons: Some product may go to waste while you learn correct timing.Pros: No upfront kit cost or storage needed. Cons: Higher price per session, and it adds up if done every 6–8 weeks.
ConveniencePros: Do it whenever suits you, no appointment needed. Cons: Takes 45–60 minutes and requires practice to get comfortable.Pros: Faster session (30–45 minutes), no learning curve for you. Cons: Requires booking and travel to a salon.
ResultsPros: You control pad size and can adjust to your own lash shape. Cons: Higher chance of uneven curls or a shorter-lasting lift if timing isn't precise.Pros: More consistent, even results from someone experienced. Cons: Less hands-on control over the exact curl style.
SafetyPros: You can stop or rinse off immediately if something feels wrong. Cons: Higher risk of over-processing, skin contact, or uneven timing without trained judgment.Pros: A trained technician monitors timing and reactions throughout. Cons: Results still depend on the technician's skill and hygiene standards.

If you're confident following instructions closely, comfortable with a learning curve, and want to save money over repeat treatments, home is a reasonable choice. If you have sensitive eyes, a history of reactions, or simply want the most consistent result with the least personal risk, professional is the safer bet.

Which to Choose? Your Decision Guide

Choosing the Best Lash Lift Option: DIY vs Professional in UAE

Choosing between a lash lift at home and a professional session mostly comes down to three things: your budget, your comfort level with the process, and your eyes' sensitivity.

Key Factors to Consider

  • Budget: If you'd rather pay once for a kit you can reuse, home is more cost-effective over time. If you'd rather pay per session with no upfront cost, professional works better.
  • Experience: First-timers who are nervous about timing or application are usually better off starting with a professional session, then considering DIY once they know what a correctly-done lift should look and feel like.
  • Eye sensitivity: If you have sensitive eyes, allergies, or have reacted to beauty products before, a professional setting — where someone is watching for early signs of irritation — is the lower-risk choice.

Our Recommendations

  • Best for home use: Winlash's My Lamination 3-Step Kit — pre-measured sachets take the guesswork out of timing, and the formula is gentle enough for first-time use with a careful patch test.
  • Best for professional treatment: A certified salon using Winlash's professional-grade lift and lamination products, ideally one that also offers tinting in the same session.

There's no universally "better" choice — only the one that fits your comfort level and your eyes' needs. If in doubt, start with a professional session.

FAQs: Common Lash Lift Questions

Is it safe to do a lash lift at home?

Yes, if you follow the instructions and timings exactly and always do a patch test 24–48 hours beforehand. Most problems happen from leaving the solution on too long, not from the product itself.

How long does a lash lift last?

Typically 6–8 weeks, whether done at home or professionally, depending on your natural lash growth cycle and how you care for your lashes afterward.

Is lash lamination the same as lash lift?

In most products, yes — the terms are used interchangeably for the same curling and setting process. Some brands use "lamination" for a version with an added sealing step.

Lash lift vs extensions — which should I get?

A lash lift enhances your natural lashes with no added length; extensions add synthetic fibers for extra length and volume. Choose a lift for low-maintenance, natural results, or extensions if you want more dramatic length.

Is a lash lift safe for sensitive eyes?

It can be, with a gentle, cruelty-free formula and a careful patch test — but if you have a history of eye irritation or allergies, a professional session is the lower-risk option.

What are the risks of a lash lift at home?

The main risks are eye or eyelid irritation, over-processed or brittle lashes, and uneven curls — almost always caused by incorrect timing or the solution touching the skin.

Conclusion

Whether you choose a lash lift at home or a professional lash lift, the treatment itself is the same — curled, lifted lashes without extensions or daily mascara. The right choice for you depends on your budget, your comfort with the process, and how your eyes tend to react to beauty products. Explore Winlash's full range of lash and brow lift products to find the right kit for your routine.

Winlash Dubai equips lash & brow professionals and dedicated at-home users with 900+ pro-grade products—including award-winning My Lamination lash lift kits and cruelty-free options. Backed by Ravabeauty (est. 2018) and a 50-member expert team, we partner with 13 global brands to deliver salon-quality tools and aftercare tuned for Dubai’s climate, with fast delivery across Dubai, Abu Dhabi, and Sharjah.

Exclusive Distributor Fast UAE Delivery Climate-Tuned Aftercare