
RSS

Blog posts of '2026' 'October'

Natural Lash Extensions: How to Create a Soft Set That Protects Natural Lashes

Ask any lash artist which request they hear most often, and the answer is almost always the same: "I want them to look natural." Natural lash extensions sound simple, but they're one of the hardest looks to get right. There's nowhere to hide. A length jump that's too big, a curl that doesn't match the client's own lashes, or a diameter that's slightly too heavy will read as "extensions" from across the room. Getting a truly natural result comes down to precise choices about length, curl, thickness and placement, all built on the client's own natural lashes. Choosing the right eyelash extensions is where that starts.

This guide walks through what makes natural looking lash extensions work: which application style to choose, how to select length, curl and diameter, how to map a natural set for different eye shapes, and how to protect the health of your client's natural lashes so every fill starts from a strong foundation.

Quick Access to This Article
  1. What Are Natural Lash Extensions?
  2. Classic vs. Hybrid vs. Light Volume: Which Looks Most Natural?
  3. Choosing Length, Curl and Diameter for Natural Looking Lash Extensions
  4. Natural Lash Mapping for Every Eye Shape
  5. Black vs. Brown Lashes for a Softer Finish
  6. Do Eyelash Extensions Damage Your Natural Lashes?
  7. Step-by-Step: Applying a Natural Classic Set
  8. Aftercare Advice to Give Your Clients
  9. Common Mistakes That Make Extensions Look Fake
  10. Frequently Asked Questions
  11. Conclusion

What Are Natural Lash Extensions?
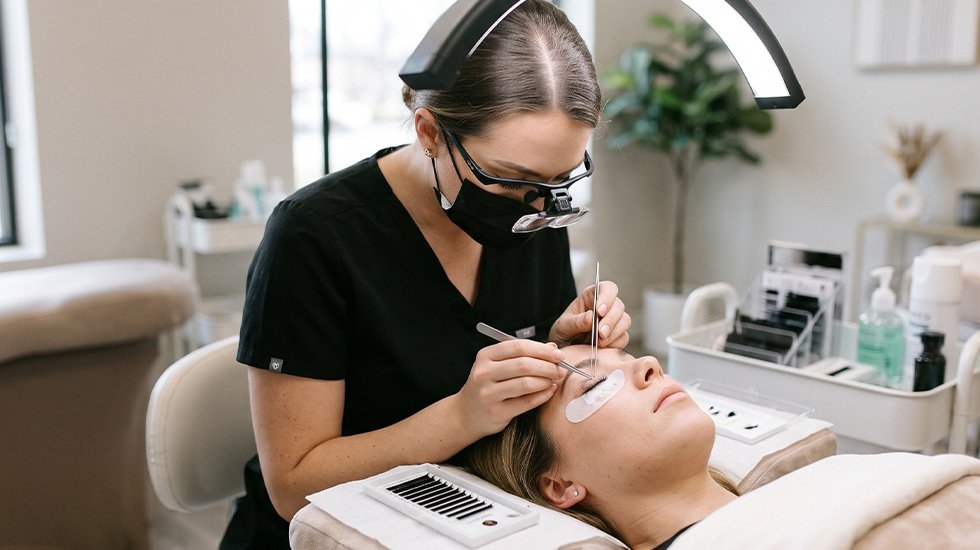
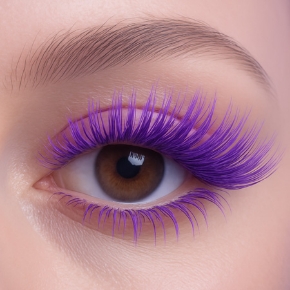
Natural lash extensions applied for a soft, mascara-like everyday look

Natural lash extensions, sometimes searched for as natural eye lash extensions, aren't a separate product or a special fiber. They're a style of application. The goal is to make the client's own lashes look longer, darker and more defined, as if they were born with great lashes or had just applied a good mascara, rather than to add obvious volume or drama.

What defines a natural set is restraint and harmony with the natural lash line:

  • Length stays close to the client's own lashes, with only a modest extension beyond each natural lash
  • The curl mirrors the client's natural curl instead of forcing a dramatic lift
  • Diameter is fine and lightweight, so the lash line looks defined rather than heavy
  • Length transitions are gradual, with no sudden jumps from one zone to the next
  • Density follows the client's natural lash count, without filling gaps so heavily that the lash line looks artificial

Because natural sets are lighter and closer to the client's own lashes, they're also one of the gentlest options for lash health. That's a big part of why they're the most common choice for first-time clients and for anyone who wants extensions they can wear every day, at work or at the gym.

Classic vs. Hybrid vs. Light Volume: Which Looks Most Natural?

When a client asks for natural lashes, most lash artists default to a classic set, and for good reason. But it isn't the only route. Depending on how many natural lashes the client has and how "full" they want the result, a hybrid or a very light volume set can also look natural when done carefully.

StyleHow it's appliedNatural-look resultBest for
ClassicOne extension on one natural lashMost natural, mascara-like definitionClients with a healthy, reasonably dense natural lash line
HybridA mix of classic lashes and small, soft fansNatural with a little added fullness and textureClients with gaps or slightly sparse areas
Light volume (2D–3D)Two or three ultra-fine extensions per natural lashSoft, fluffy fullness, still natural when kept short and fineClients with sparse or fine natural lashes who want more density

Classic: the default natural set

A classic set gives the most "my lashes, but better" result. Each natural lash receives a single extension, so the final look tracks the client's own lash pattern closely. For clients with a healthy, reasonably full lash line, classics in a fine diameter and modest length are usually all it takes.

Hybrid: natural with a little extra

Hybrids mix classic lashes with small, soft fans placed where the natural lash line is thinner. Kept short and soft, a hybrid fills gaps and adds texture without tipping into a dramatic look. It's a useful option for clients whose lash density is uneven.

Light volume: softness without weight

Light volume uses very fine fibers, typically in the 0.05–0.07 mm range, made into small 2D or 3D fans. Because each fiber is so fine, a light volume set can actually weigh about the same as a classic set while looking softer and fuller. For clients with sparse or fine lashes, a well-made black velvet volume lash palette lets you build soft, natural-looking density without overloading the natural lashes.

Choosing Length, Curl and Diameter for Natural Looking Lash Extensions
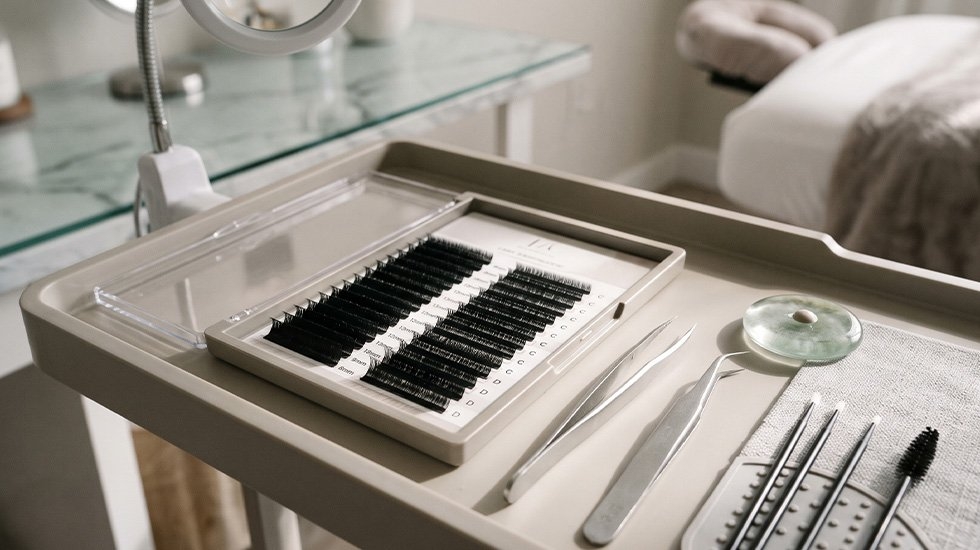
Choosing lash extension length, curl and diameter for natural looking lash extensions

Every natural set comes down to three decisions: how long, how curled and how thick. Get these right for the individual client, and the set will look natural almost automatically. Get any one of them wrong, and no amount of careful isolation will save the result.

Length: stay close to the natural lash

The most important rule for natural looking lash extensions is keeping the extension close to the length of the natural lash it's attached to. A widely used guideline is to keep extensions no more than about 2–3 mm longer than the natural lash, and to go shorter still on fine or weak lashes. Beyond that range, the set starts to read as dramatic, and the extra length acts as a lever that puts more strain on the natural lash.

Length should also vary across the lash line the way natural lashes do: shorter in the inner corner, longest through the middle or slightly outward, and tapering gently at the outer corner. Many natural sets sit somewhere in the 8–12 mm range overall, but the right numbers always come from measuring the client's own lashes, not from a fixed chart.

Curl: match, don't force

Curl has a huge effect on whether a set looks natural. A curl that's much stronger than the client's own lashes makes the extensions stand out, and on straight natural lashes, a dramatic curl can also leave a gap between the natural lash and the extension base, which hurts retention.

CurlLiftNatural-set use
JVery subtleVery straight natural lashes, ultra-natural results
BSoftEveryday natural sets and inner corners
CModerateThe most common natural-set curl, with gentle lift that still looks real
CC / DStrongUse sparingly in a natural set, usually only for naturally curly or downward-growing lashes

Diameter and weight: lighter is more natural

Diameter (thickness) controls both how dark the lash line looks and how much weight each natural lash carries. For classic natural sets, many artists work in the 0.10–0.15 mm range, choosing the finer end for fine or weak lashes. Thicker diameters create a bolder, darker line and add weight, which makes them less suited to a natural look.

Use the table below as a starting point for matching extensions to the strength of the client's natural lashes:

Natural lash conditionSuggested styleDiameterLength guidance
Fine or weakClassic or light volume0.05–0.07 mm (volume) or 0.10 mm (classic)Close to natural length; avoid long extensions
Medium, healthyClassic or hybrid0.10–0.12 mmUp to about 2–3 mm longer than natural
Strong and thickClassic0.12–0.15 mmUp to about 2–3 mm longer, still graduated

A reliable black lash extension palette with a full spread of lengths in one curl and diameter makes these graduated transitions much easier, because you can step up or down a single millimeter at a time without switching trays.

Natural Lash Mapping for Every Eye Shape
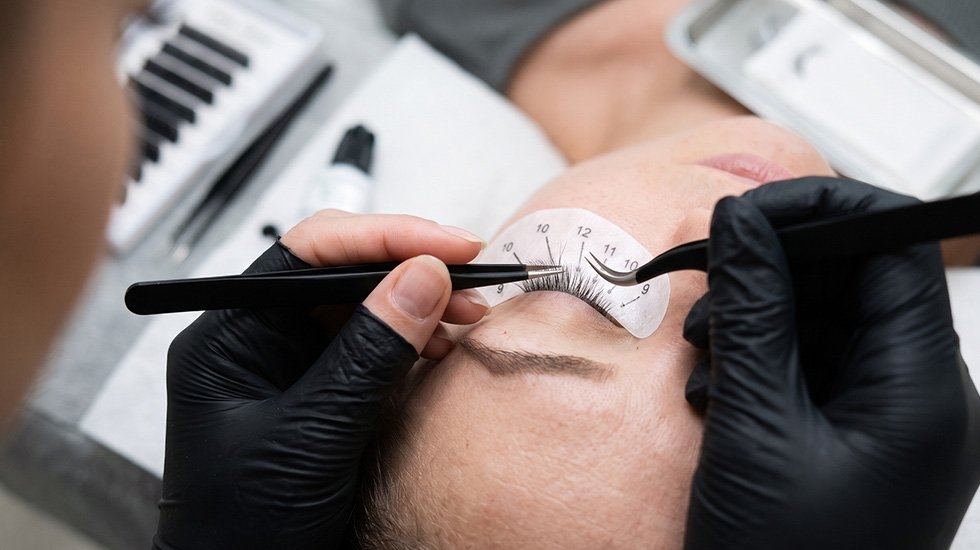
Natural lash map with graduated lengths from inner to outer corner

A lash map is a plan, usually marked on the under-eye pad, that shows which length and curl goes in each zone of the lash line. For natural sets, the map is simple in principle. It follows the client's natural lash pattern and makes small adjustments to flatter the eye shape.

A basic natural map starts short in the inner corner, increases gradually toward the middle or just past it, holds the longest length across a few lashes, and then steps down slightly at the outer corner. From there, adjust for eye shape:

Eye shapeNatural map adjustmentCurl tip
AlmondMost natural maps work well; follow the natural lash patternB or C
RoundPlace the longest lengths slightly toward the outer third to gently elongateC
HoodedKeep lengths moderate so lashes don't hit the lid fold; peak in the centerC for lift that clears the hood
Deep-setAvoid very long lengths that touch the brow boneB or C rather than strong curls
MonolidUse a gentle center peak to open the eye without looking heavyC, sometimes CC if lashes grow downward
DownturnedLift the outer third slightly with a touch more length thereC

Map each eye on its own rather than copying one side to the other. Natural lashes are rarely perfectly symmetrical, and small adjustments between eyes are what make the final set look balanced.

Black vs. Brown Lashes for a Softer Finish

Black is the standard color for lash extensions, and it works well for most clients, especially those with dark natural lashes. But for clients with light, blonde, red or fine natural lashes, or anyone who wants the softest possible result, black can create more contrast than they expect.

Brown lash extensions soften that contrast. They define the lash line in a gentler way, which suits fair-haired clients, very fine lashes and clients who usually skip mascara. Brown also works well mixed into a black set, especially in the inner corners, to soften the transition and make the overall result look more like real lashes. If you want to offer this option, a brown silk PBT lash palette is an easy way to build softer natural sets without changing your technique.

Do Eyelash Extensions Damage Your Natural Lashes?

This is one of the most common worries clients bring to their first appointment, and it's worth having a clear answer ready. When extensions are chosen and applied correctly, they don't damage natural lashes. Damage happens when specific mistakes are made, and natural sets are among the lowest-risk options because they're light and close to the natural lash length.

It also helps to explain the natural lash growth cycle. Natural lashes shed and regrow continuously, and it's normal to lose a few each day, with or without extensions. When an extension falls out attached to a natural lash, that's usually a lash that had reached the end of its cycle, not a sign of damage. Where real damage does occur, it almost always comes from one of the following causes.

Extensions that are too heavy or too long

An extension that's too thick or too long for the natural lash puts extra strain on the follicle. Over time, this can weaken lashes or cause them to shed early. Matching weight and length to the strength of each natural lash, as covered in the tables above, is the single most important protection.

Stickies: two natural lashes glued together

When an extension bonds two natural lashes together, they can't grow and shed independently. As one lash grows faster than the other, the bond pulls on the follicle and can cause discomfort or premature loss. Careful isolation and a final check with a lash comb prevents this.

Ignoring the growth cycle

Very short, fine baby lashes that are still in an early growth stage can't support an extension. Placing extensions on them, or putting long extensions on lashes that are nearly ready to shed, adds stress where the lash can't handle it.

Picking, pulling and improper removal

Clients who pick at their extensions, or remove them at home by pulling, can pull out natural lashes with them. Extensions should be removed professionally with a suitable adhesive remover so the bond dissolves rather than being forced off.

Step-by-Step: Applying a Natural Classic Set

  1. Consult and assess. Ask what "natural" means to the client, check their natural lash length, curl, density and strength, and note any sensitivities.
  2. Cleanse thoroughly. Remove makeup, oils and residue from the lashes so the adhesive can bond properly.
  3. Apply under-eye pads and map. Secure the pads comfortably, then mark your lengths by zone based on the client's natural lashes and eye shape.
  4. Isolate one natural lash at a time. Separate each lash cleanly to avoid stickies.
  5. Dip and place. Dip the base of the extension into a small amount of adhesive and place it slightly away from the skin, following the natural lash direction.
  6. Work in zones. Move across the lash line following your map, alternating eyes if needed to let adhesive cure evenly.
  7. Check and separate. Comb through the lashes and check from several angles that each natural lash moves freely.
  8. Finish and review. Remove the pads carefully, let the client see the result, and go over aftercare.

Aftercare Advice to Give Your Clients
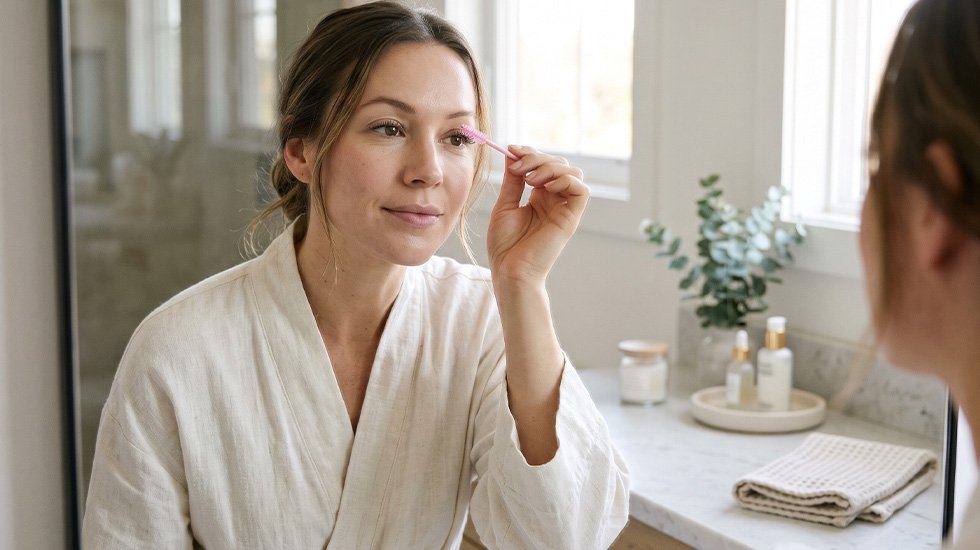
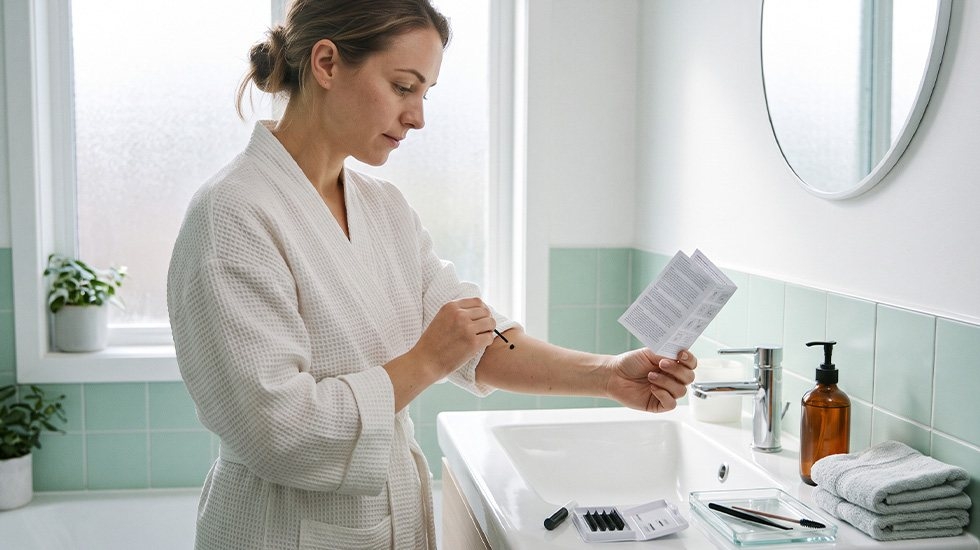
Lash extension aftercare to keep natural lashes healthy between fills

Good aftercare keeps a natural set looking fresh and protects the natural lashes underneath. Share these points at the end of every appointment:

  • Avoid getting the lashes wet for the time recommended by your adhesive's instructions, often around the first 24 hours
  • Clean the lashes regularly with a lash-safe cleanser to prevent oil and debris buildup along the lash line
  • Brush the lashes gently with a clean spoolie each day
  • Avoid oil-based products around the eyes, since oil can weaken the bond
  • Don't rub, pull or pick at the extensions
  • Avoid mechanical lash curlers and waterproof mascara
  • Book fills regularly, typically every two to three weeks, so the set stays balanced as natural lashes shed and regrow

Common Mistakes That Make Extensions Look Fake

  • Length jumps that are too big: moving several millimeters at once between zones creates a visible "step" instead of a smooth gradient
  • Curl that's stronger than the natural lash: a dramatic curl on straight lashes looks artificial and can lower retention
  • Diameters that are too thick: heavy lashes create a harsh, dark line and add stress to natural lashes
  • Uniform length across the whole eye: natural lashes vary in length, so a flat, uniform set looks false
  • Extensions placed too far from the natural lash direction: lashes that criss-cross or point in different directions break the natural effect
  • Overfilling the inner corners: long or heavy lashes in the inner corner make the eye look heavy; keep them short and fine
  • Mirroring one eye onto the other: copying a map without adjusting for natural asymmetry can make the eyes look uneven

Frequently Asked Questions

What are natural lash extensions?

Natural lash extensions are a style of application that enhances the client's own lashes with modest length, a matching curl and a fine diameter, so the result looks like naturally long, defined lashes rather than obvious extensions.

Which lash extension style looks the most natural?

A classic set, with one extension on each natural lash, usually looks the most natural. Hybrid or light volume sets can also look natural when they're kept short and soft, especially for clients with sparse lashes.

What length should natural looking lash extensions be?

Extensions for a natural look are usually kept close to the client's own lash length, often no more than about 2–3 mm longer than each natural lash, with shorter lengths in the inner corners.

Do eyelash extensions damage your natural lashes?

Not when they're applied correctly. Damage usually comes from extensions that are too heavy or long, stickies, ignoring the growth cycle, or picking and improper removal.

Are brown lash extensions more natural than black?

For clients with light or fine natural lashes, brown extensions often look softer and more natural than black. Many artists also blend a few brown lashes into a black set for a gentler finish.

How long do natural lash extensions last?

Extensions shed along with the natural lashes they're attached to, so most clients book a fill every two to three weeks to keep the set full and balanced.

Conclusion

Natural lash extensions are proof that subtle work is often the most technical. The difference between a set that looks real and one that looks fake comes down to small, deliberate choices: lengths that stay close to the natural lash, curls that match rather than force, fine diameters that protect lash health, and a map built around the client's own lash pattern and eye shape. Master those decisions, explain the growth cycle and aftercare clearly, and your natural sets will look beautiful on the first day and stay healthy through every fill.

Find professional lash extensions, palettes and studio supplies for every natural set at Winlash.
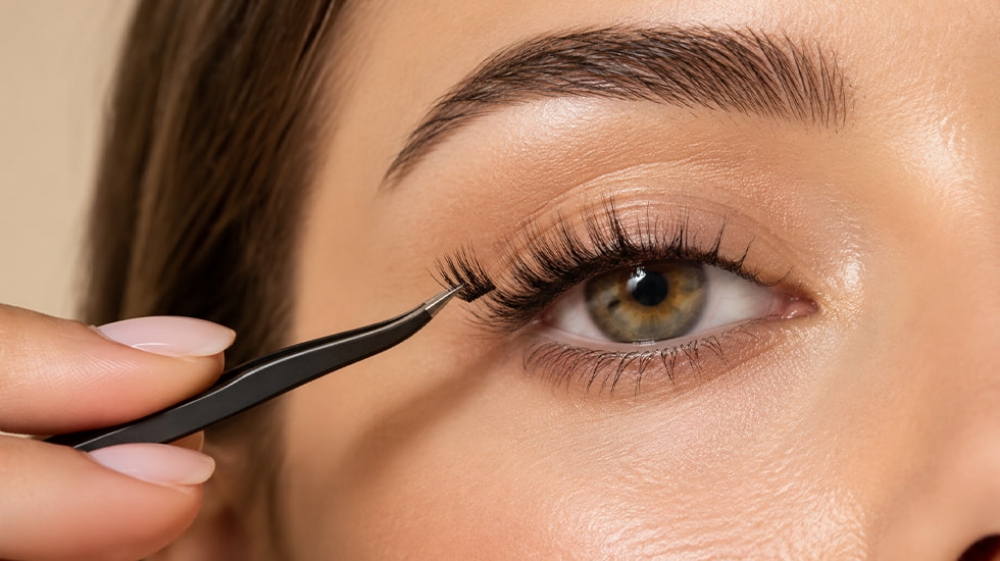
How to Apply Cluster Lashes Without Clumps, Itching or Lifting

Learning how to apply cluster lashes is much easier than it looks, as long as you get three things right: a thin layer of bond, placement just underneath your natural lashes (never on the waterline), and a clean seal. Cluster lashes are small, pre-made groups of lash fibres that you attach yourself, which makes them a flexible at-home alternative to eyelash extensions applied one by one by a trained artist. This guide walks you through every stage, from prep and lash mapping to sealing, troubleshooting and safe removal.

Quick answer: Clean and dry your lashes, curl them if you like, apply a thin layer of cluster lash bond, place each cluster under your natural lashes (starting at the outer corner and keeping a small gap from the waterline), gently press to blend, then apply the seal after the waiting time in your product instructions. Remove with a lash adhesive remover, never by pulling.

Quick Access
  1. What You Need Before You Start
  2. How to Choose and Map Your Cluster Lashes
  3. How to Apply Cluster Lashes Step by Step
  4. Where to Place Cluster Lashes (and Why Not on the Waterline)
  5. Safety First: Before You Glue Anything Near Your Eyes
  6. Common Mistakes and How to Fix Them
  7. How Long Cluster Lashes Last and How to Care for Them
  8. How to Remove Cluster Lashes Safely
  9. Cluster Lashes vs. Strip Lashes vs. Lash Extensions
  10. Frequently Asked Questions
  11. Final Thoughts

What You Need Before You Start

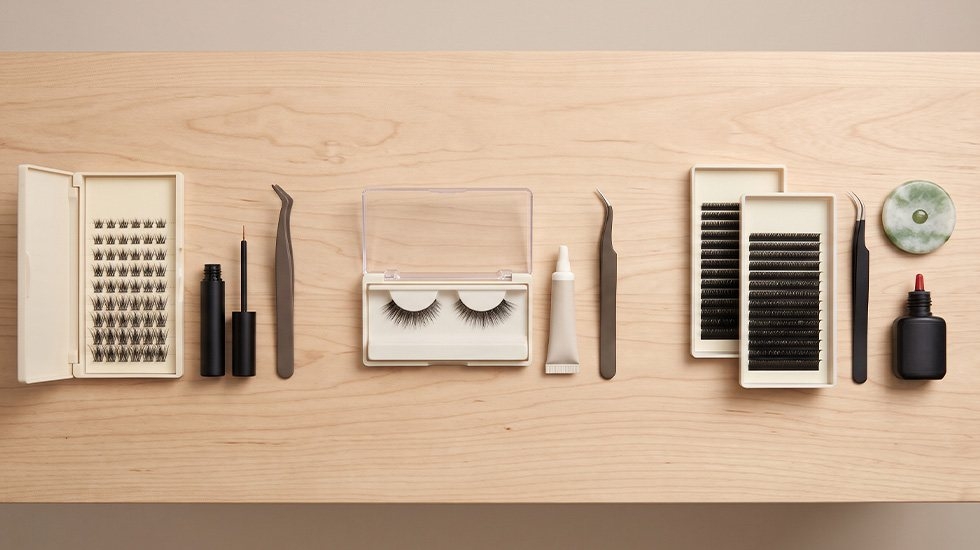
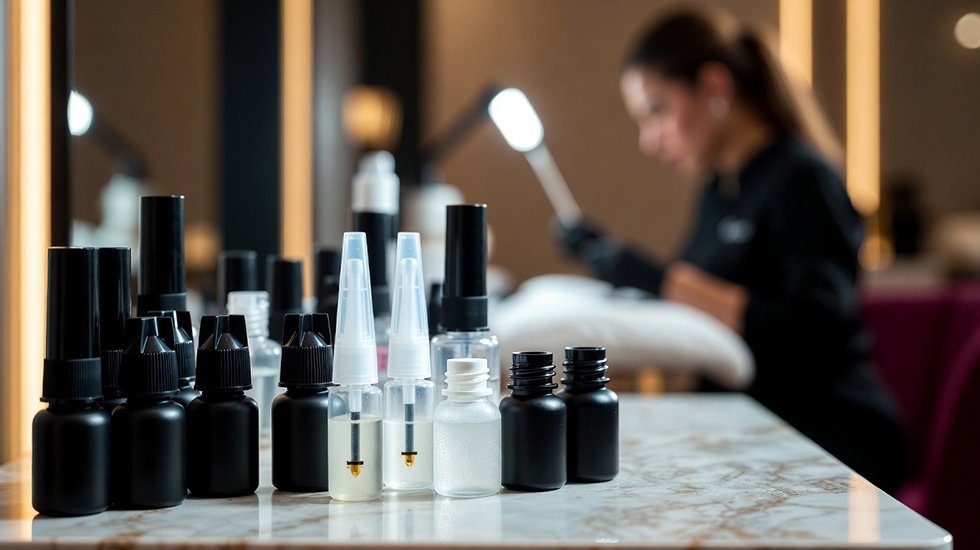
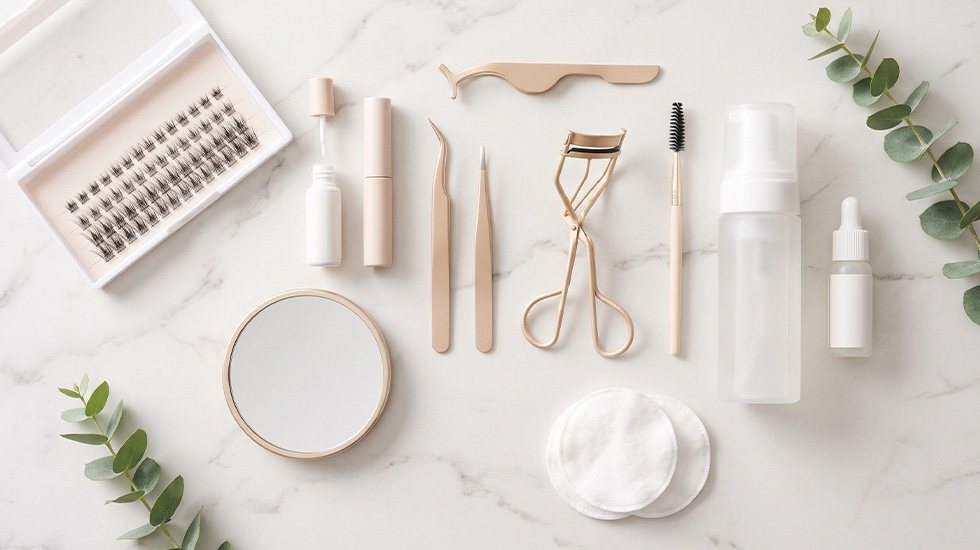
Cluster lashes, bond, seal and applicator ready before application

Having everything within reach before you open the bond saves you from rushing, and rushing is where most clumps and misplaced clusters come from. Use a well-lit mirror, ideally one that magnifies slightly, and sit at a table so your hands can rest steady.

ItemWhat it doesWhat to look for
Cluster lashesPre-made lash segments you attach to your natural lashesSoft, lightweight band and a length range that suits your eye shape
Cluster lash bondHolds the clusters to your natural lashesA bond made for cluster lashes, not professional extension adhesive
SealLocks in the bond and reduces stickinessA seal designed to pair with your bond
Applicator or fine tweezersPicks up and positions each clusterFine tip and a grip that feels steady in your hand
Oil-free cleanserRemoves makeup, oil and residue before applicationGentle formula suitable for the eye area
Lash curler (optional)Lifts natural lashes so clusters blend more easilyClean pad in good condition
Clean spoolieBrushes the finished set into placeSoft, dry and used only for lashes
Lash adhesive removerDissolves the bond for safe removalA remover made for lash adhesive and compatible with your bond

How to Choose and Map Your Cluster Lashes

Mapping simply means planning which lengths go where before any glue comes out. A natural-looking set is usually built with shorter clusters at the inner corner, medium lengths through the middle and the longest clusters at the outer corner, which lifts and opens the eye. Lay your clusters out on the back of your hand or a clean surface in the order you plan to apply them, so you are never guessing mid-application.

If you are still deciding on style, you can browse volume cluster lashes in different densities and lengths. As a beginner, lighter and shorter clusters are easier to control and are gentler on fine natural lashes, since heavy clusters can lift sooner or put extra stress on the lash.

Eye shapeWhere to focus lengthMapping tip
AlmondFairly even; slight lift at the outer cornerMost mapping styles suit this shape, so choose by the look you want
RoundOuter cornersLonger outer clusters elongate the eye
HoodedMiddle and outerKeep clusters lightweight and not overly long so they don't rest against the lid
Close-setOuter cornersKeep the inner corner short to create more visual space
Wide-setInner and middleAdd a little more length toward the centre for balance

Treat this table as a starting point rather than a rule. Faces vary, so adjust after your first attempt based on what looks and feels right.

How to Apply Cluster Lashes Step by Step

How to apply cluster lashes underneath natural lashes step by step

Work calmly and apply one eye at a time. Keep in mind that bond and seal products differ in how long they need to sit before the next step, so the instructions on your own product always come first.

Step 1: Clean and Dry Your Lashes

Remove makeup and wash your lash line with a gentle, oil-free cleanser. Even when lashes look clean, traces of moisturiser, sunscreen or natural skin oil can create a barrier between the bond and your lashes. Rinse well and pat completely dry before moving on.

Step 2: Curl Your Natural Lashes (Optional)

Curling close to the root lifts your natural lashes and helps the clusters blend in rather than sit at a different angle. Do this before applying any bond, never after.

Step 3: Apply a Thin Layer of Bond

Apply a thin coat of bond to the base of your natural lashes in a mascara-like motion, or to the cluster band if that is what your product instructions recommend. Thin is the key word. Too much bond makes lashes clump together and harder to position, and it may stay gummy instead of setting properly. Then wait for the bond to become tacky. Guides and products quote different times, from a few seconds to a minute or more, because formulas differ, so follow the timing on your bond.

Step 4: Place the Clusters

Look slightly downward into the mirror. Pick up a cluster with your applicator and place it underneath your natural lashes, close to the root but with a small gap from the waterline. Start at the outer corner and work inward, using the lengths you mapped earlier. Overlap clusters slightly or leave tiny gaps depending on how full you want the look, and avoid packing them tightly together.

Step 5: Press and Blend

Once a few clusters are in place, gently press them against your natural lashes from the base, not the tips, so the bond grips evenly. Lightly pinching clusters and natural lashes together helps them merge into one smooth line.

Step 6: Apply the Seal

When all clusters are placed and the bond has had its recommended time, apply the seal to the base of the lashes. The seal locks the bond in and reduces stickiness. Use a light touch, as too much seal can make the lashes look clumpy or stiff, and keep it off your skin.

Step 7: Do a Final Check

Brush through gently with a clean spoolie and check comfort. If you can feel a cluster when you blink, or one pokes your skin, it is in the wrong place. Remove that single cluster and replace it with a slightly shorter one set a little higher.

Where to Place Cluster Lashes (and Why Not on the Waterline)

Cluster lashes are designed to attach to your natural lashes, not to the skin of your eyelid or the waterline. The waterline contains oil glands that help keep the eye hydrated and protected, so keeping adhesive and lash bands away from that area helps prevent irritation. Placement also affects wear time: when clusters sit too close to the waterline, tears and natural moisture can break the bond down sooner.

A simple rule is to leave a small gap, roughly a millimetre, between the cluster and the waterline, or follow the distance recommended on your product. The cluster should hook under your natural lashes at the root without touching skin.

Safety First: Before You Glue Anything Near Your Eyes

Applying DIY cluster lashes safely away from the waterline

  • Patch test. Test the bond and remover on a small area of skin following the manufacturer's patch-test instructions before first use, and read the ingredient list for anything you already know you react to.
  • Use the right adhesive. Choose a bond made for cluster lashes. Professional extension adhesive is designed for a different use and is not intended for DIY clusters, and general strip lash glue may not hold clusters properly.
  • Keep products out of your eyes. Close your eyes during application, and keep bond, seal and remover away from the waterline.
  • Skip application if your eyes are already irritated. Avoid cluster lashes if you have an active eye infection, redness or irritation.
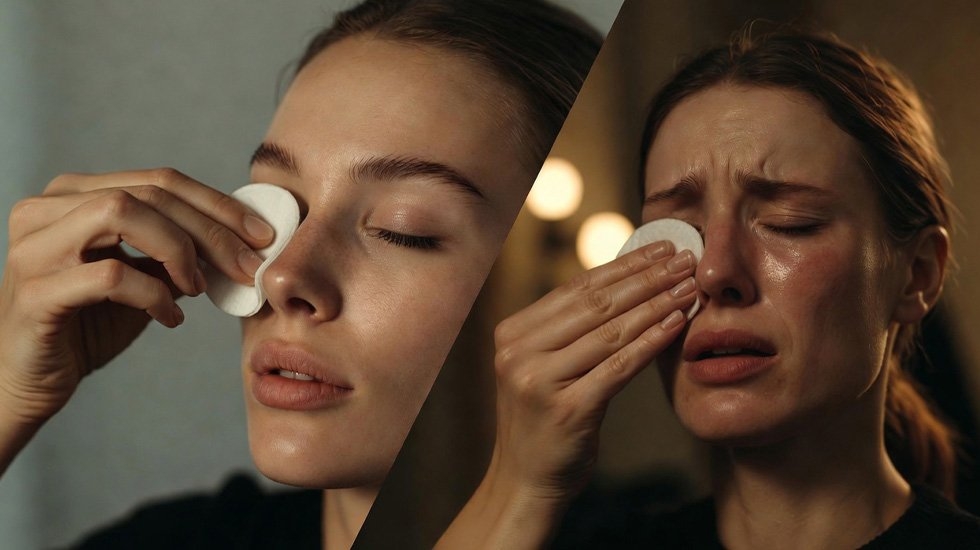
  • Stop at the first warning signs. If you notice burning, swelling, persistent itching, redness or watery eyes, remove the lashes with an appropriate remover and stop using the product. If symptoms continue, or if you have eye pain or any change in vision, contact a doctor or eye care professional.
  • Keep your tools clean. Wipe applicators and tweezers before and after each use, and don't share them.

Common Mistakes and How to Fix Them

ProblemLikely causeHow to fix it
Clusters won't stickOil or residue on lashes, wrong adhesive, or placement too close to the waterlineCleanse thoroughly, use a cluster-specific bond, and reposition slightly higher
Lashes clump togetherToo much bond or a swiping motionUse a thin layer and tap clusters into place instead of dragging them
Outer corner liftsCluster too long or heavy, or not pressed in wellUse a shorter, lighter cluster at the outer edge and press it firmly from the base
Lashes feel sticky after sealingToo much bond or seal, or sealing before the bond was readyUse less product next time and follow the waiting time on your bond
Pokey or itchy feelingCluster touching the waterline or skin, band too thick, or inner cluster too longReposition higher, use a shorter inner cluster, and stop if irritation continues
Set looks uneven or fakeUniform length, uncurled lashes, or clusters packed too tightlyMap varied lengths, curl first, and leave small gaps between clusters

How Long Cluster Lashes Last and How to Care for Them

Wear time depends on your bond, how well you prepared your lashes, how you slept, and where your natural lashes are in their growth cycle, so it is more honest to follow your product guidance than to promise a fixed number of days. A few habits make a clear difference:

  • Check your product instructions for how long to keep lashes dry after application.
  • Avoid oil-based makeup removers and heavy creams near the lash line, as oil weakens the bond.
  • Don't rub, pick or tug at the clusters.
  • Brush through gently with a clean, dry spoolie.
  • Remember that sweat, humidity and tears add moisture around the lash line. In hot, humid weather, a thin and well-sealed application tends to hold up better than a heavy one.

How to Remove Cluster Lashes Safely

Never pull or peel clusters off, because that can take natural lashes with them. Instead, use a remover made for lash adhesive and follow its directions. In general, apply the remover along the lash line without letting it get into your eyes, give it the recommended time to soften the bond, then slide the clusters off gently. Wash away any remaining residue with a mild cleanser. If a cluster resists, apply more remover and wait rather than forcing it.

Cluster Lashes vs. Strip Lashes vs. Lash Extensions

Cluster lashes compared with strip lashes and professional lash extensions

 Cluster lashesStrip lashesProfessional extensions
Who applies themYou, at homeYou, at homeA trained lash artist
AttachmentBond and seal under natural lashesStrip glue along the lash lineProfessional adhesive, one extension per natural lash
CustomisationMix lengths and density yourselfLimited to the strip's designFully customised to your eye shape
Wear timeShort term, varies by productUsually removed each dayLonger term with refills
Best forA natural-to-full look without a salon visitQuick one-off occasionsA long-lasting, polished finish

Frequently Asked Questions

How long does it take to apply cluster lashes?

Your first attempt will take longer than later ones, especially if you map your lengths beforehand. Rushing is the most common cause of clumping and misplacement, so give yourself plenty of time and let your technique speed up with practice.

Can I use eyelash extension glue for cluster lashes?

No. Professional extension adhesive is made for trained application, not for DIY clusters. Use a bond and seal made for cluster lashes and follow its instructions.

Can I sleep in cluster lashes?

That depends on the product. Some bond and seal systems are designed for multi-day wear, but pressing your face into a pillow can still lift the lashes. Check your product instructions, and remove the lashes if you notice any irritation.

Why do my cluster lashes itch or feel poky?

The most common reasons are a cluster sitting on the waterline or skin, a band that is too thick, or an inner-corner cluster that is too long. Reposition slightly higher or use a shorter cluster. If the itching comes with redness or swelling, stop using the product, as it may be a reaction to the adhesive.

Do cluster lashes damage natural lashes?

They shouldn't when applied and removed correctly. Problems tend to come from using too much adhesive, placing clusters too close to the lash line, wearing heavy clusters on fine lashes, or pulling them off instead of dissolving the bond.

How do I stop cluster lashes from clumping?

Use a thin layer of bond, let it become tacky as directed, and tap clusters into place rather than swiping. Apply the seal sparingly and brush through gently with a clean spoolie.

Final Thoughts

Once you know the basics, cluster lashes become a quick and flexible way to customise your look: clean lashes, a thin layer of bond, careful placement off the waterline, and a light seal. Take your time on the first few attempts, put comfort ahead of drama, and stop if anything feels wrong. If you prefer a salon-quality finish or have sensitive eyes, a trained lash artist is the better choice. To explore lash products, tools and more, visit Winlash.

Eyebrow Lamination Complete Guide: Process, Aftercare & Salon Cost in Dubai
Quick Access: The Complete Eyebrow Lamination Guide
  1. What Is Eyebrow Lamination and What Does "Laminated Eyebrows" Mean?
  2. How Brow Lamination Works: The 3-Step Chemical Restructuring
  3. Professional Salon Services vs. At-Home Brow Lamination Kits
  4. Eyebrow Lamination vs. Microblading vs. Brow Tinting
  5. How Much Does Eyebrow Lamination Cost in Dubai & the UAE?
  6. Essential Aftercare: How to Make Brow Lamination Last 6 to 8 Weeks
  7. Safety, Skin Sensitivities & Contraindications
  8. Frequently Asked Questions About Brow Lamination
  9. Final Thoughts: Sourcing Premium Lamination Supplies in UAE

⚡ Quick Definition: What Is Eyebrow Lamination?

Eyebrow lamination is a semi-permanent cosmetic perm that relaxes and realigns natural brow hairs using a mild chemical solution. It redirects curly, unruly, or downward-growing hairs into a uniform, brushed-up shape, giving the appearance of fuller, thicker, and perfectly sculpted "feathered" brows for 6 to 8 weeks without needles or daily brow gel.

Achieving symmetrical, runway-ready arches has made eyebrow lamination one of the fastest-growing salon services globally and across the GCC. If you struggle with stubborn hairs, sparse gaps, or asymmetry, exploring professional lash & brow lift products reveals how gentle chemical restructuring can effortlessly recreate the coveted fluffy brow aesthetic without the discomfort or commitment of cosmetic tattoos.

What Is Eyebrow Lamination and What Does "Laminated Eyebrows" Mean?

Direct Answer: A "laminated eyebrow" refers to brow hairs that have been chemically softened and reset in an upward, uniform direction. This creates a high-shine, feathery look that conceals sparse patches and adds noticeable vertical width to your natural brow shape.

Often described as a "keratin perm for your brows," lamination works on the internal hair structure rather than the underlying skin. Unlike microblading, which uses micro-incisions and semi-permanent ink to draw simulated hairs, eyebrow lamination works entirely with your existing brow hairs. Technicians lift, separate, and set each strand into your desired alignment, providing the flexibility to wear them brushed straight up for a dramatic runway statement or combed diagonally for a soft, natural arch.

How Brow Lamination Works: The 3-Step Chemical Restructuring

Direct Answer: The process breaks the disulfide cystine bonds of the hair with a lifting cream (Step 1), resets them in a sculpted direction with a neutralizer (Step 2), and deeply restores moisture through a keratin or vitamin infusion (Step 3).

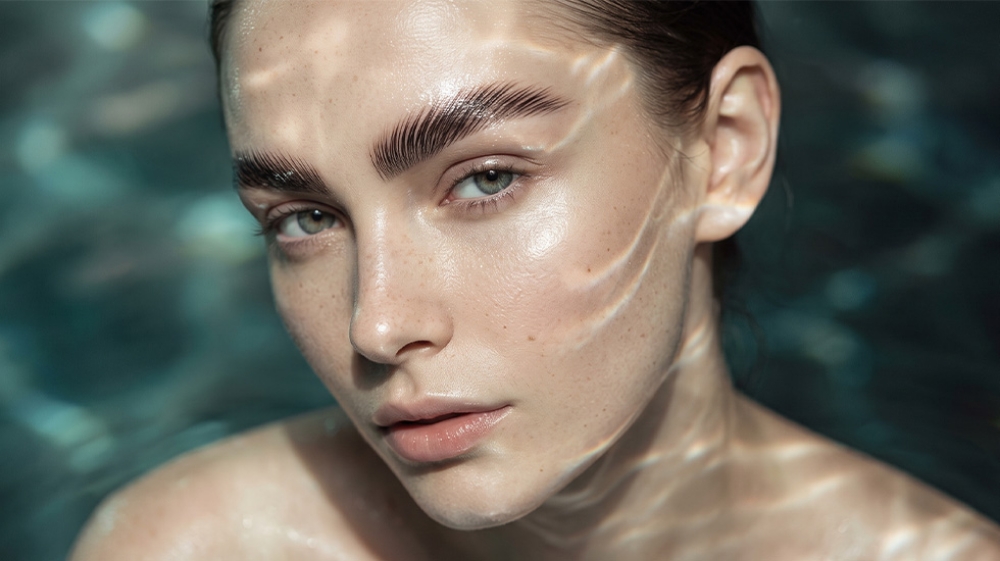
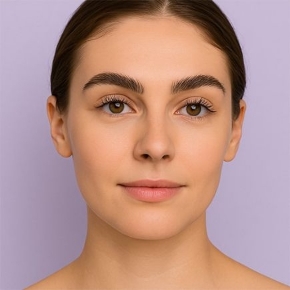
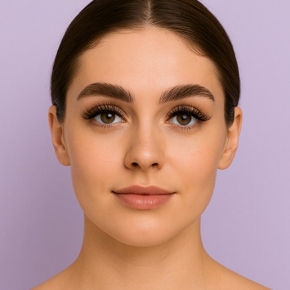
Close-up of perfectly laminated eyebrows showing lifted and aligned brow hairs

A full eyebrow lamination appointment typically takes 30 to 45 minutes and follows three precise clinical steps:

  • Step 1: Softening & Lifting Cream: A gentle reducing lotion (often cysteamine- or thioglycolate-based) is applied to break open the internal bonds of the hair cuticle, making coarse or stubborn hairs instantly pliable and responsive to brushing.
  • Step 2: Neutralizing & Setting Cream: Once the technician combs the brows into the client's preferred geometry, an oxidizing neutralizer is applied. This locks the keratin fibers into their new elevated placement.
  • Step 3: Hydrating & Restorative Serum: Chemical processing strips natural lipophilic moisture. The treatment concludes with an intensive conditioning balm, such as the clinically developed MyLamination 3-Step Brow & Lash Lamination Kit , which seals the cuticle with amino acids and panthenol to prevent brittleness.

Professional Salon Services vs. At-Home Brow Lamination Kits

Direct Answer: Professional services provide tailored chemical timings, facial mapping, and skin barrier protection. DIY kits offer convenience and lower costs, but require meticulous adherence to timing to prevent cuticle over-processing or chemical burns.

Comparison between professional salon brow lamination supplies and at-home lamination kits

While DIY kits are accessible, brow hair textures vary significantly. Fine hair requires as little as 4 to 6 minutes of lotion contact, whereas thick Mediterranean or Middle Eastern hair may require 9 to 12 minutes. Licensed artists working with premium European formulas from My Lamination assess hair diameter and skin sensitivity before determining application duration, eliminating the singed or frizzy outcomes often encountered with unmonitored home applications.

Eyebrow Lamination vs. Microblading vs. Brow Tinting

Direct Answer: Lamination re-shapes your existing hair fibers without needles; microblading tattoos semi-permanent hair strokes into the upper dermis; and brow tinting simply dyes hair shafts and skin temporarily.
Feature / TreatmentEyebrow LaminationMicrobladingBrow Tinting
MechanismChemical realignment of natural hairSemi-permanent cosmetic tattooing (blade)Oxidative hair and skin dye
Longevity6 to 8 weeks12 to 24 months3 to 5 weeks on hair (1 week on skin)
Invasiveness & PainZero pain, totally non-invasiveModerate pain, requires topical numbingZero pain, topical only
Best CandidateUnruly, coarse, thinning, or downward hairsSeverely over-plucked or alopecia-affected browsBlonde, grey, or pale brow hairs needing color

How Much Does Eyebrow Lamination Cost in Dubai & the UAE?

Direct Answer: In Dubai and Abu Dhabi, standalone brow lamination ranges between AED 200 and AED 350. Package services that combine lamination, custom brow shaping, and hybrid tinting typically average AED 350 to AED 450.

Salon pricing throughout Dubai Marina, Downtown, and Jumeirah reflects technician certification, studio hygiene standards, and product quality. Top-tier salons utilize medical-grade European formulations that integrate conditioning keratin infusions, preventing long-term hair dehydration.

Essential Aftercare: How to Make Brow Lamination Last 6 to 8 Weeks

Direct Answer: Keep your brows completely dry for the first 24 hours (avoiding steam, sweat, and washing). After 48 hours, apply a daily conditioning biotin serum and brush daily with a clean spoolie to maintain feathering.
  • First 24 Hours: Strictly avoid water, intense gym sessions, saunas, and face washing around the brow zone to allow the neutralized keratin bonds to stabilize completely.
  • Avoid Active Skincare: Keep chemical exfoliants (glycolic acid, salicylic acid) and retinoids away from the brow bone, as they accelerate hair shedding and cause skin irritation.
  • Daily Hydration: Post-lamination hair requires regular moisture. Using a peptide- and keratin-rich treatment such as the My Lamination Biotin Lash & Brow Serum keeps hairs supple, preventing breakage while nourishing new follicle growth.

Safety, Skin Sensitivities & Contraindications

Direct Answer: While brow lamination is non-invasive and safe, chemical contact with the skin can cause contact dermatitis in sensitive clients. A 24- to 48-hour patch test is essential before the procedure.

Clients with active eczema, psoriasis, or open lesions on the brow bone should postpone treatments until the skin has completely healed. Expectant and nursing mothers should take special precautions regarding topical exposure; for detailed clinical guidance on pregnancy protocols, consult our review of brow lamination and lash lift safety during pregnancy .

Frequently Asked Questions About Brow Lamination

How long does eyebrow lamination last?

On average, results last between 6 and 8 weeks. Longevity depends on your natural hair growth cycle, aftercare diligence, and skin type (oilier skin types often see results soften slightly sooner around the 5- to 6-week mark).

Can eyebrow lamination make thin or sparse brows look full?

Yes. By realigning and combing hairs upward and outward, technicians can spread existing hairs to cover gaps and sparse areas, creating an illusion of substantially thicker brows without microblading needles.

Will brow lamination ruin or damage my natural brow hairs?

When administered by a certified artist adhering to exact timing parameters, eyebrow lamination does not cause permanent damage. Hairs can become dry if not properly nourished with a daily aftercare serum post-treatment.

Can I wash my face after brow lamination?

You can wash your face, but you must avoid getting water, cleansers, or oils on your eyebrow area for the first 24 hours. After that period, wash gently with an oil-free cleanser and pat dry without rubbing.

How often can you repeat eyebrow lamination?

Technicians advise waiting at least 8 to 10 weeks between appointments. Repeating chemical processing too soon can cause cuticle fatigue, brittleness, and curly hair tips.

Final Thoughts: Sourcing Premium Lamination Supplies in UAE

Whether you are a certified aesthetician upgrading your studio workstation or a beauty enthusiast searching for the cleanest feathering results, selecting clinically verified formulations ensures predictable, long-lasting arches without compromising hair vitality. Discover genuine European lifting kits, nourishing vitamin serums, and salon-grade beauty tools with reliable same-day dispatch across Dubai and the UAE at Winlash Eyelash & Brow Supplies Dubai .

Lash Lift & Brow Lamination While Pregnant: Safety, Risks & Trimester Guide
Medical & Editorial Review Notice: This clinical guide evaluates the safety of receiving a lash lift and brow lamination while pregnant, reviewing cosmetic chemical transdermal permeability, ACOG guidance, and maternal dermatological studies. It is provided strictly for educational purposes and does not replace individual medical advice from your OB/GYN or qualified healthcare provider.
Table of Contents: Pregnancy Lash & Brow Safety
  1. The Science of Chemical Absorption: Skin vs. Lash Hair
  2. Lash Lifts vs. Brow Lamination vs. Lash Tinting
  3. Can Brow Lamination or Lash Lifts Cause Miscarriage?
  4. The Hormonal Effect: Why Your Lash Perm Might Drop
  5. Trimester-by-Trimester Safety Protocol
  6. Physical Risks: Lying Flat and Supine Hypotensive Syndrome
  7. Are Lash Lifts and Brow Laminations Safe While Breastfeeding?
  8. Pregnancy-Safe Alternatives & Nourishing Daily Care
  9. Frequently Asked Questions (FAQ)
  10. Final Medical Verdict: Making Empowered Beauty Choices

⚡ Direct Clinical Summary: Are Lash Lifts & Brow Laminations Safe?

  • Lash Lifts (LVL): Low systemic risk after the first trimester because lifting lotions are applied strictly to the hair shaft without contacting the eyelid skin.
  • Brow Lamination: Carries a higher risk of contact dermatitis and minimal dermal absorption due to continuous chemical application directly onto the skin.
  • Lash & Brow Tinting: Generally considered safe if vegetable or semi-permanent dyes are used and skin contact is eliminated.
  • Mandatory Precaution: A 48-hour patch test is essential due to hyper-reactive maternal immune responses. Always consult your obstetrician prior to treatment.

Pregnancy brings substantial physical changes, leading many expectant mothers to seek low-maintenance beauty routines like lash lifts and brow styling. However, concerns regarding fetal exposure to chemical perms, thioglycolates, and oxidizers require a grounded scientific perspective. Navigating salon procedures safely means understanding the pharmacology of professional lash and brow lift products, maternal physiological shifts, and clear trimester guidelines.

The Science of Chemical Absorption: Skin vs. Lash Hair

Direct Answer: Lash hairs consist of dead keratinocytes with zero systemic circulation; chemicals placed strictly on the hair cannot enter the bloodstream. Systemic exposure only occurs if perming lotions maintain prolonged contact with broken or highly permeable skin.

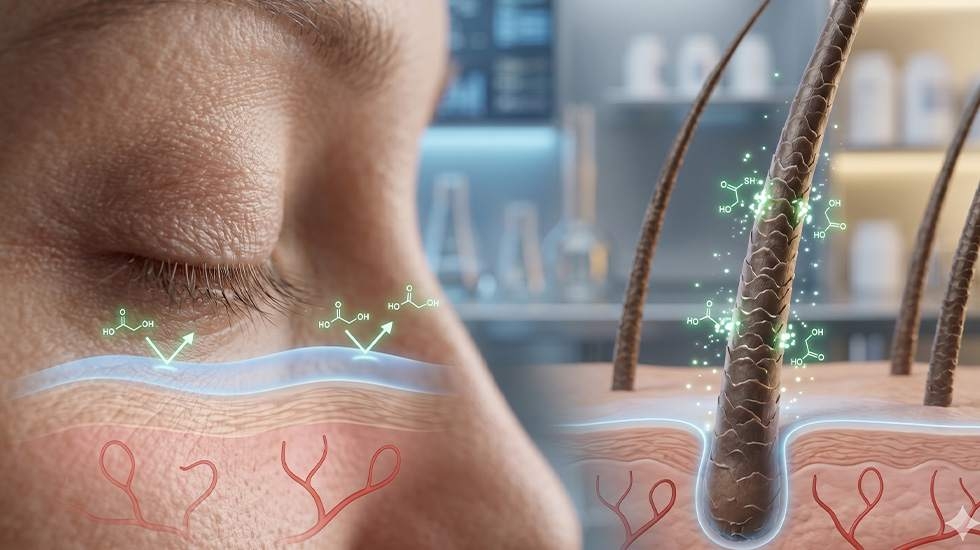
The core of evaluating maternal cosmetic safety lies in transdermal permeability. Lash lifting and brow perming utilize reducing agents—predominantly ammonium thioglycolate, cysteamine hydrochloride, or ethanolamine—to break the internal disulfide cystine bonds of the hair fiber. Once softened, a neutralizing solution (typically diluted hydrogen peroxide) rebuilds these bonds into an elevated curl.

Because hair fibers have no vascular supply, chemicals interacting exclusively with the mid-shaft of an eyelash cannot migrate into maternal blood vessels or cross the placental barrier. Risk emerges solely if low-grade formulations migrate into the ocular mucosa or directly onto epidermal tissue. For this reason, reputable salons utilize high-specification brow and lash lift materials engineered with viscous, non-dripping consistencies that remain immobilized on the shield.

Comparison of chemical absorption mechanisms during lash lift vs brow lamination in pregnancy

Lash Lifts vs. Brow Lamination vs. Lash Tinting: What Are the Differences?

Direct Answer: Lash lifts (LVL) are considered clinically safer during pregnancy because lotions do not touch the skin. Brow lamination requires direct lotion contact with epidermal tissue, increasing allergic and absorption risks. Lash tinting is safe when using gentle, peroxide-stabilized formulas kept off the eyelid margin.
  • Lash Lift (LVL / Keratin Perm): A contoured silicone rod shields the upper eyelid. Lashes are lifted upwards, and solutions are positioned 1 to 2 millimeters away from the lash root. At no point should solutions touch the skin, making systemic absorption negligible.
  • Brow Lamination: Unlike lash procedures, brow restructuring requires brushing perming solutions thoroughly through brow hairs and pressing them directly against the brow bone skin. With maternal skin experiencing heightened vascularity and permeability, direct chemical contact poses an elevated risk of severe contact dermatitis.
  • Lash & Brow Tinting: Semi-permanent tinting involves vegetable- or coal-tar-free dyes mixed with a low-volume (3%) developer. When performed by an experienced professional who does not press dye into the root waterline, tinting carries negligible risk.

To understand the broader spectrum of potential ocular irritations, explore our clinical overview of lash lift side effects and risks.

Can Brow Lamination or Lash Lifts Cause Miscarriage?

Direct Answer: There is zero medical evidence linking lash lifts, LVL, or brow laminations to miscarriage. The minute amount of cosmetic chemical applied externally cannot enter the bloodstream in quantities sufficient to affect fetal viability.

Miscarriage concerns often stem from historical confusion between modern localized cosmetic treatments and industrial-scale chemical toxicities. Teratogenic compounds require substantial systemic bloodstream saturation to reach intrauterine tissue. Neither thioglycolate nor cysteamine lotions applied in microscopic quantities (0.5 ml) to lash hair reach maternal systemic circulation. While first-trimester avoidance is advised as a standard precautionary measure during organ development, getting an accidental lash lift or brow lamination before knowing you are pregnant carries no documented clinical link to pregnancy termination.

The Hormonal Factor: Why Your Lash Lift Might Fail During Pregnancy

Direct Answer: Elevated estrogen and progesterone disrupt the natural hair growth cycle and alter lash porosity. This can cause perming lotions to under-process (leaving lashes straight) or over-process into frizziness.

Pregnancy hormones significantly extend the anagen (growth) phase of hair while modifying sebum and lipid production along the follicle. For lash clients, this manifests as unpredictable cuticle resistance. Lash artists frequently report that pregnant clients experience:

  • Premature Dropping: A lift that normally lasts 6 to 8 weeks may relax or flatten within 7 to 10 days.
  • Refractory Resistance: The hair cuticle fails to soften, yielding no discernible curl after full processing time.
  • Exaggerated Sensitivity: Sudden development of blepharitis or erythema from adhesives or silicones previously tolerated without issue.

Trimester-by-Trimester Safety Protocol for Expecting Mothers

Direct Answer: The second trimester (weeks 13–26) is the safest window for a lash lift. Avoid chemical treatments entirely during the first trimester, and accommodate physical positioning risks during the third trimester.

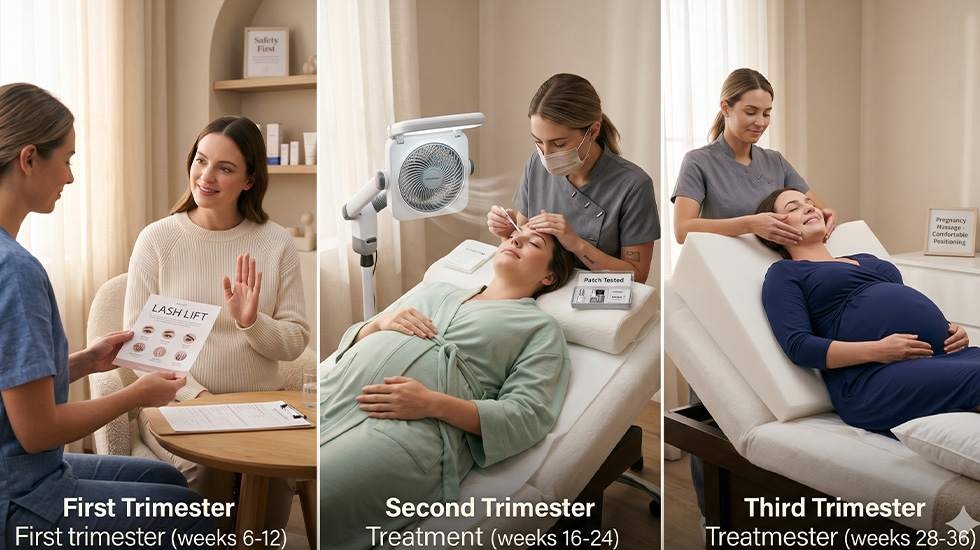
Trimester by trimester safety chart for lash lifts and brow lamination

TrimesterSafety StatusPrimary Clinical RiskMedical Recommendation
First Trimester
(Weeks 1–12)
Strictly Avoid ⛔Active organogenesis; severe odor intolerance and morning sickness.Postpone all elective chemical services. Opt for clean conditioning balms.
Second Trimester
(Weeks 13–26)
Safest Window ✅Hormonal curl resistance and heightened epidermal sensitivity.Safe to proceed with a mandatory 48-hr patch test using high-grade kits like the MyLamination 3-Step Lash & Brow Lamination Kit.
Third Trimester
(Weeks 27–40)
Physical Caution ⚠️Vena cava compression (Supine Hypotensive Syndrome) from lying flat.Do not lie supine. Treatment must be performed in a 45-degree semi-reclined or lateral position.

For a comprehensive breakdown of procedural steps and safety timings, refer to our definitive lash lift master guide.

Physical Risks: Lying Flat and Supine Hypotensive Syndrome

Direct Answer: Lying flat on the back for 45 to 60 minutes after 20 weeks of pregnancy can compress the inferior vena cava, decreasing cardiac output and uterine blood flow. Salons must provide semi-upright wedge cushions.

In the late second and third trimesters, the combined weight of the fetus, placenta, and amniotic fluid places direct pressure on the inferior vena cava when lying supine. This can cause sudden maternal dizziness, pallor, hypotension, and compromised placental perfusion.

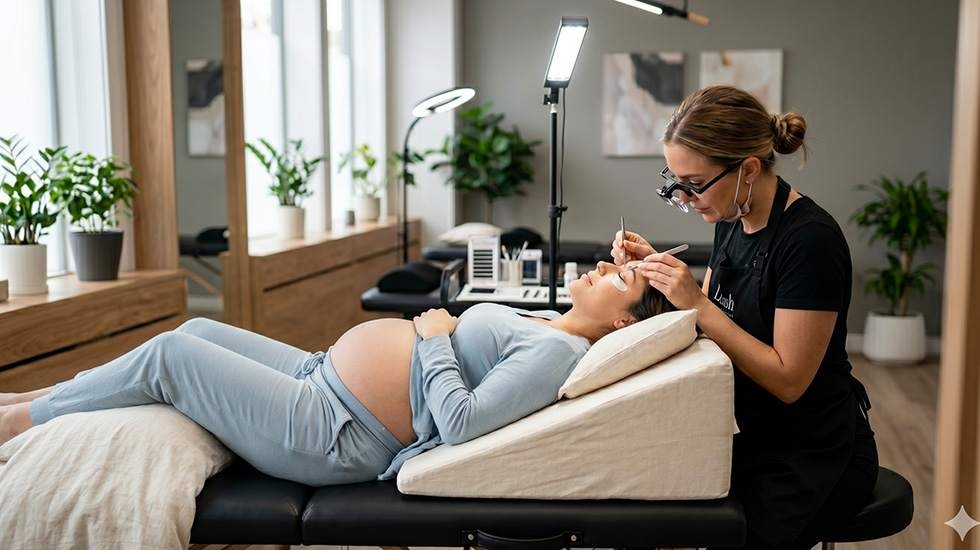
Pregnant client positioned safely on a salon bed with ergonomic wedge pillows for a lash lift

Professional lash salons in Dubai and across the UAE accommodate pregnant clients by utilizing contoured orthopedic wedge supports to elevate the back to at least 45 degrees, or by slightly tilting the left hip with a bolster to keep the vena cava fully open during appointments.

Are Lash Lifts and Brow Laminations Safe While Breastfeeding?

Direct Answer: Yes, lash lifts and brow laminations are considered safe during lactation. The chemicals do not reach systemic maternal circulation in concentrations detectable in breast milk.

Postpartum hormonal drops (especially prolactin fluctuations during nursing) can still influence hair elasticity. However, from a pharmacological perspective, topically processed lash lotions have zero biological pathway to transfer into breast milk. Nursing mothers can proceed with appointments comfortably, provided proper salon air exchange is maintained.

Pregnancy-Safe Alternatives & Nourishing Daily Care

Direct Answer: For expectant mothers choosing to bypass perming chemicals entirely, peptide conditioners, cold-pressed castor oils, and keratin treatments provide clean, non-toxic lash enhancement.

If you opt out of chemical processing during gestation, you can maintain lash density and follicle health through non-hormonal, botanical nourishment. Premium systems formulated by European laboratories like My Lamination prioritize hair restructuring without harsh alkalis.

Application of safe vitamin lash conditioning serum for pregnant women

Integrating pregnancy-safe beauty care products ensures active hydration. In particular, the prostaglandin-free My Lamination Vitamin Lash & Brow Serum (10ml) infuses natural hair shafts with vitamins A, B, C, E, and panthenol to safeguard lashes against postpartum shedding without synthetic chemical risks.

Frequently Asked Questions About Lash & Brow Safety During Pregnancy

Can I get a lash lift and tint while pregnant?

Yes, during the second trimester, a combined lash lift and tint is generally safe provided that mild, cysteamine-based perming lotions and non-ammonia tints are used. The formulas must never make contact with the eyelid skin, and a 48-hour patch test must be conducted prior to treatment.

Is brow lamination safe during the third trimester?

While brow lamination does not pose direct systemic risks to the fetus in the third trimester, lying flat on your back during service can induce supine hypotension. Furthermore, heightened skin sensitivity in late pregnancy increases the risk of chemical burns or severe contact dermatitis on the brow bone.

What should I do if I had a lash perm before realizing I was pregnant?

Do not be alarmed. Because lash perming solutions are applied to the external, non-vascularized hair shaft and are thoroughly cleansed off within an hour, systemic exposure is virtually non-existent. Inform your OB/GYN during your next routine prenatal appointment for reassurance.

Why is a 48-hour patch test mandatory during pregnancy even if I am an existing client?

Maternal immune adaptation alters antibody activity and histamine sensitivity. Formulas tolerated seamlessly before conception can trigger rapid contact allergies during gestation. A localized patch test behind the ear or on the inner arm confirms skin tolerance before any ocular application.

Final Medical Verdict: Making Empowered Beauty Choices

Preserving your personal wellness and beauty routine throughout pregnancy is entirely possible with informed, medically sound choices. While lash lifts offer a safe, contact-free profile when executed during the second trimester, brow laminations demand extra vigilance regarding dermal exposure. Always verify salon ventilation, insist on semi-reclined positioning after 20 weeks, and clear all cosmetic procedures with your physician.

Explore verified, premium cosmetic essentials and safety-tested beauty supplies trusted by licensed studios across Dubai and the UAE at Winlash Eyelash & Brow Supplies Dubai .

Lash Lift Side Effects and Risks: Are They Safe? (Doctor & Pro Guide)
Quick Safety Verdict: Lash Lift Side Effects and Risks

Yes, lash lifts are generally safe when performed by a certified technician using professional-grade lotions. Most common lash lift side effects—such as mild eye redness, watery eyes, or temporary stinging—are superficial and resolve on their own within 24 to 48 hours.

Severe lash lift risks like chemical keratitis or damaged, brittle lashes only occur if solutions seep directly into the ocular surface due to displaced shields or over-processing. Utilizing certified, dermatologically tested formulations from our lash and brow lift products range paired with a mandatory 48-hour patch test keeps treatment risks virtually nonexistent.

Table of Contents: Jump to What You Need
  1. Lash Lift Complications: Symptoms & When to See a Doctor
  2. Most Common Lash Lift Side Effects and Symptoms
  3. Severe Lash Lift Risks: Can You Go Blind or Suffer Chemical Burns?
  4. Lash Lift Gone Wrong: How to Fix Over-Curled or Frizzy Lashes
  5. Safety Contraindications: Who Should Avoid Lash Lifts?
  6. How to Prevent Lash Lift Complications (Pro Best Practices)
  7. Frequently Asked Questions
  8. Professional Lash Lift Solutions Across Dubai & the UAE

Lash lifts have skyrocketed in popularity as the ultimate low-maintenance beauty enhancement. By breaking and reshaping the internal disulfide bonds of your natural eyelashes using chemical solutions, a lash lift delivers the lifted, wide-eyed look of an eyelash curler and mascara that lasts between 6 to 8 weeks.

However, because the procedure involves placing chemical perm agents—primarily thioglycolic acid derivatives—within millimeters of your delicate corneal surface, complications can arise if safety protocols are neglected. Below is a comprehensive breakdown of lash lift side effects, realistic risk assessments, and step-by-step guidance on how to protect your ocular health.

1. Lash Lift Complications: Symptoms & When to See a Doctor

Direct Answer: Mild redness and light watery eyes are normal for up to 48 hours post-treatment. However, severe ocular pain, blurry vision, extreme eyelid swelling, or yellow discharge require urgent medical attention from an optometrist or ophthalmologist.

If you are currently experiencing discomfort following an eyelash perm or tint, use this clinical assessment table to determine whether your reaction is typical or demands immediate care:

Symptom / Side EffectUnderlying CauseTypical DurationAction Required
Mild Redness & Watery EyesMinor chemical vapor exposure or pad friction12–24 hoursMonitor at home; use preservative-free artificial tears.
Itchy, Puffy, or Swollen EyelidsAllergic contact dermatitis (chemical or tint sensitivity)2–5 daysApply cold compress. Consult a pharmacist for antihistamines.
Dry Eyes & Grittiness (Sand-like feel)Temporary Meibomian gland margin inflammation3–7 daysUse lubricating eye drops. Avoid wearing contact lenses.
Brittle, Bent, or Frizzy LashesOver-processing; chemicals left on too long4–8 weeks (natural cycle)Apply keratin or peptide conditioning serums daily.
Sharp Pain, Photophobia, or Blurry VisionChemical keratitis, corneal burn, or direct eye seepageImmediate onsetURGENT: Flush eye with saline and see an eye doctor immediately.

2. Most Common Lash Lift Side Effects and Symptoms

Common lash lift side effects and eye irritation symptoms including eyelid redness and watery eyes

Direct Answer: The most frequent lash lift side effects are localized eyelid irritation, temporary ocular dryness, mild allergic reactions to tint, and lash brittleness caused by excessive chemical processing times.

1. Eye Irritation, Stinging, and Red Sclera

During a lash lift, chemical lotions break disulfide bonds to reshape keratin fibers. Even microscopic fumes penetrating an imperfectly closed eyelid can trigger mild conjunctival hyperemia (bloodshot eyes). Symptoms usually peak within 6 to 12 hours and resolve after 24 hours. Preservative-free lubricating eye drops provide fast symptomatic relief.

2. Allergic Contact Dermatitis & Eyelid Swelling

Clients with sensitive skin can develop allergic contact dermatitis. This is rarely caused by the silicone pads and is most frequently triggered by ammonium thioglycolate in the lifting cream or p-phenylenediamine (PPD) in accompanying lash tints. Warning signs include intense itching along the eyelid margins, puffy lids, flakiness, or localized hives. A comprehensive patch test 48 hours prior to the appointment is the only foolproof method to prevent this reaction.

3. Dry Eyes and Meibomian Gland Disturbance

The eyelid margins house Meibomian glands, which secrete the essential oil layer preventing tear evaporation. If harsh perming chemicals or tint residues seep directly onto the lid margin, these glands can become inflamed, leading to temporary dry eye syndrome, ocular grittiness, or blepharitis flare-ups. Contact lens wearers must remove their lenses prior to the procedure to prevent chemicals from getting trapped beneath the lens surface.

4. Brittle, Singed, or Snapping Natural Lashes

Eyelash hair is composed of approximately 90% keratin protein. Over-processing—leaving the perming solution on longer than recommended for the client's hair density—strips natural moisture and denatures the hair cortex. The result is fried, crinkled, or brittle lashes that feel coarse and break easily. While damaged lashes will shed naturally over their normal 4 to 8 week biological cycle, targeted peptide serums are needed to restore fiber suppleness.

3. Severe Lash Lift Risks: Can You Go Blind or Suffer Chemical Burns?

Severe lash lift risks including chemical keratitis and corneal burns from improper solution application

Direct Answer: Permanent blindness from a professional lash lift is virtually unheard of. However, if lifting chemicals directly enter the eye, they can cause chemical keratitis or corneal abrasions that require immediate saline irrigation and medical treatment to prevent lasting ocular injury.

Debunking the Myth: Can a Lash Lift Make You Go Blind?

One of the most frequent consumer fears is whether a bad lash lift can trigger complete blindness. Under professional application standards, the answer is NO. The chemical concentrations used in aesthetic perming agents are not formulated to penetrate into internal ocular structures. The real danger is chemical keratitis (superficial burns to the outer cornea). If chemical solution seeps past the waterline, immediate emergency flushing with sterile saline or water for 15 minutes is vital to prevent epithelial erosion.

The Extreme Hazards of DIY At-Home Lash Lift Kits

Almost all documented cases of severe corneal erosion, eye infections, and chemical burns stem from consumers attempting to perform DIY lash perms at home. Applying chemical solutions with one eye closed while trying to maneuver mirrors and silicone pads creates an extraordinarily high probability of dripping alkaline agents directly into the eyeball. Professional lash lifting requires sterile conditions, precise isolation, and continuous supervision with both eyes closed throughout the process.

4. Lash Lift Gone Wrong: How to Fix Over-Curled or Frizzy Lashes

Over-curled and frizzy lashes from a bad lash lift and natural oil reversal remedies

Direct Answer: To fix a bad lash lift, gently relax over-curled hairs by combing organic castor or argan oil through the lashes twice daily, or visit a professional technician for a gentle 2-minute chemical reversal treatment using a nourishing keratin perm system.

If your lashes turned out crimped, curled back into your eyelid crease, or wildly uneven, avoid mechanical curlers or tugging. Here are the two safe corrective protocols:

  • The At-Home Natural Relaxation Method: Within the first 24 to 48 hours, the newly shaped disulfide bonds remain malleable. Washing your face with warm water and gently coating the lashes in cold-pressed castor, argan, or jojoba oil using a spoolie wand adds weight and hydration, allowing overly tight curls to drop and relax naturally.
  • Professional Lash Lift Reversal: If the lashes are severely kinked, return to a certified salon. A technician can apply a small amount of lifting lotion for 1 to 2 minutes to soften the hair shaft, followed by combing the lashes downward with a spoolie and neutralizing them straight to undo the extreme curl without causing follicle damage.

5. Safety Contraindications: Who Should Avoid Lash Lifts?

Direct Answer: You should avoid lash lifts if you have chronic dry eye disease, active blepharitis, ocular rosacea, or open eye infections. Individuals with hormonal fluctuations or pregnancy should take extra precautions due to heightened skin reactivity.

Pregnancy Considerations & Hormonal Sensitivity

While chemical absorption into the bloodstream from a cosmetic lash lift is negligible, pregnancy causes significant hormonal shifts that increase vascularity and skin sensitivity. Pregnant clients face a higher risk of unexpected contact dermatitis, as well as inconsistent lifting results due to altered hair texture. For an in-depth clinical analysis and trimester-by-trimester safety guidelines, read our complete guide on lash lift and brow lamination safety during pregnancy.

Lash Lift vs. Eyelash Extensions: Risk Comparison

Choosing between a lift and extensions often comes down to weighing chemical exposure against mechanical stress:

  • Lash Lifts: Zero mechanical weight added to natural lashes. Very low daily maintenance. The main risk profile is chemical irritation or over-processing every 6 to 8 weeks.
  • Lash Extensions: Physical synthetic fibers adhered with cyanoacrylate. Higher risk of traction alopecia from extra weight, poor hygiene leading to blepharitis, and daily upkeep.

6. How to Prevent Lash Lift Complications (Pro Best Practices)

Conducting a 48-hour allergy patch test before an eyelash perm to prevent allergic reactions

Direct Answer: Prevent lash lift side effects by demanding a 48-hour patch test, choosing advanced keratin-infused nourishing formulas, keeping eyes strictly closed throughout application, and following a strict 24-hour dry aftercare window.

  1. Always Demand a 48-Hour Patch Test: Ensure your salon places a tiny dab of lift lotion, neutralizer, and tint behind your ear or on your inner forearm 48 hours prior to the full service to rule out delayed hypersensitivity.
  2. Opt for Nourishing, Gentle Formulations: High-end aesthetic brands incorporate restorative complexes to protect hair integrity. Professional technicians prefer working with premium systems such as the My Lamination Lash & Brow Lift Kit, which blends gentle lifting actives with specialized lash botox vitamins and botanical extracts to eliminate frizz and brittleness.
  3. Never Wear Contact Lenses During the Service: Remove contacts before getting on the treatment bed. Soft contact lenses trap chemical fumes and moisture against the cornea, magnifying irritation risks.
  4. Strict 24-Hour Aftercare: Keep lashes completely dry, steam-free, and oil-free for the first 24 hours. In warm climates, avoid saunas, strenuous workouts, and humid showers during this initial stabilization window.

7. Frequently Asked Questions About Lash Lift Risks

Can you go blind from a lash lift?

No. Permanent blindness from a professional lash lift is virtually non-existent. While chemical contact can cause corneal abrasions or chemical keratitis if solutions leak into the eye, immediate and thorough saline flushing prevents deep structural ocular injury. Never attempt DIY lash perms at home, as self-application significantly increases accidental chemical exposure.

How long do lash lift side effects last?

Minor side effects such as redness, light tearing, and mild sensitivity generally subside within 24 to 48 hours. Mild eyelid contact dermatitis can take 3 to 5 days to clear with cold compresses. If severe pain, light sensitivity, or swelling lasts beyond 48 hours, consult an eye care professional.

Do lash lifts permanently damage natural eyelashes?

Lash lifts do not cause permanent damage when spaced 6 to 8 weeks apart. Even if lashes become over-processed or brittle from excessive timing, the damage is confined to the external hair shaft. Natural eyelashes grow and shed in continuous biological cycles, meaning new, healthy lashes will completely replace the treated ones within 1 to 2 months.

Why do my eyes feel gritty or dry after an eyelash lift?

Grittiness typically occurs if fumes or tint slightly irritated the Meibomian oil glands along your eyelid waterline. This temporary disruption causes your natural tear film to evaporate faster. Using preservative-free artificial tears for 3 to 4 days quickly restores comfortable eye hydration.

What should I do if lifting solution gets directly into my eye?

Flush your eye immediately with sterile saline solution or lukewarm clean tap water for a minimum of 15 continuous minutes. Do not rub your eye, as this can scratch the cornea. If burning, redness, or blurry vision persists after thorough irrigation, seek emergency medical care immediately.

8. Professional Lash Lift Solutions Across Dubai & the UAE

Healthy naturally lifted and curled eyelashes achieved with professional lash lift products in Dubai

Achieving breathtaking lash lift results without compromising ocular health comes down to certified expertise and gentle, medical-grade formulations. In the UAE's distinct regional climate—where the contrast between high outdoor humidity and intense indoor air conditioning can stress the skin barrier—using nourishing, hypoallergenic perming solutions is vital to prevent brittle lashes and allergic sensitivities.

For salons, certified lash artists, and beauty specialists across Dubai, Abu Dhabi, and the wider UAE seeking authentic, gentle lash lift kits, nourishing keratin serums, and precision accessories, explore the complete range at WinLash UAE with same-day and express local delivery.

Gel vs Cream Lash Remover: Which One to Use for Safe Extension Removal
Quick Access to This Article
  1. What Does an Eyelash Extension Remover Actually Do?
  2. Why Does Lash Extension Removal Sometimes Take Longer Than Expected?
  3. Gel vs Cream Lash Removers: Differences in Texture and Application
  4. The Chemistry Behind Lash Removers and Eyelash Extension Adhesives
  5. How to Choose the Right Remover for the Job
  6. A Step-by-Step Approach to Reducing Unnecessary Mechanical Stress
  7. Comparing Three Lash Removers Available at WinLash
  8. Featured Recommendation: When a Gel Remover Fits Your Workflow
  9. What Should You Do If Lash Remover Enters the Eye?
  10. Frequently Asked Questions About Gel and Cream Lash Removers
  11. Final Thoughts: Choose Based on Evidence, Not Texture Alone

When an eyelash extension takes longer than expected to remove, it can be tempting to apply more remover, wait longer, or use extra force to separate the extensions. However, the problem may not be the remover type alone. Product instructions, adhesive coverage, application technique, and the condition of the adhesive bond can all influence the removal process.

So, when should a lash artist choose a gel lash remover, and when is a cream remover the better option? It’s not just about texture. Understanding how each product works and when to use it can help you choose the right remover, deal with slow removal, and avoid putting unnecessary stress on natural lashes.

This guide compares gel and cream removers, explains the basic chemistry behind eyelash extension adhesives, and examines three products available at WinLash's eyelash extension remover collection. The goal is not to promise damage-free removal, but to help lash artists make informed decisions using product-specific instructions and available evidence.

What Does an Eyelash Extension Remover Actually Do?

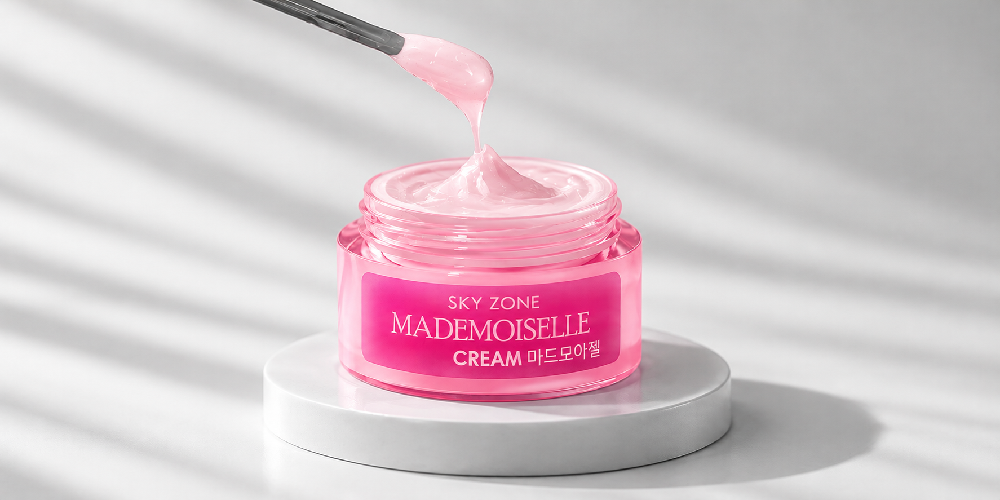
Mademoiselle cream lash remover in soft studio lighting

An eyelash extension remover is designed to weaken or dissolve the adhesive connection between an extension and a natural lash. The purpose is to allow the extension to be separated with minimal mechanical force, rather than breaking the attachment by pulling or peeling it away.

This distinction matters because natural lashes can break when extensions are tugged, rubbed, or pulled. The American Academy of Ophthalmology's guidance on eyelash extension safety warns that rubbing, tugging, and pulling can fracture natural lashes and may damage their follicles.

A remover, however, is not automatically safe simply because it is designed for adhesive removal. The result also depends on how the product is applied, whether it contacts the eye or surrounding skin, and whether the manufacturer's instructions are followed.

Why Does Lash Extension Removal Sometimes Take Longer Than Expected?

If extensions do not release as expected, the first step is to identify what might be preventing effective removal. Switching immediately to a different product or increasing the amount used may not address the underlying problem.

ProblemWhat to CheckWhat to Avoid
Extensions are not looseningConfirm that the remover is intended for the service, has reached the relevant adhesive bonds, and has been used according to its instructions.Pulling the extensions or assuming that more product will necessarily work faster.
The removal process is taking longer than expectedCheck the specified processing time, application coverage, and whether the product instructions are clear and current.Applying one product's timing to a different remover.
The remover spreads beyond the intended areaReview the amount applied, applicator control, product consistency, and eye protection.Assuming that every gel or cream will remain in place under all working conditions.
Adhesive residue remainsFollow the product's removal and cleansing instructions, then reassess the remaining bond.Scraping or pulling residue from natural lashes.
The client experiences burning, pain, or unusual irritationStop the procedure and follow the appropriate product-safety instructions. Seek medical advice when indicated.Continuing the service in the hope that the discomfort will disappear.

A useful troubleshooting habit is to change one variable at a time. Check the application technique and product directions before concluding that the formula is ineffective. If the product does not work as expected within its instructions, consult the manufacturer or supplier rather than improvising a stronger treatment.

Gel vs Cream Lash Removers: Differences in Texture and Application

Gel and cream lash removers compared by texture and application

The main visible difference between gel and cream lash removers is their consistency. Both formats are intended to support adhesive removal, but the exact application method and performance depend on the individual formulation.

A thicker product may be easier to place in a controlled area, but texture alone cannot establish which remover works faster, causes less irritation, or presents a lower risk of eye exposure. Those questions require product-specific evidence rather than assumptions about gel or cream formulas.

Comparison FactorGel Lash RemoverCream Lash Remover
ConsistencyGel-based texture; the actual thickness varies by formulation.Cream-based texture; the actual thickness varies by formulation.
ApplicationConsider the manufacturer's recommended placement, applicator, and amount.Consider the manufacturer's recommended placement, applicator, and amount.
Control and spreadingEvaluate the product's consistency and how precisely it can be applied during the service.Evaluate the product's consistency and how precisely it can be applied during the service.

The practical conclusion: neither format is universally better. A suitable choice is the product whose documented use, application requirements, and instructions match the service being performed. A reliable comparison should also consider ingredient information and safety documentation when these are available.

The Chemistry Behind Lash Removers and Eyelash Extension Adhesives

Understanding the basic chemistry helps explain why removing extensions is not simply a matter of wiping away a cosmetic product.

How Does Eyelash Extension Adhesive Form a Bond?

Many professional eyelash extension adhesives are based on cyanoacrylate chemistry, although the exact composition varies between products. In these adhesives, cyanoacrylate monomers react and polymerize, forming a solid adhesive structure as the product cures.

Once the adhesive has cured, its behaviour differs from that of the original liquid. This is one reason why removing a bonded extension may require a product specifically designed for the adhesive system rather than an ordinary makeup cleanser.

How Does a Remover Affect the Adhesive Bond?

A remover is intended to weaken or dissolve the adhesive connection so that the extension can be released without unnecessary force. However, the detailed mechanism depends on the remover's own formulation. It would be inaccurate to assume that every gel and cream remover works through the same chemical reaction.

WinLash lists three remover products in this comparison, but the reviewed product pages do not provide a complete ingredient list or a downloadable Safety Data Sheet (SDS). Without that information, we cannot reliably identify the active adhesive-dissolving ingredients, describe a specific reaction, or rank the three products by chemical strength.

Does the Formula Determine How Safe a Remover Is?

The formula matters, but it is not the only consideration. The application method, amount used, contact with the eye area, exposure time, and compliance with the product instructions also affect how a removal procedure is carried out.

Similarly, cream consistency is not proof of lower irritation, and gel consistency is not proof of faster performance. To demonstrate that one remover is safer or more effective than another, comparative testing and relevant product-safety evidence would be needed.

For a professional lash artist, the most responsible approach is to separate three things: what the product manufacturer states, what independent evidence demonstrates, and what remains unknown. This prevents marketing descriptions from being mistaken for verified chemical or clinical results.

How to Choose the Right Remover for the Job

Instead of following a universal rule such as “gel for speed” or “cream for sensitive clients,” assess the requirements of the service and the information available for each product.

For Full-Set Removal

Check whether the product instructions support the intended removal service and whether the application method allows the adhesive bonds to be treated as directed. Consider the amount of product needed, the recommended applicator, and the specified processing time.

Do not assume that all cream removers are intended only for full-set removal. Confirm the permitted use of the specific product before making that decision.

For Targeted or Partial Removal

Controlled placement becomes especially important when only selected extensions need to be removed. Review whether the product is suitable for the intended task, and use an applicator that allows precise placement while protecting the surrounding eye area.

A gel texture may be convenient for some application methods, but the format alone does not guarantee that the product will remain exactly where it is placed.

When Processing Time Matters

Processing time should be based on the manufacturer's instructions for that particular remover. Published times can differ across products, even when they belong to the same format.

Do not choose a remover solely because its product page advertises faster action. Verify the current directions and assess whether the stated application procedure suits the service. If the instructions are inconsistent, ask the supplier or manufacturer to clarify them before use.

When a Client Has a History of Sensitivity

Review the available ingredient information, warnings, and product directions before beginning. A label describing a remover as “hypoallergenic” or suitable for sensitive skin should not be interpreted as a guarantee that an individual cannot react to it.

If a client has a history of eye reactions or develops symptoms during a service, do not attempt to solve the problem by switching blindly between gel and cream formulas. Follow appropriate professional and medical guidance instead.

A Step-by-Step Approach to Reducing Unnecessary Mechanical Stress

The goal of a careful removal procedure is to allow the adhesive bond to release without forcing the extension away from the natural lash. The exact procedure must follow the instructions for the selected product.

  1. Prepare the working area. Clean your hands and tools, assess the client's condition, and prepare appropriate under-eye protection.
  2. Protect the eyes. Keep the client's eyes closed throughout application and follow the product's safety instructions. Position protective pads or tape as required.
  3. Apply the correct amount. Use the recommended applicator and place the remover only where the product instructions direct. Avoid contact with the eye and unintended surrounding areas.
  4. Respect the stated processing time. Follow the directions for the exact product rather than using a general timing rule for all gel or cream removers.
  5. Assess release without pulling. Once the bond has loosened according to the product procedure, guide the extensions away gently. If there is resistance, stop rather than forcing the extension off.
  6. Reassess if removal is incomplete. Check the instructions and consult the supplier if necessary. Do not increase the quantity or extend the processing time beyond the permitted directions without appropriate guidance.
  7. Complete post-removal cleansing. Follow the remover's instructions for removing residue and cleansing the lashes and surrounding area.

These steps can help reduce avoidable mechanical stress, but they cannot guarantee that every removal will be free of irritation or natural-lash damage. Product selection and careful technique must work together.

Comparing Three Lash Removers Available at WinLash

Comparison of three eyelash extension removers available at WinLash

Choosing between gel and cream lash removers depends on more than texture. Application requirements, product-specific instructions, and the available safety information should all be considered. The WinLash remover collection includes three options from IB and SKY, allowing lash artists to compare their published features before choosing a product for their workflow.

ProductFormat and Published FeaturesListed Processing TimeImportant Consideration
IB Nano Creamy Lash RemoverCream formula with a thick, non-dripping consistency. WinLash describes it for classic and volume eyelash extensions.5–10 minutes, according to the product page.Follow the current product instructions. A complete ingredient list and downloadable SDS are not provided on the reviewed page.
SKY Creamy Lash RemoverCream formula with a soft, thick consistency. The product page identifies South Korea as its country of manufacture.10–15 minutes, according to the product page.Verify the current instructions and availability. Claims such as “hypoallergenic” and “fume-free” are manufacturer descriptions, not independent proof that a product is suitable for every client.
SKY Gel Lash RemoverGel formula described by WinLash as suitable for targeted application, with a no-white-residue finish listed among its product features.The page contains several timing references, including 1–5 minutes, 2–5 minutes, and up to 10 minutes.Confirm the applicable processing time with the current product instructions or supplier before use.

These products illustrate the gel and cream formats available at WinLash, but the published information does not establish that one format is universally faster, safer, or less irritating. A reliable performance comparison would require consistent testing under comparable conditions and more complete formulation and safety documentation.

Featured Recommendation: When a Gel Remover Fits Your Workflow

For lash artists who prefer working with a gel remover, the SKY Gel Lash Remover is worth considering for targeted adhesive removal. Its gel format and targeted-application positioning make it a relevant option for artists who want to focus application on specific areas rather than choosing a remover based on texture alone. WinLash also lists a no-white-residue finish among the product's features.

Before adding it to your professional kit, confirm the recommended processing time with the supplier. The product page lists multiple time ranges, so the correct timing should be clarified before use.

What Should You Do If Lash Remover Enters the Eye?

A lash remover is intended for a specific application procedure and should not be allowed to enter the eye. If accidental eye exposure occurs, stop the service and follow the product's emergency instructions. General chemical-exposure guidance from Poison Control recommends immediate, thorough irrigation with room-temperature water for 15–20 minutes, followed by appropriate expert guidance. Seek urgent medical assessment for severe symptoms or ongoing pain, redness, swelling, or vision changes.

If a client experiences a suspected allergic reaction to eyelash extensions or adhesive, do not attempt to manage the reaction by continuing removal. The American Academy of Ophthalmology advises seeking ophthalmic care when an allergic reaction occurs rather than trying to remove the extensions yourself.

Frequently Asked Questions About Gel and Cream Lash Removers

What Is the Main Difference Between Gel and Cream Lash Remover?

The most obvious difference is consistency. A gel or cream texture may affect placement and handling, but the best choice depends on the individual product's intended use and documented instructions.

Which Lash Remover Should a Professional Lash Artist Choose?

Choose a product whose instructions match the removal service, application method, and working conditions. Review the available safety information and follow the product-specific processing directions rather than choosing on texture alone.

Why Is My Lash Extension Remover Taking Longer Than Expected?

Check the product's recommended use, application coverage, processing time, and current instructions. If the bond does not release within the permitted procedure, avoid pulling and seek product-specific guidance.

Does Cream Lash Remover Cause Less Irritation Than Gel?

Not necessarily. A comparison of irritation risk requires evidence about the individual formulas and how they are used. Texture alone cannot prove that a product is safer.

How Long Should Lash Remover Stay On?

Follow the current instructions for the exact product. WinLash lists different times for its cream removers, and the SKY Gel product page contains multiple timing statements. Do not use one general processing time for all three products.

Are the Ingredients of WinLash's Removers Published?

The reviewed product pages do not provide a complete ingredient list or downloadable Safety Data Sheet. Ask the supplier or manufacturer for current technical and safety documentation when you need to assess specific ingredients or compare formulations.

Can Gel or Cream Remover Guarantee Damage-Free Removal?

No guarantee should be inferred from the product format. The aim is to allow the adhesive bond to release while avoiding unnecessary mechanical stress, using the product exactly as instructed.

Final Thoughts: Choose Based on Evidence, Not Texture Alone

Choosing between gel and cream lash remover is not simply a contest between speed and gentleness. The more useful decision considers the service being performed, product-specific directions, application control, available safety information, and the ability to remove extensions without forcing the adhesive bond apart.

The WinLash range offers both cream and gel formats, giving lash artists different products to evaluate. The most responsible way to compare them is to look at what each product actually documents, identify where information is missing, and avoid treating marketing language as proof of superior performance.

Before selecting a remover, review the product instructions and available technical information. If a detail is unclear—particularly the correct processing time or a safety concern—request clarification instead of guessing. This approach supports better-informed choices and helps keep the focus where it belongs: controlled application, responsible removal, and care for natural lashes.

How to Remove Eyelash Glue Safely from Skin, Lashes & Extensions
Quick Guide: How to Remove Eyelash Glue Safely (Damage-Free Protocol)
  • Off Skin & Eyelids: Apply a warm damp compress for 3 minutes, follow with a gentle sweep of micellar water or light plant oil (jojoba/coconut) on a cotton pad in a downward motion. Never rub sideways.
  • Off Natural Lashes: Saturate a clean spoolie or micro-swab with coconut or olive oil, coat the lashes, let sit for 5 minutes to break polymer bonds, and gently roll outward.
  • Cluster & Semi-Permanent Extensions: DIY cluster bonds dissolve with gentle oil steams. Stronger cyanoacrylate bonds require specialized professional solutions from our eyelash extension glue and liquids collection, such as a non-drip cream remover, to dissolve adhesive without pulling natural lashes.
Table of Contents: Jump to What You Need
  1. How to Get Lash Glue Off Skin and Eyelids Gently
  2. How to Remove Eyelash Glue from Natural Lashes Without Breakage
  3. How to Remove Lash Extensions and Cluster Bond Safely
  4. Lash Glue Removal Methods at a Glance (Comparison Table)
  5. Critical Warnings: What You Must NEVER Do
  6. Post-Removal Care: Restoring Your Natural Lash Line
  7. Frequently Asked Questions
  8. Professional Lash Adhesive Solutions Across Dubai & the UAE

Few beauty mishaps are as frustrating—or as nerve-wracking—as stubborn eyelash glue cemented to your eyelids or clutching tightly to your delicate natural lashes. Whether you are dealing with everyday latex-based strip lash glue, DIY cluster bond-and-seal systems, or professional salon extensions, attempting to yank, scrape, or peel the adhesive off dry will almost certainly pull out your natural eyelashes and damage your hair follicles.

The secret to clean removal lies in dissolving the adhesive matrix before touching the lash line. Because different lash adhesives employ distinct chemical structures—as detailed in our guide to eyelash extension glue formulations—the right breakdown technique depends entirely on where the glue is stuck and what type of bond you are facing. Here is how to dissolve lash adhesive gently, quickly, and completely free of damage.

1. How to Get Lash Glue Off Skin and Eyelids Gently

Removing eyelash glue from delicate eyelids and skin using a warm compress and micellar water

Direct Answer: To remove eyelash glue from eyelids and skin without irritation, soften the adhesive with a warm water compress for 3 minutes, apply a drop of bi-phase micellar water or pure jojoba oil using a cotton swab, and glide gently downward along the lash line.

The skin surrounding your eyes is the thinnest on your entire body—measuring less than 0.5 millimeters in thickness. Aggressive rubbing or scraping causes immediate micro-tears, redness, and accelerated elasticity loss. When strip lash adhesive or cluster bond accidentally smears across your eyelid, use the following low-friction protocol:

Step-by-Step Eyelid Cleanup Protocol

  1. Warm Compress Soak: Soak a clean microfiber washcloth or cotton pad in comfortably warm water. Rest it over your closed eyes for 3 to 5 minutes. The gentle heat and humidity loosen the synthetic rubber or latex polymers in standard lash glue.
  2. Emulsify with Gentle Solvents: Lightly saturate a precision cotton swab (Q-tip) with bi-phase micellar water, pure jojoba oil, or baby oil. Gently dab along the dried glue marks on your eyelid. Allow the solution to rest on the residue for 60 seconds without rubbing.
  3. Roll and Wipe Downward: Using a fresh cotton pad, press softly against the eyelid and wipe in a downward motion toward the tips of the lashes. Never scrub side-to-side, as this drags the delicate eyelid tissue and pulls on adjacent lash roots.
  4. Cleanse the Barrier: Rinse your face with a mild, oil-free foaming facial cleanser and lukewarm water to wash away residual emulsified oils and dissolved adhesive particles.

2. How to Remove Eyelash Glue from Natural Lashes Without Breakage

Using a spoolie with coconut oil to safely break down eyelash glue on natural lashes

Direct Answer: To clear dried glue clumps from natural lashes, coat a clean spoolie wand in cold-pressed coconut or olive oil and brush repeatedly from base to tip. Let the oil sit for 5 minutes to break down the polymer chains, then gently wipe the residue away.

When you peel off false strip lashes at night, residue frequently stays trapped between your natural hairs, creating stubborn, hardened clumps. If left untreated, this debris can trap sweat, dust, and bacteria, potentially clogging your Meibomian glands and triggering blepharitis or styes.

The Spoolie & Plant Oil Technique

Natural plant oils—specifically organic coconut oil, sweet almond oil, and extra virgin olive oil—contain medium-chain fatty acids that naturally penetrate and soften the polymer chains holding cosmetic adhesives together.

  • Application: Warm a small pea-sized amount of coconut or olive oil between your fingertips. Dip a clean, disposable mascara spoolie brush into the oil.
  • Combing the Lashes: With your eye closed, gently comb the spoolie through your natural lashes from root to tip. Make sure the bristles distribute the oil evenly across every clump without pressing into the eyeball.
  • Resting Period: Keep your eyes relaxed for 5 to 10 minutes. The oil breaks down the cohesion of the adhesive, transforming hardened glue into a soft, jelly-like residue.
  • Clean Removal: Take two damp cotton rounds. Sandwich your natural lashes between the pads and gently glide them outward toward the lash tips. The glue residue will transfer cleanly onto the cotton rounds.

3. How to Remove Lash Extensions and Cluster Bond Safely

Professional cream lash remover dissolving cyanoacrylate extension bonds safely

Direct Answer: Semi-permanent lash extensions cured with cyanoacrylate cannot be dissolved with oils alone and require a dedicated cream remover. Apply the cream along the bonds with a micro-applicator, wait 3 to 5 minutes, and slide the extensions off without tugging.

It is vital to distinguish between DIY cluster lashes and professional semi-permanent extensions:

Removing DIY Cluster Lashes (Bond & Seal Systems)

Cluster lashes are adhered underneath your natural lashes using a tacky, flexible bonding agent. To remove them safely at home:

  1. Soak a lint-free cotton pad with dedicated cluster remover or a dual-phase oil cleanser.
  2. Press the pad firmly underneath your closed lashes for 30 to 45 seconds to fully saturate the bond.
  3. Gently slide the cluster extensions downward using your fingertips or curved tweezers. They should glide off effortlessly. If there is any resistance, reapply the cleanser for another 60 seconds—never pull.

Removing Professional Semi-Permanent Lash Extensions

Professional lash extensions are bonded with industrial-grade cyanoacrylate, formulated to withstand daily showers, facial cleansers, and environmental humidity. Attempting to remove salon extensions using coconut oil, Vaseline, or steam will only weaken a few bonds while leaving others intact, frequently tempting clients to pull and rip their natural lashes from the root.

Professional Recommendation

Use a Dedicated, Non-Drip Cream Remover

Liquid removers run directly into the eyes, causing stinging and corneal irritation. Professional lash technicians rely on thick, non-drip cream formulas like Nano Creamy Remover. Engineered with balanced dissolution agents, it encapsulates cyanoacrylate bonds within 3 minutes without liquefying or migrating onto the eyelid skin.

Explore Nano Creamy Remover

4. Lash Glue Removal Methods at a Glance

To help you select the safest technique for your exact situation, here is a breakdown of how the most popular removal methods compare in terms of speed, active agents, and safety profiles:

MethodActive MechanismTime RequiredSafety RatingBest For
Professional Cream RemoverDissolves cross-linked cyanoacrylate bonds3–5 minutesHighest (Non-drip)Salon extensions & stubborn semi-permanent bonds
Cold-Pressed Plant Oils (Coconut, Olive, Jojoba)Fatty acids soften rubber & latex polymers5–10 minutesVery High (Nourishing)Strip lash glue & residue on natural lashes
Bi-Phase Micellar WaterMicelle surfactants lift loosened adhesive2–3 minutesHigh (Gentle)Glue smudges on eyelids and sensitive skin
Warm Steam & CompressThermal moisture expands adhesive pores5–8 minutesHigh (Non-chemical)Pre-softening tough residue before oil application

5. Critical Warnings: What You Must NEVER Do

Common eyelash glue removal mistakes including pulling dry lashes and harsh chemicals

Safety Notice: Never peel dry adhesive, avoid harsh solvents like acetone near the eyes, and never substitute Vaseline for lash glue. Severe pain, cornea burns, or trapped foreign adhesive require immediate evaluation by an optometrist or ophthalmologist.

Emergency Alert: Did You Get Super Glue on Your Lashes?

If household super glue (industrial cyanoacrylate) accidentally touches your lashes or eyelids, DO NOT apply nail polish remover or pure acetone to your eye area. Acetone causes rapid corneal chemical burns, extreme pain, and potential vision impairment. Keep your eye closed, apply a generous coat of sterile ophthalmic ointment or mineral oil over the lashes to prevent the lids from bonding shut, and seek immediate emergency ophthalmic care.

The Dangers of Dry Peeling (Traction Alopecia)

Lash adhesives anchor firmly to the keratin sheath of natural eyelashes. When you pull or pick dry adhesive clumps with tweezers or fingernails, you apply mechanical tension directly to the follicle. Repeated pulling causes traction alopecia—a condition where damaged follicles become inflamed and permanently stop producing new lashes.

Why Vaseline is NOT a Safe Lash Glue Alternative

A widespread internet rumor suggests using petroleum jelly (Vaseline) as a makeshift eyelash glue. Vaseline is an occlusive emollient engineered to trap moisture; it possesses zero adhesive polymers. Applying it along the lash line will cause the false lash to slide directly into the eye, smearing heavy petrolatum across your tear film, causing blurred vision, and blocking the eyelid's delicate lubricating glands.

6. Post-Removal Care: Restoring Your Natural Lash Line

Direct Answer: After dissolving all glue residue, cleanse the eyes with an oil-free lash foam to remove broken-down polymers, apply a nourishing peptide lash serum, and allow your lashes to rest for at least 24 to 48 hours before reapplying new adhesives.

Proper aftercare ensures that your natural lashes remain thick, hydrated, and ready for future sets. Follow these recovery guidelines:

  • Double-Cleanse the Lash Margin: After utilizing oil to dissolve adhesive, wash your lids thoroughly with a foaming, pH-balanced lash shampoo. This eliminates microscopic glue particles and excess oil that could disrupt future bonding.
  • Hydrate with Peptides & Biotin: Apply a light coat of conditioning lash serum containing copper peptides, panthenol, and biotin to reinforce keratin strength and stimulate active follicle growth (anagen phase).
  • Observe a 24-Hour Reset Period: Give your eyelids 24 to 48 hours of breathing room before applying new strip lashes, clusters, or salon extensions. In warmer or high-humidity climates where sweat and sebum production increase, clean follicular rest is essential to prevent irritation.

7. Frequently Asked Questions

How to remove eyelash glue at home without makeup remover?

The most effective method is combining facial steam with household plant oils (such as coconut, olive, or sweet almond oil). Lean over a bowl of steaming water for 5 minutes with a towel over your head to soften the glue polymers. Next, dip a cotton swab in warm oil and gently glide it downward along the lash line until the residue breaks away completely.

Can coconut oil remove professional lash extensions?

Coconut oil softens everyday strip lash glues and DIY cluster bonds, but it is rarely strong enough to fully dissolve professional, salon-grade cyanoacrylate extensions. Using oil on professional extensions often loosens only a fraction of the bonds, leading to clumping and tempting individuals to pull. Always use a dedicated professional cream remover like Nano Creamy Remover for salon sets.

How long does eyelash glue take to dissolve?

Standard strip lash glue dissolves in 1 to 3 minutes when exposed to warm water or micellar water. Heavier bond-and-seal residues take 3 to 5 minutes with plant oils. Professional cream removers break down medical-grade extension bonds in approximately 3 minutes.

Can micellar water dissolve stubborn eyelash glue?

Yes, provided you use an oil-infused (bi-phase) micellar water. The oil layer loosens the adhesive while the micelle molecules lift residue away from the eyelid skin without leaving a greasy film. Standard oil-free micellar water is suitable for light smudges but will struggle against water-resistant bonds.

Can I use Vaseline as an eyelash glue substitute?

No, absolutely not. Vaseline does not possess any adhesive properties. Attempting to use petroleum jelly to stick lashes will cause them to slide into your eyes, impairing vision and clogging Meibomian oil glands along your eyelids. Always use tested, hypoallergenic lash glues.

Professional Lash Adhesive Solutions Across Dubai & the UAE

Mastering safe adhesive removal is essential for maintaining natural lash integrity, whether you are managing daily strip lashes at home or running a busy lash salon in Dubai. In the UAE's demanding climate, where intense indoor air conditioning and outdoor humidity put adhesives to the test, using high-performance, salon-grade formulations makes all the difference in both retention and safe cleanup.

For certified beauty professionals and lash lovers across the Emirates seeking premium adhesives, gentle cream removers, and precision application tools with rapid local delivery throughout Dubai, Abu Dhabi, and the wider UAE, explore our complete catalog at WinLash UAE.

Winlash Dubai equips lash & brow professionals and dedicated at-home users with 900+ pro-grade products—including award-winning My Lamination lash lift kits and cruelty-free options. Backed by Ravabeauty (est. 2018) and a 50-member expert team, we partner with 13 global brands to deliver salon-quality tools and aftercare tuned for Dubai’s climate, with fast delivery across Dubai, Abu Dhabi, and Sharjah.

Exclusive Distributor Fast UAE Delivery Climate-Tuned Aftercare