


Manga lashes have moved from social media trend to one of the most requested lash styles in the studio. Inspired by the wide, expressive eyes of manga and anime characters, the look is built on defined spikes standing out from a softer, shorter base, with deliberate gaps between them. Done well, manga lashes look graphic and doll-like. Done poorly, they look clumpy, uneven or simply like a messy volume set. The difference comes down to how the spikes are made, where they're placed, and how well the set holds its shape over the following weeks. Everything starts with choosing the right eyelash extensions for each layer.
This guide is written for lash artists. It covers what sets manga lashes apart from wispy and anime styles, how to build spikes properly, mapping by eye shape, length, curl and diameter choices, brown and lower-lash variations, and how to keep spikes crisp without putting natural lashes at risk.
Key Takeaways
- Manga lashes combine defined spikes with a shorter, softer base and intentional gaps between spikes.
- Each spike is a closed fan or premade spike attached to a single isolated natural lash, never glued across several natural lashes.
- Strong curls (D or L) and even spike spacing matter more than spike length for a clean result.
- Spike length must still respect the strength of the natural lash underneath it.
Quick Access to This Article
- What Are Manga Lashes?
- Manga vs Anime vs Wispy Lashes: What's the Difference?
- How Manga Lash Spikes Are Built
- Choosing Lengths, Curls and Diameters for Manga Lashes
- Manga Lash Mapping for Every Eye Shape
- Step-by-Step: Applying a Manga Lash Extension Set
- Brown Manga Lashes and Lower Lash Variations
- Keeping Spikes Crisp: Retention and Climate
- Protecting Natural Lashes During a Manga Set
- Manga Extensions vs Strip, Cluster and Magnetic Versions
- Common Mistakes That Ruin Manga Lashes
- Frequently Asked Questions
- Conclusion
What Are Manga Lashes?

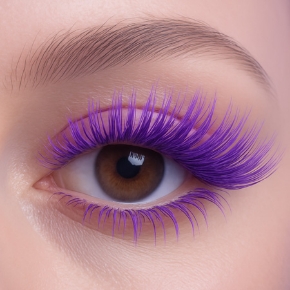
Manga lashes are a lash extension style built around visible, separated spikes. Longer, tightly closed spikes are placed at regular intervals along the lash line, while shorter, softer lashes fill the space between them. The contrast between spike and base creates the graphic, star-like effect associated with manga illustration, where eyes are drawn with a few bold, defined lashes rather than a uniform fringe.
Three features define the style:
- Defined spikes: tight, pointed clusters that read as individual "points" rather than a soft blend
- Intentional separation: visible gaps between spikes, rather than the even density of a classic or volume set
- Length contrast: a clear step between the spikes and the base layer, which is what gives the eye its wide, open look
The look grew out of Asian beauty trends and anime-inspired makeup, and it's often requested by clients who already wear spiky strip or cluster lashes and want a longer-lasting version. Because it's highly visible, it also leaves little room for error: uneven spacing or a spike that tilts the wrong way is far more noticeable than in a soft natural set.
Manga vs Anime vs Wispy Lashes: What's the Difference?
Clients often use these names interchangeably, and some brands do too. In the studio, it helps to treat them as points on a scale of how bold and separated the spikes are, and to confirm the look with reference photos before you start.
| Style | Spike character | Base layer | Overall effect |
|---|---|---|---|
| Wispy | Soft spikes with modest length contrast | Fluffy, fairly full | Textured and feathery, still blended |
| Manga | Defined, tightly closed spikes, clearly separated | Short and soft, with visible gaps | Graphic, doll-like and wide-eyed |
| Anime | The broader umbrella term; often the boldest, highest-contrast version | Can be sparse or full depending on the artist | Exaggerated and cartoon-inspired |
Many clients who search for "anime manga lashes" mean the same spiky, separated look. The safest approach is to agree on spike density, length contrast and curl together during the consultation, rather than relying on the name alone.
How Manga Lash Spikes Are Built
The spike is the signature of the whole set, so how you make it decides how clean the result looks. There are two common approaches, and both share one non-negotiable rule.
Closed fans made by hand
A spike is essentially a fan that's closed rather than opened. Pick up several ultra-fine extensions, keep the bases aligned and tight, and let the tips come together into a single point instead of spreading them out. Fine diameters make this much easier, because thin fibers close neatly and keep the spike lightweight. A palette of ultra-fine black velvet volume lashes works well for both the closed spikes and the softer fans in between.
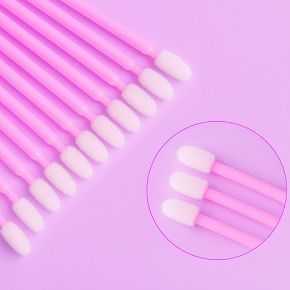
Some artists apply a little primer to the tips of the spike on a micro swab to help the fibers hold together. Keep it away from the base, since primer near the bonding area can speed up adhesive curing and affect retention.
Premade spikes
Premade spikes are factory-closed bundles with a consistent shape and thickness. They save time and make spikes more uniform across the lash line, which is useful when you're building speed or working on a tight appointment schedule. The trade-off is less control over the exact spike width for each client.
The rule both methods share
Every spike, handmade or premade, is attached to one isolated natural lash. The clustered look comes from the shape of the spike, not from gluing several natural lashes together. Bonding neighboring natural lashes into a "spike" creates stickies, which stop the lashes from shedding independently and can cause discomfort and premature lash loss.
Choosing Lengths, Curls and Diameters for Manga Lashes
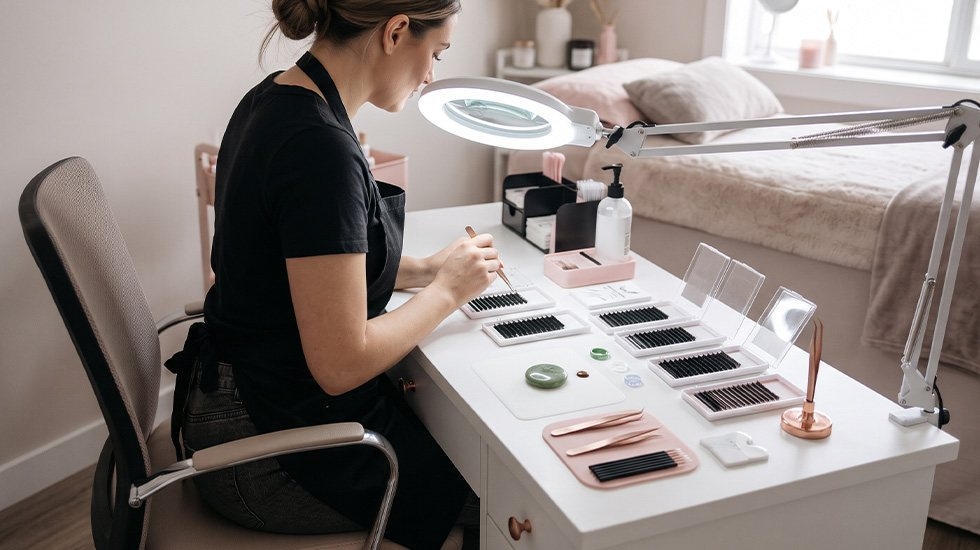
Manga lashes rely on contrast, but contrast has to work within what the client's natural lashes can support. Use the ranges below as starting points and adjust to each client.
Length: spikes, base and transitions
Brand guides publish slightly different numbers, but most manga and anime maps follow a similar logic: spikes in the longer range, a noticeably shorter base, and optional in-between lengths to soften the jump.
| Layer | Typical length range | Role in the set |
|---|---|---|
| Spikes | About 11–14 mm for most clients; longer only on strong natural lashes | Create the defined "points" |
| Transition lashes (optional) | About 1–2 mm shorter than the spikes | Soften the step for a more wearable look |
| Base layer | About 8–10 mm | Fills the gaps and makes the spikes stand out |
The larger the gap between spike and base, the more dramatic the result. A softer, everyday manga set uses a smaller step; a bold, cosplay-style set uses a bigger one. What doesn't change is the limit set by the natural lash: a long spike on a short or fine natural lash acts like a lever and puts extra strain on the follicle. On fine lashes, keep spikes shorter and let curl and spacing do more of the work.
Curl: strong enough to project
Manga spikes need lift to stand out from the base. Soft curls tend to flatten the spike against the lid and lose the graphic effect.
| Curl | Use in manga sets |
|---|---|
| C | Usually too soft for spikes; can work for the base layer on clients with naturally lifted lashes |
| D | The most common choice for spikes on almond and round eyes |
| L / L+ | Best for hooded eyes, monolids and downward-growing lashes, where the spike needs to clear the lid |
Diameter: fine fibers, defined result
Because spikes are closed bundles, they're made from fine fibers, typically around 0.05–0.07 mm. Using thick single lashes as spikes makes them look heavy and stiff and adds unnecessary weight. Fine fibers keep the spike light while still reading as bold once closed.
Manga Lash Mapping for Every Eye Shape
Spacing is where manga lashes succeed or fail. With high length contrast, even small differences in spike position become obvious. A simple, reliable approach is to divide each lash line into equal sections and place one spike in each section, then fill the base around them.
Most artists build manga sets on a cat-eye or squirrel-style base, which supports evenly distributed spikes. A doll-eye base, with its strong central peak, tends to fight against even spacing. From there, adjust spike placement to the eye shape:
| Eye shape | Spike placement | Curl tip |
|---|---|---|
| Almond | Evenly spaced along the full lash line | D |
| Round | Concentrate spikes on the outer part of the lash line, with fewer near the inner corner | D |
| Hooded | Focus spikes in the outer-centre zone where they clear the lid fold | L or L+ |
| Monolid | Place spikes across the outer two-thirds, keeping the inner corner light | L or L+ |
| Downturned | Add slightly longer spikes on the outer third to lift the eye | D or L |
Mark spike positions on the under-eye pad or tape before you start, and check symmetry from the front, not just from above, before the client sits up. Natural lashes are rarely identical between eyes, so mirror the visual result rather than copying the exact positions.
Step-by-Step: Applying a Manga Lash Extension Set
- Consult with references. Agree on spike density, length contrast and curl using photos. Confirm whether the client wants upper lashes only or lower lashes too.
- Assess the natural lashes. Check length, strength and growth direction. These decide your maximum spike length and curl.
- Cleanse and prep. Remove makeup, oils and any residue from strip or magnetic lashes so the adhesive can bond properly.
- Map the spikes. Divide the lash line into equal sections and mark each spike position with its length.
- Apply the base layer. Work the shorter, softer lashes across the lash line first, leaving the marked spike positions ready.
- Place the spikes. Attach each closed spike to a single isolated natural lash, following the natural growth direction.
- Add transitions if needed. Use in-between lengths on either side of a spike to soften the step for a more wearable result.
- Check spacing and symmetry. Comb through, check every natural lash moves freely, and compare both eyes from the front.
Brown Manga Lashes and Lower Lash Variations

Brown manga lashes
Black spikes give the boldest contrast, but they're not right for every client. Brown manga lashes keep the spiky structure while softening the overall effect, which suits clients with light, blonde or fine natural lashes, or anyone who wants the texture of manga lashes without the full graphic intensity. Some artists also mix brown into the base layer and keep the spikes black, so the points stand out while the overall set looks lighter. A brown silk PBT lash palette gives you a range of lengths to build either version.
Lower manga lashes
Many reference images show spikes on the lower lash line too, which completes the illustrated look. Lower-lash extensions are a separate skill: the lashes are shorter, finer and closer to the waterline, and they generally don't last as long as upper-lash extensions. Only offer them if you're trained in lower-lash application, keep the spikes short and very light, and assess each client's lower lashes separately before agreeing to it.
Keeping Spikes Crisp: Retention and Climate
A manga set looks its best when the spikes stay tight and pointed. When spikes start to fan out, cross over each other or drop, the look quickly becomes messy. Retention and spike shape depend on a few things you control in the studio and a few the client controls at home.
In the studio
- Thorough prep: oils and makeup residue weaken the bond, and spikes put a little more leverage on the bond than a short base lash.
- The right adhesive for the room: lash adhesives cure by reacting with moisture in the air, and each one is designed for a specific temperature and humidity range. In humid climates like the UAE, choosing an adhesive suited to your studio conditions makes a real difference. You'll find options for different conditions among our lash adhesives and liquids.
- Clean spike bases: keep the base of each spike tight and fully covered by adhesive, so it doesn't split open after a few days.
At home (what to tell the client)
- Keep the lashes dry for the time recommended by the adhesive's instructions after the appointment
- Cleanse the lashes gently and regularly with a lash-safe cleanser
- Brush gently in the direction of the spikes so they stay separated
- Avoid oil-based products, rubbing and sleeping face-down on the lashes
- Book fills regularly so spikes don't become uneven as natural lashes shed
Protecting Natural Lashes During a Manga Set
Manga lashes can be applied safely, but the style tempts artists toward two risky shortcuts: spikes that are too long or heavy for the natural lash, and "spikes" made by gluing several natural lashes together. Avoid both. Match each spike to the strength of the natural lash it sits on, and isolate every natural lash individually.
Standard eyelash extension safety also applies. Regulators such as California's Board of Barbering and Cosmetology advise avoiding the service when the eye or eyelid is irritated, inflamed or infected, considering a patch test for clients with sensitivities, and following strict hygiene with clean tools. Their eyelash extension safety tips are a useful checklist to share with clients. If a client reports pain, persistent redness or swelling after a set, the extensions should be removed professionally and the client advised to see an eye doctor.
Manga Extensions vs Strip, Cluster and Magnetic Versions
Clients often try the manga look with false lashes before booking extensions. Searches for manga fake lashes, manga individual lashes and magnetic manga lashes all point to these at-home options. Understanding how they compare helps you explain what extensions offer.
| Option | How it's worn | Pros | Cons |
|---|---|---|---|
| Manga lash extensions | Applied by a lash artist, worn for weeks | Customized spikes, no daily application, most natural blend at the base | Appointment time and regular fills |
| Manga strip lashes | Glued on a band for a day | Quick, inexpensive, removable | Visible band, fixed shape, daily application |
| Manga clusters / individual lashes | Small segments placed under or on the lash line at home | More customizable than strips | Shorter wear, risk of pulling natural lashes on removal |
| Magnetic manga lashes | Strip attached with magnetic liner | No glue, reusable | Liner can smudge in heat; must be removed before an MRI |
For clients who wear manga lashes almost every day, extensions usually make more sense. For clients who only want the look occasionally, an at-home option may suit them better, and being honest about that builds trust.
Common Mistakes That Ruin Manga Lashes

- Uneven spike spacing: with high length contrast, irregular gaps are the first thing people notice
- Curls that are too soft: C curl spikes often disappear behind hooded or monolid lids
- Spikes too long for the natural lash: they droop, twist and shed early, and they strain the follicle
- Open or loose spike bases: spikes that aren't fully closed at the base split into fans after a few days
- Gluing natural lashes together: creates stickies and damages natural lashes
- Using a doll-eye base: the central peak fights against evenly spaced spikes
- Skipping the front-on symmetry check: spikes that look even from above can look uneven when the client opens her eyes
- Not confirming the look with references: a client who asks for "manga" may actually want soft wispy texture
Frequently Asked Questions
What are manga lashes?
Manga lashes are a lash extension style with defined, tightly closed spikes placed at intervals over a shorter, softer base, creating a separated, wide-eyed look inspired by manga and anime illustration.
What's the difference between manga lashes and wispy lashes?
Wispy lashes use softer spikes with less length contrast and a fuller base, so they still blend. Manga lashes use tighter, more defined spikes with clear gaps and a stronger length contrast.
What curl is best for manga lash extensions?
D curl suits most almond and round eyes. L or L+ curls work better for hooded eyes, monolids and downward-growing lashes, because they help the spikes clear the lid.
Do manga lashes damage natural lashes?
Not when they're applied correctly. Problems come from spikes that are too long or heavy for the natural lash, or from gluing several natural lashes together to form a spike.
Can manga lashes be done in brown?
Yes. Brown manga lashes keep the spiky structure with a softer finish, and some artists mix brown into the base while keeping the spikes black.
How long do manga lash extensions last?
Like other extensions, they shed with the natural lash cycle, so most clients book fills every two to three weeks to keep the spikes even. Lower-lash spikes usually don't last as long as upper ones.
Conclusion
Manga lashes reward precision. The graphic, wide-eyed effect clients ask for comes from a handful of careful decisions: tight spikes made on single natural lashes, curls strong enough to project, spikes spaced evenly on a supportive base, and lengths that respect what each natural lash can carry. Get those right, choose an adhesive suited to your studio conditions, and give clients clear aftercare, and your manga sets will stay sharp from the first day to the next fill.
Build your next manga set with professional lash extensions, adhesives and studio supplies from Winlash.