


Quick Access to This Article
- What Are Wispy Lash Extensions?
- Wispy vs. Classic, Hybrid, Volume and Wet-Look Lashes
- How to Choose a Wispy Style for the Intended Look
- How to Build a Wispy Lash Map
- How to Choose Base Lengths and Wispy Spikes
- A Professional Workflow for Creating a Wispy Set
- Wispy Lash Extensions vs. Cluster Lashes
- Which Products Can Help Create a Wispy Effect?
- Lash Safety, Maintenance and Client Communication
- Frequently Asked Questions
- Final Thoughts
Wispy lash extensions create a textured, feathered finish by combining a softer base with longer, more visible spikes. The result can look subtle and airy or more defined and dramatic, depending on the mapping, lash type and contrast between the base and the spikes. For lash artists, the key is to plan the pattern rather than place longer lashes randomly.
This guide explains how the wispy effect differs from classic, hybrid and volume sets, how to plan a sample map, and how to select suitable lash products. It focuses on professional extension work; cluster lashes are covered separately because their construction and application method are different. If you are selecting supplies for a salon set, start by comparing the available professional eyelash extension trays against your planned technique and the natural lashes you are working with.
What Are Wispy Lash Extensions?
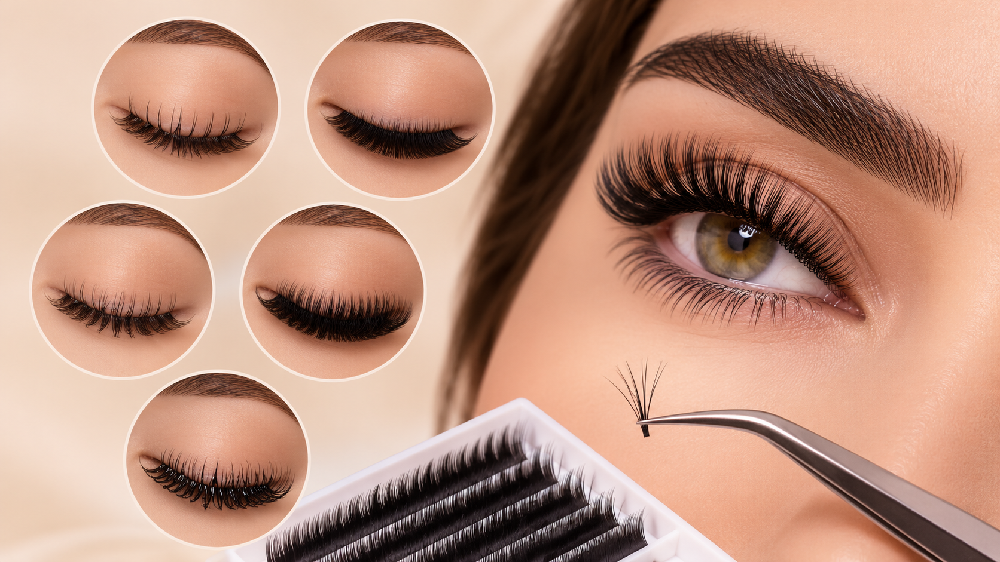
Wispy lash extensions are an eyelash styling effect built from deliberate length variation. Most of the set forms a base layer, while selected longer extensions or closed fans create visible peaks called spikes. The contrast between those peaks and the shorter lashes gives the set texture, movement and a feathered outline.
“Wispy” describes the look, not one single application method. A lash artist can create a wispy finish with classic extensions, a hybrid combination of classic lashes and volume fans, or a volume set with carefully shaped spikes. The most suitable approach depends on the client’s natural lash density, the target fullness and the artist’s technique.
A good wispy set still has an intentional silhouette. The base should support the design, and spikes should be visible without making the pattern look accidental or overcrowded. For another perspective on how the look fits into current styling conversations, see the WinLash guide to Dubai lash trends and the Wispy Kim K look.
How to Choose a Wispy Style for the Intended Look
Start with the client’s preferred level of definition, then decide where the eye should appear most open or elongated. The following descriptions are design starting points, not fixed rules for particular eye shapes; the final map should account for eyelid structure, natural lash direction, density and comfort.
Natural Wispy Lash Extensions
Use a relatively soft base and restrained peaks. The length differences can be noticeable without creating a sharply spiked outline. This is a useful starting direction for clients who want texture rather than a dramatic strip-lash effect.
Wispy Cat-Eye Lash Extensions
Build more visual length toward the outer third while checking whether the client’s outer natural lashes can support the selected lengths and curl. Very long outer corners are not suitable for every eye or lash line.
Wispy Doll-Eye or Open-Eye Style
Place the design’s strongest emphasis around the central area to create a more open appearance. Keep the transitions balanced so the spikes do not appear disconnected from the base.
Wispy Kim K or Starburst-Inspired Style
Use a more pronounced rhythm of peaks and shorter supporting lashes. Agree on the level of drama in advance; reference photos can help the client and artist align on spike visibility.
Wispy vs. Classic, Hybrid, Volume and Wet-Look Lashes
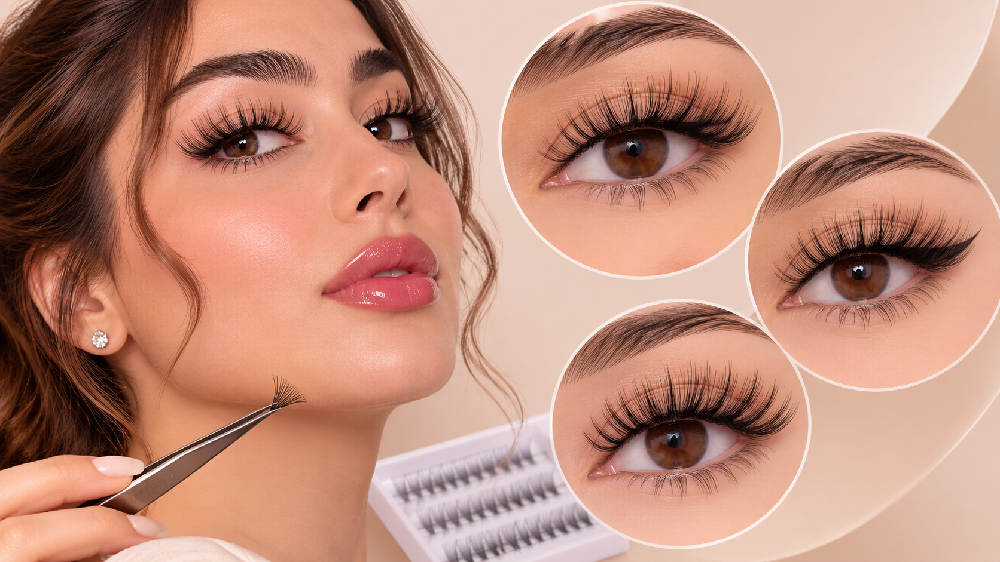
These terms describe different parts of lash styling, so they are not always direct alternatives. Classic, hybrid and volume usually refer to how extensions are applied or combined. Wispy refers to the textured outline created by variation in length. Wet look describes a more defined, piecey finish, often made with narrow-looking spikes or fans.
| Term | What It Describes | How It Can Relate to Wispy |
|---|---|---|
| Classic | A one-extension-to-one-natural-lash application pattern. | Can create a lighter, more separated wispy look when lengths are planned deliberately. |
| Hybrid | A combination of classic extensions and volume fans. | Can balance visible spikes with a fuller base. Learn more about hybrid eyelash extension techniques. |
| Volume | Multiple fine extensions arranged into fans and attached to individual natural lashes. | Can create a denser base, with selected closed or narrow fans used as defined spikes. |
| Wet look | A more piecey, separated appearance with pronounced narrow sections. | May overlap visually with wispy styles, but the desired texture and fan formation should be agreed during consultation. |
| Wispy | A style built around varied lengths and deliberate spikes. | Can be designed using different extension application methods; it is not synonymous with hybrid. |
The useful question is not simply “Which style is best?” but “What base density and spike definition match the result the client wants and what their natural lashes can support?” This keeps the consultation focused on technique and suitability rather than treating a trend name as a complete design plan.
How to Build a Wispy Lash Map
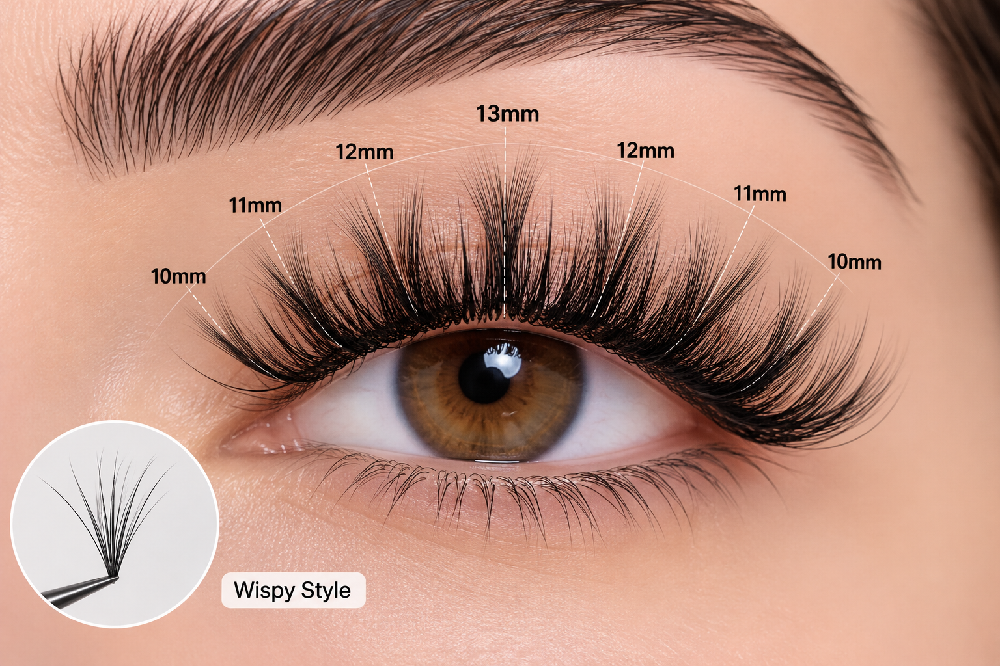
A lash map is a placement plan for distributing lengths across the lash line. For a wispy design, map the base first, then mark the intended spike positions. This creates a readable silhouette and reduces the risk of placing longer extensions wherever space happens to remain.
- Assess both eyes and the natural lashes. Observe natural direction, density, gaps, growth patterns and the client’s preferred look. The two eyes may not need identical maps to look balanced.
- Choose the overall shape. Decide whether the design should look softly natural, more elongated, or more open through the centre.
- Draw the base map. Mark the main lengths from the inner corner through the centre and outer section. Use smooth transitions rather than abrupt changes between every neighbouring section.
- Mark the spike positions. Add a second set of marks for the longer points. Place them intentionally and check the rhythm across the eye before application begins.
- Plan the fill between spikes. Decide which lengths and fan or single-extension method will fill the spaces without obscuring the peaks or leaving unintended gaps.
- Re-check suitability. Confirm that the chosen lengths, diameters, curls and fan weight are appropriate for the natural lashes. Shorten or simplify the design when needed.
| Map Element | What to Decide | Quality Check |
|---|---|---|
| Base lengths | The main silhouette and transitions from inner to outer corner. | The base should read as a coherent style even before the spikes are added. |
| Spike positions | Where the most visible points should sit and how regularly they should appear. | The peaks should look planned, not crowded or randomly spaced. |
| Fill lengths and texture | How to add density while leaving the spikes visually distinct. | The supporting lashes should not hide the intended pattern. |
For more general guidance on adapting a design to different eye shapes, use the WinLash resource on professional lash mapping by eye shape. A wispy map is a specialised design within that broader planning process.
How to Choose Base Lengths and Wispy Spikes
There is no single length chart that works for every client. The lengths should reflect the natural lash condition, the desired style, the curl and the weight of the extensions. The sample below illustrates how a base and spike layer may be planned; it is not a prescription or a recommendation to use the longest available lengths.
| Design Layer | Illustrative Planning Range | Purpose |
|---|---|---|
| Base layer | For example, a progressive selection within 8–12 mm, where appropriate. | Creates the overall line and supporting fullness. |
| Spike layer | Some example maps use spikes approximately 2–3 mm longer than nearby base lashes; adjust the difference to the intended effect. | Creates visible peaks while keeping the design connected to the base. |
Do not select length in isolation. Diameter, curl, fan construction and the natural lash’s ability to support the extension also matter. If a spike looks striking on a reference image but would be too heavy or long for the client’s lashes, adapt the design rather than forcing the reference onto every client.
The most useful way to organise a tray for wispy work is to have the lengths needed for both the supporting base and the planned peaks. Mixed-length options can make it easier to follow a custom map, but the chosen palette must still provide the curl, diameter and length range appropriate for the technique.
A Professional Workflow for Creating a Wispy Set
A consistent workflow helps the artist keep the design intentional from consultation to final check. The sequence below is a planning framework, not a substitute for professional training or product-specific instructions.
- Consult and agree on the reference. Confirm whether the client wants a natural, cat-eye, open-eye or more dramatic wispy finish. Explain what can realistically be achieved with their natural lashes.
- Assess and prepare. Inspect natural lash condition, follow salon hygiene procedures, cleanse and prepare the area according to the products being used, and protect the eye area appropriately.
- Mark the map. Identify the base lengths and spike locations before placing extensions. Recheck both eyes from the same viewing angle.
- Build the base deliberately. Apply the chosen classic, hybrid or volume method while preserving the intended density and transitions.
- Create the spikes. Place the pre-planned longer extensions or closed fans with consistent direction and separation. Avoid forcing long extensions onto natural lashes that cannot safely support them.
- Check texture and balance. Review the silhouette with the eyes closed and open as appropriate to the professional procedure. Look for crowded peaks, gaps, inconsistent directions and excessive weight.
- Finish and explain maintenance. Follow the adhesive manufacturer's curing and aftercare guidance. Explain cleaning and fill expectations without promising a fixed retention period for every client.
If adhesive selection is part of your service planning, compare the product instructions and working conditions in the professional lash extension adhesive range. Do not assume that one adhesive or curing routine suits every room, lash system or client.
Wispy Lash Extensions vs. Cluster Lashes
A wispy effect can be created in more than one lash format, but professional extensions and clusters are not interchangeable. Professional lash extensions are applied to individual natural lashes using a trained application method. Cluster products group multiple fibres at a shared base or in a pre-formed pattern, so their placement and adhesive requirements depend on the product design.
Choose the format based on the intended service, the product instructions and the result the client wants. For example, WinLash's Cluster Lashes and Volume Strip Palette lists several patterns, including King, which the page describes as an X-pattern with defined spikes. This can be relevant when evaluating a textured cluster design, but it should not be presented as the same procedure as individually applied professional extensions.
Which Products Can Help Create a Wispy Effect?
Product selection should follow the map, not the other way around. Before choosing a tray, determine the technique, the base density, the spike design, the curl and the lengths that are suitable for the natural lashes.
- Classic trays: Can be useful when the plan uses individual extensions for a defined, separated look or for selected spikes, provided the diameter and length suit the natural lash.
- Volume trays or fans: May be used to create a fuller base or a textured hybrid/volume design. Choose fan size and fibre diameter based on the artist’s training and the natural lash condition.
- Mixed-length palettes: Can simplify switching between base lengths and longer planned peaks. Check which lengths, curls and diameters are actually available on the selected product page.
- Cluster or volume-strip products: Consider only when the desired result and application format call for clusters; follow the exact product directions rather than applying professional-extension assumptions to a different system.
Avoid describing a tray as “best for wispy” unless its specifications and design genuinely support that claim. A product may offer a useful selection of lengths or curls, but the final result still depends on mapping, technique and client suitability.
Lash Safety, Maintenance and Client Communication
A good design must also be appropriate for the client’s natural lashes and eye-area health. Avoid adding length or weight solely to reproduce a photo. If the natural lashes are weak, sparse or directionally challenging, simplify the style or adjust the plan.
Explain the maintenance routine recommended for the specific lash system and products used. Clients should not tug at extensions or attempt to remove a professional set themselves. The American Academy of Ophthalmology's eyelash extension safety guidance describes risks such as irritation, allergic reactions and damage associated with tugging or pulling. If a client develops pain, marked redness, swelling, discharge or vision changes, stop the service and direct them to appropriate medical care.
Aftercare and retention vary with natural lash shedding, application quality, the adhesive system and the client's routine. Give advice based on the products used and avoid guaranteeing that every wispy set will last for a fixed number of weeks.
Frequently Asked Questions
What are wispy eyelash extensions?
Wispy eyelash extensions are a styling effect that combines a base layer with selected longer spikes. The contrast creates a textured, feathered finish that can range from natural to dramatic.
Are wispy lash extensions classic, hybrid or volume?
They can be created with different application methods. Classic describes a one-to-one approach, hybrid combines classic extensions with volume fans, and volume uses fans. Wispy describes the length variation and spikes in the final design.
How do you create a natural wispy lash extensions map?
Start with a soft base map, then add a limited number of longer spikes with modest contrast. Adapt the lengths and spacing to natural lash condition and eye shape; there is no universal map suitable for every client.
How long should wispy lash spikes be?
The difference between the base and spikes depends on the effect, natural lash strength, curl and extension weight. Some example maps use spikes around 2–3 mm longer than nearby base lashes, but that is a starting reference, not a fixed rule.
What is the difference between wispy and cat-eye lash extensions?
Wispy describes a textured finish created by varied lengths and spikes. Cat eye describes where visual length is concentrated, usually toward the outer part of the eye. A set can be both wispy and cat-eye.
Can cluster lashes create a wispy look?
Yes, some cluster designs have separated spikes or textured patterns that create a similar visual effect. However, clusters and professional extensions differ in construction and application, so use each product only as directed.
Are wispy lashes suitable for every eye shape?
The style can be adapted for different eyes, but the exact map should not be identical for everyone. Consider the eyelid, natural lash direction, density, desired emphasis and what the natural lashes can safely support.
Final Thoughts: Build the Wispy Look Around the Map
The strongest wispy sets are designed rather than improvised. A clear base map, intentional spike placement and a product choice suited to the natural lashes help create texture without losing balance. The same wispy effect can be adapted to classic, hybrid or volume techniques, while clusters should be evaluated as a separate product format.
Before starting a set, settle the intended silhouette, mark the base and spike zones, and check the length, curl and weight against the client’s natural lashes. Then choose products that match the plan instead of forcing the plan to fit a tray.
Welcome to WinLash to explore professional lash supplies and build a kit around the techniques you offer.