
Quick Access to This Article
Spider lashes usually describe a deliberately clumped, elongated mascara look: instead of a soft, evenly separated fringe, the lashes form visible dark groups that resemble fine spider legs. The term is also used loosely in online beauty conversations, so a photo labelled “spider lashes” may show mascara, false lash clusters or a professionally designed extension set. These are different application methods, not interchangeable services. If you are translating the look into a salon design, start by deciding which visual feature matters most—clumping, length, pointed sections or a dense dark finish—then explore the appropriate individual eyelash extension trays and styling options.
This guide separates the original mascara interpretation from cluster and extension adaptations, explains how the look differs from manga, wispy and Wet Look styles, and gives lash artists a practical way to turn a reference image into a considered design. One distinction matters throughout: spider lashes are not simply another name for spiky lashes. A spiky design may share pointed sections with a spider-inspired look, but the overall shape, density and visual finish can be quite different.
What Are Spider Lashes?
Spider lashes are a dramatic lash appearance in which lashes look longer, darker and more grouped together than in a naturally separated mascara finish. In the familiar makeup version, several coated lashes sit close together in narrow points or clumps. The result can look graphic, doll-like, retro or deliberately messy, depending on how thickly the mascara is applied and how the groups are shaped.
The Defining Features of the Spider Lash Look
The defining feature is not simply length. It is the contrast between grouped sections and the spaces between them. A spider-lash look often includes:
- Visible groupings: neighbouring lashes appear joined into small dark sections rather than individually separated.
- Strong definition: the lash line reads darker and more graphic than a soft, feathery finish.
- Noticeable length: elongated tips help the groups stand out, although length alone does not create the look.
- Intentional imperfection: some versions look deliberately chunky instead of perfectly uniform.
Not every spider-lash reference has the same density or shape. Some are concentrated on the upper lashes; others include defined lower lashes. The reference image—not the label alone—should determine the design brief.
How Mascara-Style Spider Lashes Differ from Extension-Based Looks
Mascara creates the traditional spider effect by coating natural lashes and allowing selected hairs to sit together as the formula is worked through them. It is a temporary makeup finish that is removed during the normal makeup-cleansing routine. Extension-based looks are constructed differently: a lash artist attaches extensions to isolated natural lashes using professional adhesive, while cluster products are pre-grouped sections intended for their own specified application method.
| Format | How the look is made | What to clarify |
|---|---|---|
| Mascara spider lashes | Natural lashes are coated and shaped into deliberate groups. | How clumped, long and dark the makeup finish should appear. |
| False lash clusters | Pre-grouped lash sections are positioned to create selected areas of density or texture. | Whether the cluster is designed for strip-style, under-lash or another specific application system. |
| Professional extensions | Individual extensions or fans are attached to isolated natural lashes to build a mapped design. | Spike placement, base density, length, curl, diameter and natural-lash suitability. |
These methods can create related visual impressions, but one should not be presented as a direct technical substitute for another. In particular, professional extension adhesive is not automatically suitable for DIY cluster application. Always match the adhesive to the lash system and follow its product instructions.
Why Are Spider Lashes Trending Again?

Spider lashes have a recognisable beauty history because exaggerated, separated lashes have appeared in several makeup eras. The look is commonly associated with the graphic eye makeup of the 1960s and with heavier mascara styling from the early 2000s. Recent social-media coverage has helped bring the intentionally clumped finish back into beauty conversations, reframing a look once treated as a mascara mistake as a deliberate styling choice.
From Retro Lash References to Social Media Inspiration
Social platforms make highly recognisable details easy to repeat: a dark lash line, a few elongated groups and a strong contrast against the rest of the makeup can be understood quickly in a short video or close-up photograph. That visual clarity helps explain why an older aesthetic can circulate again without being reproduced exactly as it looked originally. Recent beauty coverage has described the renewed interest in chunky, mascara-defined lashes and their retro references.
This is a useful example of the Law of Innovation and Diffusion of Innovation in beauty: a distinctive look may first attract trend-focused early adopters, then become more familiar as artists and clients adapt it into wearable variations. The important point for a lash professional is not to copy every viral image. It is to identify which element clients are responding to and translate that element into a design suited to their preferences and natural lashes.
Spider Lashes vs Manga, Wispy and Wet-Look Lashes
These lash terms overlap in online searches because several styles use visible texture or separated sections. However, their design logic is not identical. A useful comparison looks at the shape of the sections, the base layer and the overall impression—not just whether the tips appear pointed.
Spider Lashes vs Manga Lashes
Spider lashes, in their common mascara interpretation, are defined by deliberately grouped, dark lashes. Manga lash extensions are a mapped professional style built around distinct, usually closed spikes placed over a shorter and softer base. Manga designs often use clear length contrast and intentional spacing to create a graphic, doll-like eye.
So, although both can look dramatic and separated, they are not synonyms. A mascara clump is not automatically a professionally constructed manga spike. For a deeper technical explanation of spike mapping and extension construction, see the WinLash guide to manga lash mapping and spikes.
Spider Lashes vs Wispy Lashes
Wispy lashes usually aim for a textured but blended finish. Longer accents rise from a fuller or softer base, creating movement without making every section look heavily clumped. Spider lashes are typically more graphic: the grouped sections are more obvious and can look chunkier or darker.
A wispy set can include spikes, but that does not make it a spider-lash set. The distinction is the balance between soft blending and deliberate grouping. If the client likes texture but does not want a bold, clumped effect, a softer wispy design may be a better reference to discuss.
Spider Lashes vs Wet-Look Lashes
Wet Look extensions are built to create a dark, glossy-looking or mascara-like impression through defined sections and closed fans. The effect is controlled by how the fans are constructed and distributed across the lash line. Spider lashes, by contrast, commonly refer to the visible clumping of mascara-coated natural lashes. A Wet Look set may look similar in a photograph, but its professional construction and intended finish are different.
For a closer look at closed fans, defined spikes and mapping choices, read the WinLash Wet Look lash styling guide.
| Style | Signature appearance | What creates the effect |
|---|---|---|
| Spider lashes | Dark, intentionally grouped or clumped lash sections. | Most commonly mascara; other formats may imitate selected visual features. |
| Manga lashes | Distinct, separated spikes over a shorter base. | Mapped closed fans or suitable premade spikes attached to isolated natural lashes. |
| Wispy lashes | Soft texture with blended length variation. | A fuller base with longer accents distributed through the set. |
| Wet Look lashes | Dark, defined sections with a wet or mascara-like impression. | Closed fans and deliberate placement in a professional extension design. |
How to Recreate the Spider Lash Look
The right method depends on the result the wearer wants and the type of lash product being used. For a classic makeup interpretation, mascara is the direct route. For a temporary false-lash effect, a suitable cluster system may offer more control over where grouped sections appear. For a salon service, an artist can create a related graphic design with professional extensions—but should explain how the finished set differs from mascara clumps.
Creating the Traditional Spider Effect with Mascara
For a makeup-only interpretation, begin with clean, dry lashes and use a mascara intended for the eye area. Apply in controlled layers, allowing the formula to build definition rather than repeatedly loading the brush with excess product. A clean lash comb can help refine unwanted large clumps while preserving selected grouped sections. Avoid forcing lashes together or using tools in a way that risks scratching the eye.
The desired result is deliberate grouping, not uncontrolled product build-up. If the lashes become uncomfortable, irritated or difficult to separate, stop rather than adding more layers. Remove eye makeup gently and avoid rubbing or pulling at natural lashes.
Using Lash Clusters for a Defined, Spiky Finish
Clusters can create grouped sections without relying on mascara to hold natural lashes together. Their suitability depends on the product design and adhesive system. Before application, check whether the cluster is intended for strip-lash placement, under-lash application or another method. Use only the adhesive specified for that system; a professional extension glue should not be assumed to be interchangeable with a DIY cluster bond.
For under-lash cluster systems, follow the manufacturer's directions for placement, amount of bond and sealing. Keep products away from the waterline and do not attach a cluster to the skin or several natural lashes unless the system explicitly instructs otherwise. If the instructions are unclear, do not improvise.
Creating a Spider-Inspired Effect with Professional Extensions
For a professional service, translate the reference into a map rather than trying to glue natural lashes together to imitate mascara clumps. An artist can use a darker, more defined base and selected closed spikes or narrow accents to suggest the grouped appearance. The final design might borrow the graphic quality of spider lashes while using the construction principles of a separate extension style.
Each extension or fan should be attached according to professional isolation practice and the product's intended use. Do not bond neighbouring natural lashes together to manufacture a clump. Natural lashes need to remain free to move and shed independently. The American Academy of Ophthalmology warns that tugging or pulling extensions can fracture natural lashes and that extension services carry potential risks, including irritation, allergic reaction and infection. Review its eyelash extension safety guidance when discussing risks with clients.

Which WinLash Products Can Help Create a Spider-Inspired Lash Set?
WinLash does not need to sell a product labelled “spider lashes” for lash artists to explore related styling ideas. The relevant choice is the product format that supports the intended design. Individual extension trays are suited to professional extension work, while cluster products are a separate option with their own shapes and application requirements.
Choosing Extension Trays by Length, Curl and Thickness
For professional extensions, choose the tray based on the design map and the client's natural lashes—not simply the longest available length. Curl affects how prominently an extension lifts from the lash line; length changes the visual contrast; and diameter contributes to the weight of the extension. These factors should be considered together. A dramatic reference does not justify selecting a length or thickness that the natural lash cannot safely support.
Explore WinLash’s eyelash extension range to compare available lash trays and specifications. Check each product listing for its actual curl, diameter, length and fibre details before planning a set.
Choosing Cluster Lashes by Style, Curl and Length
The WinLash cluster range includes five named shapes: Leo, King, Knot, Fisher and Foxy, with selectable curl types D, L and CC and lengths listed from 8 to 16 mm on the product page. These are cluster options, not a claim that every shape is identical or that every variation will suit every eye.
The King design is described in the supplied WinLash product information as a spiky, textured option. It may be worth comparing when the reference calls for visible accents, but remember that a spiky cluster is not automatically a spider-lash look. The overall result still depends on placement, density and the shape of the base. Review the WinLash cluster lash options and confirm the package contents and required adhesive before ordering.

Selecting Tweezers and Professional Adhesive for Controlled Application
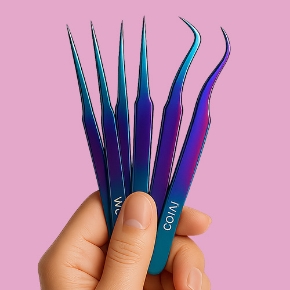
For individual extension work, suitable isolation and placement tools help the artist control each attachment. WinLash lists isolation and volume tweezers designed for different handling tasks. Choose a tweezer that matches the technique and the artist's grip rather than assuming one tip shape works for every step. Browse the professional lash tweezers and scissors range for available tool types.
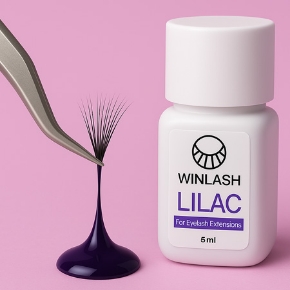
Adhesive selection should also be based on the specific extension system and the artist's working environment. Check the glue's stated temperature and humidity range, drying time, ingredients and instructions. A product's advertised performance is not a guarantee of suitability for every artist or client. Compare the available professional lash adhesives and liquids and follow the manufacturer's guidance. Do not use professional extension adhesive as a substitute for cluster bond.
How Lash Artists Can Adapt the Trend to Each Client
A trend photo is a starting point, not a complete service plan. Two clients can request “spider lashes” while imagining very different outcomes: one may want heavy mascara-like grouping, another may want only a few pronounced accents, and another may be showing a manga or Wet Look reference without knowing the technical name. A short consultation helps identify the actual preference before choosing products or mapping the set.
Matching Spike Prominence and Density to Natural Lash Strength
Assess the natural lashes before deciding on length, diameter, curl or density. Fine or short natural lashes may not support the same extension choices as stronger lashes. When the reference is very dramatic, preserve the visual idea through placement and contrast rather than automatically increasing weight or length. A lighter base with carefully selected accents may communicate the reference more clearly than an overloaded lash line.
Using Reference Photos to Agree on the Finished Look
Ask the client to identify what they like in the reference: the dark base, the grouped tips, the long outer sections, the lower lashes or the overall doll-like effect. Then clarify what they do not want. This is especially useful because online images may use filters, mascara, strip lashes, clusters or extensions, even when they share the same caption.
A practical consultation can separate the brief into four decisions:
- Grouping: subtle texture, clearly separated accents or dense clumps?
- Base: soft and light, evenly filled or dark and compact?
- Length contrast: a small difference between base and accents, or a more graphic difference?
- Coverage: upper lashes only, or a look that also includes lower-lash definition?
Avoiding Excessive Length, Weight and Overcrowded Bases
More dramatic does not always mean better. Excessive extension weight, unsuitable lengths, poor isolation and crowded placement can compromise comfort and natural-lash condition. A professional set should allow natural lashes to remain separated and move through their growth cycle. If the desired reference cannot be recreated responsibly with the client's natural lashes, explain the limitation and offer a softer interpretation.

Frequently Asked Questions About Spider Lashes
What are spider lashes?
Spider lashes usually refer to a dramatic mascara look in which natural lashes appear dark, elongated and deliberately grouped into visible sections. The term is sometimes used more broadly online for other textured lash looks, so it is important to check the reference image.
Are spider lashes and spiky lashes the same?
No. Spider lashes commonly describe a clumped mascara appearance, while “spiky lashes” describes a shape with pointed or elongated accents. A spiky extension design can create a related graphic effect, but the terms do not mean the same thing.
How do you get spider lashes with mascara?
Apply mascara in controlled layers and shape selected lashes into small groups while the formula is workable. Keep the effect deliberate rather than building excessive product on the lashes, and remove makeup gently without tugging.
Can you create spider lashes with lash extensions?
A lash artist can create a spider-inspired extension design using a mapped base and selected defined accents. It will not be technically identical to mascara clumps. Each extension or fan should be attached using proper isolation, without bonding neighbouring natural lashes together.
What is the difference between spider lashes and manga lashes?
Spider lashes usually refer to grouped, mascara-coated natural lashes. Manga extensions use a deliberate map of separated, defined spikes over a shorter base. Both can look graphic, but their construction and visual structure differ.
Are cluster lashes suitable for a spider-inspired look?
Clusters can create grouped sections or accents, depending on their shape and placement. Choose a cluster designed for the intended application method and use only its specified bond. A cluster's spiky shape alone does not make the finished look a spider-lash style.
Can spider-inspired lash extensions damage natural lashes?
Any extension service can carry risks if products or techniques are unsuitable. Excessive weight, poor isolation, irritation or pulling during removal can harm natural lashes or the eye area. A trained professional should assess natural-lash strength, follow product directions and stop if the client experiences discomfort.
Which WinLash cluster styles can I compare for a textured look?
The WinLash cluster product page lists Leo, King, Knot, Fisher and Foxy shapes, with D, L and CC curl options and listed lengths from 8 to 16 mm. Check the live product page for the available variant and package details before purchase.
Do I need professional lash extension glue for cluster lashes?
Not necessarily. Cluster systems may require a specific bond or adhesive designed for that method. Professional extension glue and DIY cluster bond are not automatically interchangeable. Follow the instructions supplied with the exact lash system.
Conclusion: Translate the Reference, Not Just the Trend Name
Spider lashes are best understood as a visual reference rather than a single professional extension technique. The familiar version is a deliberately grouped mascara look; clusters and professional extensions can interpret selected features, but they use different products and application methods. Spider lashes should also remain distinct from spiky lashes: pointed accents may appear in both, yet a spiky design alone does not define the spider-lash effect.
For lash artists, the most reliable approach is to identify what the client likes in the image, assess natural-lash strength and build a suitable map around the desired density, grouping and length contrast. Compare the relevant professional lash and brow supplies at WinLash Dubai to find extension trays, cluster styles and tools that fit the planned technique. Always confirm product specifications and application instructions before use.