RSS

Blog

How to Use Vitamin C Serum for Radiant Skin in Dubai |The Ultimate Guide
Quick Access to Article Topics (Click to Open)
  1. Why Vitamin C? The Science of Radiance
  2. Step-by-Step: How to Use Vitamin C Serum on Face
  3. Targeted Treatments: Beyond the Face
  4. The Dubai Protocol: L-Ascorbic Acid in the Heat
  5. Advanced Application: Vitamin C and Derma Rolling
  6. Targeting Specific Concerns: Dark Circles & Wrinkles
  7. Morning vs. Night Debate
  8. Integrating Professional Lash and Brow Health
  9. External Validation & Comparison
  10. How to Use Vitamin C for Skin Whitening
  11. Managing Side Effects
  12. FAQ: Everything You Need to Know

In the sun-drenched landscape of the UAE, where the intense heat and high UV index are part of daily life, maintaining a flawless complexion is both a priority and a challenge. To combat environmental stressors and achieve that coveted "Dubai Glow," savvy beauty enthusiasts are turning to potent beauty care products that offer more than just surface-level hydration.

At the heart of this skincare revolution is a powerhouse ingredient: Vitamin C. Whether you are looking to brighten your skin, reduce the appearance of fine lines, or protect against pollution in Downtown Dubai, knowing how to use vitamin c serum correctly is the secret to unlocking its full potential.

In this exhaustive guide, we will explore the science, the application techniques, and the essential pairings that will transform your skin from dull to dazzling.


Why Vitamin C? The Science of Radiance and Protection

Vitamin C serum bottle glowing with radiance benefits for skin protection against UV rays

Vitamin C, specifically in its most potent form known as L-ascorbic acid, is a legendary antioxidant that dermatologists swear by. But what exactly are the vitamin c serum benefits that make it so popular?

1. Neutralizing Free Radicals

The environment in Dubai, with its high levels of humidity and urban pollution, generates free radicals—unstable molecules that damage skin cells. Vitamin C acts as a shield, neutralizing these molecules before they can cause oxidative stress.

2. Skin Whitening and Brightening

One of the most searched queries is how to use vitamin c for skin whitening or vitamin c for skin lightening. Vitamin C inhibits the production of tyrosinase, an enzyme that helps produce melanin. This leads to a more even skin tone and a visible reduction in dark spots.

3. Collagen Synthesis and Anti-Aging

As we age, collagen production slows down, leading to wrinkles. Using a vitamin c serum for wrinkles is highly effective because it is a vital co-factor for the two enzymes required for collagen synthesis. This helps keep the skin firm and youthful.


Step-by-Step: How to Use Vitamin C Serum on Face Correctly

To get the most out of your vitamin c serum for face, timing and sequence are everything. Follow this expert-approved routine to ensure maximum absorption and minimal irritation.

Step 1: Cleanse Thoroughly

Start with a clean canvas. Use a gentle cleanser to remove oil, sweat, and Dubai’s dust from your pores. This ensures that the serum can penetrate deep into the dermis rather than sitting on top of debris.

Step 2: Tone (Optional)

If you use a toner, apply it now. A toner can help balance your skin’s pH, making it more receptive to active ingredients.

Step 3: Apply the Vitamin C Serum

Apply 3-5 drops of serum to your face and neck.

  • Pro Tip: Gently pat the serum into the skin rather than rubbing it vigorously.
  • Timing: Many wonder when and how to use vitamin c serum. While it can be used at night, most experts recommend morning application to take advantage of its antioxidant protection during the day.

Step 4: Wait and Absorb

Give the serum about 1-2 minutes to fully absorb. If you apply the next layer too quickly, you might dilute the potency of the L-ascorbic acid.

Step 5: Layering with Hyaluronic Acid

If you are wondering how to use hyaluronic acid and vitamin c serum, the rule is simple: Vitamin C first, then Hyaluronic Acid. Vitamin C works on the cellular level, while Hyaluronic Acid acts as a moisture magnet to plump the skin's surface.

Step 6: Moisturize and Seal

Lock in the active ingredients with a good moisturizer. This creates a barrier that prevents the serum from evaporating.

Step 7: SPF – The Non-Negotiable Step

If you are applying Vitamin C in the morning, SPF is mandatory. Vitamin C makes your skin slightly more sensitive to the sun, and the harsh UAE sun can quickly undo all your hard work if you aren't protected.


Targeted Treatments: Beyond the Face

Applying vitamin-enriched serum to eyelashes and eyebrows for growth and nourishment

While facial serums are vital, the "Vitamin Glow" isn't just for your skin. The same principles of nourishment and protection apply to your lashes and brows, which are often exposed to the same environmental stressors.

For those looking to integrate vitamin-rich formulas into their total beauty routine, specialized products can bridge the gap:

  • My Lamination Vitamin Lash Brow Serum: A daily treatment that brings the power of vitamins to your hair follicles.
  • My Lamination Biotin Lash Brow Serum: Perfect for those needing extra strength and growth stimulation.
  • My Lamination Vitamin Lash Brow Botox: A professional-grade sachet for intense nourishment.

The Dubai Protocol: L-Ascorbic Acid in the Heat

Living in the UAE presents a unique set of challenges for skincare. The combination of intense ultraviolet radiation, high humidity, and ubiquitous air conditioning can strip the skin of its natural defenses. Understanding how to use vitamin c serum in this specific environment is not just about aesthetics—it is about cellular protection.

The Science of Stability

When discussing l ascorbic acid benefits, we are referring to the most biologically active form of Vitamin C. However, L-ascorbic acid is notoriously unstable. In the high temperatures of Dubai, your serum can oxidize quickly, turning from a clear or light straw color to a dark orange or brown.

How to Prevent Oxidation in the UAE

  1. Storage is Key: Do not leave your serum in a sunlit bathroom. Store it in a cool, dark drawer or even a dedicated skincare fridge.
  2. Air Exposure: Keep the lid tightly sealed. Every second the bottle is open, oxygen is degrading the formula.
  3. Check the Color: If your serum has turned dark brown, it has oxidized. Using oxidized Vitamin C can actually increase free radical damage rather than preventing it.

Advanced Application: Vitamin C and Derma Rolling

For those seeking professional-grade results at home, many ask how to use derma roller with vitamin c serum. Derma rolling (microneedling) creates micro-channels in the skin, which can significantly increase the absorption of active ingredients.

The Winlash Safety Protocol for Microneedling:

  • Do not apply a highly acidic Vitamin C serum immediately after rolling, as this can cause severe stinging and inflammation.
  • Wait: It is often safer to derma roll at night and apply your Vitamin C the following morning once the micro-channels have begun to close.
  • Purity Matters: Ensure the serum is free from fragrances and heavy preservatives when using it in conjunction with microneedling.

Targeting Specific Concerns: Dark Circles and Wrinkles

Vitamin C is a multi-tasking hero. If you are struggling with tired eyes after a long week in the city, knowing how to use vitamin c serum for dark circles can be a game-changer.

1. Brightening the Under-Eye Area

The skin under the eyes is thin and prone to showing blood vessels (vascular dark circles) or pigmentation. Vitamin C strengthens this delicate skin by promoting collagen production and lightening the pigment.
Pro Tip: Look for eye-specific serums that combine Vitamin C with caffeine for a de-puffing effect.

2. Smoothing the Sands of Time

Using a vitamin c serum for wrinkles works by neutralizing the enzymes that break down collagen. Over time, consistent use leads to a "bouncy" skin texture that is resilient against the aging effects of the desert sun.


The Morning vs. Night Debate: When and How to Use Vitamin C Serum

Comparison of morning vs night skincare routine for applying Vitamin C serum

While the primary recommendation is morning use for protection, some prefer how to use vitamin c serum on face at night to aid in repair.

  • Morning (Defense): When used under SPF, Vitamin C boosts the effectiveness of your sunscreen by mopping up any UV rays that manage to penetrate the barrier.
  • Night (Repair): At night, your skin is in "rest and repair" mode. If you are not using a Retinol, applying Vitamin C at night allows the vitamin c benefits for skin to work uninterrupted by environmental pollutants.

Integrating Professional Lash and Brow Health

Just as Vitamin C revitalizes the skin, your lashes and brows require targeted nutrients to stay lush and thick, especially when exposed to the salt and chlorine of Dubai’s luxury pools.

To complement your skincare, consider these high-performance treatments from Winlash:


External Validation & Comparison

The efficacy of topical Vitamin C is well-documented in clinical literature. According to a study published in the Journal of Clinical and Aesthetic Dermatology, topical antioxidants like L-ascorbic acid are essential for photoprotection and the reversal of photoaging, particularly in regions with high UV exposure.

While our focus is on professional-grade care, many users ask about commercial options. Whether you choose dear klairs vitamin c serum for its gentle nature, la roche posay for its pharmacy-backed research, or mad hippie vitamin c serum for its botanical blend, the key is consistency. A luxury product like kiehl's vitamin c serum may feel different on the skin, but the core vitamin c for face benefits remain the same.


How to Use Vitamin C for Skin Whitening

Many residents in Dubai seek a more luminous and even skin tone. This is where vitamin c for skin whitening and vitamin c for skin lightening become central to the conversation. Unlike harsh chemical bleaches, Vitamin C works naturally by inhibiting the enzyme tyrosinase, which is responsible for melanin production.

The Mechanism of Glow

When you understand is vitamin c good for skin, you realize it doesn't just "whiten" in the traditional sense; it restores the skin's natural radiance by:

  • Fading Hyperpigmentation: Regular use of a vitamin c serum for face helps diminish sun spots caused by the intense UAE sun.
  • Preventing New Spots: By acting as an antioxidant, it prevents the cellular triggers that lead to future discoloration.
  • Vitamin C Oil vs. Serum: While vitamin c oil can be beneficial for dry skin types, water-based serums usually contain higher concentrations of L-ascorbic acid, making them more effective for targeted brightening.

Managing Side Effects: Is Vitamin C Good for Sensitive Skin?

Woman applying soothing Vitamin C serum gently on sensitive skin to avoid irritation

While the vitamin c serum for face benefits are immense, the high acidity of L-ascorbic acid can occasionally cause stinging, redness, or dryness, especially for those new to active skincare.

What to Do if Irritation Occurs:

  1. The Sandwich Method: Apply a thin layer of moisturizer before your serum to act as a buffer.
  2. Lower Concentration: Start with a 10% concentration before moving up to 15% or 20%.
  3. Frequency Adjustment: Switch from daily use to once every three days until your skin barrier adjusts.

FAQ: Everything You Need to Know

To ensure you are fully equipped to master your routine, here are answers to the most common questions regarding how to use vitamin c serum.

Can I use Vitamin C with Niacinamide?

Yes. Old myths suggested they cancel each other out, but modern formulations allow them to work together. Niacinamide calms the skin, while Vitamin C brightens it.

How long does it take to see results?

Patience is key. While some instant "glow" is visible, the true vitamin c benefits for skin, such as collagen production and fading of dark spots, typically take 8 to 12 weeks of consistent use.

Can I make DIY Vitamin C serum at home?

We strongly advise against this. Vitamin C is extremely unstable and requires a specific pH level to penetrate the skin. DIY versions often oxidize instantly and can cause chemical burns if not balanced correctly.

Does Vitamin C help with acne?

Yes, but indirectly. Its anti-inflammatory properties help reduce the redness of active breakouts, and its brightening effect helps fade post-acne marks (PIH).


Final Verdict: The Secret to the "Dubai Glow"

Mastering how to use vitamin c serum is one of the most rewarding steps you can take in your skincare journey. By protecting your skin in the morning and nourishing it with the right actives, you are investing in a future of clarity and youthfulness.

In the land of sunshine and luxury, your skin deserves the best protection. Treat it with high-quality ingredients, stay consistent with your application, and always, always wear your SPF.

For the latest in beauty innovation, professional lash care, and premium skincare advice tailored for the Middle East, stay connected with us at Winlash Dubai.

The Ultimate Guide: How to Remove Eyelash Extensions at Home Safely in Dubai
Quick Access to Article Topics (Click to Open)
  1. Before We Start: The Golden Rules of DIY Lash Removal
  2. Method 1: The Steam and Oil Method (The Dubai Spa Experience)
  3. Method 2: Using a Professional Lash Remover
  4. Method 3: Oil-Based Makeup Removers
  5. Lash Rehab: How to Restore Your Natural Lashes
  6. Troubleshooting: "Help! They Won't Come Off!"
  7. The Science of Oils: Which One Should You Use?
  8. Styling Tips: How to Hide Gaps & Look Great
  9. Professional Removal vs. DIY: Comparison Table
  10. FAQ: Frequently Asked Questions

Living in Dubai means embracing a high standard of beauty. From brunch at the Palm to meetings in DIFC, we love looking flawless. Eyelash extensions are the ultimate beauty hack for the busy UAE lifestyle, giving you that "I woke up like this" glamour without the need for mascara. However, as the weeks go by and the Dubai heat and humidity take their toll, those once-fluttersome lashes can start to look sparse, twisted, or grown out.

Perhaps you can’t make it to your favorite salon in Downtown, or maybe you’re just ready to give your natural eyes a break. This brings us to the burning question that has a high search volume: How to remove eyelash extensions at home?

While we always recommend professional application for our premium eyelash extensions, we understand that life happens. If you are looking for safe, effective, and pain-free ways to remove your extensions without leaving your natural lashes bald, you have come to the right place.

In this comprehensive guide for Winlash.ae, we will walk you through everything you need to know—from understanding the risks and preparing your eyes, to mastering the steam-and-oil method and professional removal techniques you can replicate in your bathroom.


Before We Start: The Golden Rules of DIY Lash Removal

Safety rules for removing eyelash extensions at home safely without damage

Before you reach for the coconut oil or steam bowl, it is crucial to understand what you are dealing with. Eyelash extensions are bonded to your natural lashes using a medical-grade adhesive, typically containing cyanoacrylate. This glue is designed to be water-resistant, sweat-resistant (essential for UAE summers), and incredibly durable.

Why You Should Never "Just Pull Them Off"

It might be tempting to pick at that one loose lash that’s twisting in the wrong direction. However, plucking or pulling your extensions is the cardinal sin of lash care.

  • Traction Alopecia: Pulling the extension often rips out the natural lash from the root. Repeated trauma can damage the follicle, leading to permanent hair loss.
  • Gaping Holes: Pulling creates immediate, visible gaps in your lash line that mascara cannot hide.
  • Pain and Irritation: The glue bond is strong; breaking it by force is painful and can irritate the sensitive skin of your eyelid.

The Goal: Our goal today is to dissolve or weaken the adhesive bond so the extension slides off effortlessly, leaving your natural lash intact.


Method 1: The Steam and Oil Method (The Dubai Spa Experience)

If you are searching for "how to remove eyelash extensions at home", this is likely the method you’ve seen recommended most often. It is gentle, uses household ingredients, and doubles as a mini facial—perfect for unclogging pores from the dusty Dubai weather.

This method works best for extensions that are already nearing the end of their life cycle (3-4 weeks old) where the glue has naturally weakened.

What You Will Need:

  • A large bowl of boiling water.
  • A towel large enough to cover your head.
  • Oil: Coconut oil, Olive oil, or Baby oil (Coconut oil is a favorite for its antimicrobial properties).
  • Cotton pads or lint-free swabs.
  • A gentle facial cleanser.

Step-by-Step Instructions:

Step 1: Cleanse Your Face

Start with a completely clean canvas. Remove all eye makeup, foundation, and sunscreen. You want the steam to penetrate your pores and the lash glue, not mix with old mascara. Avoid oil-based cleansers at this stage; just use your regular face wash.

Step 2: The Steam Bath

Facial steam bath process to loosen eyelash extension glue at home

Boil a pot of water and carefully pour it into a heat-safe bowl.

  • Place the bowl on a table where you can sit comfortably.
  • Lean your face over the bowl (keep a safe distance of about 20-30cm to avoid burns).
  • Drape the towel over your head and the bowl to create a "steam tent."
  • Duration: Stay in the steam for 10 to 15 minutes.
  • Why this works: The hot steam helps to soften the hardened cyanoacrylate adhesive and opens up your hair follicles slightly.

Step 3: Apply the Oil

Once you have steamed your face, dry your skin gently. Now, it’s time for the oil.

  • Warm a small amount of coconut or olive oil in your hands.
  • Soak a cotton pad or use your clean fingertips to apply the oil generously to your lashes.
  • Massage: Gently massage the oil into the lash line in a circular motion. Focus on the base where the glue is bonded.
  • Caution: Be careful not to get oil directly into your eyes, as it will cause temporary blurriness.

Step 4: The Waiting Game

Patience is key here. Unlike professional removers, oil takes time to break down the bond. Leave the oil on your lashes for 5 to 10 minutes. You can continue to gently rub the lashes downward during this time.

Step 5: Removal

After the oil has had time to work, take a clean cotton pad and gently swipe downwards from the base of your lashes to the tips.

  • Success Check: You should see extensions sliding off onto the cotton pad.
  • Resistance Check: If the lashes are not coming off, DO NOT PULL. Apply more oil and wait longer, or repeat the steaming process. If they still won't budge, the glue is too fresh or strong for this method.

Step 6: Final Cleanse

Once the extensions are out, wash your face again to remove the oily residue. This prevents clogged pores or styes, especially important in humid climates.


Method 2: Using a Professional Lash Remover (The "Pro" Way)

For those asking "how to remove lash extensions at home" and finding that natural oils aren't strong enough, this is the next level. Sometimes, the adhesives used in top-tier Dubai salons are designed to withstand high heat and humidity, making them harder to break down with just coconut oil.

If you want a quick, salon-quality result without the drive, using a dedicated lash remover is your best option. These professional-grade products come in Gel or Cream forms and are formulated to dissolve glue in minutes.

  • Cream Removers: Thicker consistency, less likely to run into your eyes. Safest for DIY.
  • Gel Removers: Thinner, works faster, but higher risk of running into eyes and stinging.

Safety First:

  • Patch Test: Always test the product on your skin 24 hours before to check for allergies.
  • One Eye at a Time: Do not try to do both eyes simultaneously. You need one eye open to see what you are doing!

Step-by-Step Guide for Cream Remover:

Applying professional cream lash remover for safe eyelash extension removal

  1. Prep the Area: Place a half-moon eye pad (or a cut cotton pad) under your lower lashes to protect your skin.
  2. Apply the Remover: Using a micro-swab, apply a small amount of cream remover to the glue zone (where the extension meets natural lash).
    Tip: Do not touch the skin of your eyelid; just target the lashes.
  3. Wait: Let the remover sit for 3 to 5 minutes (check the specific product instructions). The cream will chemically dissolve the adhesive bond.
  4. Slide Off: Use the micro-swab or a pair of tweezers to gently slide the extensions off. They should slip away with zero resistance.
  5. Cleanse Thoroughly: It is vital to remove every trace of the remover. If left on, it can continue to process or cause chemical burns. Wash your eyes with a lash shampoo or water immediately.

Method 3: Oil-Based Makeup Removers (The Gentle Approach)

If you don't have pure coconut oil or a professional remover, check your bathroom cabinet. Many bi-phase makeup removers (the kind you shake to mix oil and water) are the natural enemy of lash extensions.

This method is less intensive than the steam bath but works well for older lashes that are barely hanging on.

  1. Soak: Saturate a cotton pad with an oil-based makeup remover.
  2. Hold: Press the pad against your closed eye for 30 seconds. This allows the liquid to break down the glue.
  3. Wipe: Gently wipe downwards.
  4. Repeat: You may need to do this over several nights. It’s a gradual removal process rather than an instant fix.

Lash Rehab: How to Restore Your Natural Lashes

The period immediately following eyelash extension removal is critical. Your natural lashes are currently in a delicate state. To encourage regrowth and regain thickness, follow this 30-day plan.

1. The Power of Castor Oil

While we used coconut oil for removal, Castor Oil is the queen of regrowth. According to experts at Healthline, ricinoleic acid in castor oil may help prevent hair loss and neutralize scalp damage, which translates well to lash health.

  • How to use: Buy cold-pressed, hexane-free castor oil. Use a clean spoolie brush to apply it to your lashes every night before bed.

2. Invest in a Peptide Serum

If you want faster results, look for lash serums containing peptides and biotin. These ingredients extend the "growth phase" (anagen phase) of your eyelash hair cycle.

3. Take a Mascara Break

Give your lashes a vacation. Mascara can be drying, and the mechanical action of scrubbing it off every night can pull out baby lashes that are just starting to grow back. If you must wear makeup, opt for a nourishing, easy-to-remove formula rather than waterproof mascara.

4. Diet for Lash Health

Beauty starts from within. Ensure your diet is rich in:

  • Biotin (Vitamin B7): Found in eggs, almonds, and avocados.
  • Protein: Hair is made of keratin (a protein). Ensure you are eating enough chicken, fish, or legumes.
  • Vitamin E: An antioxidant that protects hair follicles from oxidative stress.

Troubleshooting: "Help! They Won't Come Off!"

Troubleshooting stubborn eyelash extensions that won't come off at home

Sometimes, you follow the instructions on how to remove eyelash extensions at home perfectly, but a few stubborn lashes refuse to budge. This is common, especially if your lash technician used a "Power Bond" or "Extra Strength" adhesive.

Scenario A: The Cluster Won't Move

If a cluster of lashes is stuck:

  • Do Not: Pull or twist it. This will rip your natural lashes out.
  • Solution: Re-steam your face for another 5 minutes to soften the glue further. Apply a fresh layer of oil and let it sit for 15 minutes this time.

Scenario B: My Eyes Are Stinging

  • Cause: You likely got oil or remover into your eye, or the fumes from the dissolving glue are irritating the eye surface.
  • Solution: Stop immediately. Flush your eyes with cool, sterile water or saline solution for several minutes. Do not rub your eyes.

Scenario C: I Pulled and Now There’s a Gap

  • Solution: Unfortunately, you cannot glue a natural lash back in. You must wait for the growth cycle (typically 6-8 weeks). Use eyeliner to camouflage the gap in the meantime and start using a growth serum immediately.

The Science of Oils: Which One Should You Use?

When searching for how to remove lash extensions at home, you will see dozens of oils recommended. But are they all equal? Chemically speaking, no. The effectiveness of an oil depends on its molecular weight and its ability to break down Cyanoacrylate (the main ingredient in lash glue).

Here is a scientific breakdown of the best oils for the job:

1. Coconut Oil (The Gold Standard)

  • Why it works: Coconut oil contains high levels of fatty acids, specifically lauric acid. It has a small molecular structure that allows it to penetrate the adhesive bond effectively.
  • Best for: Thick, stubborn glue bonds.
  • Bonus: It is naturally antimicrobial, which helps prevent infections like blepharitis during the removal process.
  • Verdict: Highly recommended for the steam-and-oil method.

2. Baby Oil / Mineral Oil (The Heavy Lifter)

  • Why it works: Mineral oil is a petroleum-based product. While less "natural," it is essentially a solvent. It is incredibly effective at dissolving synthetic adhesives used in both individual extensions and strip lashes.
  • Best for: False eyelash removal at home and removing leftover sticky residue.
  • Caution: It can clog pores. Must be washed off with a foaming cleanser immediately.

3. Olive Oil (The Gentle Giant)

  • Why it works: Olive oil is heavier and thicker than coconut oil. It may take longer to break down the glue, but it is incredibly nourishing for the skin around the eyes.
  • Best for: People with dry skin or sensitive eyelids who are in no rush.

4. Jojoba Oil (The Natural Mimic)

  • Why it works: Jojoba is technically a wax ester, not an oil, and it mimics human sebum (skin oil).
  • Best for: Extremely sensitive eyes. It is the least likely to cause a reaction, though it works slower than coconut oil for removal.

Styling Tips: How to Hide Gaps & Look Great Post-Removal

Makeup styling and tightlining tips to hide gaps after lash removal

You’ve removed the extensions, but now you have a special event in Dubai Marina, or you just feel "bald" without them. You don't want to damage your recovering lashes with heavy glue again. Here is how to fake the volume while you wait for regrowth.

1. The "Tightlining" Technique

This is the number one makeup artist secret for sparse lashes.

  • The Problem: Eyelash extension removal can reveal gaps in the lash line.
  • The Fix: Take a black or dark brown waterproof gel eyeliner. Instead of drawing above your lashes, gently lift your eyelid and draw inside the upper waterline (underneath the lash roots).
  • Result: This creates an illusion of a dense, dark lash base without needing mascara.

2. Use a Tubing Mascara

Avoid waterproof mascaras during the rehab phase—they require scrubbing to remove, which pulls out baby lashes.

  • The Fix: Switch to a Tubing Mascara. These formulas form little "tubes" around each lash rather than painting them with pigment.
  • Removal: They slide off easily with just warm water (no rubbing required), making them the safest option for recovering lashes.

3. The "Cat Eye" Distraction

Draw attention away from the length of your lashes and towards the shape of your eye.

  • The Fix: Create a sharp winged eyeliner. A bold wing dominates the eye look, making the length of your actual lashes less noticeable.

4. Strip Lashes (The Occasional Fix)

If you absolutely need drama for a night out, you can use strip lashes.

  • Safety Rule: Do not use individual clusters with semi-permanent glue. Use a latex-free strip lash glue.
  • Removal: Remember the query regarding how to remove false lashes at home? It’s easy. Just soak a Q-tip in oil-free remover and slide them off. Never sleep in them.

Professional Removal vs. DIY: When to Call a Pro

Comparison between professional salon removal and DIY eyelash extension removal

We know you are looking for how to remove lash extensions at home, but there are times when DIY is not the answer.

FeatureDIY Removal (Home)Professional Removal (Salon)
CostBudget-Friendly (Uses household items)Moderate Investment
Time30 - 60 Minutes15 - 20 Minutes
SafetyModerate (Risk of user error)High (Trained professional)
Best ForOld extensions (3+ weeks), loose lashesFresh extensions (1-2 weeks), full sets, sensitive eyes

Winlash.ae Recommendation: If you had your lashes done less than 2 weeks ago and the glue is still very fresh and strong, DIY methods may not work effectively. In this case, booking a professional eyelash extension removal is the safest bet to avoid damage.


FAQ: Frequently Asked Questions

To wrap up our guide, here are answers to the most common questions people ask about this process.

Does removing eyelash extensions hurt?

No, it should never hurt. If you feel pain, you are pulling too hard or the adhesive is still too strong. The process should be gentle. If you experience burning, wash your eyes immediately.

Can I use Baby Oil to remove extensions?

Yes! Baby oil is highly effective. It is mineral oil, which is great for breaking down cyanoacrylate bonds. Just be sure to wash your face thoroughly afterward, as mineral oil can clog pores if left on the skin.

How to remove individual eyelash extensions at home vs strip lashes?

If you are searching for how to remove individual eyelash extensions at home (clusters), use the steam and oil methods described above. However, for false eyelash removal at home (meaning strip lashes you glued on for the day), simply use an oil-free makeup remover on a cotton swab along the lash band—they should peel off easily.

Will my natural lashes fall out with the extensions?

It is normal to see a few natural lashes attached to the extensions when they slide off. Humans naturally lose 2-5 lashes per day. These "shed" lashes were likely held in place by the extension glue and are now being released. However, if you see a large number of natural lashes coming out, you may be using too much force.


Conclusion

Learning how to remove eyelash extensions at home is a handy skill that can save you time and money, but patience is your best friend. Whether you choose the spa-like Steam & Oil method or opt for a professional gel remover, the priority is always the health of your natural eyes.

At Winlash, we believe beautiful lashes start with healthy lashes. Treat them with care, give them a break when needed, and they will continue to frame your eyes beautifully for years to come. For more tips on lash care, premium products, and expert advice tailored to the UAE, visit Winlash.

How to Tint Eyebrows: A Comprehensive Guide for Bold, Defined Brows
Quick Access Table of Contents
  1. What Is Eyebrow Tinting?
  2. Benefits of Eyebrow Tinting
  3. Types of Eyebrow Tint Products
  4. Professional vs. DIY Eyebrow Tinting
  5. Step-by-Step Guide: How to Tint Your Eyebrows at Home
  6. Step 1: Gather Your Supplies
  7. Step 2: Prepare Your Brows
  8. Step 3: Mix the Tint
  9. Step 4: Apply the Tint
  10. Step 5: How Long to Leave Eyebrow Tint On
  11. Step 6: Remove the Tint
  12. Step 7: Final Touches
  13. Safety Tips for Eyebrow Tinting
  14. Aftercare: How to Make Your Eyebrow Tint Last Longer
  15. Common Mistakes in Eyebrow Tinting and How to Avoid Them
  16. Eyebrow Tinting in Hot Climates Like Dubai
  17. Price and Purchase
  18. FAQ

Eyebrow tinting has become a go-to beauty treatment for those seeking fuller, more defined brows without the daily hassle of makeup. Whether you're dealing with sparse hairs or simply want to enhance your natural shape, learning how to tint eyebrows can transform your look. In Dubai's vibrant beauty scene, where the hot, humid climate often demands long-lasting solutions, eyebrow tinting stands out as a practical choice. It not only saves time but also withstands the city's intense sun and occasional sandstorms. If you're new to this, starting with quality products is key—explore options like lash and brow tint dyes designed for professional-grade results at home or in salons.

This guide dives deep into everything you need to know about eyebrow tinting, from the basics to advanced tips tailored for life in the UAE. We'll cover the process step by step, safety considerations, and how to adapt it to Dubai's unique environment. By the end, you'll feel confident tackling this yourself or seeking professional help.

What Is Eyebrow Tinting?

Before and after eyebrow tinting showing fuller and darker brows with tint cream and applicator brush

Eyebrow tinting is a semi-permanent cosmetic procedure that uses dye to darken and define your brow hairs. It's similar to hair coloring but formulated specifically for the delicate facial area. The dye coats each hair, making them appear thicker and more uniform, while also staining the skin underneath for a filled-in effect.

In essence, it's about enhancing what you already have. For residents in Dubai, where the arid climate can make brows look faded or dry, tinting provides a boost of color that mimics a natural, sun-kissed glow. Unlike microblading or tattooing, which are more invasive, tinting is temporary and fades gradually with your skin's natural exfoliation.

The process typically involves mixing a dye with a developer, applying it to clean brows, and letting it set before removal. Results can last anywhere from three to six weeks, depending on factors like skin type and aftercare. If you're curious about combining it with other treatments, such as a lash lift and tint, it can create a cohesive eye-enhancing routine.

Benefits of Eyebrow Tinting

Why bother with eyebrow tinting? The advantages go beyond aesthetics. First, it creates the illusion of fuller brows by darkening lighter hairs, which is especially helpful if you've over-plucked in the past. This can fix trouble spots and give a more youthful appearance without fillers or surgery.

Another key benefit is time-saving. In Dubai's fast-paced lifestyle, where mornings might involve rushing to work in the heat, tinted brows mean less reliance on pencils or powders. Imagine waking up with perfectly shaped arches ready for the day—no smudging from sweat or humidity.

Tinting also defines your brow shape, making your face look more symmetrical and balanced. For those with fair or graying hairs, it restores depth and contrast. Plus, it's pain-free and low-maintenance compared to threading or waxing. Studies from beauty experts note that professional tints can last up to a month, reducing the need for frequent touch-ups.

In hot climates like ours, where pool days and beach outings are common, tinted brows stay put without running. It's a subtle enhancement that boosts confidence, whether you're at a business meeting in Downtown Dubai or enjoying a sunset at Jumeirah Beach.

Types of Eyebrow Tint Products

Choosing the right product is crucial for safe and effective results. Eyebrow tints come in various forms, each suited to different needs and skill levels.

Cream-based tints are popular for their thick consistency, which prevents dripping and allows precise application. They're ideal for beginners and often include nourishing ingredients like aloe vera to soothe the skin.

Gel tints offer a more liquid formula that's easier to mix and apply, providing a natural sheen. Hybrid tints, which combine dye with stain, deliver longer-lasting color by penetrating both hair and skin.

For home use, kits like those with plant-based dyes are gentle and eco-friendly. Silver nitrate-based options provide quick results in under three minutes but require careful handling.

In Dubai, where high humidity can affect product stability, opt for heat-resistant formulas. Brands like RefectoCil eyelash and eyebrow dye are favored for their wide shade range, from natural browns to deep blacks, ensuring a match for diverse skin tones common in the city.

Other options include My Lamination lash and brow dye, which works well with lamination treatments for added volume. Always pair with a developer, such as a 2% color activator, to activate the pigment without irritation.

Here's a quick comparison table of common types:

TypeProsConsBest For
Cream TintPrecise, nourishingThicker applicationBeginners, sensitive skin
Gel TintEasy mixing, natural shineCan be runnyQuick touch-ups
Hybrid StainLong-lasting on skinStronger formulaBold, defined looks
Plant-BasedGentle, eco-friendlyFades fasterNatural preferences

Select based on your brow goals—subtle for everyday or bold for evenings out in Dubai's nightlife.

Professional vs. DIY Eyebrow Tinting

Professional eyebrow tinting in salon vs DIY at home application comparison

Deciding between salon services and at-home tinting? Both have merits, but your choice depends on experience and desired outcome.

Professional tinting offers expertise. Estheticians assess your face shape, skin tone, and hair type to customize the color, ensuring symmetry. In Dubai salons, treatments often include shaping via waxing or threading, plus aftercare advice tailored to the local climate. Sessions last 15-30 minutes, with results enduring up to six weeks. It's safer, as pros use high-quality, FDA-approved dyes, minimizing risks like allergic reactions.

DIY tinting, however, is convenient and cost-effective. With kits available online or in stores, you can tint at home in 10-20 minutes. It's great for touch-ups between salon visits. However, it requires practice—uneven application or wrong shade selection can lead to mishaps. In humid Dubai, DIY might fade faster if not sealed properly.

Ultimately, start with professional if you're new, then transition to DIY for maintenance. Many in the UAE prefer a hybrid approach, getting pro tints quarterly and DIY monthly.

Step-by-Step Guide: How to Tint Your Eyebrows at Home

Ready to try it yourself? This detailed tutorial ensures safe, salon-like results. Always patch-test 24-48 hours before to avoid reactions.

Step 1: Gather Your Supplies

You'll need: tint dye, developer (like My Lamination 2% color developer), mixing bowl, applicator brush, petroleum jelly, cotton pads, and timer. Cleanse your face to remove oils.

Step 2: Prepare Your Brows

Brush brows into shape. Apply petroleum jelly around the brows to protect skin from staining. This barrier is especially useful in Dubai's dry air, preventing unwanted color bleed.

Step 3: Mix the Tint

Follow kit instructions—typically 1:1 ratio of dye and developer. Stir until creamy. For custom shades, blend colors like light brown with ash for cooler tones.

Step 4: Apply the Tint

Using an angled brush, apply from the tail inward, following your natural arch. Cover all hairs evenly. For sparse areas, layer lightly.

Step 5: How Long to Leave Eyebrow Tint On

Timing is key—3-10 minutes for light results, up to 15 for darker. Start short; you can always reapply. In hot climates, shorter times prevent over-processing due to sweat.

Step 6: Remove the Tint

Wipe with a damp cotton pad. If too dark, gently scrub with clarifying shampoo.

Step 7: Final Touches

Apply a brow serum for hydration. Admire your enhanced arches!

This process takes about 20 minutes and yields brows that pop against Dubai's sunny backdrop.

Safety Tips for Eyebrow Tinting

Patch test for eyebrow tint safety on arm in ventilated area

Safety first—eyebrow tinting involves chemicals, so precautions are essential.

Always perform a patch test on your inner arm. Wait 48 hours for reactions like redness or itching. Use only brow-specific dyes; hair color is too harsh.

Work in a well-ventilated area, especially in Dubai's enclosed apartments during summer. Wear gloves to avoid skin staining.

If pregnant or with sensitive skin, consult a dermatologist. Avoid if you have open wounds or recent chemical peels.

In case of irritation, rinse immediately with cool water and seek medical advice. Opt for vegetable-based dyes for gentler options.

Aftercare: How to Make Your Eyebrow Tint Last Longer

Proper aftercare extends your tint's life. Avoid water, steam, or sweat for 24 hours post-tint—crucial in Dubai's humid weather.

Use oil-free cleansers; oils break down dye. Apply sunscreen to brows when outdoors, as UV rays fade color faster in the intense UAE sun.

Brush brows daily with a spoolie and use a nourishing serum. Skip saunas or hot yoga for a week.

With good care, your tint can last 4-6 weeks, even through Dubai's pool parties.

Common Mistakes in Eyebrow Tinting and How to Avoid Them

Avoid pitfalls for flawless results. One error: choosing the wrong shade—too dark looks unnatural. Match to your hair roots, erring lighter.

Over-application leads to blocky brows; use thin layers. Not timing properly? Set a timer to prevent over-development.

In Dubai, ignoring humidity can cause uneven staining—tint in a cool room.

Patchy results? Ensure brows are oil-free pre-application. If too dark, learn how to lighten eyebrow tint with clarifying shampoo or oil.

Eyebrow Tinting in Hot Climates Like Dubai

Professional eyebrow tinting treatment in Dubai outdoor setting with city skyline

Dubai's heat (up to 45°C) and humidity challenge tint longevity. Sweat and sun accelerate fading, so aftercare is vital.

Choose water-resistant formulas. Tinting pairs well with lamination for added protection against moisture.

Local salons often incorporate cooling gels post-treatment. For beach days, wear hats to shield brows.

Despite the climate, tinting thrives here—many expats swear by it for low-maintenance beauty amid the desert lifestyle.

Price and Purchase

When considering eyebrow tinting, investing in reliable products ensures stunning, long-lasting results without the guesswork. Explore curated selections that cater to various shades and formulas, perfect for achieving that salon-fresh look at home. Whether you're enhancing your routine with complementary treatments like a lash lift near me or seeking standalone options, quality matters. Browse trusted dyes and developers designed for precision and safety, available through specialized beauty suppliers in Dubai.

FAQ

How Much Does Eyebrow Tinting Cost?

Costs vary by location and expertise. In Dubai, salon sessions are priced affordably, while home kits offer value for multiple uses.

How to Lighten Eyebrow Tint?

If too dark, apply clarifying shampoo or oil-based remover gently. Repeat as needed, but avoid over-scrubbing to prevent irritation.

How to Get Eyebrow Tint Off Skin?

Use micellar water or makeup remover on a cotton pad. For stubborn spots, try baking soda paste.

How to Do Eyebrow Tinting?

Follow the step-by-step guide above: prepare, mix, apply, time, and remove for best results.

How to Make Eyebrow Tint at Home?

DIY with natural ingredients like henna, but for professional results, use dedicated kits.

How to Make Eyebrow Tint Last Longer?

Keep brows dry initially, avoid oils, and protect from sun—essential in Dubai's climate.

How to Remove Tinted Eyebrows?

Similar to lightening: use removers or wait for natural fade over weeks.

How to Take Eyebrow Tint Off?

Gentle cleansing with soap or specialized tint remover works quickly.

How to Tint My Eyebrows?

Personalize by selecting shades matching your tone and following safe application steps.

How to Tint Your Eyebrows?

Emphasize even coverage and proper timing for natural enhancement.

Conclusion

Mastering how to tint eyebrows opens up a world of effortless beauty, especially in Dubai where durable treatments shine. From understanding benefits to navigating the heat, this guide equips you for success. For more beauty essentials, visit WinLash—your go-to for top-tier supplies.

Top Lash Lift Products 2026: Expert Reviews, Kits for Beginners & Pros, Lasting 8 Weeks
quick access menu
  1. Top Lash Curling Solutions Shaping Beauty Trends
  2. Understanding Lash Lift Products
  3. Expert-Recommended Lash Lifting Solutions for 2026
  4. Best Overall Lash Lift Kit
  5. Best for Beginners
  6. Preferred Choice for Salon-Grade Lash Treatments
  7. Emerging Trend
  8. Lash Lift and Tint Kit
  9. Essential Supplies to Complete Your Lash Lift Routine
  10. Top Brow Lift Products for Lamination
  11. Buying Guide: How to Choose the Right Lash Lift Products
  12. Frequently Asked Questions (FAQs)

Lash lifts have exploded in popularity, with searches for lash lift products surging by over 50% since 2023, as beauty enthusiasts chase effortless, wide-eyed glamour without daily mascara routines. If you're tired of flat lashes or the hassle of extensions, lash lift kits offer a semi-permanent solution that curls and enhances your natural lashes for up to 8 weeks. This 2026 review dives deep into the top lash lift products, focusing on starter kits for beginners and professionals alike, alongside essential supplies that make every treatment seamless.

The lash brow lift products category includes a range of options, from beginner-friendly kits to professional-grade tools. Whether you're a salon professional seeking professional lash lift kits or an individual looking for the best lash lift kit for beginners, there are products designed to suit various needs. These kits deliver long-lasting curls and often include nourishing ingredients like keratin to maintain lash health and strength.

In this guide, we'll explore why lash lift products are transforming eye beauty routines, review our expert picks for the best lash lift kits that last 8 weeks, and highlight must-have supplies like shields and adhesives. We'll also touch on complementary brow lift products to round out your look. By the end, you'll know exactly what to choose for salon-quality results at home or in the studio.

Top Lash Curling Solutions Shaping Beauty Trends in 2026: Expert Reviews, Comparisons, and Essential Tips

Lash Lift Before and After: Dramatic curl enhancement with keratin-infused lash lift products lasting up to 8 weeks

Lash lift products continue to redefine everyday beauty by delivering curled, voluminous lashes that last up to 8 weeks, eliminating the need for curlers or extensions. This guide breaks down top-rated options for beginners and professionals, including key features, user insights, and complementary supplies like shields, rods, and adhesives. We also cover brow lift integrations for a complete eye enhancement. Whether for home use or salon sessions, discover kits that prioritize safety, nourishment, and long-term results.

To get started, check out our curated top three lash lift starter kits for 2026, selected based on performance, value, and real-user feedback:

Kit NameKey FeaturesPrice RangeBest ForRating
My Lamination 3-Step Brow & Lash Lamination KitKeratin-infused, cruelty-free, up to 8 applications per sachet, lasts 6-8 weeksAffordableBeginners and home use4.8/5
ICONSIGN Upgraded Lash Lift KitImproved glue adhesion, easy DIY, sodium bromate-free options availableMid-rangeVersatile for pros and starters4.7/5
Luxe Lashlift SetLong-lasting curl up to 8 weeks, includes tint, buy-one-get-one dealsPremiumProfessional sessions4.9/5

These selections are based on user reviews, durability, and ease of use, ensuring you get the most value from your lash lift starter kit. As we move forward, remember that quality lash lift products prioritize safety—look for formulas free from harsh chemicals like sodium bromate to avoid irritation.

With trends leaning toward natural, low-maintenance beauty in 2026, lash lift and tint kits are leading the charge, offering a quick alternative to extensions that can weigh down lashes over time. If you're new to this, starting with a top lash lift products for beginners can make all the difference, providing step-by-step guidance and all essentials in one package.

Understanding Lash Lift Products: Why They're a Game-Changer

What exactly makes lash lift products so revolutionary? At its core, a lash lift is a semi-permanent treatment that curls your natural lashes from the base, creating an open-eyed effect that lasts 6-8 weeks without the need for daily curling tools. Unlike eyelash extensions, which add synthetic fibers and require frequent fills, lash lifts work with what you have, using perming solutions to reshape and tint for a fuller appearance.

The benefits of quality lash lift products are numerous. First, they offer low-maintenance glamour—imagine waking up with perfectly curled lashes that mimic the visible curl results after a lash lift treatment seen in salons. For those searching lash lift solutions with 6–8 week durability, these kits deliver durability, with many incorporating keratin or collagen to nourish and strengthen lashes, reducing breakage. This is especially appealing in 2026 trends, where natural enhancements trump heavy makeup.

Compared to extensions, lash lifts are gentler on natural lashes, avoiding the glue and weight that can cause damage over time. They're also more cost-effective long-term, with a single eyelash lift kit providing multiple applications. For professionals, investing in salon-grade lash lifting systems means higher client satisfaction, as results hold up through swimming, showers, and daily life.

Here's a quick comparison to highlight the edge:

  • Lash Lift vs. Extensions: Lifts enhance natural lashes (no fallout risk), while extensions add volume but need 2-3 week touch-ups.
  • Duration: Up to 8 weeks vs. 2-4 weeks.
  • Maintenance: Minimal vs. High (avoid oil-based products).

With rising interest in lash lift supplies, these products are game-changers for anyone seeking effortless beauty. Now, let's explore the top picks dominating 2026.

Expert-Recommended Lash Lifting Solutions for 2026

When it comes to top lash lift kits reviewed, 2026 brings innovative options that prioritize speed, safety, and stunning results. We've scoured user feedback and trends to select kits that excel in best lash lift kit searches, focusing on those lasting 6-8 weeks with nourishing formulas. From beginner starters to pro bundles, these are tailored for the WinLash category, emphasizing features like keratin infusion and cruelty-free ingredients.

Best All-Around Choice for Natural, Long-Lasting Curl : My Lamination 3-Step Brow & Lash Lamination Kit

My Lamination 3-Step Brow & Lash Lamination Kit: Best Overall Lash Lift Kit 2026 with keratin and collagen

My Lamination 3-Step Brow & Lash Kit earns top marks as the best lash lift kit for its versatility and value. It includes lifting cream, neutralizing cream, and hydrating serum in 1.5ml sachets—enough for 7-8 lash applications or 3-4 brow treatments.

Key features:

  • Nourishing with keratin and collagen to prevent dryness.
  • Cruelty-free and gentle, ideal for sensitive eyes.
  • Results last 6-8 weeks, with easy application in 20-30 minutes.

Pros: Beginner-friendly instructions, dual-use for lashes and brows. Cons: Sachets may not suit high-volume pros. User reviews praise its long-lasting curl, making it a go-to for lash lift starter kit seekers. 

Best for Beginners: ICONSIGN Upgraded Lash Lift Kit

For those typing beginner-friendly lash lift options, the ICONSIGN kit shines with its 2026 upgrades, including improved milky glue for better adhesion and a user-friendly design that minimizes errors during application. This lash lift starter kit is sodium bromate-free, ensuring safety for sensitive eyes, and provides up to 15 applications, making it cost-effective for newcomers experimenting at home.

Highlights:

  • Includes pads, rods, and tools for DIY ease, with clear step-by-step guides.
  • Vegan formula with keratin boost to hydrate and strengthen lashes.
  • Curls hold for 6-8 weeks, offering natural-looking results without daily maintenance.
ProsCons
Affordable and user-friendly for first-timersGlue can dry quickly if not stored properly in a cool place
Positive reviews for natural lift and easeMay require practice for perfect results on uneven lashes

It's perfect for what lash lift supplies do I need for beginners, bundling essentials like cleansers and applicators in one box, reducing the need for extra purchases.

Preferred Choice for Salon-Grade Lash Treatments : Lash Stuff Lash Lift and Tint Kit with Keratin

Professionals searching best kits designed for professional technicians that last 8 weeks will love this premium option from Lash Stuff. It combines lifting lotions, tint for added depth, and keratin conditioner for salon-grade results, lasting up to 8 weeks without the need for extensions or frequent touch-ups.

Features:

  • Sodium bromate-free for safety, suitable for all client skin types.
  • Includes training resources like online tutorials for technique refinement.
  • Up to 20 applications per kit, ideal for busy salons.

Users report unbeatable durability, with clients returning for its reliable hold through activities like swimming, making it ideal for client sessions in high-demand environments.

Emerging Trend: Korean Lash Lift Kit with Upgraded Glue

Korean lash lift kit with upgraded glue is a rising star in 2026, like the Clione Prime, offering glue-free alternatives or upgraded adhesion formulas for sensitive users who want minimal irritation. These cysteine-based kits are cruelty-free and focus on natural enhancement, lasting 8 weeks with a subtle, voluminous curl.

Benefits:

  • Fast processing (under 60 minutes), perfect for quick salon turns or at-home routines.
  • Natural ingredients, no harsh chemicals, emphasizing skin-friendly cysteine over traditional perms.

Reviews highlight effortless application, with many noting its gentle nature on fine lashes, making it a fresh pick for trends in clean beauty and K-beauty innovations.

Lash Lift and Tint Kit: Luxe Lashlift Set

For bundled value, this lash lift and tint kit with keratin from Luxe delivers colored curls that pop, lasting 8 weeks while nourishing with keratin to prevent brittleness. It's great for affordable lash lift starter kit for professionals, often featuring buy-one-get-one deals that make stocking up economical.

Additional perks include customizable tint shades for matching client preferences, enhancing the overall eye look without additional products.

KitDurationApplicationsKey IngredientPrice LevelRating
My Lamination6-8 weeks7-8Keratin, CollagenLow4.8
ICONSIGN6-8 weeks15Vegan formulaMid4.7
Lash Stuff8 weeks20KeratinPremium4.9
Korean (Clione)8 weeks10-15CysteineMid4.6
Luxe8 weeks15+Tint + KeratinPremium4.8

Essential Supplies to Complete Your Lash Lift Routine

Stunning Lash Lift Results 2026: Wide-eyed glamour with long-lasting natural curl

No lash lift is complete without the right essential lash lift supplies. These tools enhance kit performance, ensuring precise, safe applications for essential supplies for lash lift client sessions that deliver consistent, professional outcomes.

Must-Have Lash Lift Supplies

Start with basics like lifting creams, neutralizers, and serums—core to any routine for breaking bonds, setting shapes, and nourishing lashes. For refills, opt for professional lash lift supplies refill packs like My Lamination tubes (10ml, 45-50 applications), which provide bulk options to keep your inventory stocked without frequent reorders.

Checklist:

  • Lifting Cream: Breaks down lash bonds for curling, often with gentle formulas to avoid over-processing.
  • Neutralizing Cream: Sets the shape securely, ensuring the curl holds through daily wear.
  • Hydrating Serum: Nourishes post-treatment with ingredients like keratin, promoting lash health and shine.

Lash Lift Shields and Rods for Perfect Curls

Lash lift shields and rods for C-curl are crucial for customization, allowing you to tailor the lift to client lash lengths. Silicone shields in sizes S-M-L create J-curl or C-curl variations, while rods offer tighter lifts for dramatic effects, all reusable for cost savings.

ItemPurposeRecommended
Shields/RodsCurl shapingSilicone, reusable for multiple sessions
AdhesiveLash fixationWater-soluble, like Dolly's Lash Glue for easy removal
BrushesApplicationMicrofiber for precision and even product distribution

Refill Packs for Ongoing Use

For pros, lash lift supplies inventory checklist includes disposables like eye pads and mini sticks to maintain hygiene standards, plus removers for clean-ups. These packs ensure you're always prepared, minimizing downtime in salon settings.

Brow Lift Products: Complement Your Lash Lift Game

Brow Lamination and Lash Lift Combo: Fluffy brows and curled lashes for complete eye enhancement

Elevate your routine with top brow lift products for lamination. These pair perfectly with lashes for a full eye makeover, creating cohesive, polished looks that clients love.

Top Brow Lift Products for Lamination

Kits like the My Lamination Brow Lift use similar 3-step processes, with keratin for fluffy, laminated brows lasting 6-8 weeks. They straighten and set brow hairs for a groomed appearance, often combined with tints for added definition.

Lash Brow Lift Products: Bundled Options

Lash brow lift products bundles, such as 4-in-1 kits, offer value for combined treatments, saving time and money. Explore these at WinLash.ae for exclusive options tailored to UAE beauty pros.

Side-by-Side Comparison:

  • Lash: Curl focus for lifted, open eyes.
  • Brow: Fluff and shape for bold, structured frames.

Buying Guide: How to Choose the Right Lash Lift Products

How to Choose the Best Lash Lift Kit: Woman applying professional lash lift at home

When answering what lash lift supplies do I need for beginners, prioritize sodium bromate-free options for safety and long-term lash health—exactly what you'll find in our curated selection at WinLash. As Dubai's go-to source for premium beauty tools, it offers the best lash lift products that blend quality, affordability, and innovation, ensuring stunning results every time.

Key factors to consider when shopping on WinLash lash brow lift products:

  • Ingredients: Opt for keratin for nourishment and strengthening—our top kits like My Lamination include this to keep lashes vibrant and resilient.
  • Duration: Aim for 8 weeks of hold, as seen in professional favorites available exclusively on our site, perfect for busy lifestyles in the UAE.
  • Budget: Choose an affordable lash lift starter kit for professionals with competitive pricing from WinLash, with deals like buy-one-get-one to maximize value without compromising on salon-grade performance.

Q&A:

  • Best for home use? Beginner kits with instructions, like our ICONSIGN options, for effortless DIY.
  • Are they sodium bromate free? Yes, for sensitive eyes—shop our safe selections today.
  • Decision Tree: Start with needs (beginner/pro) → Features (tint/keratin) → Budget, and head to WinLash for personalized recommendations.

Frequently Asked Questions (FAQs)

What's the best lash lift kit for home use?

Starter options with keratin, such as the ICONSIGN Upgraded Kit, offer easy application and 6-8 weeks of curl.

How long do lash lift results last?

Typically 6-8 weeks, depending on the kit—our professional selections ensure maximum durability.

Are these products safe for sensitive eyes?

Yes, most are sodium bromate-free and cruelty-free; always patch test as recommended.

What essential supplies should I buy with a kit?

Shields, adhesives, and serums—bundle them on WinLash for savings.

Can I combine lash and brow lifts?

Absolutely! Our lash brow lift products bundles make it simple for a complete eye transformation.

Conclusion & Next Steps

In summary, the best lash lift products combine innovation and nourishing ingredients for long-lasting, beautiful results. Our top recommendations, such as My Lamination kits, excel in delivering quality for lash lift products, available through our curated selection at WinLash Dubai. we stock only trusted brands that deliver reliable, cruelty-free formulas, making it easy to build your kit with confidence. Whether you're a beginner or pro, our products come with detailed guides and support to elevate your beauty game.

What Is Brow Lamination? Complete Guide to Process, Benefits & Care
Quick Access Table of Contents
  1. The History of Brow Lamination
  2. How Does Brow Lamination Work? Step-by-Step Process
  3. Key Benefits of Laminated Brows
  4. Brow Lamination vs. Other Brow Treatments
  5. Is Brow Lamination Suitable for All Brow Types?
  6. Brow Lamination in Dubai: Considerations for Hot and Humid Climate | Winlash
  7. Essential Products for Brow Lamination
  8. Aftercare Tips for Long-Lasting Results
  9. Price and Purchase: Where to Get Your Brow Lamination Supplies in Dubai
  10. Frequently Asked Questions (FAQ)

In the world of beauty treatments, few innovations have captured attention quite like brow lamination. If you've ever scrolled through social media or flipped through a glossy magazine, you've likely seen those perfectly groomed, fluffy eyebrows that look effortlessly full and defined. But what exactly is brow lamination, and why has it become a go-to for so many people seeking a low-maintenance brow upgrade? At its core, brow lamination is a semi-permanent treatment that restructures your natural eyebrow hairs, making them appear thicker, smoother, and more uniform. It's often described as a "perm for your brows," but instead of curls, it focuses on lifting and setting the hairs upward for that brushed-up, voluminous effect.

This treatment has surged in popularity because it offers a natural-looking alternative to more invasive options, helping to tame unruly brows or enhance sparse ones without the need for daily pencils or gels. Whether you're dealing with thin eyebrows that refuse to cooperate or simply want to wake up with brows that look salon-fresh, brow lamination could be the solution. For those in Dubai, where the hot and humid climate can make maintaining makeup a challenge, this treatment stands out for its durability against sweat and moisture. If you're interested in exploring professional tools to achieve this at home or in a salon, check out our selection of lash and brow lift products designed specifically for long-lasting results.

In this comprehensive guide, we'll dive deep into everything you need to know about brow lamination—from its origins and step-by-step process to benefits, comparisons with other treatments, and tailored advice for Dubai residents. By the end, you'll have a clear understanding of whether this trend is right for you and how to make the most of it.

The History of Brow Lamination

Evolution of eyebrow trends from thin 1920s brows to modern fluffy laminated brows

Brow trends have evolved dramatically over the decades, from the pencil-thin arches of the 1920s to the bold, bushy styles popularized by icons like Cara Delevingne in the 2010s. Brow lamination fits right into this progression, emerging as a modern response to the demand for fuller, more natural-looking eyebrows. The treatment originated in Russia around the late 2010s, where beauty experts began experimenting with chemical solutions inspired by hair straightening and perming techniques. It quickly gained traction in Europe before making its way to the U.S. and beyond, fueled by social media influencers showcasing their "fluffy brow" transformations.

By 2018, brow lamination had exploded onto the global beauty scene, with salons in major cities adopting it as a staple service. What set it apart was its non-invasive nature—unlike tattoos or implants, it worked with your existing hairs, making it accessible to a wider audience. In Dubai, the trend caught on rapidly due to the city's vibrant beauty industry and the need for treatments that withstand the region's intense heat and humidity. Local salons adapted the process to include hydrating elements, ensuring brows stay nourished in the dry desert air.

This evolution reflects a broader shift toward semi-permanent, low-commitment beauty solutions. Today, brow lamination is celebrated for its versatility, appealing to everyone from busy professionals to beauty enthusiasts. Its history underscores a key principle: effective treatments build on natural features rather than overhauling them.

How Does Brow Lamination Work? Step-by-Step Process

Understanding the brow lamination process demystifies why it's so effective. It's a multi-step treatment typically performed by a trained professional, though at-home kits are available for the adventurous. The entire session usually takes 45 to 60 minutes, and results can last four to eight weeks, depending on your hair growth cycle and aftercare.

Here's a breakdown of the typical steps:

  1. Consultation and Prep: Your technician assesses your brow shape, discusses your desired look (e.g., fluffy and natural or sleek and defined), and cleanses the area to remove oils, makeup, or dirt. This ensures the solutions adhere properly.
  2. Application of Softening Solution: A perming lotion (often containing thioglycolic acid) is applied to break down the hair's disulfide bonds, making the brows malleable. This step lasts 5-10 minutes, covered with plastic wrap to enhance penetration.
  3. Neutralizing and Setting: Next, a neutralizing solution fixes the hairs in their new position. The brows are brushed upward or into the desired shape during this phase.
  4. Tinting (Optional): Many sessions include a tint to darken the hairs, adding depth and filling in gaps for a bolder appearance.
  5. Nourishing Finish: A conditioning serum or oil is applied to hydrate the brows, counteracting any dryness from the chemicals.

For those in Dubai, technicians often incorporate extra hydration steps due to the low humidity levels, which can make brows more prone to brittleness. If you're considering DIY, always patch-test products to avoid irritation.

The science behind it is fascinating: by altering the hair's structure temporarily, brow lamination creates the illusion of fuller brows without adding anything artificial. It's safe when done correctly, but always choose certified professionals to minimize risks like over-processing.

Key Benefits of Laminated Brows

Before and after brow lamination showing fuller, fluffier and more defined eyebrows

Why choose brow lamination over other brow enhancements? The benefits are numerous, making it a favorite for those seeking effortless beauty. First and foremost, it delivers fuller-looking brows by redirecting hairs to cover sparse areas, which is ideal if you have gaps from over-plucking or aging.

Another key advantage is its time-saving aspect. Imagine skipping the daily routine of filling in brows—lamination keeps them groomed for weeks, even in Dubai's sweltering summers where makeup often melts away. It's also pain-free and non-invasive, unlike threading or waxing, with no downtime; you can resume normal activities immediately.

From a confidence boost perspective, many report feeling more polished and put-together. In hot climates like Dubai, where humidity can frizz hairs, lamination provides a sleek, sweat-resistant finish. Plus, it's customizable: whether you want a subtle lift or dramatic fluff, it adapts to your style.

Studies from beauty experts highlight its role in promoting brow health when paired with nourishing aftercare, as the process encourages disciplined growth. Overall, the benefits extend beyond aesthetics, offering practicality in everyday life.

Brow Lamination vs. Other Brow Treatments

When exploring brow options, it's helpful to compare brow lamination with alternatives like microblading or eyebrow perming. Each has its place, but understanding the differences can guide your choice.

TreatmentDurationInvasivenessBest For
Brow Lamination4-8 weeksLow (chemical-based)Fuller, natural look; unruly brows
Microblading1-2 yearsHigh (semi-permanent tattoo)Sparse brows needing fill-in
Eyebrow Perm4-6 weeksLow (similar to lamination)Curly or wavy brows

Brow lamination stands out for its temporary nature, making it perfect for commitment-phobes. Unlike microblading, which involves pigment insertion and potential scarring, lamination uses your natural hairs. Compared to an eyebrow perm, which curls rather than straightens, lamination focuses on upward lift for that trendy, brushed-up effect.

In Dubai's beauty market, lamination is favored for its quick sessions and resilience against heat. If you're torn between options, start with lamination—it's reversible and lets you test a fuller brow style.

Is Brow Lamination Suitable for All Brow Types?

One of the beauties of brow lamination is its adaptability to various brow types, but it's not one-size-fits-all. For thick, unruly brows, it's a game-changer, taming wild hairs into a cohesive shape. Sparse or thin brows benefit from the lifting effect, which creates volume by fanning out existing hairs.

However, if your brows are extremely short or damaged, results might be subtler, and over-processing could lead to breakage. Curly brows respond well, as the treatment straightens them for a polished look. Straight, fine brows get a boost in fluffiness.

In Dubai, where diverse ethnicities mean varied hair textures, technicians adjust formulas—thicker Middle Eastern brows might need longer processing, while finer Asian types require gentler solutions. Always consult a pro to assess suitability, especially if you have sensitive skin or conditions like eczema.

Brow Lamination in Dubai: Considerations for Hot and Humid Climate

Professional brow lamination treatment in Dubai luxury salon with city skyline view

Dubai's unique environment—scorching temperatures averaging 40°C in summer and humidity levels up to 90%—influences how brow treatments perform. Brow lamination shines here because it's designed to hold up against sweat and moisture, unlike pencils that smudge in the heat.

The dry desert air can dehydrate brows post-treatment, so local salons emphasize hydration with oils like argan or jojoba. Humidity might shorten longevity slightly, but with proper aftercare, results still last 4-6 weeks. For beachgoers or those in outdoor jobs, it's a practical choice, resisting pool water and sun exposure.

Popular spots in Dubai, like those in Media City or Jumeirah, offer climate-adapted services. If you're new to the city, search for "brow lamination near me in Dubai" to find humidity-proof options.

Essential Products for Brow Lamination

Achieving salon-quality brow lamination requires the right tools. Key products include perming lotions, neutralizers, and nourishing serums. For professionals or at-home users, kits streamline the process.

Consider the MyLamination 3-Step Brow Lash Lamination Kit, which includes everything for multiple sessions. Another standout is the My Lamination Lash Brow Lift Kit, perfect for lifting and setting.

Don't forget accessories like the simple eyebrow brush for lift lamination to style precisely. In Dubai, opt for humidity-resistant formulas to maintain that fresh look.

Aftercare Tips for Long-Lasting Results

Proper aftercare is crucial for maximizing brow lamination benefits. For the first 24-48 hours, avoid water, steam, or products on your brows—no showers, saunas, or swimming.

Ongoing tips include:

  • Brush brows daily with a spoolie to maintain shape.
  • Apply a nourishing oil like castor twice daily to combat dryness, especially in Dubai's arid climate.
  • Skip harsh exfoliants or retinol near the area.
  • Protect from sun with hats or SPF to prevent fading.

With these habits, your brows will stay fluffy and defined longer.

Price and Purchase: Where to Get Your Brow Lamination Supplies in Dubai

Professional brow lamination products and kits display in Dubai beauty store

Investing in brow lamination is worthwhile for its transformative effects, and Dubai offers plenty of options for supplies without breaking the bank. Whether you're a salon owner or DIY enthusiast, quality kits ensure professional results. Look for bundles that include perm solutions, tints, and tools tailored for the local climate.

For reliable products that deliver salon-worthy brows, explore comprehensive kits designed for ease and longevity. These are ideal for achieving that perfect lift, even in humid conditions. Stock up on essentials to keep your routine seamless and effective.

All of these essentials are available in one place at Winlash, making it easier to find reliable brow lamination supplies suited for Dubai’s climate.

Frequently Asked Questions (FAQ)

How long does brow lamination last?

Typically 4-8 weeks, depending on your hair growth and aftercare. In Dubai's heat, it might lean toward 4-6 weeks with extra moisture.

Is brow lamination safe?

Yes, when performed by professionals using quality products. Patch tests prevent reactions.

What is the difference between brow lamination and eyebrow perm?

Brow lamination lifts and straightens for a fluffy look, while perms curl hairs.

Can I do brow lamination at home?

Absolutely, with kits, but start with tutorials for best results.

Does brow lamination damage brows?

Minimal if not overdone; nourishing aftercare helps.

How much does brow lamination cost in Dubai?

Sessions vary in price by salon.

Is brow lamination suitable for sensitive skin?

Yes, but inform your technician for gentler formulas.

Can I wear makeup after brow lamination?

Wait 24 hours, then use gentle products.

What if my brows are too sparse for lamination?

It enhances what's there; combine with tinting for better coverage.

How often can I get brow lamination?

Every 6-8 weeks to avoid over-processing.

In conclusion, brow lamination offers a versatile, natural way to elevate your brow game, especially in challenging climates like Dubai's. Whether you're new to it or a seasoned fan, embracing this treatment can simplify your beauty routine. For more beauty essentials, visit Winlash.ae.

Exploring the Benefits of Vitamin Lash Botox

In the world of beauty and cosmetics, the quest for long, lush eyelashes never ceases. Among the myriad of treatments available, one of the latest trends making waves in the beauty industry is Vitamin Lash Botox. This innovative approach has caught the attention of beauty enthusiasts and professionals alike. But what exactly is Vitamin Lash Botox, and how does it differ from other lash treatments and Lift Products? In this article, we'll dive deep into the benefits of Vitamin Lash Botox, how it works, and why it might be the perfect solution for your lash enhancement needs.

Vitamin Lash Botox is not your typical Botox treatment. Unlike traditional Botox, which is a neurotoxin used to relax muscles and reduce facial wrinkles, Vitamin Lash Botox is a specialized lash treatment designed to nourish and strengthen your eyelashes. It is fundamentally different in its purpose and application, focusing on enhancing the natural beauty of your lashes rather than altering facial expressions. The treatment involves the application of a unique formula that is infused with vitamins, proteins, and other nutrients, specifically aimed at promoting eyelash growth and overall health.

The Ingredients Behind the Magic

Vitamin Lash Botox before and after: Longer, curled, and healthier lashes after treatment

The secret to Vitamin Lash Botox lies in its carefully curated ingredients. The treatment typically includes a blend of essential vitamins such as A, B, E, and F, which are known for their nourishing properties. These vitamins play a crucial role in maintaining the health and vitality of the lashes. Along with these vitamins, the formula incorporates proteins like keratin and collagen, both of which are fundamental to hair health and strength. These components work synergistically to fortify the lashes, making them appear fuller, stronger, and healthier. Additionally, the formula often contains natural oils and extracts, such as argan oil and jojoba oil, which provide deep hydration and a natural shine, leaving the lashes looking vibrant and nourished.

How Does Vitamin Lash Botox Work?

The application process for Vitamin Lash Botox is similar to that of a traditional lash lift, but it incorporates additional steps to enhance the health and appearance of the lashes. Here's a step-by-step breakdown of how it works:

  1. Preparation: The treatment begins with a thorough cleaning of the lashes to remove any makeup, oils, or debris. This ensures that the Vitamin Lash Botox formula can effectively penetrate the lash fibers and deliver its full benefits.
  2. Application: Using a small brush or applicator, the Vitamin Lash Botox formula is meticulously applied to the lashes. This allows the nourishing ingredients to deeply penetrate and condition each lash, promoting growth and resilience.
  3. Setting: The lashes are then gently lifted and set using a silicone pad. This not only helps to shape and curl the lashes but also ensures that the formula is evenly distributed, allowing it to work its magic.
  4. Processing: The formula is left on the lashes for a specific amount of time, typically between 20 to 30 minutes. During this period, the ingredients work to deeply condition and strengthen the lashes, improving their texture and appearance.
  5. Finishing Touches: Once the treatment is complete, the lashes are carefully cleaned to remove any residue. A nourishing serum is then applied to lock in moisture and shine, leaving the lashes looking lush and healthy.

The Benefits of Vitamin Lash Botox

Enhanced Lash Appearance

One of the primary benefits of Vitamin Lash Botox is its ability to significantly enhance the overall appearance of your lashes. The treatment not only lifts and curls the lashes, giving them a naturally glamorous look, but also adds volume and length. This results in a more dramatic and defined appearance, making your eyes pop without the need for additional makeup like mascara or eyelash extensions. The enhanced appearance is not just cosmetic; it reflects the improved health and vitality of the lashes.

Improved Lash Health

Unlike some lash treatments that can weaken or damage lashes over time, Vitamin Lash Botox is designed with lash health as a priority. The nourishing ingredients work to strengthen the lash fibers from the inside out, reducing breakage and promoting healthy growth. This means that over time, your natural lashes become healthier, more resilient, and less prone to damage. The treatment provides a protective barrier that shields the lashes from environmental stressors, further enhancing their longevity and strength.

Safe and Gentle

Vitamin Lash Botox results: Long, curled, and natural-looking lashes with an attractive healthy appearance

Vitamin Lash Botox is a safe and gentle treatment that is suitable for most individuals, including those with sensitive eyes or skin. It is especially beneficial for those who have had adverse reactions to other lash treatments that contain harsh chemicals. The formula is free from parabens, sulfates, and other potential irritants, making it a non-irritating option for enhancing lash appearance and health. Its gentle nature ensures that it can be incorporated into regular beauty routines without the risk of adverse effects.

Long-Lasting Results

One of the most appealing aspects of Vitamin Lash Botox is its long-lasting results. The effects of the treatment typically last for 6-8 weeks, depending on your lash growth cycle and personal care routine. This longevity means you can enjoy beautifully enhanced lashes for an extended period without the need for frequent touch-ups or reapplications. The durability of the results makes it a cost-effective and convenient option for individuals seeking to maintain their lash enhancement over time.

Vitamin Lash Botox vs. Traditional Botox

It's important to note that Vitamin Lash Botox is entirely different from traditional Botox treatments. While both share the word "Botox" in their names, they serve very different purposes. Traditional Botox is primarily used for reducing facial wrinkles and fine lines by relaxing the muscles that cause them. In contrast, Vitamin Lash Botox is a nourishing treatment specifically for the lashes, aimed at improving their health, appearance, and overall vitality. Understanding this distinction is crucial for clients seeking targeted treatments for their beauty needs.

Can I Get a Lash Lift After Botox?

If you've recently had a traditional Botox treatment, you might wonder if you can still opt for a lash lift or Vitamin Lash Botox. The good news is that there are generally no contraindications for receiving a lash lift after Botox. The treatments target different areas and have different effects, making them compatible when performed by experienced professionals. However, it's always a good idea to consult with your beauty technician or dermatologist to ensure there are no specific concerns based on your individual circumstances. They can provide personalized advice to ensure optimal results and safety.

Lash Botox Before and After: What to Expect

If you're considering Vitamin Lash Botox, you might be curious about the results you can expect. Before and after photos can provide a visual representation of the transformation, showcasing the potential improvements in lash volume, length, and curl. Typically, clients notice a significant enhancement in these areas, with lashes appearing fuller, more defined, and healthier. The visual results are often accompanied by improved lash texture and resilience, making the treatment a worthwhile investment for those seeking to elevate their natural beauty.

Botox for Lashes and Brows

Professional Vitamin Lash Botox and lash lift tools and products | Complete eyelash treatment kit

Vitamin Lash Botox isn't limited to just eyelashes. The treatment can also be applied to eyebrows, offering similar benefits for those looking to enhance multiple areas. Known as brow botox, this treatment helps to nourish and strengthen the brow hairs, resulting in a fuller, more defined look. This makes it an excellent option for those seeking to enhance both their lashes and brows simultaneously, achieving a harmonious and balanced aesthetic. The dual application underscores the versatility and efficacy of the treatment.

Conclusion

In conclusion, Vitamin Lash Botox is a revolutionary treatment that offers a range of benefits for those looking to enhance their lashes and brows. With its nourishing formula and long-lasting results, it's no wonder why this treatment has become a popular choice in the beauty industry. Whether you're seeking to improve the health of your lashes, achieve a more dramatic look, or enhance multiple areas of your facial appearance, Vitamin Lash Botox could be the perfect solution for you. The treatment's unique approach to lash and brow care sets it apart as a holistic and effective option for beauty enhancement.

If you're ready to experience the transformative effects of Vitamin Lash Botox, visit WinLash.ae today—your one-stop destination for premium lash and brow products in the UAE. Shop our high-quality My Lamination Vitamin Lash Brow Botox options, including the convenient sachet format for single-use applications or the versatile pump bottle (15ml) for professional salons and multiple treatments. Our products are sourced from trusted brands to ensure safe, effective results that nourish and strengthen your lashes and brows. For more beauty essentials, explore our full range at WinLash and elevate your routine with expert-recommended solutions delivered right to your door. Contact our team for personalized advice and start achieving the lashes and brows of your dreams with confidence!

Eyebrow Lamination Explained: A Comprehensive Guide

Eyebrow lamination is a beauty trend gaining popularity for its transformative effects. If you’re wondering what is eyebrow lamination, it’s a method that helps create a fuller, more defined brow shape with a “set-in-place” finish, often called a laminated eyebrow look.
This non-invasive treatment is suitable for all brow types, from thin to unruly. It involves a chemical process that restructures brow hairs, giving them a polished look.
The results can last up to eight weeks, making it a convenient option for busy individuals. Whether you're considering a professional service or an at-home kit, understanding the process is key.
This guide will explore everything you need to know about eyebrow lamination. If you’re exploring at-home options, choosing the right eyebrow lamination products and following kit instructions closely can make a big difference in results and comfort.

what laminated eyebrow means?

Eyebrow lamination is a popular beauty treatment designed to enhance the appearance of eyebrows. It involves straightening and setting brow hairs into a desired shape. This technique makes brows appear fuller and more symmetrical.

The procedure uses a chemical solution to relax the brow hairs. Once relaxed, the hairs are brushed into the desired position. This process smooths and sets them for a polished look. In simple terms, a “laminated eyebrow” means the brow hairs look lifted, smoother, and more uniform, as if they’ve been gently “set” into place.

What eyebrow lamination can achieve:

  • Fuller, more defined brows
  • Smooth, uniform hair texture
  • Lasting results without daily maintenance

Laminated eyebrows are especially popular for their natural yet enhanced appearance. The treatment suits anyone looking to improve their brow shape without permanent changes.

Whether your brows are thin or unruly, eyebrow lamination can offer a dramatic improvement. The results are both striking and natural, making it an appealing choice in modern beauty routines.

How Does Eyebrow Lamination Work?

eyebrow lamination process step by step

Eyebrow lamination restructures brow hairs for a sleek look. First, a lifting solution is applied to soften the hairs, making them more pliable for shaping. After that, the brows are brushed into the desired position, and a neutralising step helps set the hairs in place so they hold their new shape.

If you’re doing this at home, the same sequence applies, so it helps to use a kit that’s clearly organised into steps, like the MyLamination Lash & Brow Lift Kit (3 step), which includes Lifting Cream (Sachet #1), Neutralising Cream (Sachet #2), and a Hydrating Serum (Sachet #3).

Quick eyebrow lamination process breakdown

  • Application of the softening solution
  • Shaping and styling the brow hairs
  • Setting them with a neutralizer

The entire eyebrow lamination process is quick, taking about 30-45 minutes. It results in refined brows that maintain their shape for weeks. This method is ideal for those seeking to enhance their eyebrow aesthetics without daily grooming.

Benefits of Eyebrow Lamination

Eyebrow lamination offers multiple aesthetic benefits for many brow types. It transforms sparse, unruly brows into a tidy, refined look. The treatment is non-invasive, making it a popular choice for anyone seeking quick improvements.

One significant advantage is its duration. Lamination results typically last six to eight weeks, reducing daily maintenance. It allows you to wake up with well-groomed, stylish brows without the need for makeup every day. Because it involves chemical solutions, comfort can vary by skin type, so patch testing and careful aftercare are important.

Key benefits at a glance:

  • Fuller and more symmetrical brows
  • Enhanced natural brow shape
  • Low-maintenance beauty solution

Additionally, lamination can improve your overall facial symmetry. It frames your eyes, creating an instant eye-lift effect. As a result, this procedure not only offers aesthetic enhancements but also boosts confidence by accentuating your features.

Who Should Consider Eyebrow Lamination?

Eyebrow lamination is perfect for anyone looking to enhance their natural brows. It's especially beneficial for those with unruly or sparse hair. If you're looking for a fuller, more defined shape without committing to permanent makeup, this treatment might be for you.

Additionally, those who prefer low-maintenance beauty routines will find it appealing. This process reduces daily brow grooming time significantly.

Ideal candidates

  • Individuals with asymmetrical brows
  • People with coarse or curly brow hair
  • Anyone seeking a temporary brow enhancement

If you have irritation, broken skin, or very sensitive skin around the brow area, it’s best to pause and be extra cautious with patch testing.

The Eyebrow Lamination Process: Step by Step

Eyebrow lamination typically starts with a consultation. The technician discusses your desired brow shape and style. This ensures the final result meets your expectations.

The first step in the actual process involves cleansing the brows. Removing oils and makeup residues prepares them for treatment. A bonding product is then applied to make the brow hairs pliable.

Next, the technician uses a lifting solution. This softens the brow hairs, allowing them to be brushed and shaped. At this point, your brows are positioned in their desired shape.

A neutralizing solution follows. This sets the brows in their new shape, ensuring they stay in place. This step can lock the brows into a fuller, lifted appearance.

After this, a nourishing serum is often applied. This replenishes moisture lost during treatment. It also helps maintain the health and softness of the brow hairs. If you’re doing this at home, always follow the kit’s step order and timing exactly.

Quick overview of the steps:

  • Consultation
  • Cleanse the brows
  • Apply bonding and lifting solution
  • Shape the brows
  • Neutralize the brow shape
  • Finish with a nourishing serum

The entire process is quick, typically lasting 30-45 minutes.

Professional vs. At-Home Eyebrow Lamination Kits: How to Choose the Best Kit

my lamination 3-step kit and professional kit

Choosing between professional and at-home eyebrow lamination kits depends on your comfort and desired results. Both options offer unique benefits and drawbacks, impacting the decision based on your needs.

Professional services generally ensure better results. Skilled technicians use high-quality products and techniques, minimizing the risk of errors. If you prefer a pro-level setup at home or in a professional setting, the Professional My Lamination Lash & Brow Lift Kit is an all-inclusive option, covering the full 3-step routine (Lifting Cream+ Step 1, Neutralizing Cream+ Step 2, Hydrating Serum+ Step 3) plus key extras like lift adhesive, reusable silicone lash pads in multiple sizes, and tint with developer for a more defined finish.

At-home kits provide flexibility and affordability. They allow you to manage your brows' appearance without leaving home. However, they require careful application to prevent mishaps or inconsistent results.

Key considerations for both options include:

  • Professional service: guarantees expertise and precision.
  • At-home kits: more cost-effective and accessible.
  • Quality of products: affects the outcome and safety.

Regardless of your choice, ensure you're informed and well-prepared.

Factors to consider when choosing a kit:

  • Comprehensive instructions for beginners.
  • Reputable brand with positive reviews such as: My Lamination, Dolly's Lash.
  • Availability of customer support for inquiries.
  • A complete kit that clearly includes each step (lift + neutralize + nourish) and the basic tools needed for clean application.
  • Clearly labeled steps (Step 1 / Step 2 / Step 3) so you don’t mix the order.

Eyebrow Lamination Products: What You Need

For a seamless eyebrow lamination experience, choosing the right products is key. High-quality formulas support better results and can help the laminated brow look last longer. Whether you’re doing brow lamination at home or building a professional kit, it helps to start with the essentials and then add extras based on your routine.

A complete setup usually includes products for shaping, setting, and aftercare. If you want to compare options in one place, you can browse lash & brow lift products to find the core solutions and choose what fits your experience level.

Essential eyebrow lamination products:

  • Setting lotion
  • Neutralizer
  • Nourishing serum

Using these products helps keep brows looking smooth and well-groomed for weeks. Prioritize clear instructions, reputable brands, and formulas that match your skin sensitivity and brow type for the best results.

Where to Buy Eyebrow Lamination Products in Dubai (Emirate)

For brow lamination professionals in the UAE, consistent results often come down to reliable formulas and a stocked workflow, from lifting and neutralizing steps to aftercare essentials. If you’re sourcing eyebrow lamination products, looking for the best eyebrow lamination kit, or need brow lift products, you can shop Winlash Dubai for professional lash & brow lift and extension supplies in Dubai, Abu Dhabi, Sharjah, and across the UAE, including step-based systems (lift, neutralize, hydrate) and the everyday essentials lift masters rely on.

You’ll also find it easier to standardize your service quality when your core products stay consistent across clients, especially for timing, setting, and finishing. Whether you’re restocking for weekly appointments or upgrading your professional kit, having a trusted local supplier helps you compare options faster and choose products that fit your technique and preferred finish.

What professionals typically prioritize:

  • Step-based systems (lift, neutralize, hydrate) for consistent processing
  • Professional-grade formulas designed for clean results and repeatable timing
  • Everyday studio essentials that support smooth workflows between clients
  • Extension supplies for artists who offer lift and extensions together
  • Reliable restocking in the UAE to keep your services consistent week to week

Aftercare Tips for Laminated Eyebrows

Proper aftercare is crucial for maintaining beautiful laminated eyebrows. Right after treatment, avoid getting your brows wet for 24 hours. This helps set the shape and ensure lasting results.

Avoid using oil-based products on your brows. These can disrupt the lamination and shorten its lifespan. Stick to gentle, non-oily cleansers and moisturizers.

Touching and rubbing your brows can weaken the lamination. Leave them alone for the best outcome. A light daily brush-through and a nourishing serum (when suitable) can help brows look smoother for longer.

laminated eyebrows aftercare

Aftercare checklist:

  • Avoid water exposure for 24 hours
  • Use non-oily skincare products
  • Minimize touching or rubbing

Once the initial setting period is over, biotin can be a great option for supporting healthier-looking lashes and brows, so you can use a biotin serum as part of your routine.

Potential Risks and How to Avoid them

eyebrow lamination is generally safe, some potential risks exist. Skin irritation or allergic reactions may occur if sensitive to chemicals. Always conduct a patch test 24 hours before the procedure.

To minimize risks, ensure your technician is experienced and certified. Use only high-quality products. Avoid using oil-based cleansers immediately post-treatment for better results.

Potential risks and tips of brow Lamination:

  • Skin irritation: Do a patch test.
  • Allergic reactions: Verify product quality.
  • Use an experienced technician.

Eyebrow Lamination vs. Other Brow Enhancement Methods

Eyebrow lamination offers a non-invasive alternative to other brow treatments. Unlike microblading, it involves no needles or permanent changes. The results, however, last up to eight weeks, providing a semi-permanent option that requires less commitment.

Compared to traditional tinting, lamination offers more structure and lift. It's also quicker and less expensive than brow tattoos. Here is a brief comparison:

  • Eyebrow Lamination: Non-invasive, temporary shaping and lift.
  • Microblading: Involves needles, semi-permanent.
  • Brow Tinting: Adds color only, no structural change.

Common Questions About Eyebrow Lamination

How long does eyebrow lamination last?

Most clients see results for around 6–8 weeks, but longevity depends on hair growth, skin type, and aftercare.

How often can you do eyebrow lamination?

A common professional guideline is every 6–8 weeks to help avoid over-processing and keep brow hair healthy.

Can I get my brows wet after lamination?

Most aftercare guidance recommends keeping brows dry for the first 24 hours (and being careful with steam/sweating right after) to protect longevity and comfort.

Can I wash my face after brow lamination?

Typically yes, but avoid the brow area for 24 hours, then cleanse gently and don’t rub or scrub the brows.

Is eyebrow lamination safe?

It’s generally considered safe when done correctly, but reactions can happen. Many pros recommend a patch test to reduce the risk of irritation or allergy.

What are the most common risks?

The most discussed risks include irritation/allergic reaction, over-processing (dryness or breakage), and uneven results if timing or technique is off.

Will brow lamination make sparse brows look fuller?

It can create the appearance of fuller brows by redirecting hairs, but extremely sparse areas may still need other approaches (like tinting or makeup) for a stronger fill.

Final Thoughts: Is Eyebrow Lamination Right for You?

• Eyebrow lamination could be the perfect solution for achieving polished and well-groomed brows. It offers a low-maintenance option that fits into the busy lifestyles of many. If you desire fuller-looking brows without permanent commitment, this might be your answer.

• Consider factors like your natural brow condition and aesthetic goals. Lamination works for most brow types but is especially effective if you're dealing with unruly or sparse brows. Think about your lifestyle and budget as well.

• Consult a professional to discuss your options and expectations. Your brow goals should align with the results that lamination can offer. Ultimately, the decision should enhance your confidence and complement your natural features.

If you prefer an at-home approach, take your time choosing the best eyebrow lamination kit and reliable eyebrow lamination products so you’re set up for both results and comfort.

how long do lash extensions last
Quick Access to Article Sections
  1. How Long Do Lash Extensions Last?
  2. What Are Lash Extensions?
  3. How Long Do Lash Extensions Typically Last?
  4. Factors Affecting the Lifespan of Lash Extensions
  5. Types of Lash Extensions and Their Duration
  6. Tips to Make Your Lash Extensions Last Longer
  7. How Long Can You Wear False Eyelashes?
  8. Eyelash Extensions in Dubai and the UAE
  9. Conclusion

Lash extensions have become a beloved beauty staple, offering an effortless way to accentuate your natural lashes for a more voluminous and captivating appearance. Whether you're contemplating getting lash extensions or simply curious about their lifespan, you're in the right place. In this comprehensive guide, we will delve into the lifespan of various types of lashes, including lash extensions, and provide practical tips on how to maximize their durability. By understanding the nuances of lash extensions, you can make informed decisions and enjoy your enhanced lashes for longer.

What Are Lash Extensions?

How long do lash extensions last – close-up of perfect classic and volume eyelash extensions on female eye – Winlash Dubai

Lash extensions are a beauty enhancement that involves attaching semi-permanent fibers to your natural lashes, creating a lengthened and fuller look. These extensions are available in different materials, such as mink, silk, and synthetic, each offering distinct characteristics. Unlike strip lashes, which are applied as a single unit, lash extensions are meticulously applied to individual eyelashes, ensuring a natural appearance.

Lash extensions are carefully crafted to blend seamlessly with your natural lashes, providing a subtle yet noticeable enhancement. They come in various lengths, thicknesses, and curls to suit different preferences and eye shapes. The extensions are bonded to your natural lashes using a specialized adhesive, ensuring a secure attachment that can withstand daily activities.

How Long Do Lash Extensions Typically Last

Typically, lash extensions have a lifespan of approximately 4 to 6 weeks. This duration depends on your individual lash growth cycle, which varies from person to person. Factors such as the type of extensions used, the quality of the adhesive, and your aftercare routine can significantly influence how long your extensions last.

The application process for lash extensions involves a meticulous technique performed by a skilled technician. Each extension is applied individually, ensuring precision and a natural look. The adhesive used is crucial for the longevity of the extensions, as it must be strong enough to hold the extensions in place while remaining gentle on your natural lashes.

Factors Affecting the Lifespan of Lash Extensions

The choice of material for your lash extensions can impact their appearance and durability. Mink lashes are known for their lightweight nature and luxurious feel, often lasting longer than other materials. Silk lashes offer a soft and natural look, while synthetic lashes are more affordable and come in a variety of styles.

Your natural lashes follow a growth cycle that typically lasts 6 to 8 weeks. This cycle consists of three phases: growth, rest, and shedding. Since lash extensions are attached to your natural lashes, they will fall out as your natural lashes shed, affecting the overall lifespan of the extensions.

The material of your lash extensions plays a significant role in their longevity. Mink extensions, although pricier, tend to last longer due to their feather-light composition. Silk and synthetic lashes offer different benefits, with silk providing a natural finish and synthetic options being more budget-friendly.

The expertise of the technician applying your lash extensions is critical. A skilled technician ensures that the extensions are applied correctly, using the right amount of adhesive and positioning each extension precisely. This meticulous approach enhances the durability of the extensions and prevents premature fallout.

Proper aftercare is essential for extending the life of your lash extensions. Avoiding oil-based products, keeping the lashes dry for the first 24 hours, and refraining from rubbing your eyes are key practices. Regular maintenance, such as gentle cleansing and brushing, can also help keep your extensions in optimal condition.

Types of Lash Extensions and Their Duration

Individual lash extensions, also known as classic extensions, are applied one by one to each natural lash. They offer a natural appearance and can last about 4 to 6 weeks with proper care. Their longevity is influenced by the natural lash growth cycle and aftercare practices.

Volume lash extensions involve applying multiple lightweight extensions to a single natural lash, creating a fuller and more dramatic look. These extensions can last 4 to 6 weeks, similar to individual lashes, but may require more frequent touch-ups to maintain their volume.

Hybrid lash extensions combine the techniques of individual and volume lashes, offering a balance of natural and voluminous appearance. They last around 4 to 6 weeks, depending on the quality of application and aftercare, providing a versatile option for those seeking a customized look.

Strip lashes are a temporary solution designed for single-day use. They are applied along the lash line with adhesive and should be removed before bedtime. With meticulous care, strip lashes can be reused multiple times, but each application typically lasts for just one day.

False Eyelashes

False eyelashes, like strip lashes, are meant for short-term wear. Depending on the adhesive used, they can stay on for a day or two. Removing them before sleeping is crucial to prevent damage to your natural lashes and the false lashes themselves.

Tips to Make Your Lash Extensions Last Longer

Mega volume Russian lash extensions before and after – how to make lash extensions last longer – Winlash UAE

Select the Right Adhesive

The adhesive used for lash extensions plays a critical role in their longevity. Ensure your technician uses a high-quality adhesive specifically designed for lash extensions. This will help secure the extensions effectively and minimize the risk of premature shedding.

Avoid Water and Steam

For the first 24 to 48 hours after application, it's essential to keep your lash extensions dry. Avoid getting them wet or exposing them to steam, as moisture can weaken the adhesive bond. This practice helps the adhesive to cure properly and enhances the durability of the extensions.

Gentle Cleansing Routine

Maintaining a gentle cleansing routine is vital for keeping your lash extensions clean and free from debris. Use an oil-free cleanser and a soft brush to cleanse your lashes without causing damage. Avoid rubbing your eyes, as this can lead to premature shedding of the extensions.

Daily Brushing

Using a clean mascara wand, gently brush your lash extensions daily to keep them in order and prevent tangling. This simple practice helps maintain the desired shape and alignment of the extensions, contributing to their overall longevity.

Regular Refill Appointments

To maintain the fullness of your lash extensions, schedule regular refill appointments every 2 to 3 weeks. During these appointments, your technician can replace any extensions that have fallen out and ensure your lashes continue to look their best.

How Long Can You Wear False Eyelashes?

False eyelashes, when applied with high-quality glue, can last up to 24 hours. However, it's advisable to remove them before sleeping to avoid any irritation or damage to your natural lashes. Proper removal also helps preserve the condition of the false lashes for future use.

Eyelash Extensions in Dubai and the UAE

In regions like Dubai and the UAE, where beauty trends are constantly evolving, eyelash extensions have gained immense popularity. The dry and hot climate can affect the longevity of your extensions, making proper aftercare even more crucial. It's important to select a reputable salon with experienced technicians to ensure your extensions last as long as possible.

Climate Considerations

The climate in Dubai and the UAE presents unique challenges for maintaining lash extensions. The combination of heat and dryness can impact the adhesive's effectiveness, making it crucial to follow aftercare guidelines meticulously to preserve the extensions' lifespan.

Choosing the Right Salon

Selecting a reputable salon with experienced technicians is essential for achieving the best results. Look for salons that prioritize hygiene and use high-quality products. Reading reviews and seeking recommendations can help you find a salon that meets your expectations.

Cultural Influence on Eyelash Trends

The cultural emphasis on beauty and fashion in Dubai and the UAE influences eyelash trends. Lash extensions are often seen as a must-have beauty accessory, with many women opting for them to enhance their natural beauty and keep up with the latest trends.

Conclusion

The lifespan of lash extensions and other types of false eyelashes largely depends on factors such as the type of lashes, application techniques, and aftercare practices. By understanding these elements and taking appropriate measures, you can enjoy beautiful, long-lasting lashes that enhance your natural beauty. Whether you're in Dubai, the UAE, or anywhere else, these tips will help you maintain your lash extensions and keep them looking fabulous for weeks.

In summary, lash extensions typically last between 4 to 6 weeks, but with proper care, you can extend their life and enjoy their full, dramatic effect for as long as possible. Choose the right type of lashes and adhesive, adhere to aftercare instructions, and consider regular refills to maintain the desired look. With the right approach, your lash extensions can remain a stunning feature of your beauty routine.

✨ Ready for perfect, long-lasting lash extensions that always look flawless? Only at Winlash.ae you'll find the best professional materials: original My Lamination Vitamin Lash Botox, premium adhesives, volume fans, and everything top lash artists in Dubai and the UAE trust and use daily.

→ Shop Now at Winlash.  – Your Trusted Lash Supplier in Dubai
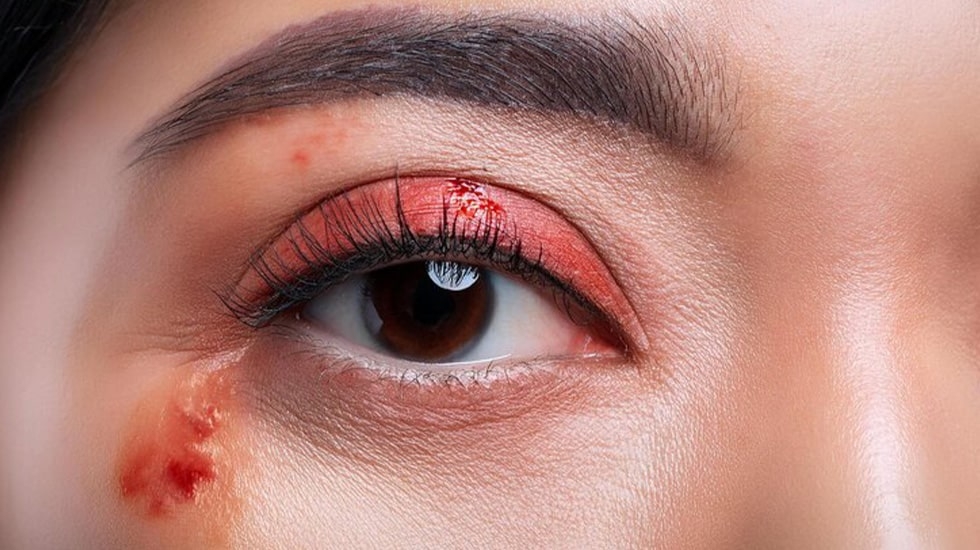
The Ultimate Guide to Eyelash Extensions
Quick Access to Article Contents
  1. What Are Eyelash Extensions?
  2. Types of Eyelash Extensions: Materials and Styles
  3. Classic, Volume, and Hybrid Lashes Explained
  4. Silk, Mink, and Synthetic Lashes: Pros and Cons
  5. Choosing the Right Eyelash Style for You
  6. Short Eyelash Extensions and Natural Looks
  7. Dramatic and Volume Lashes
  8. The Eyelash Extension Application Process
  9. What to Expect During Your Appointment
  10. Patch Tests and Safety Considerations
  11. Lash Care and Maintenance Tips
  12. Cleaning and Protecting Your Extensions
  13. Lash Maintenance: Infills and Touch-Ups
  14. Finding the Best Eyelash Salon Near You
  15. Eyelash Extensions in Abu Dhabi and Dubai
  16. Common Myths and FAQs About Eyelash Extensions
  17. Eyelash Extensions for Special Occasions and Everyday Wear
  18. Removing Eyelash Extensions Safely
  19. Final Thoughts: Are Eyelash Extensions Right for You?

Eyelash extensions have become a beauty staple for many. They offer a way to enhance your natural lashes effortlessly.

These semi-permanent fibers are attached to your natural lashes. They add length, curl, and fullness.

Choosing the right type and style is crucial. Options range from classic to volume lashes, each offering a unique look.

The application process is precise and should be done by a professional. This ensures safety and quality results.

Proper lash care and maintenance are essential. They help prolong the life of your extensions and keep them looking fresh.

Finding a reputable eyelash salon is key. It ensures you receive the best service and results.

Whether you're in Abu Dhabi, Dubai, or elsewhere, options abound. Eyelash extensions can transform your look and boost confidence.

This guide will explore everything you need to know. From types and styles to care and maintenance, we've got you covered.

What Are Eyelash Extensions?

Close-up of beautiful eyelash extensions - WinLash Abu Dhabi & Dubai

Eyelash extensions are popular for enhancing the natural beauty of your eyes. They are composed of semi-permanent fibers.

These fibers are meticulously attached to your natural lashes. The objective is to add length, thickness, and curl.

The process is detailed and requires precision. This is why it's crucial to work with experienced professionals.

Eyelash extensions can vary in style and material. Each type offers different advantages and suits varying preferences.

The benefits of eyelash extensions include:

  • Enhancing your natural lashes' appearance
  • Reducing the need for daily mascara
  • Providing long-lasting results with care

They come in different forms, like mink, silk, and synthetic, each offering unique qualities. Whether you’re seeking a subtle enhancement or a dramatic look, there are options to explore. Eyelash extensions serve as a flexible beauty treatment, adapting to your needs. Understanding what they are is the first step in achieving the desired result.

Types of Eyelash Extensions: Materials and Styles

Different types of eyelash extensions: classic, volume and hybrid lashes

Eyelash extensions come in various materials and styles. Each type provides a distinct look and feel. Choosing the right one depends on your personal preference and desired outcome.

Materials Used in Eyelash Extensions

  • Silk Lashes: Lightweight with a soft sheen
  • Mink Lashes: Known for their natural, fluffy appearance
  • Synthetic Lashes: Offer a bold, dramatic look

Silk lashes offer a mid-weight option. They are ideal for clients who want a defined lash line without going too bold.

Mink lashes are luxurious and highly sought after. They are perfect for those who desire natural elegance.

Synthetic lashes are great for dramatic effects. They are thicker and have a glossy finish.

Styles of Eyelash Extensions

  • Classic: One extension per natural lash
  • Volume: Multiple extensions per lash for a full look
  • Hybrid: A blend of classic and volume lashes

Classic lashes provide a natural, mascara-like effect. They are perfect for daily wear.

Volume lashes offer a denser, more impactful appearance. They are suitable for special occasions.

Hybrid lashes combine the best of both worlds. They provide texture and natural thickness.

The choice of material and style affects the overall look and feel. It's important to consult with a professional. They can help you choose what's best for your eyes and lifestyle.

Classic, Volume, and Hybrid Lashes Explained

Understanding the different styles of eyelash extensions can help you make an informed decision. Let's delve into these styles in more detail.

Classic eyelash extensions are the most straightforward. One extension is attached to each natural lash, creating a simple, elegant look. They enhance the natural beauty of your lashes without adding excessive volume.

Volume lashes take it a step further. Multiple extensions are attached to a single natural lash. This creates a fuller, more dramatic appearance. They are perfect for those who desire an eye-catching look.

Hybrid lashes combine classic and volume techniques. This style delivers both texture and volume. It's an excellent choice for those looking for a balance between natural and bold.

Lash Styles at a Glance

  • Classic: Natural, enhancing
  • Volume: Full, dramatic
  • Hybrid: Mixed, balanced

Each style serves different needs and aesthetic desires. Consulting with a lash technician can guide your choice. Ultimately, the best style depends on the look you wish to achieve.

Silk, Mink, and Synthetic Lashes: Pros and Cons

Comparison of silk, mink and synthetic eyelash extensions

Different lash materials have unique attributes. Understanding their pros and cons helps in making the best choice.

Silk Lashes: These are semi-gloss and hold their shape well. They offer a natural feel and are perfect for those seeking elegance.

Mink Lashes: They are soft and fluffy, providing a natural, luxurious look. However, they tend to be the most expensive option.

Synthetic Lashes: They are sturdy and bold, ideal for dramatic styles. They are often less expensive but may feel slightly heavier.

MaterialPros & Cons
Silk LashesPros: Lightweight, natural sheen
Cons: May not be as full as volume styles
Mink LashesPros: Soft, natural
Cons: Higher cost
Synthetic LashesPros: Bold, affordable
Cons: Heavier, less natural

Selecting the right material involves weighing these benefits and drawbacks. It's important to consider your lifestyle and budget. A professional can help in determining what will work best for your desired result.

Choosing the Right Eyelash Style for You

Selecting the perfect eyelash style is essential for achieving your desired look. The right style can enhance your natural beauty and complement your unique features.

Consider your lifestyle and the occasions for which you'll wear the lashes. Do you prefer subtlety, or are you aiming for a statement look? Your everyday routine and the amount of time you're willing to spend on maintenance also play roles.

Key Factors to Consider:

  • Lifestyle and frequency of wear
  • Desired level of drama or subtlety
  • Maintenance commitment

Consulting with a Professional:

Discuss your preferences with a lash technician. Their expertise can guide you through the options, ensuring you make the best choice.

Matching your eye shape with the lash style is crucial. Certain styles accentuate specific features, making them more prominent.

Short Eyelash Extensions and Natural Looks

Short eyelash extensions are ideal for those who appreciate a natural appearance. They enhance your eyes without overpowering them, offering a graceful and subtle change.

These extensions are perfect for daily wearers who desire simplicity. They blend seamlessly with your natural lashes, giving a barely-there enhancement.

Advantages of Short Extensions:

  • Natural appearance
  • Low maintenance
  • Suitable for daily wear

Short extensions can especially benefit individuals with shorter natural lashes. They provide a light boost and an elegant finish, maintaining a refined look that's versatile for any occasion.

Dramatic and Volume Lashes

Dramatic Russian volume eyelash extensions before and after

Dramatic and volume lashes are for those who love bold beauty statements. These styles create depth and fullness, offering an impressive transformation.

Volume lashes, in particular, are perfect for special occasions. They add multiple extensions to each lash, creating a thick, lush appearance.

Benefits of Dramatic Lashes:

  • Makes eyes stand out
  • Ideal for special events
  • Creates a fuller look

Dramatic styles offer a glamorous aesthetic. Consider these if you enjoy being the center of attention or have an affinity for striking looks. Discuss with a lash technician to ensure these styles suit your natural features.

The Eyelash Extension Application Process

The process of applying eyelash extensions is intricate and should be performed by a trained professional. It's essential for ensuring both safety and the best possible outcome.

Initially, a consultation helps determine the right type and style of lashes for your needs. Your lash technician will assess factors like eye shape and natural lash health.

Key Stages of the Process:

  1. Preparation and cleaning of your natural lashes
  2. Application of extensions using a specialized adhesive

During the application, you'll lie comfortably with your eyes closed. This allows the technician to work precisely without disturbance.

The application can take one to two hours, depending on the complexity and style chosen. Precision is crucial to achieve a seamless blend with your natural lashes.

Essential Aftercare Steps:

  • Avoid water and steam exposure for 24-48 hours
  • Follow specific care instructions provided by your technician

The result is semi-permanent lashes that enhance the length and volume of your natural lashes. The application process, when executed correctly, can last for several weeks with proper care.

What to Expect During Your Appointment

When you arrive at the salon, expect a professional and relaxing atmosphere. Your technician will begin with a thorough consultation to understand your preferences.

You'll be comfortably positioned for the application process. It's essential to keep your eyes closed throughout to prevent irritation and ensure accuracy.

Common Steps During the Appointment:

  • Consultation and selection of lash style
  • Preparation of natural lashes
  • Safe attachment of eyelash extensions

During your appointment, feel free to ask questions. Understanding the process enhances your comfort and confidence in the service provided. Enjoy the luxury of a beauty treatment designed to elevate your look.

Patch Tests and Safety Considerations

Professional eyelash extension patch test and safety procedure

A patch test is a crucial safety step before applying eyelash extensions. It checks for any allergic reactions to the adhesive used.

The patch test is typically conducted 24 hours before your full appointment. This ensures your safety and peace of mind during the procedure.

Important Safety Measures:

  • Conduct a patch test to check for allergies
  • Ensure salon hygiene standards are met
  • Seek services from certified technicians

Choosing a reputable salon with certified technicians is essential. This ensures proper hygiene practices and a safer experience overall. Safety should always be a priority when enhancing your natural beauty with eyelash extensions.

Lash Care and Maintenance Tips

Proper lash care is essential to keep your extensions looking their best. Simple changes to your routine can extend their lifespan.

Avoid oil-based products near your eyes. They can weaken the adhesive and cause premature lash loss. Opt for water-based or specially formulated lash-friendly products.

Gentle handling of your extensions is also crucial. Resist the urge to rub your eyes or pull on your lashes. This prevents unnecessary stress on the extensions.

Regular cleaning is essential to prevent buildup of dirt and debris. Use a soft, lash extension cleanser and a gentle brush. This helps maintain hygiene without damaging the extensions.

Maintain a healthy environment for your lashes by sleeping on silk pillowcases. They reduce friction and help preserve the shape of your extensions.

Consider a lash care routine that includes:

  • Oil-free makeup removers
  • Lash serums for nourishment
  • Gentle cleansers specifically for extensions

Keeping up with regular salon visits for infills is just as important. This maintains volume and fills gaps as natural lashes shed. Aim for appointments every 2-4 weeks depending on personal growth cycle.

Investing in professional lash care can make a significant difference in the durability and appearance of your extensions.

Cleaning and Protecting Your Extensions

Cleanliness is vital for maintaining the longevity of your eyelash extensions. Daily cleaning prevents buildup that can lead to irritation or infection.

Use a specially formulated lash cleanser to remove any pollutants gently. Ensure that it is oil-free to maintain the adhesive's integrity.

Incorporate these steps into your routine:

  • Use a gentle lash cleanser daily
  • Rinse with cool water
  • Pat dry with a soft towel

Be mindful of how you apply skincare products around your eyes. Avoid getting too close to the lash line to reduce the risk of affecting the adhesive.

Proper cleaning can enhance the appearance and health of both your extensions and natural lashes. It's an effective way to keep them looking fresh and full.

Lash Maintenance: Infills and Touch-Ups

Regular infills are necessary to keep your extensions looking their best. As your natural lashes shed, extensions will naturally fall out too.

Schedule infills every 2-4 weeks to maintain consistent volume. This timing can vary based on your lash growth cycle and preferred fullness.

When attending your infill appointment, make sure:

  • Remove all eye makeup beforehand
  • Arrive on time to enjoy the full service
  • Communicate any issues or concerns with your technician

Professional touch-ups provide a polished look and ensure the health of your natural lashes. It's a maintenance step that supports the longevity of your extensions.

Investing in regular appointments not only keeps extensions intact but also enhances the overall appearance of your lashes, providing long-lasting beauty enhancements.

Finding the Best Eyelash Salon Near You

Luxury eyelash extension salon interior in Abu Dhabi

Locating the right eyelash salon can significantly impact your experience and results. Start by researching salons with good online reviews and recommendations. This ensures you choose a reputable establishment known for quality service.

Word of mouth is powerful. Ask friends or family for their suggestions. Personal experiences can offer valuable insights that online reviews may not highlight.

Consider these factors when choosing a salon:

  • Professional certifications and training of technicians
  • Salon cleanliness and hygiene standards

Visit potential salons for a consultation. Discuss your desired eyelash styles and evaluate their customer service. A professional salon will advise you on the best options for your lash type.

Before committing, inquire about their products and adhesive safety. Knowing their approach to lash care can prevent future issues.

Be mindful of price versus quality. Though affordability is important, sometimes investing in a reputed salon pays off with better lash extensions and care services. Ultimately, your comfort and satisfaction are what matter most.

Eyelash Extensions in Abu Dhabi and Dubai

Professional lash artist applying eyelash extensions in Dubai

Eyelash extensions are extremely popular in Abu Dhabi and Dubai. The cities house numerous salons offering a diverse range of styles and services. Each salon provides unique options to cater to varied preferences.

In these bustling cities, luxury salons are widely accessible. They offer premium service tailored to the client's needs. Ensure the chosen salon meets your expectations in terms of lash safety and hygiene.

When selecting a salon in Abu Dhabi or Dubai, consider:

  • Variety of eyelash styles offered
  • Expertise of lash technicians on staff
  • Availability of aftercare services

For those seeking truly professional-grade results with products trusted by top artists across the UAE, Winlash has become a favorite go-to in Dubai. Offering premium eyelash extensions, award-winning lash lift kits, and climate-tuned aftercare with fast delivery to both Dubai and Abu Dhabi, Winlash consistently delivers salon-quality perfection whether you're a client or a technician.

Many salons in these cities emphasize personalization. They provide customized lash extensions that enhance natural beauty and are perfect for special occasions. Enjoying high-quality service in such vibrant locations can elevate your beauty experience.

Common Myths and FAQs About Eyelash Extensions

Eyelash extensions can be misunderstood despite their popularity. Let's address some common myths and frequently asked questions to clarify.

Do eyelash extensions damage natural lashes?

If applied correctly by a professional, extensions should not harm your lashes. Proper lash care also prevents damage.

Can I wear makeup with eyelash extensions?

Yes, you can. However, avoid oil-based makeup and removers, which weaken adhesive bonds. Opt for water-based products instead.

Do extensions prevent natural lash growth?

No. Extensions don't prevent natural lash growth.

Can eyelash extensions look natural?

With care and the right style, your extensions can look completely natural.

Are all lash styles suitable for everyone?

Extensions come in various styles and should be chosen based on your natural lash length and eye shape. Choosing the right style enhances comfort and appearance.

Eyelash Extensions for Special Occasions and Everyday Wear

Bride with perfect wedding eyelash extensions for special occasions

Eyelash extensions are the perfect accessory for any occasion. Whether it's a special event or daily wear, they can enhance your natural beauty. By choosing the right style, you can achieve both subtlety and drama.

For special occasions, volume lashes can provide a glamorous and bold look. They draw attention to the eyes, making them ideal for weddings, parties, or photo shoots. Opt for dramatic curls and longer lengths to maximize the impact.

In contrast, for everyday wear, natural eyelash extensions offer a subtle enhancement. They save time by reducing the need for mascara. Opting for shorter extensions that closely mimic your natural lash line can provide an effortlessly chic look.

Here's how to choose:

  • Volume lashes for high-impact events
  • Natural lashes for routine elegance
  • Consider the occasion's formality

Regardless of the occasion, eyelash extensions can transform your look, enhancing confidence and simplifying your beauty routine.

Removing Eyelash Extensions Safely

Removing eyelash extensions requires careful handling to protect your natural lashes. It's advised to seek professional assistance for safe removal. Trying to pull them out can damage your lashes.

A lash technician uses a gentle remover to dissolve the adhesive. This process is swift and minimizes the risk of lash loss. Avoid attempts at home remedies for the safest results.

If professional removal isn't possible, take these steps:

  • Use a lash-safe remover from a reputable brand.
  • Avoid pulling or tugging on extensions.
  • Follow with gentle eyelash conditioning to nourish lashes.

Removing extensions with care ensures your natural lashes remain healthy. Regular maintenance and professional guidance make the extension experience enjoyable and safe.

Final Thoughts: Are Eyelash Extensions Right for You?

Deciding on eyelash extensions is a personal choice. Consider your lifestyle and commitment to maintenance. If you're seeking convenience and elegance, extensions offer a time-saving solution.

Evaluate the long-term benefits against the costs and care requirements. Eyelash extensions can significantly enhance your natural beauty. However, they demand proper upkeep and regular infills.

Consult a professional to ensure the best outcome for your lashes. A consultation will help determine if extensions suit your needs.

Whether you're a lash artist looking for premium products or a beauty lover wanting salon-quality results at home, Winlash delivers everything you need – from award-winning lash lift kits to professional extensions and climate-perfect aftercare – with fast delivery across the UAE.

Make an informed decision and discover your perfect lash look today at https://winlash.ae/

The Benefits of Lash Lamination Explained
Quick Navigation to Article Sections
  1. Enhance Your Natural Lashes with Lash Lamination
  2. The Science Behind Lash Lamination
  3. Comparing Lash Lamination to Extensions
  4. Ideal Candidates for Lash Lamination
  5. How Does Lash Lamination Work?
  6. Step-by-Step Breakdown of the Lamination Process
  7. The Role of Nourishing Serums
  8. Safety Precautions During the Procedure
  9. Benefits of Lash Lamination
  10. Why Professional Lash Lamination Matters
  11. How to Choose Safe, High-Quality Lash Lamination Products
  12. Conclusion — Why Lash Lamination Is Worth It
  13. Frequently Asked Questions (FAQ)

Lash lamination, also known as eyelash lamination or lash lifting, is a semi-permanent beauty treatment that focuses on enhancing the appearance of your natural lashes. Unlike eyelash extensions, which involve attaching synthetic lashes to your natural ones, lash lamination works with what you already have. It lifts and curls your lashes, giving them a fuller, more voluminous appearance—lasting for weeks without the daily maintenance. If you're looking for a low-maintenance way to enhance your lashes, lash lamination could be the perfect solution, especially when combined with a high-quality lash lamination kit for consistent results.

Enhance Your Natural Lashes with Lash Lamination

Lash lamination is an excellent way to enhance your natural lashes, providing a subtle yet dramatic curl that lasts for weeks. The treatment is perfect for those seeking a low-maintenance and natural look, without the need for eyelash extensions or constant mascara application. Unlike eyelash extensions, which involve attaching synthetic lashes to your natural ones, lash lamination works with your existing lashes, making them appear longer, fuller, and more defined. Using the right lifting solution helps ensure a smooth, even lift across every lash.


The Science Behind Lash Lamination

Understanding the science behind lash lamination can help you appreciate the transformation it offers. The process involves altering the structure of the hair through chemical solutions. By breaking and reforming the disulfide bonds in your eyelashes, the treatment can mold them into the desired shape. This scientific approach ensures that the lashes retain their new form for weeks—especially when supported by the best lash lamination product suited for your lash type.

Comparing Lash Lamination to Extensions

While both lash lamination and eyelash extensions aim to beautify your eyes, they do so in very different ways. Lash extensions add weight and length by attaching synthetic lashes to your natural lashes, which can sometimes strain them. On the other hand, lash lamination enhances your natural lashes without adding any extra weight, making it a healthier option for those who prioritize lash health. This difference makes lash lamination an excellent choice for individuals seeking a more natural enhancement that doesn’t compromise the integrity of their lashes.

Ideal Candidates for Lash Lamination

Lash lamination is particularly effective for those with naturally straight or downward growing lashes. It is also a great choice for people with sensitive eyes who might react negatively to extensions or heavy makeup. Understanding your lash type can guide you in deciding if this treatment is right for you.

How Does Lash Lamination Work?

The process of lash lamination involves several steps. First, a lifting solution is applied to the lashes to break down the bonds in the hair, allowing them to be reshaped. Next, the lashes are lifted and curled over a silicone rod, creating the desired shape. A setting solution is then applied to reform the bonds and lock the lashes in their new position. Finally, a nourishing serum is used to condition and strengthen the lashes, ensuring they remain healthy and strong.

Step-by-Step Breakdown of the Lamination Process

The lash lamination process is a meticulous one, designed to ensure each lash is perfectly positioned. Initially, a thorough cleaning removes oils and residues, ensuring the solution adheres properly. The subsequent application of the lifting solution softens the lashes, enabling them to be shaped around the chosen silicone rod size, which determines the curl's intensity.
To complete the process, a neutralizing solution is applied to lock the new shape in place, followed by a hydrating or nourishing serum that restores moisture and protects the lashes after chemical processing.

For those who prefer using a complete professional system, the MyLamination 3-Step Brow & Lash Lamination Kit offers all three essential steps—Lifting Cream, Neutralizing Cream, and Hydrating Serum—in one high-quality set, making it one of the most reliable 3-step lamination kit options available.

3-step MyLamination lash lamination kit with lifting , neutralizing and hydrating serum

The Role of Nourishing Serums

Nourishing serums play a crucial role in maintaining lash health post-lamination. These serums are enriched with vitamins and minerals that feed and strengthen the lashes. By using a nourishing serum, you not only enhance the immediate results but also promote long-term lash health, ensuring they remain strong and less prone to breakage.

Safety Precautions During the Procedure

Safety is paramount during any beauty treatment. During lash lamination, professionals take several precautions to protect the delicate eye area. Protective pads are placed under the eyes to catch any stray solution, and only high-quality, gentle products are used. These measures ensure that the process is as safe as it is effective.

Benefits of Lash Lamination

Lash lamination offers a wide range of benefits that make it an attractive option for anyone who prefers natural, long-lasting results without the hassle of extensions. Here are some of the key advantages:

Natural Enhancement

One of the major benefits of lash lamination is its ability to enhance your natural lashes without adding synthetic fibers. The treatment lifts what you already have, creating a natural lash enhancement that looks refined and effortless.

Subtlety and Sophistication

Lash lamination provides a subtle yet sophisticated result. The lashes appear longer, smoother.

Emphasizing Natural Features

By lifting and curling the lashes upward, the eyes appear more open and expressive.

Low Maintenance

Because the results last for weeks, you won’t need daily upkeep. Using a quality lash lamination kit, especially a 3-step lamination kit, keeps your lashes looking lifted and polished with minimal effort.

Time-Saving Benefits

Laminated lashes save you time every morning. With a long-lasting lift, there’s no need for mascara or curlers — perfect for anyone looking for the best lash lamination product that keeps their routine quick and effortless.

Safe and Gentle

When performed with high-quality, professional formulations, lash lamination remains safe and gentle—protecting delicate natural lashes. Premium formulations protect the delicate eye area, minimize irritation, and keep the natural lashes strong and flexible—making the treatment suitable even for sensitive eyes.

Why Professional Lash Lamination Matters?

Professional application plays a crucial role in achieving safe, consistent, and high-quality lash lamination results. Trained lash technicians understand lash structure, processing times, and product behavior—reducing risks and ensuring the treatment enhances natural lashes without causing irritation or damage.

How to Choose Safe, High-Quality Lash Lamination Products?

high-quality lash lamination products and lash lift kits

Choosing the right products is essential whether you're offering lash lamination services or planning to perform the treatment at home. The following criteria help ensure safety, reliability, and consistent performance. Here are some tips to help you make the best choice:

  • Choose reputable brands
    Always choose lash lamination brands that are trusted worldwide for safe, gentle, and consistent results. Well-known professional brands include MyLamination, Shinee, and Dolly’s Lash — each recognized for reliable formulations used by lash artists globally. Winlash is the exclusive distributor of MyLamination in Emirates, ensuring authentic, certified products for professionals.
  • Check brand reputation & reviews
    Pick lamination products with gentle, nourishing ingredients and cruelty-free formulas that protect the natural lashes without harsh chemicals.
  • Review product ingredients
    Choose formulations with gentle, nourishing ingredients that protect the natural lashes and avoid unnecessary harsh chemicals.
  • Verify certifications
    Always choose products from certified, reputable retailers. Checking a store’s trust and credibility standards helps ensure the products meet cosmetic safety requirements and are professionally tested for safe use around the eyes.

Conclusion: Why Lash Lamination Is Worth It

Lash lamination has become a global favorite for enhancing natural lashes with minimal effort. Its long-lasting curl, subtle volume, and eye-opening effect—without extensions or daily mascara—make it one of the most practical beauty treatments available.
As the industry evolves, using the best lash lamination product ensures even safer, longer-lasting, and more impressive results. Whether you're a beauty professional or someone trying it for the first time, choosing the right lash lamination solution and following proper techniques guarantees naturally lifted lashes you’ll love.

Frequently Asked Questions About Lash Lamination

Is lash lamination safe for sensitive eyes?

Yes. When performed by a trained professional using high-quality formulations, lash lamination is safe even for sensitive eyes. Gentle, nourishing ingredients prevent irritation and protect the natural lashes. If you have sensitivities, always request a patch test beforehand.

Does lash lamination help save time in my morning routine?

Absolutely. Laminated lashes stay curled and defined for weeks, eliminating the need for mascara or a lash curler. It’s ideal for anyone searching for a “time-saving lash routine for busy mornings.”

Do I still need mascara after lash lamination?

No. Lash lamination gives a lifted and polished look without mascara. Many people choose the treatment specifically for a “no-mascara-needed lash lift” effect. You can still add mascara if you want extra drama—but it’s optional.

Is lash lamination good for gym-goers and swimmers?

Yes. Laminated lashes remain curled even through sweat, workouts, and humidity. This makes the treatment a great fit for active lifestyles, especially for people asking about “lash lamination for gym-goers and swimmers.”

How long does lash lamination last?

Typically 6–8 weeks, depending on your natural lash growth cycle. Proper aftercare—like avoiding oils and rubbing your eyes—helps maintain the lift even longer.

How can I make my lash lamination last longer?

To prolong your results, avoid oil-based products, don’t rub your eyes, and use a gentle lash-safe cleanser. These steps directly answer the search intent behind “how to make lash lamination last longer.”

Does lash lamination make eyes look bigger?

Yes. By lifting the lashes upward, the eyes appear more open and expressive. This aligns with popular searches like “laminated lashes for bigger-looking eyes.”

Winlash Dubai equips lash & brow professionals and dedicated at-home users with 900+ pro-grade products—including award-winning My Lamination lash lift kits and cruelty-free options. Backed by Ravabeauty (est. 2018) and a 50-member expert team, we partner with 13 global brands to deliver salon-quality tools and aftercare tuned for Dubai’s climate, with fast delivery across Dubai, Abu Dhabi, and Sharjah.

Exclusive Distributor Fast UAE Delivery Climate-Tuned Aftercare