
RSS

Blog

Lash Lift at Home vs Professional: Pros, Cons Safety
Quick Access to Article Sections
  1. What Is a Lash Lift?
  2. Lash Lift vs Lash Extensions: Key Differences
  3. Lash Lamination vs Lash Lift: Are They the Same?
  4. Lash Lift at Home: The DIY Revolution
  5. Professional Lash Lift: Salon Expertise
  6. Lash Lift at Home vs Professional: Pros and Cons Compared
  7. Which to Choose? Your Decision Guide
  8. FAQs: Common Lash Lift Questions
  9. Conclusion

A lash lift at home vs professional decision starts with understanding what a lash lift actually is: a semi-permanent treatment that curls and lifts your natural lashes for a wide-eyed, effortless look — no falsies or lash curler required. But should you try it at home with a DIY kit, or book a professional session? In this guide, we compare the real pros, cons, and safety considerations of each option, including product recommendations from Winlash's lash and brow lift kits, so you can decide which suits you best.

What Is a Lash Lift?

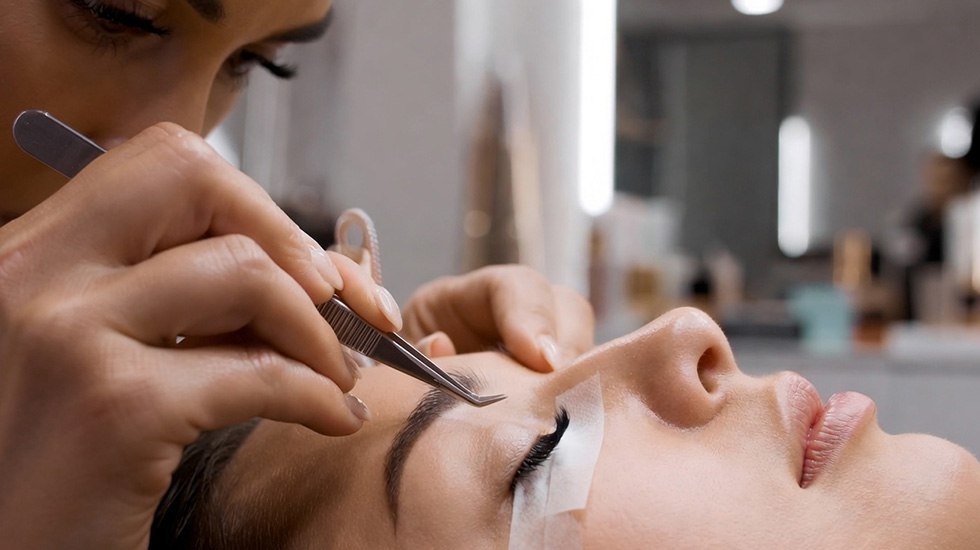
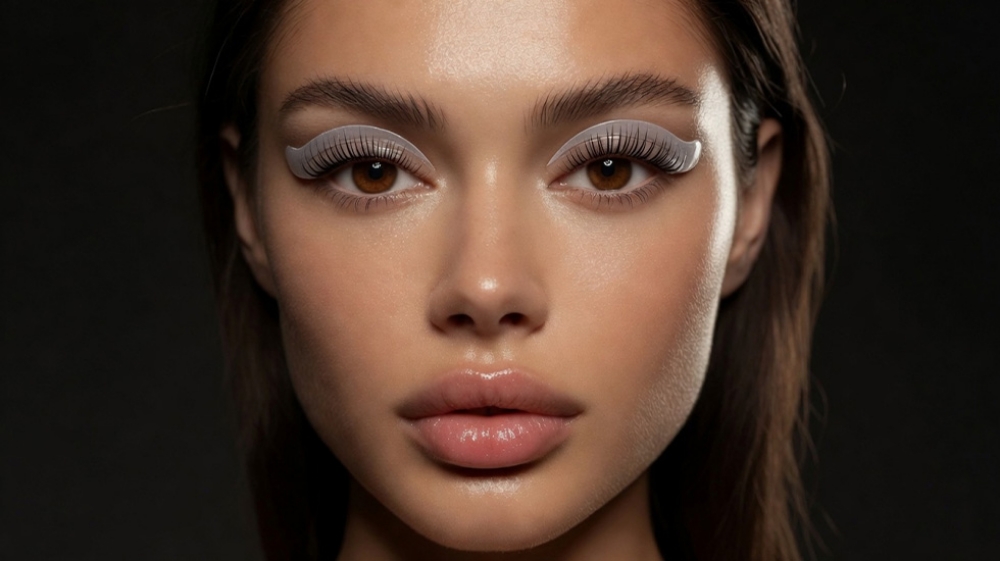
What Is a Lash Lift? Natural Eyelash Curling & Lifting Process Explained

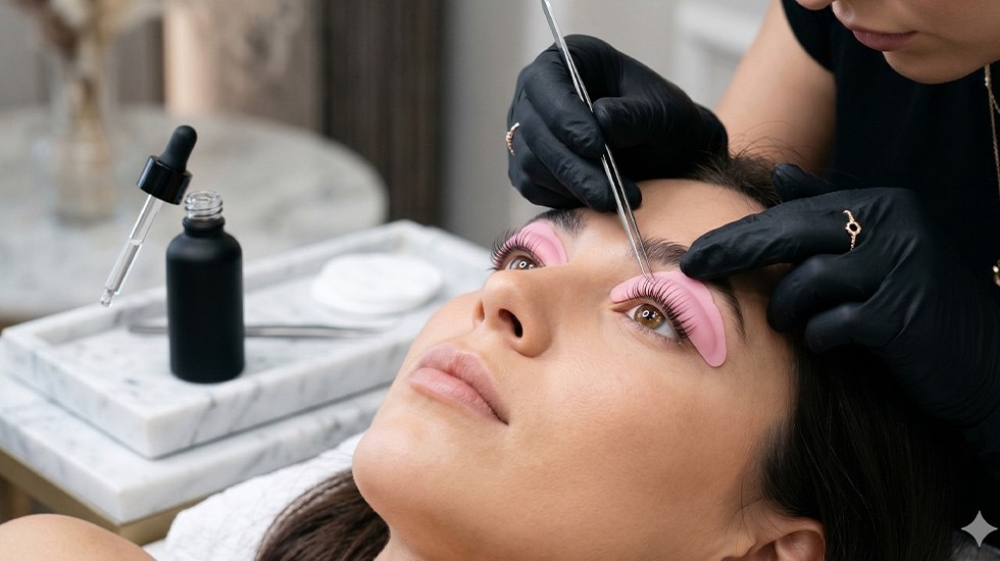
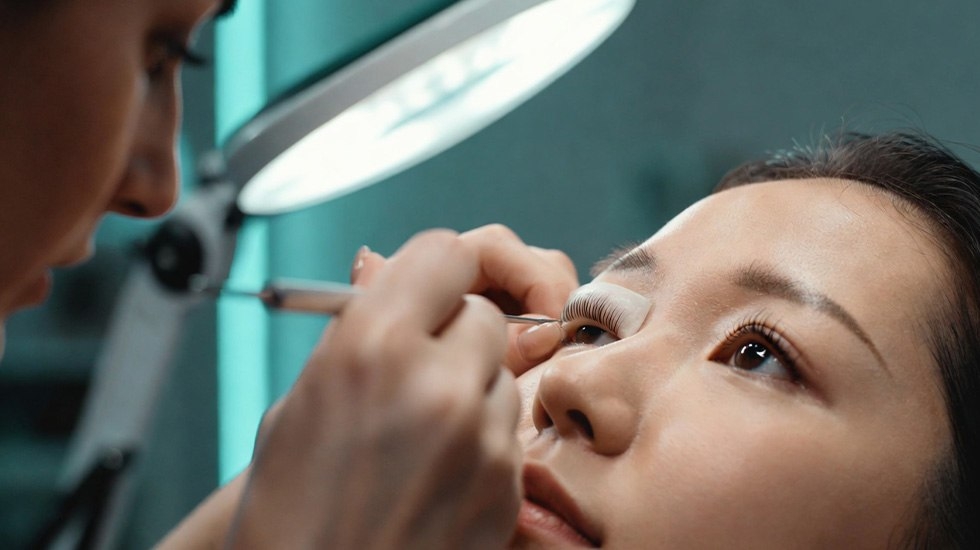
A lash lift works like a perm for your eyelashes. A silicone rod or shield is placed against your eyelid, and your natural lashes are curled up and over it. A lifting solution is then applied to soften the lash structure so it can be reshaped, followed by a setting (neutralizing) solution that locks the new curl in place. Many kits and salon treatments finish with a nourishing serum — often containing keratin or collagen — to condition the lashes after the chemical process.

Unlike eyelash extensions, which add synthetic fibers for extra length and volume, a lash lift enhances the lashes you already have. This makes it a lower-maintenance option for people who want a natural, wide-eyed look without daily curling or the upkeep that extensions require. A full session — whether at home or in a salon — typically takes 45 to 60 minutes, and results usually last 6–8 weeks, depending on your natural lash growth cycle and how you care for your lashes afterward (for example, avoiding oil-based products, which can loosen the curl faster).

Because the process involves chemical solutions used close to the eyes, it's worth understanding exactly what's involved before deciding whether to try it yourself or book a professional — which is exactly what we'll break down in the rest of this guide.

Lash Lift vs Lash Extensions: Key Differences

The main difference between a lash lift and lash extensions comes down to one question: are you enhancing your natural lashes, or adding to them? A lash lift curls and lifts the lashes you already have — no added length, no synthetic fibers. Lash extensions, on the other hand, attach individual synthetic or silk fibers to each natural lash for extra length, volume, and drama.

This difference affects upkeep as much as it affects the look. Extensions typically need fill appointments every 2–3 weeks as your natural lashes shed and grow, and the added weight can, over time, contribute to lash breakage if they aren't applied or removed correctly. A lash lift needs no fills — it simply grows out with your natural lash cycle over 6–8 weeks, with no daily maintenance in between.

Neither option is objectively "better" — they suit different goals. If you want dramatic length and volume, extensions deliver that in a way a lift can't. If you want a natural, low-maintenance lift to your existing lashes — especially with tinting added for extra definition — a lash lift is usually the simpler, lower-commitment choice.

Lash Lamination vs Lash Lift: Are They the Same?

"Lash lamination" and "lash lift" are often used interchangeably, and in most kits and salons, they refer to the same core process — curling and setting the natural lashes. Some brands use "lamination" to describe a slightly more complete treatment that includes an extra sealing or glossing step for a smoother, shinier finish, sometimes paired with a brow lift as a combined treatment. In practice, the difference is mostly in branding rather than the underlying technique.

This has led to a wider range of combined kits on the market, including options that pair lash lifting with brow lifting in a single brow lift kit. Winlash's My Lamination 3-step kits, for example, include lifting cream, neutralizing cream, and a hydrating serum in pre-measured sachets, designed to be used for both lash and brow treatments.

Whichever term a product uses, the questions worth asking before buying are the same: what ingredients does it contain, is it formulated for sensitive eyes, and does it include clear timing instructions? Those details matter more than whether a kit is labeled "lift" or "lamination."

Lash Lift at Home: The DIY Revolution

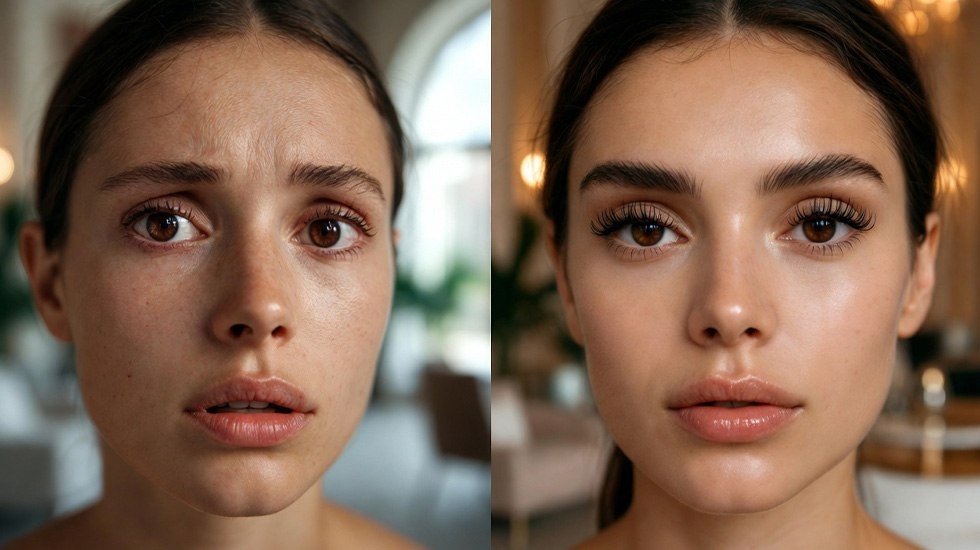
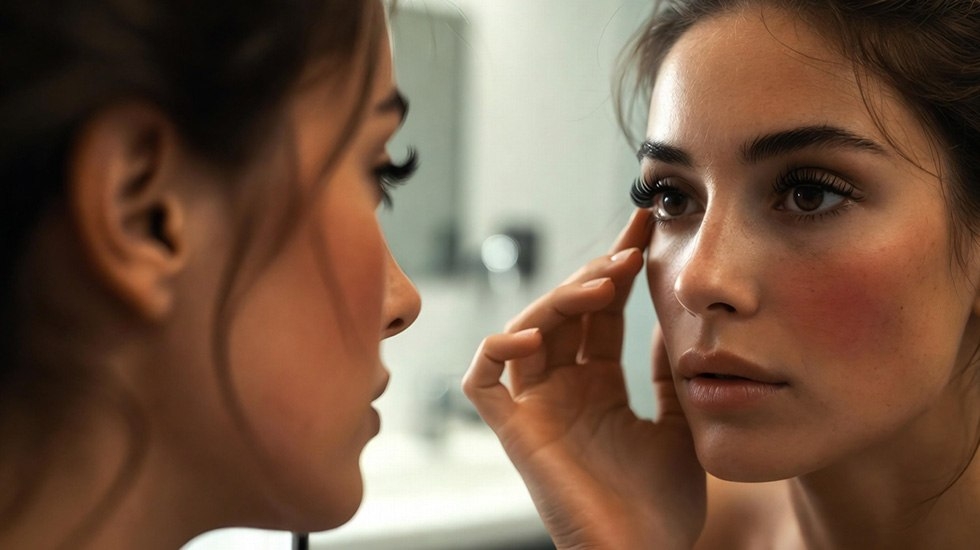
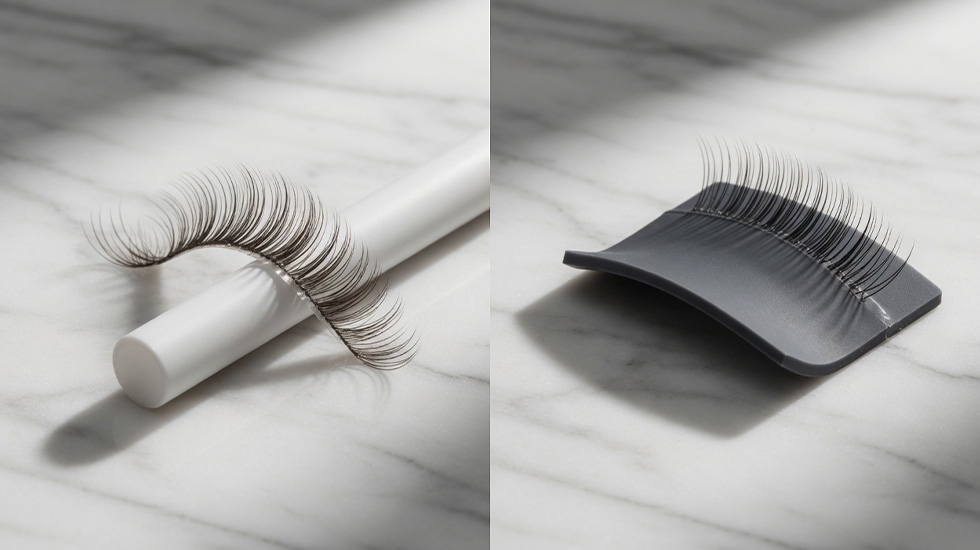
How to Do a Lash Lift at Home | Complete DIY Process Using My Lamination Kit

The appeal of a lash lift at home is simple: no appointment, no travel, and a kit you can reuse multiple times for a fraction of the cost of repeated salon visits. It's a legitimate option for people comfortable following instructions carefully — but it does require more attention to detail than the "apply and wait" marketing often suggests.

How It Works: Step-by-Step Guide to a DIY Lash Lift

Start by cleansing your lashes thoroughly to remove oil and makeup residue, then do a patch test 24–48 hours beforehand to check for any allergic reaction. Once you're ready, here's the general process most kits follow:

  1. Apply the shield and adhesive: Use a water-soluble lash lift adhesive, like Winlash's My Lamination version, to secure the silicone lash pad to your eyelid. Pads come in different sizes — smaller for a more dramatic curl, larger for a subtler lift.
  2. Lifting step: Brush on the lifting cream (Step 1). Leave it on for the time stated on the packaging — usually 6–12 minutes depending on lash thickness. This softens the lash structure so it can be reshaped.
  3. Neutralizing step: Apply the neutralizing cream (Step 2) to lock in the curl, typically for 5–10 minutes.
  4. Hydrate and finish: End with a hydrating serum (Step 3) to condition the lashes after the chemical process.

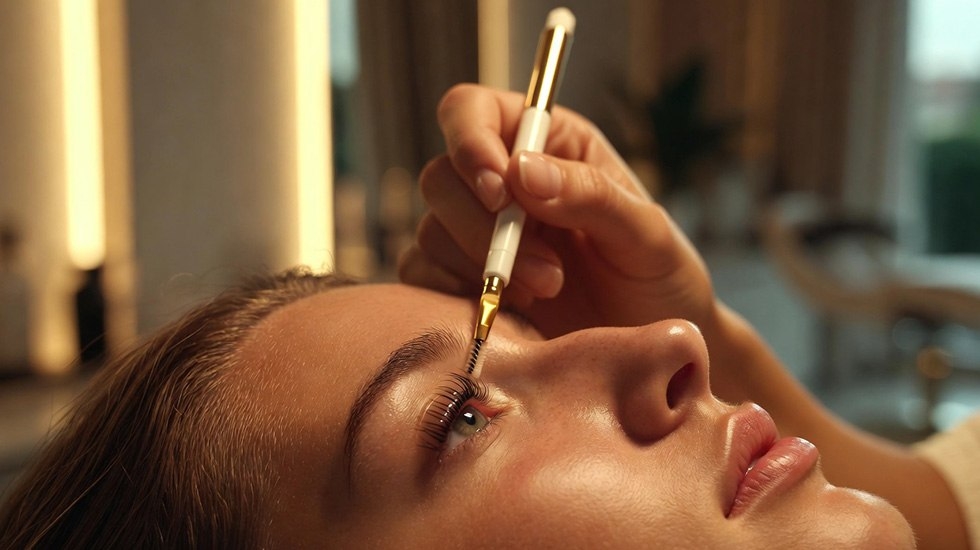
The full process takes about 45–60 minutes. A dual-ended lash brush, like the My Lamination Eyelash & Eyebrow Lift Brush, makes it easier to keep lashes evenly separated and placed on the pad throughout.

Safety First: The Real Risks of a Lash Lift at Home

Lash lift solutions are strong enough to reshape hair structure, which means timing and placement genuinely matter. Leaving the lifting or neutralizing solution on for too long — or applying it too close to the skin — is the most common cause of problems, and can lead to:

  • Eye or eyelid irritation, especially if solution seeps under the pad or touches the skin.
  • Over-processed, brittle, or "singed" lashes, which can look frizzy or break more easily afterward.
  • Uneven curls if the pad size or solution timing doesn't suit your lash type.

To reduce these risks: always do a patch test first, follow the exact timings on the packaging rather than guessing, and choose a gentle, cruelty-free formula suited to sensitive eyes — Winlash's My Lamination range, made in Italy, is formulated with this in mind. If you experience redness, stinging, or swelling, rinse the area immediately with water and, if it persists, see a doctor or ophthalmologist rather than a beauty professional.

Best Lash Lift Kit for Home Use

For a reliable at-home option, Winlash's My Lamination 3-Step Lash & Brow Lift Kit is a solid choice: pre-measured sachets remove the guesswork of mixing solutions, and the formula is designed to nourish lashes through the process rather than just curl them. Pair it with silicone lash pads in a size suited to your lash length for a more customized curl.

DIY lash lifts can absolutely work well — but success depends far more on following instructions precisely than on any single product. If you're trying it for the first time, read through the full process once before you start, and don't rush the timing steps.

Professional Lash Lift: Salon Expertise

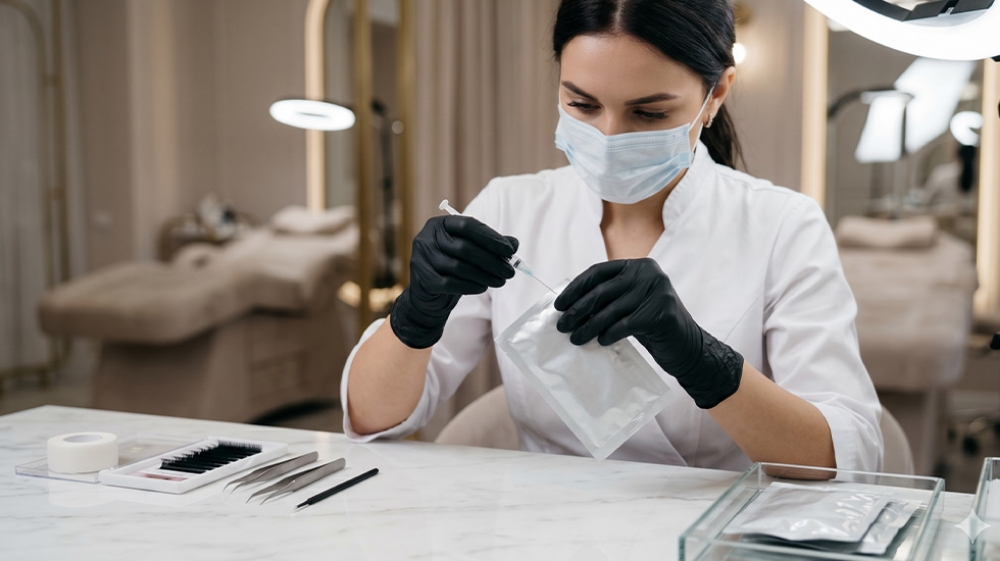
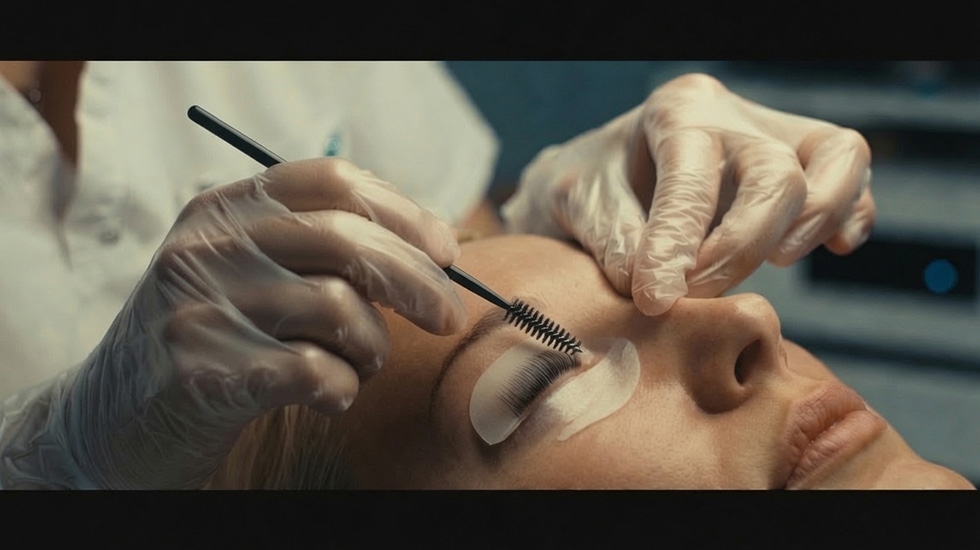
Professional Lash Lift vs DIY: Salon Results You Can Trust

A professional lash lift means having a trained technician handle the timing, product selection, and application for you. This matters more than it might seem: the biggest risks with lash lifts — over-processing, uneven curls, or solution touching the skin — are almost entirely a matter of technique and timing, which is exactly what a trained technician is practiced at controlling.

What to Expect in a Salon Session

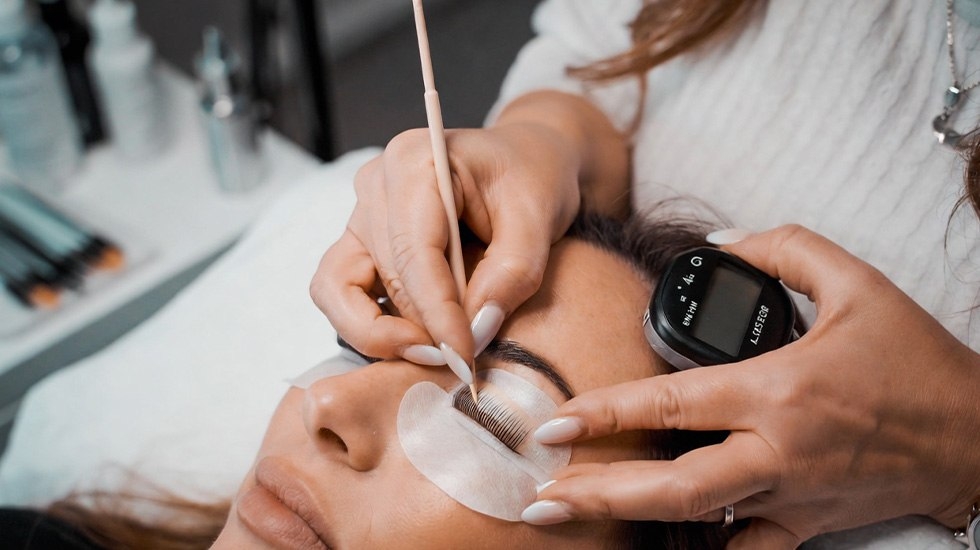
A typical session lasts 30–45 minutes. The technician will look at your lash length, thickness, and natural direction to choose the right silicone rod size, then apply the lifting and neutralizing solutions with more precise control than most people can manage on their own eyes. Many salons use professional-grade products, such as Winlash's My Lamination Lash & Brow Lift Tubes, and can add tinting in the same session for a darker, more defined finish.

What You're Really Paying For

Professional lash lift sessions typically cost more per visit than a reusable DIY kit — but that price reflects a few real advantages: a technician trained to judge timing by eye rather than a fixed clock, sanitized tools, and someone watching for early signs of irritation before they become a problem. For people with sensitive eyes, a history of allergic reactions, or simply no confidence applying products near their own eyes, this extra care is often worth the cost.

Finding a Salon in the UAE

When choosing a salon in Dubai or Abu Dhabi, look for technicians who are certified in lash lift application specifically (not just lash extensions) and who can tell you exactly which products and brands they use. A salon willing to answer questions about their process and ingredients — rather than just booking you in — is usually a good sign.

Lash Lift at Home vs Professional: Pros and Cons Compared

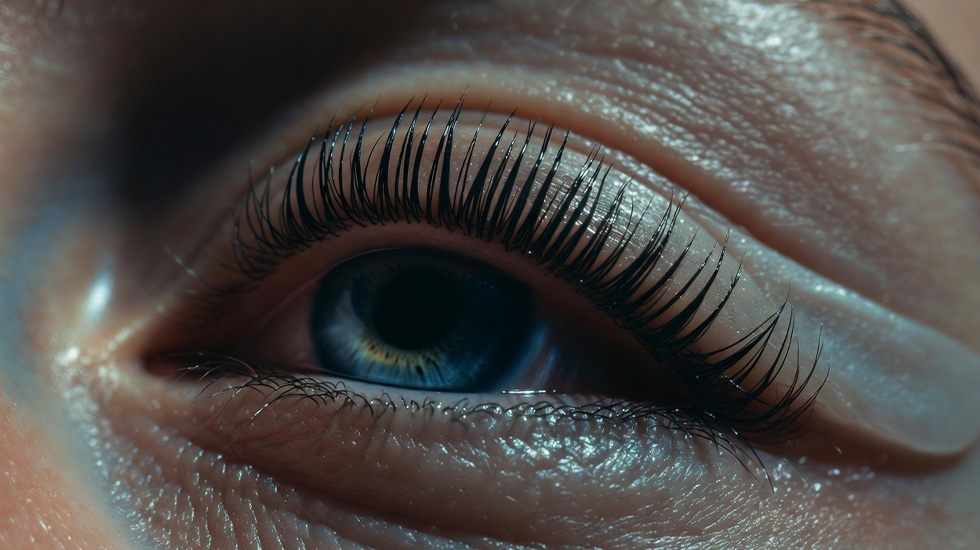
Lash Lift at Home vs Professional: Which is Safer and More Convenient?

Here's a side-by-side breakdown of how the two options actually compare, based on cost, convenience, results, and safety.

AspectLash Lift at HomeProfessional Lash Lift
CostPros: One kit covers multiple uses, so cost per treatment drops over time. Cons: Some product may go to waste while you learn correct timing.Pros: No upfront kit cost or storage needed. Cons: Higher price per session, and it adds up if done every 6–8 weeks.
ConveniencePros: Do it whenever suits you, no appointment needed. Cons: Takes 45–60 minutes and requires practice to get comfortable.Pros: Faster session (30–45 minutes), no learning curve for you. Cons: Requires booking and travel to a salon.
ResultsPros: You control pad size and can adjust to your own lash shape. Cons: Higher chance of uneven curls or a shorter-lasting lift if timing isn't precise.Pros: More consistent, even results from someone experienced. Cons: Less hands-on control over the exact curl style.
SafetyPros: You can stop or rinse off immediately if something feels wrong. Cons: Higher risk of over-processing, skin contact, or uneven timing without trained judgment.Pros: A trained technician monitors timing and reactions throughout. Cons: Results still depend on the technician's skill and hygiene standards.

If you're confident following instructions closely, comfortable with a learning curve, and want to save money over repeat treatments, home is a reasonable choice. If you have sensitive eyes, a history of reactions, or simply want the most consistent result with the least personal risk, professional is the safer bet.

Which to Choose? Your Decision Guide

Choosing the Best Lash Lift Option: DIY vs Professional in UAE

Choosing between a lash lift at home and a professional session mostly comes down to three things: your budget, your comfort level with the process, and your eyes' sensitivity.

Key Factors to Consider

  • Budget: If you'd rather pay once for a kit you can reuse, home is more cost-effective over time. If you'd rather pay per session with no upfront cost, professional works better.
  • Experience: First-timers who are nervous about timing or application are usually better off starting with a professional session, then considering DIY once they know what a correctly-done lift should look and feel like.
  • Eye sensitivity: If you have sensitive eyes, allergies, or have reacted to beauty products before, a professional setting — where someone is watching for early signs of irritation — is the lower-risk choice.

Our Recommendations

  • Best for home use: Winlash's My Lamination 3-Step Kit — pre-measured sachets take the guesswork out of timing, and the formula is gentle enough for first-time use with a careful patch test.
  • Best for professional treatment: A certified salon using Winlash's professional-grade lift and lamination products, ideally one that also offers tinting in the same session.

There's no universally "better" choice — only the one that fits your comfort level and your eyes' needs. If in doubt, start with a professional session.

FAQs: Common Lash Lift Questions

Is it safe to do a lash lift at home?

Yes, if you follow the instructions and timings exactly and always do a patch test 24–48 hours beforehand. Most problems happen from leaving the solution on too long, not from the product itself.

How long does a lash lift last?

Typically 6–8 weeks, whether done at home or professionally, depending on your natural lash growth cycle and how you care for your lashes afterward.

Is lash lamination the same as lash lift?

In most products, yes — the terms are used interchangeably for the same curling and setting process. Some brands use "lamination" for a version with an added sealing step.

Lash lift vs extensions — which should I get?

A lash lift enhances your natural lashes with no added length; extensions add synthetic fibers for extra length and volume. Choose a lift for low-maintenance, natural results, or extensions if you want more dramatic length.

Is a lash lift safe for sensitive eyes?

It can be, with a gentle, cruelty-free formula and a careful patch test — but if you have a history of eye irritation or allergies, a professional session is the lower-risk option.

What are the risks of a lash lift at home?

The main risks are eye or eyelid irritation, over-processed or brittle lashes, and uneven curls — almost always caused by incorrect timing or the solution touching the skin.

Conclusion

Whether you choose a lash lift at home or a professional lash lift, the treatment itself is the same — curled, lifted lashes without extensions or daily mascara. The right choice for you depends on your budget, your comfort with the process, and how your eyes tend to react to beauty products. Explore Winlash's full range of lash and brow lift products to find the right kit for your routine.

What Is Eyelash Extension Glue? Types, Chemistry & Pro Guide
Quick Access Table of Contents
  1. What Is Eyelash Extension Glue?
  2. The Chemistry & Active Ingredients: How Polymerization Works
  3. Types of Eyelash Extension Glues (Speed & Viscosity Matrix)
  4. Humidity & Temperature Control: Preventing Shock Polymerization
  5. Safety Protocols: Allergic Reactions vs. Chemical Irritation
  6. Lash Extension Glue vs. Regular & Strip Adhesives
  7. Proper Storage & Shelf-Life Management
  8. Safe Removal Techniques for Cyanoacrylate Bonds
  9. Frequently Asked Questions
  10. Conclusion & Professional Recommendations

Quick Summary: Eyelash extension glue is a specialized, medical-grade cyanoacrylate liquid adhesive formulated exclusively for certified lash technicians to attach synthetic lashes to natural eyelashes. Unlike consumer strip-lash adhesives, professional formulas available in certified eyelash extension glue and liquids collections polymerize rapidly through ambient moisture to form an insoluble, flexible bond lasting 4 to 8 weeks.

What Is Eyelash Extension Glue?

What Is Eyelash Extension Glue | Definition and Role of Professional Semi-Permanent Lash Adhesive

Eyelash extension glue—often termed semi-permanent lash adhesive—is an engineered bonding agent designed specifically to attach synthetic fibers (PBT) onto individual natural eyelashes. Unlike cosmetic strip adhesives that dry via water evaporation and wash off daily, extension adhesives create a resilient, waterproof bond that withstands natural lash shedding cycles, sebum secretion, and daily cleansing.

Because the adhesive is applied within 0.5mm to 1mm of the ocular margin, its formulation must balance high tensile strength, rapid setting speeds, and biocompatibility. In professional salon workflows, selecting the correct adhesive formula directly determines lash retention, client safety, and procedural speed.

The Chemistry & Active Ingredients: How Polymerization Works

Eyelash extension glue does not "dry" through air exposure; it cures through polymerization. Cyanoacrylate monomers remain in a stable liquid state inside an airtight container due to acidic stabilizers. Once a micro-drop is exposed to air, airborne moisture (hydroxyl ions, OH-) neutralizes the acid stabilizer, triggering a chain reaction that transforms liquid monomers into solid polymer chains within seconds.

Modern lash adhesives contain 90% to 95% cyanoacrylate, combined with targeted additives that refine performance:

  • Cyanoacrylate Base: Provides instantaneous bonding and structural retention.
  • Polymethyl Methacrylate (PMMA): An acrylic resin thickener that controls viscosity, adds elasticity, and prevents the cured bond from snapping under mechanical stress.
  • Hydroquinone / Acid Stabilizers: Preserves shelf stability by preventing premature polymerization inside the bottle.
  • Carbon Black (CI 77266) or D&C Black No. 2: High-purity cosmetic pigment that creates a deep black finish, blending extensions seamlessly along the lash line. Clear glues omit this pigment entirely.

Comparing Cyanoacrylate Formulations

Different chemical variations of cyanoacrylate are utilized depending on client sensitivity and required setting speeds:

TypeDrying SpeedFume LevelRetention PowerPrimary Use Case
Ethyl Cyanoacrylate0.5 – 2.0 secModerate to High6 – 8 WeeksIndustry standard; maximum retention for non-sensitive clients.
Butyl Cyanoacrylate2.0 – 4.0 secVery Low3 – 5 WeeksFormulated for medical devices and sensitive eyes prone to irritation.
Alkoxy-2-Cyanoacrylate1.0 – 2.0 secNear Zero4 – 6 WeeksHigh-grade hypoallergenic hybrid formula; minimal odor with pro speed.

Types of Eyelash Extension Glues (Speed & Viscosity Matrix)

Adhesives are categorized primarily by setting speed and liquid viscosity to match distinct lash artistry techniques:

  • Fast-Setting Adhesives (0.5 – 1.0s): Ultra-thin viscosity formulas designed for master technicians and volume fanning. They lock handmade volume fans open instantly before the adhesive can wick up the lash shaft.
  • Intermediate Adhesives (1.0 – 2.0s): Medium-thin viscosity providing a balanced curing window, making them versatile for classic 1-to-1 applications and hybrid sets.
  • Sensitive & Beginner Adhesives (2.0 – 4.0s): Thicker viscosity with slower setting times, allowing new artists sufficient time to isolate, place, and adjust extension alignment without premature drying.
  • Clear / Transparent Adhesives: Carbon-black-free formulas essential for colored lash sets, glitter accents, or clients exhibiting specific sensitivity to carbon pigments.

For an in-depth breakdown of formulations tailored to each technique, explore our comprehensive guide to professional lash extension glues.

Humidity & Temperature Control: Preventing Shock Polymerization

Humidity & Temperature Control | How Climate Affects Cyanoacrylate Curing and Lash Retention

Because cyanoacrylate cures via airborne moisture, environmental factors dictate adhesive performance. Deviating from the manufacturer's recommended parameters creates severe retention failures:

  • Low Humidity (<40% RH): Curing slows down drastically. Extensions slide or lean upon placement, and lingering uncured fumes increase ocular irritation and client sensitivity.
  • High Humidity (>70% RH): Triggers Shock Polymerization (Blooming). The outer shell of the adhesive drop hardens almost instantly before bonding to the natural lash cuticle, leaving a chalky white residue and creating a brittle, glass-like bond that snaps off within days.

Environmental Operating Guidelines

Humidity RangeTarget Room TempAdhesive BehaviorDrop Refresh Rate
Low (< 40%)19°C – 22°CSlow curing, risk of stickies & fumesEvery 25–30 minutes
Optimal (45% – 60%)20°C – 24°CRated drying speed, flexible durable bondEvery 15–20 minutes
Extreme (> 65%)20°C – 22°CShock curing, blooming, weak brittle attachmentEvery 10–12 minutes

In high-humidity climates (such as coastal areas or GCC regions like Dubai), maintaining climate stability requires precision hygrometers, dehumidifiers, and switching to slightly slower-curing adhesives (1.5s–2s) to counteract atmospheric acceleration.

Safety Protocols: Allergic Reactions vs. Chemical Irritation

Distinguishing between chemical irritation and a true allergy is vital for client safety:

  • Chemical Irritation / Fume Burn: Occurs when cyanoacrylate fumes come in contact with the moist cornea during the set (often caused by incomplete eyelid closure or micro-gapping). Symptoms appear immediately as bloodshot eyes (scleral redness) without eyelid swelling and typically dissipate within 24 hours.
  • Allergic Contact Dermatitis: A true immune response to cyanoacrylate vapor exposure. Symptoms emerge 24 to 72 hours post-application and include swollen, red, itchy eyelids, flaking skin, and fluid discharge. Once a client develops a true allergy, patch tests and sensitive glues will rarely prevent recurrence; extensions should be removed immediately.

Pro Safety Checklist

  1. Never Apply Directly to Skin: Always maintain an isolation gap of 0.5mm–1.0mm from the lash follicle.
  2. Ensure Complete Eye Seal: Position hydrogel eyepads properly to ensure the client's upper and lower eyelids remain completely sealed throughout the application.
  3. Use Chemical Bonders: Applying a professional curing bonder post-application instantly seals cyanoacrylate fumes, eliminating the old "24-hour no-water" rule and reducing fume exposure by up to 80%.

Lash Extension Glue vs. Regular & Strip Adhesives

Lash Extension Glue vs Strip and Industrial Adhesives | Why Only Professional Cyanoacrylate Is Safe for Eyes

There is a critical technical distinction between professional extension glue and consumer lash adhesives:

FeatureProfessional Extension GlueStrip / Cluster DIY GlueIndustrial Superglue
Chemical BaseRefined Cosmetic CyanoacrylateRubber Latex / Acrylates CopolymerUnrefined Methyl/Ethyl Cyanoacrylate
Bond Longevity4 to 8 Weeks12 to 24 HoursPermanent (High Risk)
Ocular SafetySafe when used by certified prosSafe for self-application on eyelid skinEXTREMELY DANGEROUS (Severe chemical burns)

Safety Warning: Industrial household adhesives or DIY substitutes should NEVER be applied to eyes. Only certified professionals utilizing cosmetic-grade cyanoacrylate should execute individual semi-permanent lash extensions.

Proper Storage & Shelf-Life Management

Because cyanoacrylate is exceptionally reactive to ambient humidity, proper storage directly preserves retention strength and prevents viscosity degradation:

  • Unopened Bottles: Store in a cool, dark environment between 15°C and 20°C with humidity below 45%. Unopened bottles remain viable for 6 to 9 months from manufacture date.
  • Opened Bottles: Once opened, store upright inside an airtight vacuum container containing active silica gel packets or dry uncooked rice. Opened bottles must be replaced every 4 to 6 weeks.
  • No Refrigeration After Opening: Never store opened adhesive in a refrigerator. Temperature fluctuations cause internal condensation inside the nozzle, initiating immediate shock polymerization inside the bottle.
  • Burping the Bottle: After dispensing a drop, hold the bottle upright, gently squeeze to expel trapped air, and wipe the nozzle with a lint-free nozzle wipe before tightly recapping.

Safe Removal Techniques for Cyanoacrylate Bonds

Safe Removal of Eyelash Extension Glue | Chemical Dissolution Methods That Protect Natural Lashes

Never attempt to pull, pick, or mechanically peel extensions from natural lashes. This causes severe traction alopecia and follicle damage.

Cyanoacrylate bonds require chemical dissolution using solvent-based removers containing gamma-butyrolactone (GBL-free alternatives), propylene carbonate, or plant-derived lipid esters:

  • Cream Removers: Dense, non-drip viscosity ideal for full-set removals. The thick texture stays securely in place without running into the client's eyes, using professional salon formulas such as Sky Creamy Lash Remover or micro-emulsion options like IB Nano Creamy Remover.
  • Gel Removers: Medium viscosity formulated for targeted, precise removal of outgrown individual lashes during infill appointments (such as fast-acting Sky Gel Lash Remover).

Frequently Asked Questions

What is the primary active ingredient in eyelash extension glue?

The primary active component is cyanoacrylate (accounting for 90-95% of the formula), a fast-curing medical-grade acrylic resin that polymerizes upon contact with ambient moisture.

Why does lash glue turn white or dry brittle in high humidity?

This phenomenon is known as shock polymerization (blooming). When humidity exceeds 65-70%, the adhesive cures too rapidly, trapping moisture and weakening the molecular bond, leaving a chalky white residue.

Can regular superglue or strip lash glue be used for eyelash extensions?

No. Industrial superglue releases toxic fumes causing chemical ocular burns, while strip lash glue lacks the structural tensile strength needed for individual isolation and semi-permanent bonding.

What is the difference between an allergic reaction and chemical irritation from lash glue?

Chemical irritation occurs immediately from cyanoacrylate fumes and resolves within 24 hours. A true allergic reaction develops over 24-72 hours, resulting in swollen, itchy eyelids caused by immune sensitization to cyanoacrylate vapors.

Conclusion & Professional Recommendations

Professional Recommendations for Eyelash Extension Glue | Achieving 6–8 Week Retention with Safe Practices

Mastering eyelash extension glue requires a clear understanding of cyanoacrylate chemistry, environmental control, and safety protocols. By closely monitoring room temperature and humidity, selecting the appropriate drying speed for your skill level, and strictly adhering to chemical safety standards, lash artists can consistently achieve 6 to 8 weeks of clean retention while safeguarding natural lash integrity.

For certified professionals seeking precision-tested adhesives formulated for challenging climates, explore the full line of professional products at Winlash.

The Ultimate Lash Lift Guide: Process, Aftercare & Pro Tips
Quick Navigation: The Complete Lash Lift Guide
  1. What is a Lash Lift? (Definition & Quick Overview)
  2. The Science Behind Lash Lifting
  3. Lash Lift vs. Lash Perm: Key Differences
  4. Top Benefits of Getting a Lash Lift
  5. Essential Aftercare & Maintenance (Humidity & Climate Tips)
  6. How to Choose the Best Lash Lift Kit in the UAE
  7. Lash Lift Services in Dubai & Abu Dhabi
  8. Frequently Asked Questions (FAQs)
  9. Conclusion & Pro Recommendations

A lash lift is a professional semi-permanent cosmetic treatment designed to elevate, curl, and define your natural eyelashes from the root, providing an open-eye effect that lasts 6 to 8 weeks. Performed using specialized lash & brow lift products, this treatment gently reshapes the hair structure to maximize length and volume without the need for artificial extensions or daily mascara application.

Unlike traditional extensions that adhere synthetic fibers to delicate hair, a lash lift works exclusively with your existing lashes. By utilizing precision-molded silicone shields, technicians lift each lash upward from the base, delivering a natural, polished curl that stands up even to the high humidity levels typical of the UAE climate.

The Science & Chemistry Behind Lash Lifting

The Science & Chemistry Behind Lash Lifting | How Disulphide Bonds Are Safely Reshaped

Eyelashes are composed primarily of keratin, a fibrous protein held together by internal structural links called disulphide bonds. These natural bonds dictate whether lashes grow straight, downward, or with a natural curve.

A professional lash lift works through a controlled biochemical process executed in three distinct stages:

  • Bond Reduction: A lifting solution (typically formulated with gentle cysteamine or refined thioglycolate salts) opens the outer hair cuticles and temporarily softens disulphide bonds, making lashes flexible and moldable.
  • Structural Alignment: Lashes are combed and aligned flush against a curved silicone shield to set their new upward trajectory directly from the root.
  • Bond Neutralization & Hydration: A stabilizing neutralizer reforms the disulphide bonds in their new lifted position. Premium salon formulations concurrently infuse peptides, keratin, and panthenol to lock in moisture and preserve lash cuticle integrity.

Lash Lift vs. Lash Perm: Key Differences Explained

While often confused, a lash lift and a traditional lash perm represent two fundamentally different generations of lash enhancement. The differences lie in the tools, the chemical formulas, and the resulting aesthetic.

Application Method & Tools

Traditional eyelash perms use small cylindrical rods that wrap lashes backward in a circular loop, which can cause the tips to curl into the eyelid or appear unnaturally crimped. In contrast, modern lash lifts employ anatomical silicone shields that lift lashes straight upward from the base, delivering maximum visible length and an open, fanned-out look.

Formulation & Lash Health

Older perm solutions relied heavily on strong alkaline agents that often stripped lashes of natural oils, leading to brittleness and breakage over time. Lash lift formulas prioritize lower pH solutions enriched with conditioning agents, making them substantially safer for delicate natural lashes.

Comparison AspectModern Lash LiftTraditional Lash Perm
Lifting ToolsAnatomical silicone shields / padsCylindrical sponge / perm rods
Curl TrajectoryUpward root lift (elongating effect)Circular curve (shortens apparent length)
Active IngredientsGentle cysteamine / keratin-infused lotionsHigh-alkaline ammonium thioglycolate
Lash IntegrityPreserves moisture & structural strengthHigher risk of tip crimping and dryness
SuitabilityAll lash lengths (short, straight, or downward)Longer lashes wanting vintage curls

Top Benefits of Getting a Lash Lift

Top Benefits of Getting a Lash Lift | Natural Open-Eye Effect and Low-Maintenance Results

A lash lift enhances your existing eyelashes without adding artificial weight, making it a go-to service for clients seeking a refined, effortless beauty routine.

1. Natural Aesthetic with an Open-Eye Effect

Unlike lash extensions that require synthetic hairs and bonding adhesives, a lash lift works entirely with your natural lash growth. The treatment curls lashes upward right from the base, making your eyes look wider, brighter, and naturally refreshed without looking overly dramatic or artificial.

2. Low Maintenance & Weather-Proof Durability

Once set, lifted lashes require minimal daily upkeep. There is no need for mechanical eyelash curlers or daily mascara application. The curl holds its shape reliably through gym workouts, swimming, and humid weather conditions across the Gulf region, remaining completely smudge-proof throughout the 6 to 8-week cycle.

3. Universal Versatility for All Lash Types

Lash lifts adapt to various lash profiles—whether lashes are naturally straight, pointing downward, short, or coarse. Technicians customize shield curves (from subtle natural curves to dramatic vertical lifts) to complement individual eye shapes and natural lash lengths.

4. Ideal Combination with Lash Tinting

Pairing a lash lift with a custom deep black or dark brown lash tint creates the look of mascara with zero clumps or flaking. The tint adds rich depth and color saturation from root to tip, giving fine or light-colored lashes a fuller, darker appearance.

Essential Aftercare & Maintenance: Maximizing Lash Lift Longevity

Proper aftercare is essential to protect the freshly reformed disulphide bonds in your natural lashes. Adhering to professional maintenance protocols ensures your curl remains balanced, glossy, and intact for up to two full months.

The Critical First 24 to 48 Hours

During the immediate 24 to 48 hours post-treatment, the keratin structure of your lashes continues to stabilize. To prevent disrupting the setting process, observe the following rules:

  • Avoid Direct Contact with Water & Steam: Keep lashes completely dry. Avoid hot showers, saunas, steam rooms, and intense cardiovascular workouts that induce facial sweat.
  • Skip Eye Makeup: Do not apply mascara, eyeliner, or concealer around the lash line during this stabilization window to prevent product residue from compromising the curl.
  • Sleep on Your Back: Avoid sleeping face-down on pillows, as physical pressure can crimp or misshape freshly lifted lashes while the bonds are setting.
  • Refrain from Rubbing: Do not rub or aggressively touch the eyes. Gently comb through the lashes with a clean, dry spoolie brush if needed.

Long-Term Lash Maintenance in the UAE Climate

The transition between air-conditioned indoor spaces and outdoor heat and humidity in the Gulf region can cause natural lashes to lose moisture over time. Follow these daily habits to maintain lash elasticity and strength:

  • Switch to Oil-Free Cleansers: Heavy oils and waterproof makeup removers can gradually soften the lift. Use gentle water-based micellar waters and foam cleansers.
  • Incorporate Nourishing Serums: Apply a peptide- or keratin-infused lash conditioning serum daily to replenish moisture, nourish the hair shaft, and support healthy natural growth cycles.
  • Schedule Regular Refresh Sessions: As natural lashes shed and complete their growth cycle (every 6 to 8 weeks), schedule a touch-up treatment to lift new growth seamlessly without overlapping old curls.

How to Choose the Best Lash Lift Kit in the UAE

How to Choose the Best Lash Lift Kit in the UAE | Key Criteria for Professional Systems

Whether you are a certified lash artist sourcing salon inventory or an experienced beauty professional seeking reliable supplies across Dubai and the UAE, selecting a high-standard lash lift system is crucial for safety, lash integrity, and consistent results.

Key Criteria for Selecting a Professional System

  • Nourishing Active Formulations: Prioritize systems enriched with hydrolyzed keratin, silk proteins, and amino acids. These ingredients help reinforce natural lash cuticles during the chemical reshaping stage.
  • Airtight Sachet Packaging: Single-dose sachets ensure solutions stay fresh and potent, preventing premature oxidation and maintaining consistent processing times for every client.
  • Anatomical Silicone Shields: Premium kits include ergonomic shields in multiple sizes (from subtle C-curls to dramatic L-lifts) to accommodate various eyelid shapes and natural lash lengths.
  • Precise Processing Guidelines: Reliable kits provide clear, step-by-step timing instructions calibrated for fine, normal, and coarse lash structures to prevent over-processing.

Industry Recommendation: My Lamination System

For beauty studios and lash technicians across the Emirates, The My Lamination Lash & Brow Lift Kit is an internationally celebrated choice. Formulated and manufactured in Italy, this professional system pairs controlled lifting performance with intensive lash-repairing properties, promoting fuller, glossier natural lashes treatment after treatment.

Professional Lash Lift Treatments in Dubai & Abu Dhabi: What to Expect

With a thriving beauty industry across Dubai, Abu Dhabi, and Sharjah, booking a lash lift at a licensed salon offers a customized, premium experience tailored to your natural facial features and lifestyle.

1. Personalized Consultation & Lash Assessment

A professional service begins with a thorough evaluation of your natural lash length, direction, and density. Certified artists select the appropriate shield curvature—whether you prefer a soft, rounded curl or an ultra-straight upward lift—ensuring the result complements your specific eye shape.

2. High Hygiene Standards & Formula Quality

Reputable salons across the UAE prioritize strict sanitation and use dermatologically approved, ophthalmologically tested solutions. High-grade Italian and European formulations ensure that the treatment remains gentle on sensitive eyes while delivering long-lasting structural definition.

3. Choosing the Right Beauty Salon

When selecting a lash lift provider in the Emirates, look for licensed technicians with verified portfolio results and positive client reviews. Certified professionals understand how to adjust application times precisely for different hair textures, preventing over-processing and maintaining overall lash health.

Frequently Asked Questions About Lash Lifts

Here are expert-backed answers to the most common questions regarding lash lift procedures, safety, and long-term maintenance:

Is a lash lift safe for sensitive eyes?

Yes. When performed by a certified professional using dermatologically tested, high-quality formulations, lash lifts are very safe. The solutions are applied exclusively along the base and mid-shaft of the lashes without touching the eyelid skin or the waterline. For those with a history of ocular sensitivity, a standard 24-hour patch test is recommended prior to application.

How long does a lash lift last?

A lash lift typically lasts between 6 to 8 weeks. Its longevity depends on your individual eyelash growth and shedding cycle, as well as following proper aftercare routines during the initial 24 to 48 hours.

Can I wear mascara after getting a lash lift?

Yes, but only after the initial 24-hour setting window has passed. When you do wear makeup, choose water-based, non-waterproof mascaras that can be easily cleansed without harsh rubbing or oil-based removers.

Will a lash lift damage my natural lashes?

No. Modern lash lift systems are formulated with nourishing conditioning agents like hydrolyzed keratin and peptides that protect the hair cuticle. Damage typically only occurs if lashes are over-processed with incorrect timing or poor-quality chemical products.

What happens if my lashes get wet within the first 24 hours?

Exposing lashes to moisture, steam, or sweat within the first 24 hours can weaken the newly formed disulphide bonds, causing the curl to drop or set unevenly. If accidental exposure happens, gently blot the moisture away with a lint-free cloth and comb them upward with a clean spoolie.

Can I get a lash lift if I have short or downward-pointing lashes?

Yes, lash lifts are particularly transformative for straight or downward-facing lashes. Using specialized smaller silicone shields, artists can lift short lashes directly from the root to create maximum vertical elevation and visibility.

How often can I safely repeat a lash lift?

It is recommended to wait 6 to 8 weeks between treatments. This ensures that previous lashes have naturally shed and new lash growth is ready to be treated without risking repeated chemical exposure on the same hair shafts.

Conclusion: Elevate Your Natural Lash Routine

A professional lash lift is one of the most effective, low-maintenance beauty solutions for enhancing natural lashes. By elevating lashes directly from the root and setting them with nourishing keratin-rich formulas, you achieve an open, defined gaze that lasts up to 8 full weeks without the need for extensions or daily mascara.

For beauty salons and certified lash artists across Dubai, Abu Dhabi, and the wider UAE, consistent results rely on choosing high-grade, cruelty-free lifting systems designed to perform reliably in regional climate conditions. Combining premium formulations with meticulous aftercare guarantees healthy, glossy, and beautifully lifted natural lashes every single day.

Discover Premium Lash Lift Kits at Winlash.ae

The Best Lash Tech Starter Kit for New Technicians
Quick Access Navigation
  1. What a Professional Lash Tech Starter Kit Actually Includes
  2. Picking the Right Adhesive When You're Just Starting Out
  3. Tweezers and Application Tools That Make or Break Your Work
  4. Lash Lift Kits, Primers, and Aftercare Essentials Explained
  5. What’s Inside the My Lamination Lash & Brow Lift Kit Professional 10ml Pack
  6. Processing Times and Application Overview
  7. Key Ingredients That Protect and Strengthen
  8. Primers, Bonders and Why Both Belong in Your Starter Kit
  9. Aftercare Products Every Client Needs
  10. My Lamination Lash & Brow Lift Kit – Quick Reference Table
  11. How Much to Budget for Your Lash Tech Starter Kit in the UAE
  12. Building Your Complete Kit from One Place in Dubai
  13. Frequently Asked Questions (FAQ)
  14. Start Strong and Build with Confidence

Starting as a lash technician is genuinely exciting. The training is done, the vision is clear, and then the first real challenge hits: what do you actually need to buy? Many new techs either overinvest in tools they won't touch for months or underestimate what a professional setup requires and create gaps mid-service. A solid lash tech starter kit usually includes everything from adhesives and tweezers to complete lash and brow lift products.

This guide breaks down every category inside a solid lash tech starter kit, from adhesive to aftercare, with realistic AED price estimates for the UAE market. The product knowledge here draws from Winlash Dubai's extensive catalog of professional-grade SKUs, so the recommendations reflect what lash techs across the UAE actually use, not generic lists pulled from global roundups.

What a professional lash tech starter kit actually includes

What a Professional Lash Tech Starter Kit Actually Includes

A professional kit is not one box from one brand. It is a curated set of product categories that work together as a system. Choosing them separately, or without understanding how they relate, is where most beginners go wrong.

Every complete eyelash extension starter kit covers five core categories: lash extension supplies (mixed-length lash trays), adhesive and application liquids, precision tools such as tweezers and scissors, prep products like primers and bonders, and aftercare essentials for client use. When all five categories are in place, you can run a complete, professional service from start to finish without improvising.

Building your lash tech starter kit: the five non-negotiable product categories

Lash trays are your raw material. For beginners, a mixed-length tray set in a single curl style (C or D) is a practical starting point that gives you range without overcomplicating choices. Common lengths run from shorter to longer options depending on the brand, so check the tray specs when buying.

Adhesive is your most technical purchase and gets its own section below. Precision tools include two pairs of tweezers at minimum, micro brushes, gel eye pads, and a lash fan. Prep products, primer and bonder, bracket the application on either side. Aftercare closes the service while directly affecting how long results last.

What you can skip for now

Mega-volume lash trays, specialty nano-adhesives, advanced mapping tools, and lash perm rods are all products for later. In your first six months, the goal is consistency and control on classic and beginner-volume sets. Reaching for advanced tools before you have the foundational technique down adds cost without adding results, and it distracts from the repetition that actually builds skill.

Picking the right adhesive when you're just starting out

Adhesive is the single most consequential purchase in your lash extension supplies, and choosing wrong costs you both money and client results. Three variables matter most: cure time, viscosity, and humidity sensitivity. Getting all three right for your specific environment makes everything else easier .

For beginners, a 3, 5 second dry time is the target. That window gives you enough time to position the extension accurately before the bond sets. Fast-drying adhesives with a 1, 2 second cure are engineered for experienced hands that work quickly and precisely. As a new tech, a faster glue will skin over before you are ready and create brittle bonds.

Cure time and why it matters more than brand name

The brand name on your adhesive bottle matters far less than understanding its dry time in your specific environment. A beginner working with a 2-second glue in a well-lit, climate-controlled room will still fight the clock on every single lash. Start with 3, 5 seconds, master your isolation and placement, then graduate to faster formulas as your speed improves.

What the UAE climate does to your glue

Dubai's dry heat and low indoor humidity are key factors that many generic guides miss. In low-humidity environments, lash adhesive typically cures faster than the label suggests, because moisture in the air is one of the triggers that activates the bond. This means a beginner in Dubai should lean toward a slightly slower-curing, medium-viscosity formula to stay in control. If your studio runs heavy air conditioning, even a 3-second glue can behave like a 1.5-second one. Winlash Dubai carries adhesive formulas marketed specifically for UAE conditions, which takes a lot of the guesswork out of choosing your first glue.

Allergy risk and how to minimize it

Most lash adhesives contain cyanoacrylate, which is the compound responsible for the majority of sensitivity reactions in both clients and techs. Latex-free and low-fume options reduce risk significantly, though they do not eliminate it entirely. Always conduct a patch test 24, 48 hours before a client's first full service. This is non-negotiable, regardless of which brand you stock.

Tweezers and application tools that make or break your work

Tweezers and Application Tools That Make or Break Your Work as a New Lash Tech

Tweezers are where most beginners either cheap out or buy the wrong type. You need two distinct pairs from the start: isolation tweezers and application tweezers. Using one pair for both jobs slows you down and increases the risk of sticking natural lashes together.

Isolation tweezers are typically straight or slightly curved, and their job is to hold surrounding natural lashes away from the one you are working on. Application tweezers come in L-shape or J-curl styles and are used to pick up and place the extension. Some beginners find that fiber-tip application tweezers work well for building volume fans, as the textured tip can make it easier to grip the lash without requiring the same pressure precision as a smooth metal tip, though this comes down to personal preference as you develop your technique.

Isolation vs. application tweezers

A straight isolation tweezer gives beginners the most control because the tip is predictable and easy to manage. For application, a J-curl or 45-degree angled tweezer is the most forgiving shape when you are still developing consistent pickup technique. Invest in one quality pair of each rather than three budget pairs that flex inconsistently or lose tension after a few weeks of use.

The supporting tools your workspace needs

Beyond tweezers, your workspace requires a core set of placement tools and disposables. On the placement side: a micro lash fan for nanomisting or curing, a jade stone or adhesive ring to keep your glue droplet fresh, and lash mapping tape. For hygiene and client prep: gel eye pads, lint-free applicators, micro brushes, and a quality spoolie. These items are strongly recommended for any professional client service . The jade stone maintains consistent adhesive viscosity throughout the session, while disposables like micro brushes and eye pads protect hygiene standards and need regular restocking.

Lash lift kits, primers, and aftercare essentials explained

Many new lash technicians in the UAE offer professional lash lifts alongside classic and volume extensions . The prep and aftercare products for both services overlap usefully, so understanding each step prevents common mistakes that reduce retention and client satisfaction.

A complete professional lash lift kit contains three core solutions: a lifting cream that gently breaks disulfide bonds to reshape the natural lash, a neutralizing cream that locks the new curl in place, and a hydrating/nourishing serum that conditions the lash and helps release it cleanly from the silicone shield .

One of the most widely used systems among UAE salons is the My Lamination Lash & Brow Lift Kit Professional 10ml Pack (available at Winlash Dubai). Designed in Italy since 2017 under the brand’s “Same as Nobody” philosophy, this all-in-one professional kit delivers long-lasting results of 6–8 weeks while prioritizing hair health. It is vegan, cruelty-free, free from sodium bromate, parabens and formaldehyde, and formulated to perform reliably in Dubai’s dry, air-conditioned environments.

What’s inside the My Lamination Lash & Brow Lift Kit Professional 10ml Pack

What’s Inside the My Lamination Lash & Brow Lift Kit Professional 10ml Pack

  • Lifting Cream+ (Step 1, 10 ml) – Gently breaks disulfide bonds to reshape lashes or brows for the desired lift or curl.
  • Neutralizing Cream+ (Step 2, 10 ml) – Reforms the bonds to set the new shape (sodium-bromate-free for safer processing).
  • Hydrating Serum+ (Step 3, 10 ml) – Nourishes and seals the cuticle with nine active elements, restoring moisture, shine and strength.
  • Lift Adhesive (5 ml) – Water-soluble glue with brush applicator for securing silicone pads and hairs.
  • Butterfly Silicone Lash Pads (5 pairs) – Reusable sizes S, M, XM, L, XL for customized curl results.
  • Blue Black Tint + Color Developer – For rich, uniform color and dramatic definition after lifting.

Each 10 ml tube supports approximately 45–50 full lash lift applications or 22–25 brow laminations, making the kit highly cost-efficient for growing technicians.

Processing times and application overview

Apply Lifting Cream+ 1–2 mm from the root. Processing time is typically 8–12 minutes depending on lash density and thickness (thinner lashes 8–9 min, medium 9–10 min, thicker 11–12 min). Remove dry, then apply Neutralizing Cream+ for roughly half the Step-1 time plus 1–2 minutes. Optional tinting can be done after neutralization. Finish with Hydrating Serum+ for 2–3 minutes (no rinse required). Always perform a 48-hour patch test and follow professional training protocols.

A University of Padua study confirmed a significant increase in average lash diameter (up to 48 % in reported measurements) after the professional treatment, supporting the claim of healthier, thicker-looking lashes over time.

Key ingredients that protect and strengthen

  • Lifting Cream+: Ammonium thioglycolate base enriched with keratin and collagen for controlled reshaping without excessive harshness.
  • Neutralizing Cream+: Hydrogen-peroxide system that safely oxidizes and locks the new shape.
  • Hydrating Serum+: Hydrolyzed keratin, hydrolyzed silk, panthenol, aloe, mallow, nettle, collagen and glycerin — nine nourishing elements that repair and hydrate.
  • Lift Adhesive: Gentle, water-soluble polyvinyl-alcohol formula that removes cleanly.

These clean, humidity-resistant formulas minimize damage and help lashes stay stronger and fuller with regular use — an important advantage in Dubai’s climate.

Primers, bonders and why both belong in your starter kit

Primer and bonder serve opposite ends of the extension process. Primer removes oils and residue while balancing pH so the adhesive can bond correctly. Bonder is applied after the full set to seal the adhesive and accelerate the final cure. Skipping either step is one of the most common reasons new technicians see early shedding or poor retention.

Aftercare products every client needs

Stock a lash-safe foam cleanser, an oil-free nourishing serum and a clean spoolie as your baseline aftercare trio. After a lash lift, advise clients to wait at least 24 hours (ideally 48) before applying serum and to avoid all oil-based products (castor, jojoba, coconut, etc.), which can break down the lift prematurely.

My Lamination Lash & Brow Lift Kit – Quick Reference Table

ComponentSize / QuantityPrimary FunctionKey Benefit for New Techs
Lifting Cream+ (Step 1)10 mlBreaks disulfide bonds & reshapesControlled processing window (8–12 min)
Neutralizing Cream+ (Step 2)10 mlLocks new curl / shapeSodium-bromate-free, safer formula
Hydrating Serum+ (Step 3)10 mlNourishes, seals & releases from pad9 active ingredients for healthier lashes
Lift Adhesive5 mlSecures pads and hairsWater-soluble, easy clean-up
Butterfly Silicone Pads5 pairs (S–XL)Creates desired curl shapeReusable, multiple sizes in one kit
Blue Black Tint + DeveloperIncludedAdds definition after liftComplete service without extra purchases
Applications per kit~45–50 lash / 22–25 browHigh yieldExcellent cost-per-service for starters
Expected results6–8 weeksLong-lasting natural enhancementBuilds client retention & reviews

This single professional kit covers everything a new technician needs to deliver high-quality lash lifts and brow laminations from day one, while the nourishing Italian formulas support better long-term lash health — exactly what growing UAE clients notice and return for.

How much to budget for your lash tech starter kit in the UAE

How Much to Budget for Your Lash Tech Starter Kit in the UAE

Setting a realistic budget before you buy prevents both overspending on gear you don't need yet and underspending on products that undermine your results. The UAE market supports three clear tiers, and knowing which one fits your situation saves you from rebuying equipment within your first few months.

Budget tier (AED 40, 150): practice and learning

At this price point you can cover basic lash trays, an entry-level adhesive, one pair of tweezers, and minimal disposables. This range suits students still in training or techs practicing on a mannequin head as part of a lash practice kit before taking real clients. It is not sufficient for professional services because adhesive quality and tool precision are both compromised at this level, and the inconsistency will show in your results.

Mid-range tier (AED 150, 500): the recommended starting point

This is the right range for any new tech taking on their first real clients. Within this budget you can access a professional-grade adhesive suited for UAE conditions, a quality tweezer set covering both isolation and application, a beginner lash lift kit, primer, bonder, and enough disposables to run your first several services properly. A lash starter bundle at this tier gives you everything functional without paying for advanced specialization you are not ready to use yet.

Professional starter tier (AED 500+): building for the long term

At this level, your kit expands to include a professional lift kit brand such as My Lamination, multiple lash tray sets across different curls and lengths, a full adhesive and liquid system, and a complete aftercare bundle. Techs who plan to work in a salon environment or take on clients immediately after training are better served starting here. The higher upfront cost reduces restocking frequency and gives you product consistency from your very first service.

Building your complete kit from one place in Dubai

Sourcing a beginner lash kit across multiple UAE suppliers is time-consuming and risks mixing incompatible products from different brand systems. Pairing an adhesive with a primer from an incompatible brand can alter cure time in ways that are hard to diagnose when you are new to the craft.

Winlash Dubai stocks every category covered in this article under one roof. That includes adhesives suited for UAE conditions, professional tweezers, My Lamination and Be Perfect lash lift kits, primers, bonders, oil-free aftercare serums, and all the disposables your workspace needs. Orders ship nationwide across the UAE, and the broad catalog means you can start with a focused beginner setup and scale your orders as your client base and service menu grow.

Why sourcing from one professional supplier matters

When your adhesive, primer, and bonder all come from a supplier who understands the UAE environment, the products are selected to perform together in your specific climate. You also get consistent restock availability, which matters when you are building a service routine around products that perform reliably . Mixing budget-market items with professional-grade liquids creates variables that are hard to track and even harder to fix mid-service.

What Winlash Dubai carries for new technicians

What Winlash Dubai Carries for New Technicians Building Their First Kit

The range covers everything a new lash tech needs: beginner-friendly adhesives with UAE-appropriate cure times, isolation and volume tweezers including fiber-tip options, My Lamination three-step lift kits, primers, bonders, aftercare serums, gel pads, micro brushes, jade stones, and spoolies. The eyelash glue and tweezers kit options available at Winlash are curated with UAE conditions in mind, so you are not left guessing which adhesive will perform in Dubai's dry climate. Browse the full lash extension supplies range at winlash.com and build your kit by category, starting with exactly what you need now.

frequently asked questions (FAQ)

Q: What should be included in a professional lash tech starter kit?

A: A complete starter kit covers five core categories: lash extension supplies (mixed-length lash trays), adhesive and application liquids, precision tools like tweezers and scissors, prep products such as primer and bonder, and aftercare essentials for clients. When those five categories are in place you can run a full professional service without improvising.

Q: Which lash trays are best for beginners?

A: Beginners should start with mixed-length trays in a single curl style—commonly C or D—which provide range without overcomplicating choices . Check the tray specs for length ranges so you know what short-to-long options are included.

Q: How do I choose the right adhesive as a new lash tech?

A: Focus on three variables: cure time, viscosity, and humidity sensitivity. For beginners the guide recommends a 3–5 second dry time to give enough working time for accurate placement, then graduate to faster formulas as your speed and isolation improve.

Q: How does Dubai's climate affect lash adhesive performance?

A: Dubai's dry heat and low indoor humidity usually make adhesives cure faster than labels suggest because moisture triggers the bond. New techs working in Dubai should account for faster cure in their choice of glue—start with slightly slower cure times and test adhesives in your own workspace.

Q: What precision tools are essential when starting out?

A: At minimum you need two pairs of tweezers, micro brushes, gel eye pads, a lash fan, and a good pair of scissors. These precision tools let you isolate, apply, and finish classic and beginner-volume sets consistently.

Q: What can I safely skip in my first six months as a lash tech?

A: You can skip mega-volume trays, specialty nano-adhesives, advanced mapping tools, and lash perm rods early on. The first six months should focus on consistency and control with classic and beginner-volume work rather than advanced tools that increase cost and distraction.

Start strong and build with confidence

Building your lash tech starter kit does not have to be overwhelming. Once you understand the five core categories, match your budget to the right tier, and source from a supplier who knows the UAE market, you can walk into your first real client appointment prepared rather than improvising.

The technicians who get the best early results tend to be the ones who invest in the right products from the start rather than replacing cheap tools after their first few clients. Consistent products produce consistent results, and consistent results build the reviews and referrals that grow a lash business. Get your kit sorted through Winlash Dubai and start your first services with supplies chosen specifically for UAE lash professionals.

What's the Difference Between Lash Extension Glues?
Quick Access Navigation
  1. What Lash Extension Adhesive is Actually Made Of
  2. How Viscosity Affects Lash Extension Glue Choice and Climate Performance
  3. Drying Speed and Curing Time Are Not the Same Thing
  4. Black vs. Clear, and Choosing for Sensitive Clients
  5. How to Choose the Right Lash Extension Glue for Your Setup
  6. The Bottom Line on Lash Extension Glue Differences and How to Choose
  7. Frequently Asked Questions (FAQ)

If you've ever stared at a product page full of lash adhesives wondering what is the difference between lash extension glues and how do I choose, you're not alone. Every label claims "professional strength" and "maximum retention," with zero clarity on what actually sets them apart. It's a frustrating experience, and it doesn't get easier just because you've been doing lashes for a few years. The descriptions overlap, the terminology blurs, and nobody explains the actual variables that matter. Here's the good news: once you understand four core factors, choosing the right adhesive becomes a much simpler process. Those four factors are composition, viscosity, drying speed, and sensitivity profile. This article breaks down each one so you can shop with confidence, whether you're stocking a busy salon in Dubai Marina or building your first professional kit. WinLash Dubai carries an adhesive range built around these exact specs, selected with Gulf climate conditions in mind.

What Lash Extension Adhesive is Actually Made Of

What Lash Extension Adhesive is Actually Made Of | Cyanoacrylate, PMMA and Supporting Ingredients Explained

Cyanoacrylate: the backbone of every professional glue

Virtually all professional lash adhesives are built around cyanoacrylate, a fast-bonding polymer that cures on contact with moisture. Higher concentrations mean faster curing and stronger initial adhesion, but they also produce more fumes and carry a higher irritation risk for reactive clients. When a product is labeled "professional strength," cyanoacrylate concentration is often what that claim refers to, though the phrase can also reflect overall formulation potency. This matters because not every client and not every room environment calls for maximum cyanoacrylate concentration. Understanding that this single ingredient drives both the speed and the sensitivity profile of the glue gives you a useful filter for narrowing down your options before you even look at the label's other claims.

The supporting ingredients and what they do

Beyond the primary bonding agent, most lash adhesives contain PMMA (polymethyl methacrylate), a reinforcing polymer that adds viscosity and improves long-term retention durability. Carbon black is included purely as a pigment to give black glue its color; it has no effect on bond strength. Stabilizers like hydroquinone or BHT are added to prevent the glue from curing inside the bottle, extending shelf life without contributing to the bond itself. Some formulas also include latex as a flexibility additive, though latex-free formulations are now commonly preferred in professional products due to sensitization concerns. The clear takeaway: cyanoacrylate drives speed and bonding, PMMA improves texture and retention, and pigments or stabilizers affect color and shelf life. None of the supporting ingredients are fillers; each one plays a specific functional role in how the adhesive performs from bottle to lash.

How Viscosity Affects Lash Extension Glue Choice and Climate Performance

Thin, medium, and thick: what each actually feels like to use

Viscosity describes how runny or thick the adhesive is when it leaves the nozzle. Thin glue wicks and flows quickly, making it precise but demanding. It cures fast and leaves almost no room to reposition after contact. Medium glue is the general-purpose option: it balances control with workability and suits a wide range of application styles. Thick glue stays exactly where you place it, fills any micro-gaps at the base, and gives the most working time of the three, but it can clump if you overload the extension base. Skill level maps directly to viscosity. Beginners benefit most from medium, where there's enough working time to isolate properly without the glue setting before placement is confirmed. Advanced technicians doing volume sets often prefer thin adhesive because clean, airy fan bases need a light, fast-setting bond rather than a heavy one. Knowing which category you fall into removes a significant chunk of the decision before you've read a single product description.

Why climate matters more than most technicians realize

Humidity accelerates cyanoacrylate curing. In more humid environments, thin glue helps prevent overcuring before the extension is placed. In many salons across Dubai and the Gulf that run heavy air conditioning, a thick or medium adhesive extends open time so you're not racing against a near-instant cure. The ideal working environment for lash adhesives is roughly 20 to 24°C and 40 to 60% relative humidity; outside that range, your glue will behave differently regardless of the label's stated dry time. A common retention problem in Gulf-region salons is not the glue itself but using the wrong viscosity for the room conditions. A fast, thin adhesive in a very dry, heavily air-conditioned treatment room will cure before proper placement, and no amount of technique will compensate. Always check whether the product specifies a humidity range, and match that range to your actual workspace before purchasing.

Drying Speed and Curing Time Are Not the Same Thing

Once you understand how viscosity interacts with your climate, the next variable that trips people up is speed. Specifically, the difference between when a glue feels set and when it actually is set.

What tack time vs. full cure actually means for retention

Tack time is the point at which the bond stops feeling wet and the extension can be released, typically anywhere from 0.5 to 5 seconds depending on the formula. Full cure is the complete chemical bond, which takes 24 to 48 hours with most traditional cyanoacrylate adhesives. Retention depends on full cure, not tack time. A glue that sets in 0.5 seconds is not automatically more durable than one that sets in 3 seconds; if placement is rushed or room conditions are off, the bond will fail regardless of how fast the label claims it sets. This distinction matters because many technicians, especially those newer to the craft, associate speed with quality. Speed is a workflow advantage, not a durability indicator. What supports long-term retention is the quality of the bond formed during full cure, which is shaped by correct placement, proper isolation, and application within the glue's specified environmental range.

Matching glue speed to your skill and working style

Ultra-fast adhesives with sub-one-second tack times suit experienced technicians doing high-volume sets efficiently. They leave no room to adjust placement after the extension makes contact. Medium-speed formulas in the 2 to 3-second range suit most classic lash work and are more forgiving for artists still building their isolation consistency. Slower formulas running 4 to 6 seconds are ideal for beginners, training environments, and clients who require extra care during application. The rule is straightforward: the faster the glue, the more precise your technique needs to be before the bond forms. Slower is not inferior; for most technicians outside of high-volume production settings, a 2 to 3-second adhesive is the smarter daily choice. It supports accurate placement, reduces the risk of stickies, and allows proper isolation without the anxiety of racing the clock on every single extension.

Black vs. Clear, and Choosing for Sensitive Clients

Black vs Clear Lash Extension Glue and Choosing for Sensitive Clients

When the color of your adhesive actually matters

Black glue contains carbon black pigment, which creates a seamless dark base that blends with lash extensions and gives a finished, defined look at the lash line. Clear glue dries transparent, making it the right choice for lighter lashes, colored extensions, or clients who are specifically sensitive to carbon black. Color has no effect on bond strength, but it absolutely affects the visual result and can be a meaningful factor for clients with pigment sensitivities that don't extend to cyanoacrylate itself. This is a straightforward decision that many technicians overlook when they default to black glue for every client. If a client reports irritation but has no prior allergy history, switching to a clear formula is a simple first step worth taking before escalating to a full sensitivity formula. That one change is often enough to resolve the issue.

Low-fume and latex-free formulas for reactive clients

Sensitivity-focused adhesives typically feature lower cyanoacrylate concentrations, latex-free and formaldehyde-free formulations, and reduced fume output during application. They are not allergy-proof; cyanoacrylate is still present and is still the primary allergy trigger in lash adhesives. What they do is reduce the overall chemical load significantly, making them appropriate for clients with a history of mild reactions or those who find standard formulas uncomfortable. Tack times in sensitive formulas are generally slower, typically in the 3 to 6-second range. That is a fair trade for client safety. Any client with a documented strong allergy history should receive a patch test prior to a full set, regardless of the adhesive used. Sensitive formulas reduce risk; they do not eliminate it. Building that patch test step into your consultation process protects both the client and your business.

How to Choose the Right Lash Extension Glue for Your Setup

A practical selection checklist before you buy

Four questions will narrow your adhesive choice from an overwhelming catalog to a focused shortlist. Work through them in order before you land on a product.

  1. What is the typical humidity and temperature in your workspace? A heavily air-conditioned Dubai salon generally calls for a medium or thick formula to extend working time.
  2. What is your current skill level and application speed? If isolation consistently takes you more than 2 seconds, a sub-one-second glue will work against you.
  3. Do any of your clients have known sensitivities or a history of reactions? If yes, a low-fume, latex-free formula should be in your kit regardless of what you use for other clients.
  4. What set type do you do most often? Classic, volume, and sensitive-client work each point toward a different viscosity and speed combination.

Once you've answered those four questions, match your answers to the set type guide below:

  • Classic sets: medium-viscosity, 2 to 3-second tack time works well for most
  • Volume fans: thin or medium, fast to medium speed, depending on your fan-making speed
  • Sensitive clients: low-fume, latex-free, clear or black depending on pigment tolerance
  • Beginner or training environment: medium viscosity, 3 to 5-second tack time

Why a curated adhesive catalog makes the decision easier

Working through that checklist is significantly easier when the catalog you're shopping from has already filtered for your local conditions. WinLash Dubai's adhesive range is selected with the UAE market in mind, and each product listing includes the key specs lash artists actually need: humidity range, tack time, viscosity, and formulation type. Rather than guessing which of hundreds of generically listed options might suit a dry, air-conditioned salon in Dubai, the shortlisting work is done before you get to the product page. Whether you need a fast-dry, low-humidity formula for a high-volume set or a sensitive, clear-dry adhesive for a reactive client, the WinLash Dubai catalog is organized around the specs that matter to Gulf-based lash technicians. That kind of climate-aware sourcing is what separates a specialist supplier from a general beauty distributor, and it saves you the cost of buying the wrong adhesive twice.

The Bottom Line on Lash Extension Glue Differences and How to Choose

The Bottom Line on Lash Extension Glue Differences and How to Choose the Right One

The four factors that differentiate lash extension adhesives are composition, viscosity, drying speed, and sensitivity profile. Cyanoacrylate drives bonding strength and fume output; PMMA improves texture and retention; viscosity determines how the glue moves and how much working time you have; tack time affects workflow while full cure drives actual retention; and sensitivity formulas reduce chemical load for reactive clients without eliminating the need for patch tests. None of these factors exist in isolation. A fast thin glue that's perfect for a humid coastal salon may fail completely in an over-air-conditioned treatment room in Downtown Dubai.

The right adhesive is the one that matches your room conditions, your application pace, and your client's tolerance profile, not the one with the most aggressive retention claim on the label. Now that you understand the difference between lash extension glues and how to choose, you can stop guessing and start matching adhesive specs to your actual setup. Browse WinLash Dubai's adhesive range, where each product is listed with the specs you need: humidity range, tack time, viscosity, and formulation type. No guesswork, no wasted orders, just the right glue for your setup.

Frequently Asked Questions (FAQ)

Q: What are lash extension glues made of?

A: Most professional lash adhesives are built around cyanoacrylate, a fast-bonding polymer that cures on contact with moisture. Supporting ingredients include PMMA (polymethyl methacrylate) for viscosity and retention, carbon black as a pigment for black glue, stabilizers like hydroquinone or BHT to prevent bottle curing, and sometimes latex as a flexibility additive.

Q: What does "professional strength" mean on a lash glue label?

A: "Professional strength" usually refers to a higher cyanoacrylate concentration, which gives faster curing and stronger initial adhesion. However, higher concentration also increases fumes and the risk of irritation, so the term can be misleading without context on sensitivity and room conditions.

Q: How does viscosity affect which lash glue I should use?

A: Viscosity describes how runny or thick the adhesive is: thin glues flow and cure very fast, medium glues balance control and workability, and thick glues stay where placed and give more working time. Your skill level and the set type matter—beginners often prefer medium, while advanced technicians doing volume fans may choose thin for airy bases.

Q: Which lash glue is best for beginners?

A: Beginners typically benefit from a medium-viscosity adhesive because it provides enough working time to isolate lashes without setting too quickly. Medium glue reduces the risk of clumping or premature bonds while you develop placement speed and technique.

Q: How does climate or humidity affect lash adhesive performance?

A: Cyanoacrylate cures on contact with moisture, so higher humidity speeds curing while low humidity slows it down. In humid climates (for example the Gulf), adhesives can set very quickly, so technicians may choose formulations and viscosities—like slightly thicker glue or lower cyanoacrylate concentration—selected for that environment; WinLash Dubai carries adhesives chosen with Gulf climate conditions in mind.

Q: What should I look for if clients have sensitive eyes or reactions?

A: Choose adhesives with lower cyanoacrylate concentration and prefer latex-free formulations to reduce sensitization risk. Also patch-test when possible, use good ventilation to reduce fumes, and opt for formulas specifically marketed as low-irritant or for sensitive clients.

Q: Do pigments or stabilizers affect bond strength or just color and shelf life?

A: Pigments like carbon black only affect color and do not change bond strength, while stabilizers such as hydroquinone or BHT prevent the glue from curing in the bottle and extend shelf life. PMMA is the supporting ingredient that does affect performance by increasing viscosity and improving long-term retention—none of these are inert fillers; each has a functional role.

What Are Fiber Tip Lash Tweezers? (The End of Slipping Fans)
Quick Access Table of Contents
  1. The Material Science of Micro-Mesh Metallurgy
  2. How Micro-Friction Prevents Mega Volume Fan Collapse
  3. Technical Evaluation: Traditional vs. Fiber Tip Grid Jaws
  4. Advanced Kit Configuration: Integrating Isolation with Fiber Tip Volume
  5. Comprehensive Salon FAQ: Cleaning and Sterilization Protocols

Imagine spending your valuable time crafting a flawless, perfectly symmetrical mega volume fan, only to watch it instantly split, collapse, or slide out of your grasp the exact microsecond you lift it off the strip. For ambitious lash technicians, this isn’t just an irritating daily hurdle—it is a direct drain on your salon's speed, product inventory, and daily revenue. The truth is, your hand placement isn't the problem; the structural limitation lies entirely within traditional, smooth-jawed steel. A massive shift in tool technology is happening globally. By introducing micro-frictional metallurgy directly to your styling station, investing in high-performance tools from our premium tweezers and scissors collection permanently eradicates the nightmare of slipping fans, transforming how you control ultra-fine fibers.

Executive Brief: This technical guide strips away the marketing hype to analyze the physical science of fiber tip lash tweezers. You will learn how laser-etched hexagonal micro-mesh expands your tool's sweet spot to a definitive 100% full-coverage plane, why micro-friction drastically prevents hand fatigue during high-density sets, and how to calibrate your isolation and volume kit to unlock maximum operational speed.

The Material Science of Micro-Mesh Metallurgy

The Material Science of Micro-Mesh Metallurgy in Fiber Tip Lash Tweezers

To truly appreciate why traditional tweezers fail during the construction of high-density mega volume fans, one must look closely at the interfacial physics between high-grade surgical stainless steel and advanced synthetic polymers. Standard premium volume tweezers are manufactured using high-tensile stainless steel alloys (typically martensitic grades like Japanese SUS440C or German 410/420 surgical steel). While these metals provide exceptional corrosion resistance and spring tension, their interior clamping jaws are ground down to a highly polished, mirror-smooth finish.

When a lash artist attempts to pick up or pinch a hand-crafted volume fan made of ultra-fine 0.03mm, 0.05mm, or 0.07mm premium Korean PBT eyelash extensions, they are dealing with a material known for its incredibly slick, low-surface-energy exterior. Polybutylene Terephthalate (PBT) is engineered to be smooth and non-porous to maintain its deep gloss and curl stability. Consequently, when smooth metal meets smooth PBT, the mechanical assembly relies 100% on raw, manual clamping pressure to compress the shifting bases of the extensions.

Because even the most perfectly aligned steel jaws contain microscopic structural air gaps, surface waves, and zero natural porosity at the nano-level, the slightest structural variance in finger pressure creates an immediate "slip window." The result is an instant salon disaster: the center lashes of the mega volume bundle slide backward out of alignment, the symmetry of the fan collapses into a messy clump, and valuable operational time, adhesive, and raw materials are permanently wasted.

Next-generation fiber tip tweezers overcome this deep structural limitation by altering the fundamental laws of contact mechanics. Rather than leaving the steel bare, manufacturers apply highly specialized surface-engineering technologies directly to the functional inside face of the tweezer tip:

  • Advanced Chemical Vapor Deposition (CVD): A process conducted inside vacuum chambers where vaporized metalloid compounds are chemically reacted to fuse a micro-thin, high-hardness crystalline mesh layer permanently into the steel matrix.
  • Precision Micro-Laser Texturing (Ultra-Short Pulse): Utilizing localized picosecond or femtosecond laser bursts to etch a hyper-precise, dense hexagonal or cross-hatched grid directly into the metal. The depth of these micro-grooves is calibrated precisely between 10 to 30 microns to perfectly mirror the curvature of ultra-fine extension bases.
  • Crystalline Hybrid Coatings: Incorporating specialized diamond-like carbon (DLC) or titanium-fused matrices into the texturing to guarantee the micro-mesh valleys never dull down or flatten out, even after thousands of heavy-duty salon cycles.

How Micro-Friction Prevents Mega Volume Fan Collapse

Closing a premium fiber tip tweezer on a delicate bundle of synthetic extensions completely changes the mechanical dynamics of your workflow. Instead of applying simple lateral compression, the instrument instantly transitions into a series of active, physical interlocking structural anchors. By utilizing microscopic friction rather than aggressive hand force, this mechanical upgrade delivers definitive operational advantages:

  • Multi-Point Mechanical Interlocking Topography
    • The raised ridges of the micro-mesh bite gently into the cylindrical profiles of the PBT fibers without cutting or causing physical deformation to the extension.
    • This action creates multi-directional locking anchors across every individual extension strand within the fan base, holding them entirely immobile.
  • Symmetrical Stress and Force Distribution
    • Traditional tweezers feature a localized 1mm to 2mm "sweet spot" where the steel fully meets. If your lash fan rests outside this exact millimeter, it instantly splits.
    • The high-friction fiber texturing effectively equalizes the gripping force symmetrically across the entire inner mouth of the tool, converting the entire boot or curve into one massive, zero-defect sweet spot.
  • Massive Increase in the Static Coefficient of Friction
    • By introducing controlled structural roughness, the static coefficient of friction is elevated by over 300% compared to un-textured surgical steel.
    • This extreme structural stability completely resists lateral kinetic slip, meaning heavy 15D, 20D, or complex mega volume fans can be lifted vertically off the sticky tape strip without a single lash shifting out of its radial placement.

To illustrate this in a live salon environment, look at the precise 4-step kinematic sequence that occurs during a perfect fan creation and lift when switching to a micro-mesh tool:

  1. The Pinch/Roll Phase: The artist spreads out and pinches the bases of the 0.03mm PBT extensions on the strip into a perfectly symmetrical, wide radial fan.
  2. The Low-Pressure Engagement: The fiber tip tweezer jaws close around the fan base. The micro-mesh instantly seats the extensions inside its valleys under minimal initial touch pressure.
  3. The Friction Lock: As the artist pulls back, the static friction threshold prevents any singular lash strand from shifting laterally or creeping backward. The fan's geometry is safely frozen in place.
  4. The Flawless Dip: The fan is cleanly extracted from the adhesive strip without collapsing, ready for a flawless dip into the cyanoacrylate adhesive and seamless attachment onto the natural lash.

The direct, real-world consequence of this metallurgical advancement is a massive reduction in occupational physical stress. Lash technicians no longer need to exert maximum, white-knuckle squeezing pressure to ensure their volume work doesn't fall apart. By letting the micro-textured tool handle the physical heavy lifting, artists can dramatically reduce chronic strain on the *thenar eminence* muscles, decrease hand fatigue, and actively shield themselves from career-shortening carpal tunnel syndrome during intensive, back-to-back mega volume appointments.

Technical Evaluation: Traditional vs. Fiber Tip Grid Jaws

Technical Evaluation: Traditional Smooth Steel vs Fiber Tip Grid Jaws in Lash Tweezers

Selecting the perfect instrument requires analyzing the functional physics of the tool's jaws. Below is an engineering comparison detailing how micro-textured fiber tips transform everyday application metrics:

Performance ParameterTraditional Smooth Steel JawsAdvanced Fiber Tip Grid Jaws
Sweet Spot LocationHighly localized (typically a 1-2mm zone near the center or front)100% Full-Coverage (From base to apex of the tip)
Required Hand Clamping ForceHigh (Requires consistent physical squeezing to hold fans)Ultra-Low (Light touch engages the micro-textured grip)
Mega Volume Compatibility (0.03mm)Unstable (Fibers regularly wrap, cross, or drop out)Flawless (Locks up to 25D ultra-fine strands without shifting)
Adhesive Vapor ResistanceModerate (Glue buildup glazes the tip, causing total grip failure)High (Micro-grooves absorb minor outgassing without ruining grip)

How to Configure Your Tweezer Kit: Isolation Meets Fiber Tip Volume

While fiber tip tweezers are the undisputed champion for creating and picking up volume fans, an elite lash set requires an integrated ecosystem of precision tools. A common mistake among salon professionals is focusing solely on the volume tweezer while ignoring the ergonomic dynamics of isolation.

For seamless execution, serious technicians deploy a calibrated professional 2-piece lash tweezer set with a protective metal case. This ensures that while your dominant hand utilizes the unmatched holding power of fiber tips, your non-dominant hand isolates with surgical fluid motion. Depending on your personal hand anatomy and the client's facial bone structure, your isolation tool should be meticulously matched:

  1. The Deep-Set Eye Isolation: Utilize a specialized W2 curved tip lash tweezer to effortlessly navigate prominent brow bones without poking the client’s skin or losing your direct line of sight.
  2. The Ergonomic Corner Angle: Implement the iconic W9 dolphin curved tweezer, perfect for isolating the inner corners and delicate downward-facing natural lashes.
  3. The Classic High-Speed Vector: For high-speed master artists working on flat planes, a perfectly weighted W8 classic straight lash tweezer provides direct, linear muscle memory tracking.

Advanced Technical FAQ: Maintaining Fiber Tip Infrastructure

Because fiber tip tweezers feature a highly engineered micro-textured surface, they require distinct maintenance and cleaning protocols compared to traditional steel tools. Below, we address the critical questions submitted by working salon owners:

1. How do you clean cured cyanoacrylate lash glue out of fiber tips without ruining the mesh?

Never scrape the inner jaws of a fiber tip tweezer with sandpaper, files, or another sharp metal tool. Doing so will instantly shear off the microscopic laser-etched ridges, permanently ruining the high-friction grid system.

Instead, submerge the contaminated tips in a specialized liquid lash tweezer cleanser or pure acetone for a maximum of 2 to 3 minutes. The solvent will dissolve the polymer matrix of the cyanoacrylate glue within the nano-grooves. Once softened, gently wipe the tip clean using a lint-free microfiber wipe. Always dry thoroughly to prevent moisture crystallization.

2. Will chemical sterilization fluids or autoclaves degrade the fiber tip coating?

Premium fiber tip tweezers engineered from medical-grade surgical stainless steel can safely withstand standard sterilization routines, including hospital-grade disinfectants (Barbicide) and high-temperature steam autoclaves.

However, it is critical to adhere strictly to recommended immersion times. Leaving tweezers submerged in liquid chemical disinfectants for prolonged periods (e.g., overnight) can trigger chemical oxidation, leading to corrosion beneath the micro-mesh layer, causing it to flake off prematurely over time.

3. Why do mega volume fans still slide out even with a fiber tip tweezer?

If your volume fans are slipping through a fiber tip tool, it is almost always caused by one of two operational factors:

  • Microscopic adhesive glazing: A thin, invisible film of dried adhesive has filled the valleys of the micro-mesh, rendering the surface completely flat and smooth again. Clean with acetone immediately.
  • Incorrect alignment plane: Pulling or lifting the fan at an extreme angle that contradicts the direction of the micro-etched lines. Ensure you pull vertically or at a clean 90-degree vector to engage the maximum friction lock.

Investing in innovative tool technology is the fastest way to elevate your salon's reputation, slash your service times, and stop wasting high-cost materials. By combining advanced metallurgical engineering with premium design, WinLash continues to supply the Gulf region’s most demanding lash artists with the physical instruments required to master high-speed, zero-defect mega volume applications. Upgrade your station today and experience the absolute finality of slip-free fan creation.

Faux Mink vs. Silk vs. Korean PBT: What Are Your Lash Extensions Actually Made Of?
Table of Contents (Click to Open)
  1. The Marketing Myth: What Are Lash Extensions Made Of?
  2. Comparative Fiber Anatomy
  3. The Real Mink & Organic Silk Illusion: Truth vs. Labeling
  4. The Engineering of Korean PBT: The Gold Standard Fiber
  5. The Physics of Curl Retention: Why Extensions Lose Their Shape
  6. Micro-Surface Texturing: Optimizing Adhesive Interlocking Mechanics
  7. The Buyer’s Choice: Selecting Your Perfect Structural Finish
  8. Weight-to-Volume Mathematical Ratios across Fiber Profiles
  9. FAQ: Comprehensive Lash Material Troubleshooting

Step into the modern beauty landscape, and you are instantly bombarded with confusing retail labels like "real silk," "authentic mink," and "synthetic cashmere." The frustrating chaos of asking what are lash extensions made of is a pivotal pain point that leaves both retail buyers and professional lash creators vulnerable to cheap marketing gimmicks. Buying into these unverified luxury labels often leads to unexpected disasters: sets that droop flat after a hot shower, rigid fibers causing localized eyelid weight irritation, and uneven synthetic blends that refuse to hold a bond. True mastery of your aesthetic investments requires bypassing superficial retail descriptions and dissecting the precise macromolecular chemistry of premium eyelash extensions raw materials.

Executive Brief: The Material Illusion in Lash Engineering

The historical debate over mink vs silk lashes is fundamentally a semantic illusion; over 99% of the premium global market contains zero animal fur or natural silk proteins. Today's manufacturing relies entirely on high-performance polymers. Specifically, advanced premium Korean PBT lashes have redefined industry standards, offering pure hypoallergenic safety, absolute dimensional stability, and an engineered molecular memory that locks curls perfectly against extreme environmental heat and moisture stress.

Comparative Fiber Anatomy

Comparative Fiber Anatomy of Premium Korean PBT vs Faux Silk and Real Mink Lash Extensions

To understand how different raw materials behave over a six-week wear cycle, we must analyze their underlying physical profiles. Review this comprehensive structural breakdown to see how various lash compounds handle real-world wear:

Material ClassChemical CompositionCurl Retention RateHypoallergenic SafetyPhysical Weight Profile
Premium Korean PBTHigh-grade conditioned Polybutylene Terephthalate polymer.Elite (99.8%); permanent memory resistant to steam.Maximum (100% sterile, inert synthetic matrix).Ultra-lightweight; hollow-tapered optimization.
Traditional Faux SilkLow-grade Acrylic/Polyester synthetic blends.Moderate; prone to relaxing in hot micro-climates.High; but can trap surface residues if overly glossy.Heavy; dense molecular structure limits fan sizing.
Real Animal MinkNatural organic keratin harvested from animal fur.Extremely Poor; completely flattens when exposed to water.Dangerous (High risk of severe ocular allergen response).Variable; irregular organic diameters create gaps.

The Real Mink & Organic Silk Illusion: Truth vs. Labeling

Let us clear up the widespread industry misinformation regarding mink vs silk lashes. In the early days of eyelash applications, raw animal fur harvested from minks was briefly introduced to the market. However, organic animal hair quickly failed to meet basic safety and aesthetic standards due to several critical flaws:

  1. Severe Allergenic Risks: Animal fur retains natural organic proteins and dander, which frequently trigger acute contact conjunctivitis, blepharitis, and severe histaminic swelling when placed near the eyes.
  2. Zero Structural Memory: Just like human hair, real mink fur absorbs ambient humidity and water. The moment a client washes their face, the extensions lose their structural curl, flattening out completely into an unstyled mess.
  3. Ethical Concerns: Modern global consumers strongly reject the cruel and unhygienic practices associated with harvesting animal fur, driving a massive shift toward high-tech synthetic alternatives.

Similarly, "Silk" extensions are not spun by silkworms. Natural silk fiber is structurally weak, degrades rapidly when exposed to adhesive stabilizers, and cannot maintain a permanent shape. When you see terms like "faux mink" or "silk palette" in the beauty market today, manufacturers are simply describing the visual finish of the fiber. "Mink" typically refers to a semi-matte, deep obsidian finish with a long, gradual taper, while "Silk" describes a highly saturated, glossy finish with a shorter taper that creates immediate visual density.

The Engineering of Korean PBT: The Gold Standard Fiber

If organic animal fibers are obsolete, what exact scientific infrastructure underpins the world's most durable and luxurious lash sets? The answer lies in the macromolecular architecture of advanced premium Korean PBT lashes. Polybutylene Terephthalate (PBT) is a high-performance, semi-crystalline engineering thermoplastic belonging to the polyester family. It is globally celebrated by material scientists for its exceptional tensile strength, profound chemical resistance, structural elasticity, and natural thermal insulation properties. However, the secret to elite lash performance does not just lie in the raw polymer itself, but in the highly regulated, precise synthesis and drawing methods perfected by Korean chemical laboratories.

During the advanced manufacturing phase, high-purity raw PBT granules are subjected to controlled extrusion molding. The polymer is melted and forced through micro-spinnerets to form continuous filaments with hyper-precise cross-sectional diameters. While the filament is cooling, it undergoes a critical longitudinal stretching process. This physical drawing aligns the chaotic polymer chains parallel to the axis of the fiber, exponentially increasing the material’s structural integrity and preventing microscopic splitting or fraying.

Once the raw filaments achieve uniform thickness, they are wrapped around specialized, calibrated heat-treating steel rods. The fibers are then baked inside high-temperature industrial ovens to forge the exact intended curl profile (such as the standard C, CC, D, or highly technical L and M curves). This complex thermodynamic baking process executes a permanent molecular restructuring:

  • Thermal Relaxation: Relieves internal mechanical stresses induced during the initial filament extrusion phase.
  • Crystalline Locking: Forces the aligned polymer chains into a rigid, permanent geometric matrix.
  • Hydrophobic Stabilization: Maximizes the fiber's natural resistance to moisture absorption, ensuring it stays non-porous.

This meticulous engineering intervention hard-codes a permanent structural shape memory directly into the core of the fiber. It guarantees that whether you are a master lash artist building intricate volume fans or a retail beauty consumer enjoying everyday wear, your extensions maintain a flawlessly lifted, clean, and symmetrical architecture through heavy friction, high-impact exercise, and intense facial cleansing routines.

The Physics of Curl Retention: Why Extensions Lose Their Shape

The Physics of Curl Retention: Why Premium Korean PBT Lash Extensions Keep Their Shape

A persistent and costly frustration for lash buyers is watching beautifully applied curls relax, droop, and completely flatten out after just a week or two of wear. To understand this premature failure, we must explore the thermodynamic properties of low-grade plastics. Cheap synthetic fibers sourced from unrefined acrylic, low-purity polyester, or generic PVC blends possess a highly unstable glass transition temperature (Tg)—often hovering close to normal daily extremes. The glass transition temperature is the thermodynamic threshold where a polymer transitions from a hard, rigid, glassy state into a soft, flexible, rubbery state.

When these cheap, low-Tg fibers are exposed to common daily environmental stressors—such as concentrated heat from hair dryers, facial steaming units, hot showers, or the extreme ambient summer heat of the Gulf region—the polymer chains instantly begin to soft-relax. Under these conditions, the weak intermolecular forces (Van der Waals forces) holding the low-grade plastic in its curled shape disintegrate. The fiber undergoes irreversible plastic deformation, causing the curl to sag and flatten permanently. Furthermore, high humidity acts as a molecular plasticizer on cheap materials, accelerating this structural collapse.

High-purity Korean PBT completely neutralizes this degradation mechanism due to its remarkably high melting point (approximately 223°C) and highly stabilized crystalline lattice. Because the glass transition temperature of premium PBT is far above any environmental or styling temperature a human body will ever encounter, the polymer chains refuse to shift, soften, or relax. This exceptional dimensional stability means that even under the intense humidity and blazing outdoor climates of Dubai, your retention standards remain utterly immaculate, preserving the crisp, sharp lift of the extension from the initial salon application until the natural lash completes its biological shedding cycle.

Micro-Surface Texturing: Optimizing Adhesive Interlocking Mechanics

Long-lasting lash retention is not solely dictated by the curl integrity of the fiber; it relies fundamentally on the chemical and mechanical adhesion interface between the synthetic base and the liquid adhesive. Standard, cheap synthetic plastics are completely non-porous and ultra-smooth on a microscopic scale. This smooth profile results in exceptionally low surface energy, which creates an adverse contact angle wetting barrier. When liquid cyanoacrylate glue is applied to an unrefined, ultra-smooth synthetic fiber, it cannot spread uniformly. Instead, the liquid bead beads up, failing to establish an intimate molecular contact zone, which leads to early shedding during normal brushing or face washing.

To overcome this severe physical limitation, premium Korean PBT fibers undergo specialized micro-laser etching or chemical functionalization during the final manufacturing stages. This precise surface manipulation carves microscopic ridges, nano-pores, and precise cross-hatching patterns directly into the base of the lash extension fiber. This mechanical texturing serves two profound physical functions:

  1. Capillary Action Infiltration: The moment the micro-textured lash base is dipped into the liquid adhesive, the glue is drawn deep into the nano-grooves via natural capillary forces, ensuring 100% surface wetting.
  2. Exponential Surface Area Expansion: Micro-etching increases the usable bonding surface area by over 40% compared to a smooth fiber, giving the glue more structural landscape to cling to.

As the cyanoacrylate adhesive undergoes anionic polymerization and cures, it solidifies inside these microscopic ridges, forming an unbreakable mechanical interlock. The adhesive and the micro-textured Korean PBT fiber become a unified, singular matrix. This engineered interlocking mechanic completely eliminates the risk of early sliding, ensuring the extension remains bonded to the natural hair cuticle under heavy external shear stress.

The Buyer’s Choice: Selecting Your Perfect Structural Finish

Achieving a custom, luxurious lash look requires selecting the right fiber design to match your unique styling goals. Depending on whether you prefer an intense, dramatic dark line or a soft, weightless texture, choosing the right engineered PBT variant makes all the difference:

  • The Accelerated Smart-Fan Architecture: If you are looking to build rich volume sets in half the time, choosing an optimized db fast fan eyelash extension palette silk pbt is a total game-changer. These premium Korean PBT fibers are arranged on a specialized micro-sticky tape layer that prevents fan bases from separating, allowing you to pick up and spread multi-fiber fans effortlessly while maintaining perfect structural alignment.
  • The Deep Specular Glossy Finish: For high-drama looks that pop beautifully under event lighting and photography, the ultra-saturated glossy black silk lash extensions palette delivers incredible intensity. This fiber features a shortened taper combined with a subtle specular sheen that catches the light beautifully, making it an absolute favorite for high-impact glamour.
  • The Micro-Laser Textured Matte Standard: For a sophisticated, modern aesthetic that blends seamlessly with natural hair, the advanced eyelash palette laser matte pbt offers an ultra-refined, light-absorbing finish. These fibers feature precise micro-laser cuts at the base to double your mechanical adhesion, providing deep obsidian depth with a completely weightless feel.

Chemical Interlocking: Bonding Mechanics and Adhesive Cohesion

Chemical Interlocking: Bonding Mechanics Between Premium Korean PBT Fibers and Professional Lash Adhesives

Even the highest-grade polymer fiber requires a compatible chemical environment to perform its best. To achieve elite retention, the micro-textured PBT base must pair with a high-homogeneity cyanoacrylate liquid. Subing out premium fibers with low-grade, generic adhesives creates a weak bond prone to early failure. Ensuring your toolkit is stocked with advanced, molecularly stable eyelash extension glue and liquids is essential for achieving a reliable, flexible bond line.

For high-speed application styling and maximum durability under challenging temperature and humidity conditions, using a specialized formula like db super lash glue 5ml provides the ultimate structural support. This high-viscosity liquid polymerizes into a perfectly clear, seamless lattice that locks onto the micro-etched PBT fiber instantly, preventing early shedding and securing a beautiful hold for up to six weeks.

The Long-Term Aesthetic Value of Premium Raw Materials

Investing in superior lash chemistry is the smartest way to protect your look, your time, and your budget. Choosing cheap, unrefined plastic extensions leads to brittle bonds, frizzy fiber tips, and constant, frustrating touch-up appointments. By choosing premium heat-set Korean PBT fibers paired with specialized liquid bonders, you enjoy clean weight distribution, perfect hypoallergenic safety, and gorgeous, long-lasting symmetry that looks stunning day after day.

Take your lash standards to the next level with world-class polymer engineering. Explore our complete collection of heat-stabilized Korean PBT fibers, micro-laser matte trays, and advanced bonding liquids at WinLash, and enjoy beautiful, long-lasting lash perfection today.

FAQ: Comprehensive Lash Material Troubleshooting

Can heat from cooking or saunas permanently flatten synthetic extensions?

Low-grade acrylic or polyester fibers will quickly droop and straighten when exposed to steam or heat. However, premium Korean PBT has a exceptionally high melting point and built-in molecular shape memory, allowing it to maintain its perfect, lifted curl even through hot saunas, showers, and intense outdoor heat.

Is there any real organic difference between silk and mink extensions today?

No, both are made from synthetic PBT polymers. The terms simply describe the finish: mink fibers feature a subtle, semi-matte finish with a long, elegant taper for a natural look, while silk fibers have a shorter taper and a glossy sheen for immediate visual density.

Why do some synthetic lash extensions feel stiff and cause eyelid poking?

Stiffness is a warning sign of low-grade plastic injection molding or excessive raw polyester fillers. High-grade Korean PBT undergoes detailed chemical conditioning, giving it a soft, flexible texture that mimics human hair while protecting the delicate lash line from discomfort.

Lash Extension Allergy vs. Irritation: How to Prevent Red Eyes
Table of Contents (Click to Open)
  1. The Salon Crisis: Managing Post-Application Ocular Distress
  2. Medical Allergy vs. Chemical Irritation Matrix
  3. The Biological Divide: Histamines vs. External Corneal Insult
  4. Decoding Lash Glue Allergy Symptoms: The Contact Dermatitis Timeline
  5. Cyanoacrylate Fumes Sensitivity: The Physics of Gaseous Humidity Seeking
  6. The Master Emergency Protocol: Reducing Fume Load in Real-Time
  7. Material Optimization: How Advanced PBT Lattices Minimize Adhesive Volatility
  8. The Financial Toll of Ocular Irritation on Salon Client Lifetime Value
  9. FAQ: Emergency Ocular Troubleshooting for Elite Technicians

Your phone buzzes hours after a high-paying client leaves your chair, displaying a high-contrast photograph of inflamed, swollen, and bloodshot eyelids. Confronting acute red eyes after eyelash extensions is an intense, high-stress salon crisis that can instantly shatter your client retention rates and compromise your professional credibility. For master artists, handling this emergency calmly requires a deep, scientific understanding of ocular pathology rather than defensive guesswork. Successfully saving your business relationship hinges entirely on your immediate capacity to differentiate between an incurable immune system rejection and a highly preventable chemical burn—allowing you to adjust your application variables and preserve premium eyelash extensions loyalty.

Executive Brief: Molecular Resolution of Ocular Sensitivity

Ocular adverse reactions following synthetic lash placement are heavily misdiagnosed within the luxury beauty market. Technicians frequently label every localized inflammatory response as an allergy, missing critical operational warning signs. True lash glue allergy symptoms manifest as a systemic, histaminic immune response triggered by direct epidermal contact with curing compounds. Conversely, acute cyanoacrylate fumes sensitivity is a localized, mechanical irritation caused by gaseous monomer vaporization stripping the eye's natural moisture barrier. By isolating these physiological boundaries, advanced salons can deploy calculated safety protocols—utilizing specialized gaseous scavengers, optimized environmental parameters, and low-exposure fiber lattices to preserve absolute client safety.

Medical Allergy vs. Chemical Irritation Matrix

Comparison matrix of true lash glue allergy versus chemical fume irritation symptoms

To protect a reacting client and determine whether an immediate, chemical mechanical removal is required, an elite technician must cross-reference symptoms against this definitive clinical breakdown:

Clinical DiagnosticTrue Lash Glue AllergyChemical Fume Irritation
Biological MechanismSystemic T-cell immune response (accumulation of histamines over repeated exposure).Localized physical barrier insult (acidic dehydration of corneal and scleral tissues).
Primary Symptom ZoneSevere erythema, internal itching, and deep blepharitis (swelling of the upper and lower eyelid lines).Bloodshot sclera (redness restricted mostly to the eyeball), mild stinging, and dry watering.
Temporal Onset & EvolutionDelayed onset (manifests 12–72 hours post-treatment) and intensifies continuously over time.Immediate or sub-acute onset (peaks within 24 hours of application) and naturally subsides over time.
Operational Action RequiredImmediate chemical removal using a high-viscosity cream remover and referral to a medical professional.Retain extensions. Adjust salon humidity baseline, neutralize curing gases, and refine isolation tracking.

The Biological Divide: Histamines vs. External Corneal Insult

Understanding the deep biology of a reaction prevents catastrophic decisions. A true allergic reaction involves a type IV delayed hypersensitivity response. When cyanoacrylate monomer molecules repeatedly touch the skin, the immune system recognizes them as external antigens, building antibodies over months or years. This explains why a loyal client can suddenly develop severe lash glue allergy symptoms after years of showing zero sensitivity. Once this genetic switch flips, taking antihistamines provides minor relief; the body will violently reject the allergen during subsequent applications, rendering further extension services impossible until the material is completely detached.

Chemical irritation, however, involves zero immune system memory. This is a direct physical consequence of cyanoacrylate's intense hygroscopic properties—meaning it aggressively absorbs moisture from its immediate surroundings to drive its curing cycle. If a client's eyes flutter open slightly during a set, or if the lower lash pads shift up and rub against the eyeball, the evaporating adhesive gases rapidly strip the moisture layer from the cornea and sclera. This creates a localized, non-allergic chemical burn that manifests as bright red eyes after eyelash extensions, which safely resolves as soon as the gaseous exposure drops.

Decoding Lash Glue Allergy Symptoms: The Contact Dermatitis Timeline

Timeline of contact dermatitis and lash glue allergy symptoms after extensions

When contact dermatitis manifests, the cellular timeline is highly predictable. The reaction rarely begins on your salon bed. Instead, as the polymer matrix stabilizes over 24 to 48 hours, the continuous micro-emission of residual chemical stabilizers induces escalating vascular permeability around the eyelid margins. Clients will experience intense, uncontrollable internal itching along the lash root line, followed closely by symmetrical swelling that creates a characteristic "heavy lid" appearance. If you observe generalized puffiness affecting both eyes equally, accompanied by crusting or weeping fluid along the skin fold, you are dealing with a clear histaminic event that requires an immediate, professional, non-abrasive removal.

Cyanoacrylate Fumes Sensitivity: The Physics of Gaseous Humidity Seeking

To effectively mitigate cyanoacrylate fumes sensitivity, technicians must understand the movement of airborne monomers. Evaporating adhesive molecules are structurally heavy and remain low to the surface, pooling directly in the ocular hollows of a recumbent client. If a salon's environmental relative humidity falls below the critical 45% threshold, the curing process stalls, allowing these volatile monomers to float in a gaseous state far longer. Seeking stabilization, these vapors instantly bond with the moisture of the client’s tears, causing immediate burning, micro-vessel dilation, and focal scleral redness. This explains why uneven redness confined exclusively to the lower half of the eyeball indicates a physical gas insult rather than a medical allergy.

The Master Emergency Protocol: Reducing Fume Load in Real-Time

Transitioning your application workflow from basic attachment to a high-level, allergen-isolated protocol is essential for protecting sensitive client demographics. Deploy this systematic management routine to control airborne irritants during every step of the appointment:

  • Phase 1: Chemical Decontamination and Sanitization: Unmanaged chemical residues sitting on the lash line prior to application will react unpredictably with fresh adhesive, accelerating gas production. Before isolation, purge the lash line completely of environmental particulates, lipids, and cosmetics using specialized, medical-grade beauty care products. This deep-cleansing preparation ensures a perfectly neutral skin surface, preventing premature monomer boiling and dramatically lowering the overall gas release during the application process.
  • Phase 2: Instant Gas Neutralization: The absolute gold standard for eliminating fume exposure is completing the service with an advanced chemical super bonder. Instead of leaving the adhesive to release vapors into the client's ocular space for hours, apply a micro-drop of bonder directly to the attachments using a micro-brush. This solution cross-links the liquid cyanoacrylate instantly from within, locking away volatile gasses inside a secure solid matrix within 3 minutes. This rapid stabilization stops the accumulation of airborne monomers, preventing chemical corneal burns and entirely removing the outdated 24-hour water restriction.

Material Optimization: How Advanced PBT Lattices Minimize Adhesive Volatility

Advanced PBT fiber lattices that reduce adhesive volatility and fume exposure

A hidden variable in managing chemical reactions is the surface properties of the synthetic extension fiber itself. Cheap, unrefined plastic fibers have poor capillary attraction, forcing technicians to use massive drops of adhesive to ensure a stable attachment. Excess liquid glue translates directly into high gas emissions and guaranteed irritation. Upgrading your inventory to advanced polybutylene terephthalate (PBT) fiber lattices completely resolves this structural issue:

  • Precision Base Geometry: Utilizing a high-purity db fast fan eyelash extension palette silk pbt provides optimized micro-textured bases that pull exactly the required amount of adhesive via natural magnetic cohesion. This prevents pooling and reduces vapor release to a baseline minimum.
  • Weightless Volume Architecture: For dense volume looks on clients with highly sensitive skin, opting for a specialized ib volume brown eyelash extension palette 5 shades lets you create soft, ultra-lightweight luxury looks. The refined diameter minimizes follicular weight and reduces the necessary bonding area, keeping the adhesive footprint tiny and well away from delicate lid margins.
  • Micro-Laser Enhancements: To achieve maximum retention without heavy adhesive usage, the engineered eyelash palette laser matte pbt features micro-laser incisions across the base of the fibers. This structural enhancement doubles the mechanical bond strength natively, allowing technicians to achieve a flawless 6-week hold while using up to 40% less liquid glue.

The Financial Toll of Ocular Irritation on Salon Client Lifetime Value

In the ultra-premium luxury beauty sector, client safety and trust are your primary capital assets. A single instance of unmanaged chemical irritation can drive a loyal client to leave a negative digital review, permanently damaging your salon's reputation. Shifting your operational protocol toward real-time gas neutralization and high-purity PBT material integration safely insulates your business from liability, positioning your brand as an elite hub of clinical excellence.

Insulate your salon business from application crises and safeguard your sensitive clientele. Discover the world's finest hypoallergenic adhesives, premium PBT palettes, and chemical vapor neutralizers at WinLash, and elevate your professional safety standards today.

FAQ: Advanced Ocular Troubleshooting for Elite Technicians

Can a client safely continue extension services after experiencing a true allergy?

No. True cyanoacrylate allergy involves permanent immunological memory. Once a client is sensitized, subsequent exposure will trigger increasingly severe contact dermatitis regardless of technique, requiring a permanent transition to alternative cosmetic options.

How can I instantly stop a client's eyes from watering due to fumes during a set?

Immediately stop application and reposition the eye pads to verify they aren't touching the sclera. Use a handheld fan blowing downward away from the face to clear pooled vapors, and dry the excess moisture to avoid a localized kinetic moisture shock.

Why does generalized swelling happen 24 hours after a completely painless application?

This delayed onset is typical of type IV contact hypersensitivity. While the liquid glue feels completely comfortable during placement, the continuous release of microscopic chemical stabilizers over the next 24 hours slowly triggers a deep localized immune response.

Why Does Lash Glue Turn White? How to Stop Shock Curing & Blooming
Table of Contents (Click to Open)
  1. The Panic of Frosting: Why Does Lash Glue Turn White?
  2.  Shock Curing vs. Blooming Effect Matrix
  3. The Molecular Science of Cyanoacrylate Polymerization
  4. Shock Curing: The Danger of Free Moisture Contamination
  5. The Blooming Effect: Volatile Monomer Vapor Accumulation
  6. Step-by-Step Prevention Protocol: Balancing Lash Micro-Climates
  7. Carbon Black Pigment Separation vs. Adhesive Frosting Physics
  8. Clear vs. Black Adhesives: Choosing the Right Chemical Lattice
  9. The Financial Toll of Brittle Bonds on Salon Retention
  10. FAQ: Advanced Adhesive Troubleshooting for Master Artists

You complete a flawless, micro-symmetrical volume set, only to look down and witness a lash artist’s ultimate horror: a chalky, stark white crust creeping across the base of the extensions. The immediate panic of asking why does lash glue turn white is a high-stakes defining moment that separates amateur technicians from master ocular architects. This unsightly frosting completely ruins the dark, dense aesthetic of premium sets, leaving clients frustrated and your salon's reputation vulnerable. To permanently eliminate this retention-killing anomaly, masters must look past basic application tips, invest in scientifically formulated eyelash extension glue and liquids, and dive deep into the precise chemical physics of cyanoacrylate curing dynamics.

Executive Brief: Managing Cyanoacrylate Curing Pathologies

White residue on professional eyelash extensions is never a random manufacturing defect; it is a direct biological and environmental consequence of unmanaged polymerization physics. In the intense, variable-humidity climate of Dubai, lash artists frequently misdiagnose this phenomenon. The white chalky substance manifests via two completely separate chemical pathways: shock curing lash extensions (instantaneous liquid water contact) and the cyanoacrylate blooming effect (delayed precipitation of volatile monomer vapors). Understanding these molecular boundaries allows elite salons to deploy targeted chemical interventions—specifically advanced moisture pre-calibration and rapid polymer chain sealing—ensuring clean, jet-black bonds with absolute structural flexibility.

Shock Curing vs. Blooming Effect Matrix

Comparison of shock curing vs blooming effect on eyelash extensions showing chalky white residue causes

To establish a flawless troubleshooting protocol, an experienced technician must instantly recognize whether they are dealing with an instantaneous kinetic shock or a delayed vapor condensation. Use this definitive architectural matrix to diagnose the exact chemical failure occurring on the lash line:

FeatureShock CuringBlooming Effect
Primary Root CauseDirect, sudden exposure of liquid adhesive to uncalibrated free moisture or liquid water droplets.Accumulation, stagnation, and subsequent condensation of volatile monomer vapors on wet adhesive.
Temporal OnsetInstantaneous (occurs within seconds of improper moisture or liquid contact during the set).Delayed (manifests several hours later, often after the client has left the salon environment).
Physical MorphologyThick, dense, rough, and highly visible chalky-white structural layer directly at the adhesive base.Fine, powdery, soft frosted mist or superficial white dust coating the extension fibers.
Engineered SolutionPre-application lipid and moisture balancing using high-purity chemical primers.Instant polymer-chain encapsulation and vapor neutralization via advanced chemical bonders.

The Molecular Science of Cyanoacrylate Polymerization

Professional lash extensions rely entirely on ethyl-cyanoacrylate, an acrylic monomer that remains liquid inside the bottle due to acidic stabilizers. When expelled onto a jade stone or glue ring, it requires a weak base—specifically the microscopic moisture layer naturally present in ambient air and on the human eyelash cuticle—to initiate anionic polymerization.

During a healthy cure, these individual monomers link together to form long, organized polymer chains, creating a strong, crystal-clear, and flexible solid matrix. However, if the kinetic speed of this chemical reaction is thrown out of equilibrium by excessive environmental moisture or unmanaged vapor release, the polymer chains form chaotically. This molecular disarray compromises the physical integrity of the bond and refracts light differently, showing up as a white, frosted blemish.

Shock Curing: The Danger of Free Moisture Contamination

When a lash artist encounters true shock curing, they are witnessing a violent, unchecked chemical reaction that instantly severely degrades lash retention. This pathology occurs when liquid water or an excess of free moisture collides directly with unpolymerized ethyl-cyanoacrylate adhesive. A classic example is utilizing a traditional nano mister too close to the face (within 30cm) or too quickly after completing a set, resulting in heavy water droplets resting on the extensions, causing a severe nano mister shock. However, in high-end salons, this is also frequently triggered by a client's tearing eyes due to cyanoacrylate fumes, or micro-condensation caused by faulty salon air conditioning units blasting cold air onto a warm face.

The physics behind this failure rests on capillary action and rapid surface tension shifts. The sudden rush of liquid water molecules forces the outer layer of the cyanoacrylate drop to polymerize instantly. Because this outer shell hardens in milliseconds, it creates an impermeable barrier that traps unlinked, wet volatile monomers and gasses beneath it. The trapped internal pressure breaks the expanding polymer lattice from within. Instead of forming a smooth, transparent crystalline structure, the adhesive crystallizes into a highly brittle, chalky white shield that completely loses its tensile strength and structural flexibility. This causes total mechanical bond failure, leading to immediate lash shedding within 24 to 48 hours.

The Blooming Effect: Volatile Monomer Vapor Accumulation

Close-up of cyanoacrylate blooming effect causing fine white powder on lash extensions overnight

Conversely, the cyanoacrylate blooming effect is a subtle, atmospheric phenomenon driven by unmanaged vapor pressure dynamics. Cyanoacrylate monomers are highly volatile, meaning they readily evaporate into the ambient air as volatile monomer vapors while the liquid glue bead is slowly curing. If the ambient relative humidity (RH) in your salon is too low (below 40%), or if you use an excessive volume of adhesive on a single volume fan, the drying and cross-linking process slows down significantly, leaving the outer layer of the glue wet and exposed for an extended period.

As these gaseous monomers hover directly above the natural lash line due to inadequate salon ventilation, they slowly seek out moisture sources in the immediate micro-climate. Once they locate airborne moisture, they undergo a mid-air polymerization process, condense into microscopic solid particles, and gently precipitate back down onto the adjacent areas. This creates a fine, powdery, frosted coating across the mid-lengths and tips of the extensions, rather than just at the base. It perfectly explains the classic industry mystery: why a lash set can look completely black, clean, and flawless when the client leaves your chair, but appears covered in a white mist by the time they wake up the next morning.

Step-by-Step Prevention Protocol: Balancing Lash Micro-Climates

Eliminating white residue from your professional career requires transitioning from reactive troubleshooting to an advanced, engineering-focused application protocol. Controlling your salon's micro-climate (ideal range: 45–60% humidity and 20–22°C temperature) is crucial, but managing the chemical properties of the natural follicle is where master retention is won. Follow this systematic chemical management routine to guarantee deep obsidian retention:

  • Step 1: Calibrate the Cuticle with a Dedicated Lash Primer: To master how to prevent lash glue turning white, you must first normalize the surface moisture of the natural lash. Natural lashes carry highly unpredictable ratios of sebum, cellular debris, and intracellular moisture. Applying a fast-curing adhesive to an uncalibrated cuticle triggers a chaotic moisture shock. By pre-treating the lash line with a high-purity lash primer, you strip away problematic surface lipids while perfectly balancing the natural moisture baseline. This clean preparation ensures a smooth, highly uniform anionic polymerization the exact millisecond your extension fan contacts the follicle.
  • Step 2: Instant Vapor Encapsulation with an Advanced Bonder: The true hero of modern lash chemistry is the immediate post-application sealant. Relying on outdated training manuals that force clients into a strict 24-hour water quarantine is a major operational risk, especially in the humid Gulf region. The moment you finish applying your last extension, apply a micro-drop of a specialized bonder directly onto the bond zones using a micro-brush. This solution initiates an immediate, highly controlled polymerization of the adhesive from the inside out, completely locking down volatile monomer vapors within 3 minutes. With no escaping vapors, the blooming effect is physically blocked from forming, while the cyanoacrylate matrix gains elite structural flexibility, instantly rendering the set 100% waterproof.

Carbon Black Pigment Separation vs. Adhesive Frosting Physics

Often confused with environmental blooming, carbon black pigment separation is another severe chemical pitfall that destroys the deep appearance of professional sets. High-end black adhesives get their rich obsidian depth from microscopic carbon black particles mechanically suspended within the clear cyanoacrylate liquid matrix. Because these pigment particles have a higher density than the liquid monomers, they naturally settle at the bottom of the bottle when left static.

If a technician fails to shake the adhesive bottle thoroughly (ideally for 60 seconds manually or using a mechanical glue shaker) before dispensing a drop, they will primarily express clear cyanoacrylate with an inadequate concentration of pigment. When this poorly blended, low-viscosity solution interacts with ambient humidity, it undergoes a phase separation. This structural imbalance magnifies the visual impact of any minor frosted lash extensions, leaving behind a mottled, dull greyish-white base. Utilizing a molecularly stable, highly homogenized formula like eyelash extension glue black 5ml provides a uniform particle suspension that strongly resists phase separation even under extreme environmental stress.

Clear vs. Black Adhesives: Choosing the Right Chemical Lattice

Clear vs black eyelash extension glue comparison for preventing white residue and pigment separation

For avant-garde styling, colored lash sets, or clients presenting with extreme chemical sensitivities to carbon black pigment, transitioning to a clear adhesive lattice is an excellent alternative. While clear glue completely removes the risk of pigment separation, many master artists falsely assume it is immune to aesthetic defects. In fact, clear cyanoacrylate lacks the stabilizing thermal mass that carbon black particles provide, which can sometimes make its curing speed slightly more unpredictable under sudden humidity drops or spikes.

In reality, clear cyanoacrylate is equally susceptible to both shock curing and blooming if moisture and vapors are poorly managed. When a clear adhesive shocks, it loses its seamless clarity and turns into an opaque, highly reflective white bead that looks messy and unrefined. For ultra-clean styling or colored contact lens coordination, utilizing a premium eyelash extension glue white (clear formulation) provides a pristine, translucent bond line—giving you complete aesthetic safety, provided your advanced priming and bonding protocols are rigorously followed.

The Financial Toll of Brittle Bonds on Salon Retention

In a luxury beauty market where clients demand flawless execution, white residue is more than a visual blemish—it is a financial leak. Brittle, moisture-shocked bonds lead to premature lash shedding, triggering emergency fix-it appointments that drain your salon's time and resources. By modernizing your workspace chemistry with calculated priming and instant vapor neutralization, you shift your salon into a premier bracket of multicultural excellence.

Elevate your professional toolkit from basic adhesives to advanced chemical solutions. Explore the complete range of master-grade liquids, primers, and specialized adhesives at WinLash, and redefine your lash retention standards today.

FAQ: Advanced Adhesive Troubleshooting for Master Artists

Can I safely use a nano mister without triggering a kinetic shock?

Yes, but it requires strict calibration. Wait 3 minutes post-set, hold the device 40cm away, and mist for under 15 seconds. To eliminate this kinetic risk entirely, replacing misting devices with an advanced chemical bonder is highly recommended.

How does extreme outdoor humidity accelerate the delayed blooming effect?

Stepping into high humidity creates a sudden vapor pressure shift. Uncured, volatile monomers violently evaporate from the wet adhesive core, polymerize instantly in the damp air, and fall back onto the extensions as a white, powdery frost.

Can frosted lash extensions be fixed, or do they require a complete removal?

Mild blooming (powdery dust) can be masked by re-hydrating the surface with a micro-brush of primer. However, structural shock curing (thick, brittle crust) permanently fractures the bond lattice, requiring immediate removal and replacement of the affected fans.

Lash Primer vs. Lash Bonder: Do You Actually Need Both?
Table of Contents
  1. The Chemistry of Cyanoacrylate Adhesives
  2. What is a Lash Primer? (The Pre-Treatment Catalyst)
  3. What is a Lash Bonder? (The Post-Treatment Lock)
  4. Side-by-Side Retention Matrix
  5. Environmental Factors: Temperature and Lash Room Humidity
  6. How to Integrate Both into Your Workflow
  7. The Cost of Misuse: Shock Curing and Brittle Adhesive Bonds
  8. Frequently Asked Questions

In the professional eyelash styling industry, maximizing retention requires a precise understanding of your chemical application timeline. When analyzing your back-bar protocols to prevent premature shedding, navigating the exact chemistry of Lash Primer vs. Lash Bonder is critical to your studio's success. While exploring professional eyelash extension glue and liquids, many lash artists question whether these formulas are interchangeable or redundant. To optimize cyanoacrylate polymerization and safeguard your sets against varying environmental climates, let's dive deep into the science of lash retention to understand why these two distinct liquids operate on completely opposite ends of your styling workflow.

The Chemistry of Cyanoacrylate Adhesives

Chemistry of cyanoacrylate adhesives in professional lash extensions

To understand retention enhancers, you must first understand your glue. Modern professional lash adhesives rely almost exclusively on cyanoacrylate. Unlike traditional glues that dry via evaporation, cyanoacrylate cures through a chemical reaction called anionic polymerization. This reaction is triggered instantly by moisture (specifically hydroxyl ions) present in the air and on the surface of the natural lash.

If the natural lash is too dry, too oily, or highly acidic, the polymerization process stalls, resulting in poor attachment. Conversely, if sudden moisture hits the curing glue externally, it causes "shock curing," turning the adhesive brittle, white, and highly prone to premature shedding. This is exactly where primers and bonders step in to control the environment.

What is a Lash Primer? (The Pre-Treatment Catalyst)

A professional lash primer is a precision-engineered pre-treatment liquid applied to the natural lashes immediately following the initial deep cleanse (lash shampoo) and prior to placing your first extension. From a biochemical standpoint, it serves as the ultimate surface-conditioning agent that bridges the gap between organic hair keratin and synthetic cyanoacrylate.

The Science of Surface Prep: Human eyelashes are naturally coated in sebum (lipids), metabolic proteins, and residual cosmetic elements. This film acts as a physical barrier. If a fast-setting adhesive is applied directly over an unprimed, oily hair shaft, the cyanoacrylate bonds to the volatile oil layer rather than the actual hair structure, leading to catastrophic retention failure within 48 to 72 hours.

A high-performance primer dissolves these stubborn lipid matrices cleanly using optimized, cosmetic-grade solvent carriers while simultaneously modulating the hair's natural pH level. Healthy human hair naturally sits at a slightly acidic pH of roughly 4.5 to 5.5. Primers elevate this local environment toward a mild alkaline state (typically between 7.0 and 8.0).

When exposed to this slight alkalinity, the microscopic keratin cuticles—the protective, shingle-like outer layers of the hair shaft—gently swell and lift outward. This micro-scale texture optimization dramatically multiplies the physical surface area of the natural lash. When a classic extension or volume fan is placed, the liquid cyanoacrylate flows into these microscopic gaps instantly, establishing an unshakeable mechanical lock. This eliminates extension sliding, grounds the attachment base, and significantly cuts down your isolation-to-placement transition time.

What is a Lash Bonder? (The Post-Treatment Lock)

Conversely, a premium lash bonder functions on the polar opposite end of your appointment timeline. It is a highly specialized post-treatment accelerator designed to interact directly with the active, curing adhesive points once your styling map is 100% complete.

To grasp the engineering genius behind a bonder, one must look at how traditional cyanoacrylate cures naturally. Without a post-treatment curing agent, lash glues rely entirely on ambient atmospheric humidity to slowly polymerize over a 24 to 48-hour window. This standard atmospheric curing operates strictly from the outside-in, forming a premature outer crust that traps volatile, unpolymerized monomers underneath. As these trapped molecules slowly break down and cure, they continuously off-gas, releasing heavy chemical vapors that cause burning sensations, eye redness, and localized chemical sensitivity for the client.

When a professional bonder is precisely micro-dosed onto the active glue joins, it completely rewrites this volatile timeline by triggering a series of immediate structural upgrades:

  • Instant Inside-Out Polymerization: Instead of waiting days for atmospheric moisture to settle, the bonder introduces immediate chemical cross-linking agents that force polymerization from the core outward, solidifying the adhesive mesh in under 3 minutes.
  • Immediate Vapor Capture: By locking the cyanoacrylate chains rapidly, it permanently traps unpolymerized monomers beneath the surface, completely neutralizing chemical off-gassing and eliminating post-appointment stinging or redness.
  • Elastomeric Matrix Shock Absorption: Traditional slow curing leaves glue joints rigid, glassy, and brittle. A bonder infuses calculated elasticity into the bond site, creating a resilient, flexible matrix that safely bends under daily brushing or sleeping friction without snapping off.
  • Absolute Elimination of Downtime: Because the chemical bond is fully stabilized instantly, it completely abolishes the outdated "don't wet your eyes for 24 hours" restriction. Your clients are free to shower, swim, sweat, or steam immediately post-appointment with zero risk of shock curing.

Lash Primer vs. Lash Bonder: Side-by-Side Retention Matrix

Side-by-side comparison of lash primer and lash bonder functions

To keep your back-bar protocol clear and optimize your client care strategy, evaluating the structural layout of Lash Primer vs. Lash Bonder across key performance metrics is essential. Here is how these two liquid powerhouses compare when addressing specific adhesion, retention, and chemical curing variables during application:

FeatureLash PrimerLash Bonder
Application TimingBefore applying extensions (Prep)2-3 minutes after the final extension (Finish)
Target SurfaceNatural lash cuticleAdhesive bonding points
Chemical GoalRemoves lipids, adjusts pH to alkalineAccelerates inside-out polymerization
Client BenefitPrevents base extensions from slippingZero fumes, instant water exposure allowed

Environmental Factors: Temperature and Lash Room Humidity

Your workspace environment heavily dictates how extension liquids behave. Cyanoacrylate is highly hygroscopic—it draws moisture from the surrounding air to cure. Therefore, fluctuations in your lash room humidity and temperature can completely alter your adhesive’s curing speed, making primers and bonders your environmental insurance policies.

In Low Humidity Conditions (Below 40% RH): The air lacks the moisture needed to kickstart anionic polymerization. The glue stays wet for too long, causing extensions to lean, slip, or create "stickies." Utilizing a pH-balanced primer in this scenario is vital; it forces the natural lash cuticle to act as a localized alkaline accelerator, speeding up the magnetic attraction between the extension base and the hair shaft.

In High Humidity Conditions (Above 65% RH): The glue cures too quickly, often partially hardening before you can place the extension onto the natural lash. This causes a weak surface-only bond. To prevent this adhesive layer from degrading rapidly into brittle adhesive bonds, applying a post-treatment bonder seals the core structure instantly, protecting the premature bond from collapsing under heavy atmospheric moisture.

How to Integrate Both into Your Workflow

For master lash artists, it is not a matter of choosing one over the other; it is about combining them systematically to achieve unparalleled retention. Here is the professional step-by-step master method using high-performance components:

  1. Prep: Wash the lashes using an oil-free lash shampoo. Rinse thoroughly and pat dry.
  2. Prime: Apply a minimal amount of primer to a microfiber brush. Dampen, don't soak, and glide it across the natural lashes. Let it air dry completely.
  3. Isolate & Bond: Dip your lash extension into a premium, stable adhesive like our Eyelash Extension Black Glue (5ml) and place it accurately on the isolated natural lash.
  4. Lock: Once the full set is finished, wait 2 to 3 minutes. Take a clean microbrush, apply a tiny drop of bonder, wipe off the excess, and precisely dab the base of the extensions where the adhesive sits.

The Cost of Misuse: Shock Curing and Brittle Adhesive Bonds

Common mistakes with lash primer and bonder leading to brittle bonds

While adding these liquids to your back-bar can transform your business, improper application protocols can yield catastrophic retention issues and chemical irritation for your clients.

An all-too-common industry error is over-priming lashes. Because primers contain controlled amounts of cosmetic-grade alcohol to strip oils, soaking the natural lashes can over-dehydrate the hair cortex. When the hair becomes hyper-dry, the adhesive cannot cure from the inside out; instead, it crystallizes on the surface, causing the extensions to pop off effortlessly during the post-appointment brush-out.

On the flip side, mismanaging your bonder can trigger immediate shock curing. If you apply a post-treatment bonder too quickly—before allowing the outer layers of cyanoacrylate to naturally settle for 2 to 3 minutes—the rapid chemical conversion turns the glue frosty white. This is known as bleaching or blooming. Not only does this ruin the aesthetic look of a clean black lash line, but it also creates a rough, scratchy texture that causes localized eyelid friction and premature shedding within days.

Pro-Tip for Lash Techs: Always practice micro-dosing. Use a microfiber brush, apply your liquid, and firmly dab the brush tip onto a lint-free glue wipe to extract excess moisture before touching the client's lash line. Less is always more.

Frequently Asked Questions

Can I use a lash bonder instead of a primer?

No. They serve completely unique chemical roles. Primer prepares the raw, natural canvas for initial bonding by removing oils, while a bonder modifies the internal structural curing of the glue at the end of the treatment.

Does primer dry out the client's natural lashes too much?

Only if over-applied. If your client has extremely dry, brittle hair or a low moisture level, you can skip primer and use a saline primer or pre-treatment cleanser instead. For oily skin types, primer is mandatory.

Can I use a nano mister if I already applied a bonder?

You don't need to. A nano mister introduces external moisture to cure the top layer of glue slowly, whereas a bonder polymerizes the internal core instantly. Using both is redundant and can occasionally over-saturate the bond.

When comparing Lash Primer vs. Lash Bonder, do you need lash primer and bonder for every client?

Yes, because they serve opposite functions. In the breakdown of lash primer vs lash bonder, the primer is used at the start to strip oils and open cuticles, while the bonder is applied at the end to instantly cure the glue mesh.

So, do you need lash primer and bonder for every set? While not mandatory, using both together is the ultimate insurance for maximum retention, zero vapor irritation, and allowing clients to wet their lashes immediately.

Want to unlock industry-leading retention metrics for your salon or brand? Elevate your lash studio setup with authentic, premium supplies exclusively from WinLash.

Winlash Dubai equips lash & brow professionals and dedicated at-home users with 900+ pro-grade products—including award-winning My Lamination lash lift kits and cruelty-free options. Backed by Ravabeauty (est. 2018) and a 50-member expert team, we partner with 13 global brands to deliver salon-quality tools and aftercare tuned for Dubai’s climate, with fast delivery across Dubai, Abu Dhabi, and Sharjah.

Exclusive Distributor Fast UAE Delivery Climate-Tuned Aftercare